338159
16
Zoom out
Zoom in
Previous page
1/36
Next page
16
Das Gerät ist mit 2 Winkeln (E) ausgestattet. Diese
sind zur seitlichen Befestigung des Gerätes am
Möbel zu verwenden.
D735
E
E
Vergewissern Sie sich nach Ausführung des
Anschlagwechsels der Türen, daß alle Schrauben
fest angezogen sind und überprüfen Sie auch,
ob die Magnetdichtung am Möbel perfekt anliegt.
Bei einer niedrigen Raumtemperatur (z.B. im
Winter) kann es vorkommen, dass die Dichtung
nicht perfekt am Schrank haftet. Die
Wiederherstellung der Dichtung erfolgt
automatisch nach gewisser Zeit.Wollen Sie aber
diesen Prozess beschleunige, so genögt es die
Dichtung mit einem Fön zu erwärmen.
PR167/1
Hd
Hb
Die Abdeckung (Hd) in die Schiene (Hb) eindrücken,
bis sie einrastet.
57
Important
If the ambient temperature is high or the
appliance is fully loaded, and the appliance is
set to the lowest temperatures, it may run
continuously causing frost to form on the rear
wall. In this case the dial must be set to a higher
temperature to allow automatic defrosting and
therefore reduced energy consumption.
Fresh food refrigeration
To obtain the best performance:
do not store warm food or evaporating liquids in
the refrigerator;
do cover or wrap the food, particularly if it has a
strong flavour.
Position food so that air can circulate freely round
it.
USE OF THE REFRIGERATOR
Operation
To start the appliance, turn the thermostat knob,
located inside the compartment, to the required
position. This thermostat has six operating positions
and an «O» (Stop) position.
To stop the appliance, turn the thermostat knob to
the «O» position. The freezer compartment will
continue to operate.
Temperature regulation
The temperature is automatically regulated and can
be increased to achieve a higher temperature
(warmer) by rotating the thermostat knob toward
lower settings or reduced (colder) rotating the knob
towards higher settings.
However, the exact setting should be chosen
keeping in mind that the temperature inside the
refrigerator depends on:
room temperature;
how often the door is opened;
the quantity of food stored;
location of appliance.
A medium setting is generally the most suitable.
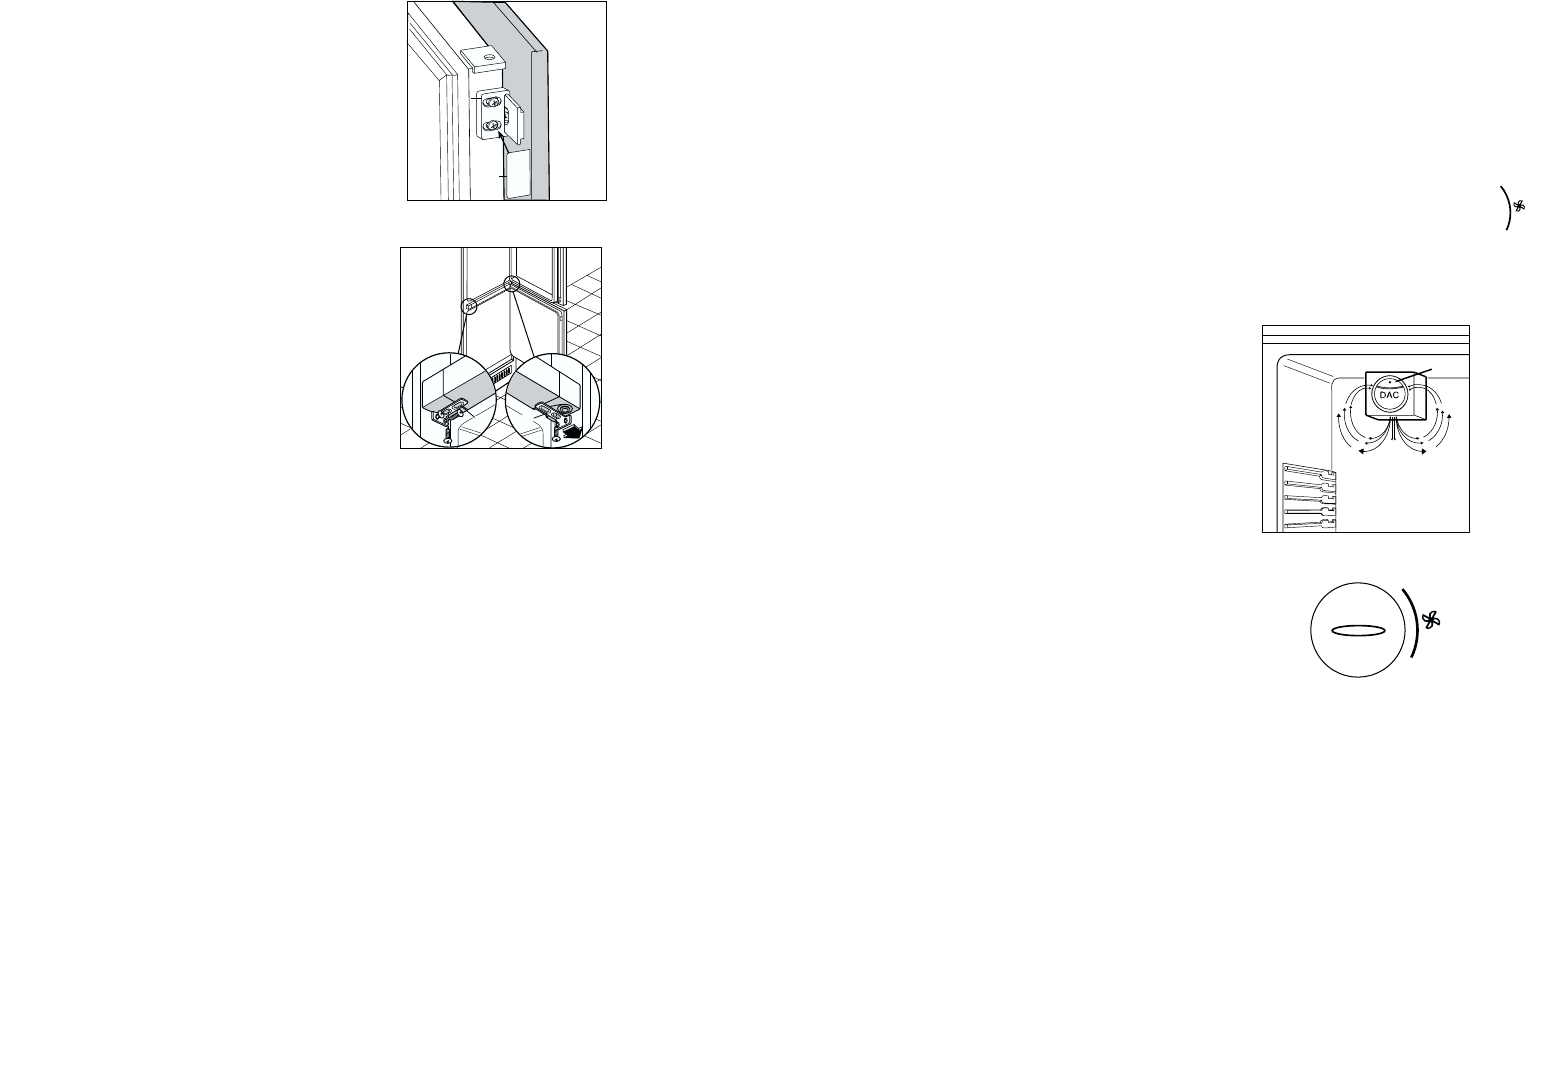
6
5
4
3
2
1
O
Air recycling
The refrigerator compartment is equipped with a
special D.A.C.(Dynamic Air Cooling) fan which can
be turned on with the switch ( see fig. 1). The green
light, when on, means that the fan is working.
It is suggested that the fan (D.A.C.) be used when
the ambient temperature exceeds 25°C .
It should be remembered that the thermostat knob
must be placed (see fig.2) within the sector .
This device allows for rapid cooling of foods and a
more uniform temperature in the compartment.
SWITCH
Fig. 1
Fig. 2
16


Need help? Post your question in this forum.

Forumrules
1

Forum

zanussi-zi-922-9-dac

Reset search

  • I am looking for the circuit diagram for refrigator ZI 922/9 DAC Please Thank you Submitted on 14-9-2021 at 00:21

    Reply Report abuse


Report abuse

Libble takes abuse of its services very seriously. We're committed to dealing with such abuse according to the laws in your country of residence. When you submit a report, we'll investigate it and take the appropriate action. We'll get back to you only if we require additional details or have more information to share.

Product:

For example, Anti-Semitic content, racist content, or material that could result in a violent physical act.

For example, a credit card number, a personal identification number, or an unlisted home address. Note that email addresses and full names are not considered private information.

Forumrules

To achieve meaningful questions, we apply the following rules:

Register

Register getting emails for Zanussi zi 922-9 dac at:


You will receive an email to register for one or both of the options.


Get your user manual by e-mail

Enter your email address to receive the manual of Zanussi zi 922-9 dac in the language / languages: English, German, Dutch, French as an attachment in your email.

The manual is 0,96 mb in size.


You will receive the manual in your email within minutes. If you have not received an email, then probably have entered the wrong email address or your mailbox is too full. In addition, it may be that your ISP may have a maximum size for emails to receive.

The manual is sent by email. Check your email

If you have not received an email with the manual within fifteen minutes, it may be that you have a entered a wrong email address or that your ISP has set a maximum size to receive email that is smaller than the size of the manual.

The email address you have provided is not correct.

Please check the email address and correct it.

Your question is posted on this page

Would you like to receive an email when new answers and questions are posted? Please enter your email address.


Info