5
Reinigung der Innenteile
Bevor Sie das Gerät in Betrieb nehmen, beseitigen
Sie den typischen «Neugeruch» am besten durch
Auswaschen der Innenteile mit lauwarmem Wasser
und einem neutralen Reinigungsmittel Sorgfältig
nachtrocknen.
Bitte keine Reinigungs- bzw. Scheuermittel
verwenden, die das Gerät beschädigen
könnten.
Temperaturregelung
Die Temperatur wird automatisch geregelt und kann
erhöht werden (wärmer) durch Drehen des Thermo-
statknopfes auf niedrigere Einstellungen oder
verringert (kälter) durch das Drehen auf höhere
Zahlen.Die richtige Einstellung erhält man, unter
Berücksichtigung folgender, die Innentemperatur
beeinflussender Faktoren:
• Raumtemperatur,
• Häufigkeit des Türöffnens,
• Menge der eingelagerten Lebensmittel,
• Aufstellung des Gerätes.
Die mittlere Einstellung ist meistens die
geeignetste.
Wichtig
Höchste Kälteeinstellung bei hoher
Raumtemperatur und erheblicher
Lebensmittelmenge kann fortdauernden
Kühlschrank-Betrieb verursachen, dabei kann
sich eine Reif- oder Eisschicht an der hinteren
Innenwand bilden. In diesem Falle den
Thermostatknopf auf wärmere Temperaturen
stellen, damit das automatische Abtauen, mit
folglich geringerem Stromverbrauch,
gewährleistet werden kann.
GEBRAUCH
Inbetriebnahme
Den Stecker in die Steckdose einsetzen.
Kühlschranktür öffnen und Thermostatknopf von der
Stellung «O» (STOP) aus im Uhrzeigersinn drehen.
Das Gerät ist eingeschaltet.
Hinweise zum richtigen Kühlen
von Lebensmitteln und Getränken
Um die besten Leistungen des Kühlschrankes zu
erreichen, beachten Sie bitte folgendes:
• Keine warmen Speisen oder dampfenden
Flüssigkeiten in den Kühlschrank einstellen.
• Geruchverbreitende Lebensmittel müssen
abgedeckt oder eingewickelt werden.
• Die Lebensmittel müssen so eingelagert werden,
daß die Kälte um sie frei zirkulieren kann.
Instructions for totally built-in
appliances
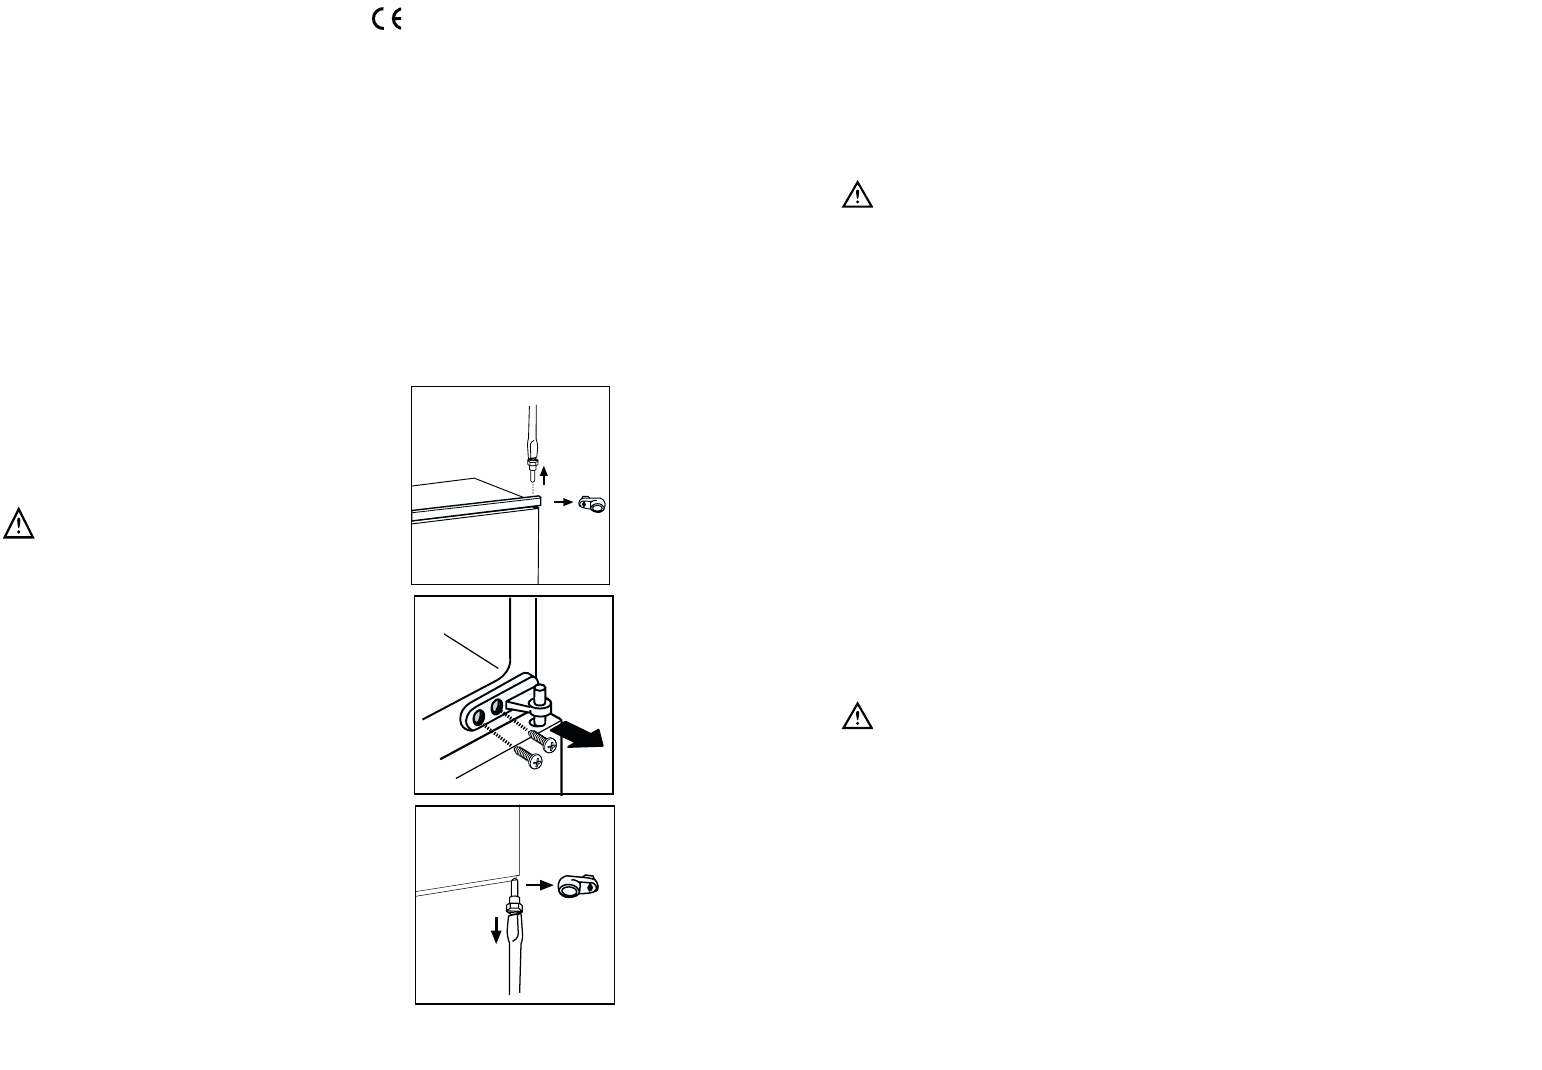
Door reversibility
The appliance is supplied with the right
or left door opening.To change the opening
direction of the door proceed as in the
following instructions before installing it.
1. Unscrew the upper pin and remove the spacer
2. Remove the upper door
3. Unscrew the middle hinge and the plugs and refit
them on the opposite side
4. Refit the upper door, the upper pin and the
spacer on the opposite side
5. Unscrew the lower pin and remove the spacer
and refit them on the opposite side
56
Electrical connection
Before plugging in, ensure that the voltage and
frequency shown on the serial number plate
correspond to your domestic power supply.Voltage
can vary by ±6% of the rated voltage.
For operation with different voltages, a suitably sized
auto-transformer must be used.
The appliance must be earthed.
The power supply cable plug is provided with a
contact for this purpose.
If the domestic power supply socket is not earthed,
connect the appliance to a separate earth in
compliance with current regulations, consulting a
specialist technician.
The Manufacturer declines all responsibility if
the above safety precautions are not observed.
This appliance complies with the following
E.E.C. Directives:
- 87/308 EEC of 2/6/87 relative to radio interference
suppression.
- 73/23 EEC of 19.2.73 (Low Voltage Directive) and
subsequent modifications;
- 89/336 EEC of 3.5.89 (Electromagnetic
Compatibility Directive) and subsequent
modifications.