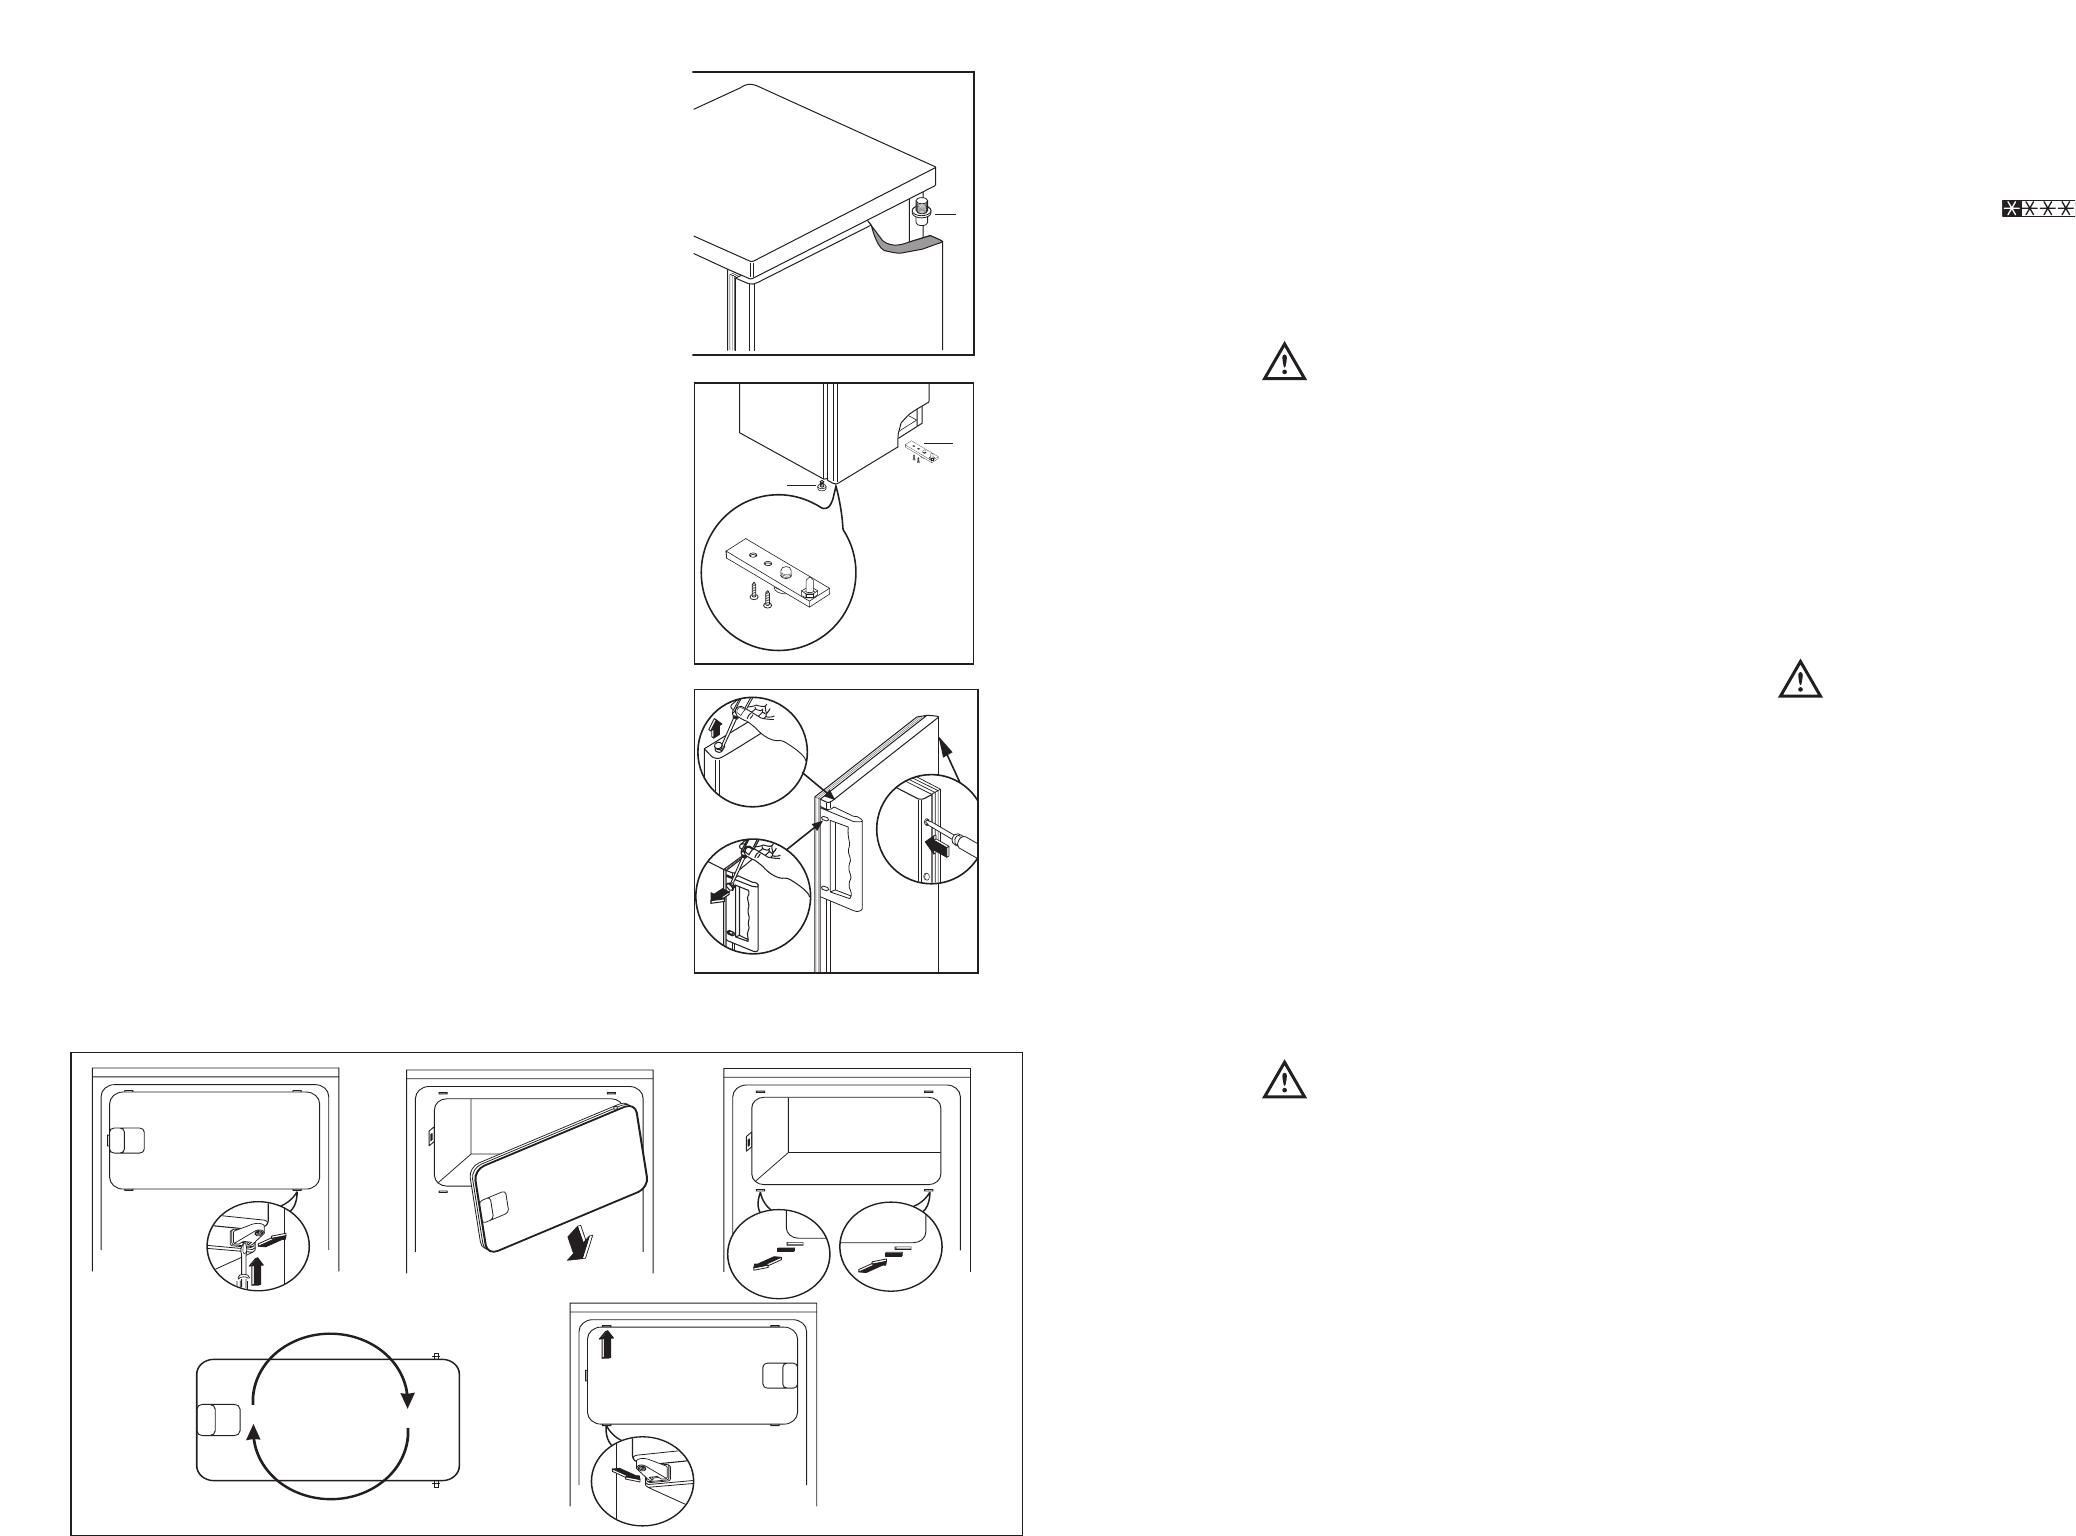
TŸranschlagwechsel
Bevor Sie nachstehende ArbeitsvorgŠnge durchfŸhren,
Netzstecker unbedingt aus der Steckdose ziehen!
Den Wechsel auf folgende Weise ausfŸhren:
1. Nehmen Sie das untere Scharnier (1), den
Schraubfu§ (2) ab;
2. TŸr vom obere Scharnierstift (G) abschrauben und auf
gegenŸberliegenden Seite wieder anmontieren;
3. Schrauben Sie den linken vorderen Schraubfu§ ab
und schrauben Sie ihn an der gegenŸberliegenden
Seite wieder an;
5. Stšpsel der TŸren entfernen, und auf der
gegenŸberliegenden Seite wieder einsetzen; TŸr
montieren;
6. montieren Sie entsprechend den Angaben in der
Abbildung das untere Scharnier und den Schraubfu§
wieder an der gegenŸberliegenden Seite.
7. Griff(e) abnehmen und auf der gegenŸberliegenden
Seite befestigen. Mit einem Senkstift die Plastikstšpsel
auf der gegenŸberliegenden Seite der Griffe
durchlšchern. Mit den im Beipack enthaltenen
Plastikstšpseln, die freigebliebenen Lšcher abdecken.
Achtung
Vergewissern Sie sich nach AusfŸhrung des An-
schlagwechsels der TŸren, da§ alle Schrauben fest
angezogen sind und ŸberprŸfen Sie auch, ob die
Magnetdichtung am Mšbel perfekt anliegt. Bei einer
niedrigen Raumtemperatur (z.B. im Winter) kann es
vorkommen, dass die Dichtung nicht perfekt am
Schrank haftet. Die Wiederher-stellung der Dichtung
erfolgt automatisch nach gewisser Zeit. Wollen Sie
aber diesen Prozess beschleunige, so genšgt es die
41
Fresh food refrigeration
To obtain the best performance:
¥ do not store warm food or evaporating liquids in
the refrigerator;
¥ do cover or wrap the food, particularly if it has a
strong flavour.
¥ Position food so that air can circulate freely round
it.
Cleaning the interior
Before using the appliance for the first time, wash
the interior and all internal accessories with luke-
warm water and some neutral soap so as to remove
the typical smell of a brand-new product, then dry
thoroughly.
Do not use detergents or abrasive
powders, as these will damage the finish.
Temperature regulation
The temperature is automatically regulated and can
be increased to achieve a higher temperature
(warmer) by rotating the thermostat knob toward
lower settings or reduced (colder) rotating the knob
towards higher settings.
However, the exact setting should be chosen
keeping in mind that the temperature inside the
refrigerator depends on:
¥ room temperature;
¥ how often the door is opened;
¥ the quantity of food stored;
¥ location of appliance.
A medium setting is generally the most suitable.
Important
If the ambient temperature is high or the
appliance is fully loaded, and the appliance is
set to the lowest temperatures, it may run
continuously causing frost to form on the rear
wall. In this case the dial must be set to a higher
temperature to allow automatic defrosting and
therefore reduced energy consumption.
USE
Operation
Insert the plug into the wall socket.
Turn the thermostat knob ,clockwise, beyond the ÒOÓ
(STOP) position.
To stop operation, simply turn the thermostat knob to
position ÒOÓ.
Freezing fresh food
The 4-star compartment is suitable for
long term storage of commercially frozen food, and
for freezing fresh food.
To freeze fresh foods It is not necessary to change
the setting of the thermostatknob. However, for a
quicker freezing operation, turn the thermostat knob
to the coldest setting; but remeber that, in this
condition, the refrigerator compartment temperature
might drop below 0¡C. If this occurs reset thermostat
knob to a warmer setting.
Ice-cube production
This appliance is equipped with one or more trays
for the production of ice-cubes. Fill these trays with
water, then put them in the freezer compartment.
Do not use metallic instruments to remove the
trays from the freezer.
Thawing
Deep-frozen or frozen food, prior to being used, can
be thawed in the refrigerator compartment or at
room temperature, depending on the time available
for this operation.
Small pieces may even be cooked still frozen,
directly from the freezer: in this case, cooking will
take longer.
Storage of frozen food
When first starting-up or after a period out of use,
before putting the products in the compartment let
the appliance run at least two hours on the coldest
setting, then turn the thermostat knob to the normal
operating position.
Important
In the event of accidental defrosting, for example
due to a power failure, if the power has been off
for longer that the value shown in the technical
characteristics chart under Òrising timeÓ, the
defrosted food must be consumed quickly or
cooked immediately and then refrozen (after
cooling).