554953
26
Zoom out
Zoom in
Previous page
1/71
Next page
E-16
SPEAKER BALANCE ADJUSTMENT
ANTENNA
FRONT
SPEAKERS
DO NOT CONNECT THIS UNIT TO SPEAKERS OTHER
THAN NX-C70 (CENTER) OR NX-E70 (REAR).
RL
R L
RL
SINCE THIS UNIT
HAS AN ACTIVE
SERVO CIRCUIT
BUILT–IN.
DO NOT CONNECT
IT TO SPEAKERS
OTHER THAN
NX–GX70.
75 UNBAL.
REAR CENTER REAR
FM GND AM
SPEAKERS
CENTER/REAR
OUT
IN
VCR
LD/TV
OUT
MD/AUX
IN
AUDIO SIGNAL
OUT
SUBWOOFER VIDEO SIGNAL
MONITOR
OUT
CENTER MODE
NORMAL
PHANTOM
TV MODE
PAL
NTSC
AUTO
CENTER MODE
NORMAL
PHANTOM
1
PLAYBACK
2
REC
/
PLAYBACK
EJECT
OPEN/CLOSE
DISC CHANGE
MINI COMPONENT SYSTEM
GX
90VCD
1
2
3
DISC
PROGRAM
USER
VOLUME
MEMORY
REC/PAUSE
MODE
HOUR MIN
NORMAL
DUBBING
HIGH
MEMORY
TIME ADJ
DOLBY NR
AUTO/MAN’L
TIMER
TIMER REC
MUSIC
POWER
PHONES
A/B/C/D/E
RANDOM
REPEAT
EDIT
DISPLAY
CD
INPUT INPUT
TAPE
1/2
EJECT
Active Servo
Technology
MIC MIXING
P
R
E
S
E
T
/
T
U
N
I
N
G
/
B
A
N
D
VIDEO CD
Version 2.0
/
Playback Control
ECHO ECHO
1
1
2
2
3
3
4
4
5
5
TIME
A
DISC SKIP
PROG
B
TAPE
C
EDIT
D
+I0
E
OPEN/CLOSE
INDEXMODE
6
6
7
7
8
8
9 0
CD
PRESET
TUNER
TAPE
RETURN
STOP PLAYPLAY
REC/ PAUSE TAPE 1/2
MUSIC
TEST FLAT
CENTER/REAR
/DELAY
PROGRAM
USER
POWER
INPUTSLEEP
VOLUME
REPEAT
PREV NEXT
SELECT
ECHO/KEY
LEVEL
This procedure lets you adjust the sound output level balance
between the front, center, and rear speakers using the built-in
test tone generator. When this adjustment is performed, the
sound output level heard at the listening position will be the
same from each speaker. This is important for the best
performance of the built-in Dolby Pro Logic surround decoder.
The adjustment of each speaker output level should be
done at your listening position with the remote control
transmitter. Otherwise, the result may not be satisfactory.
Before operation
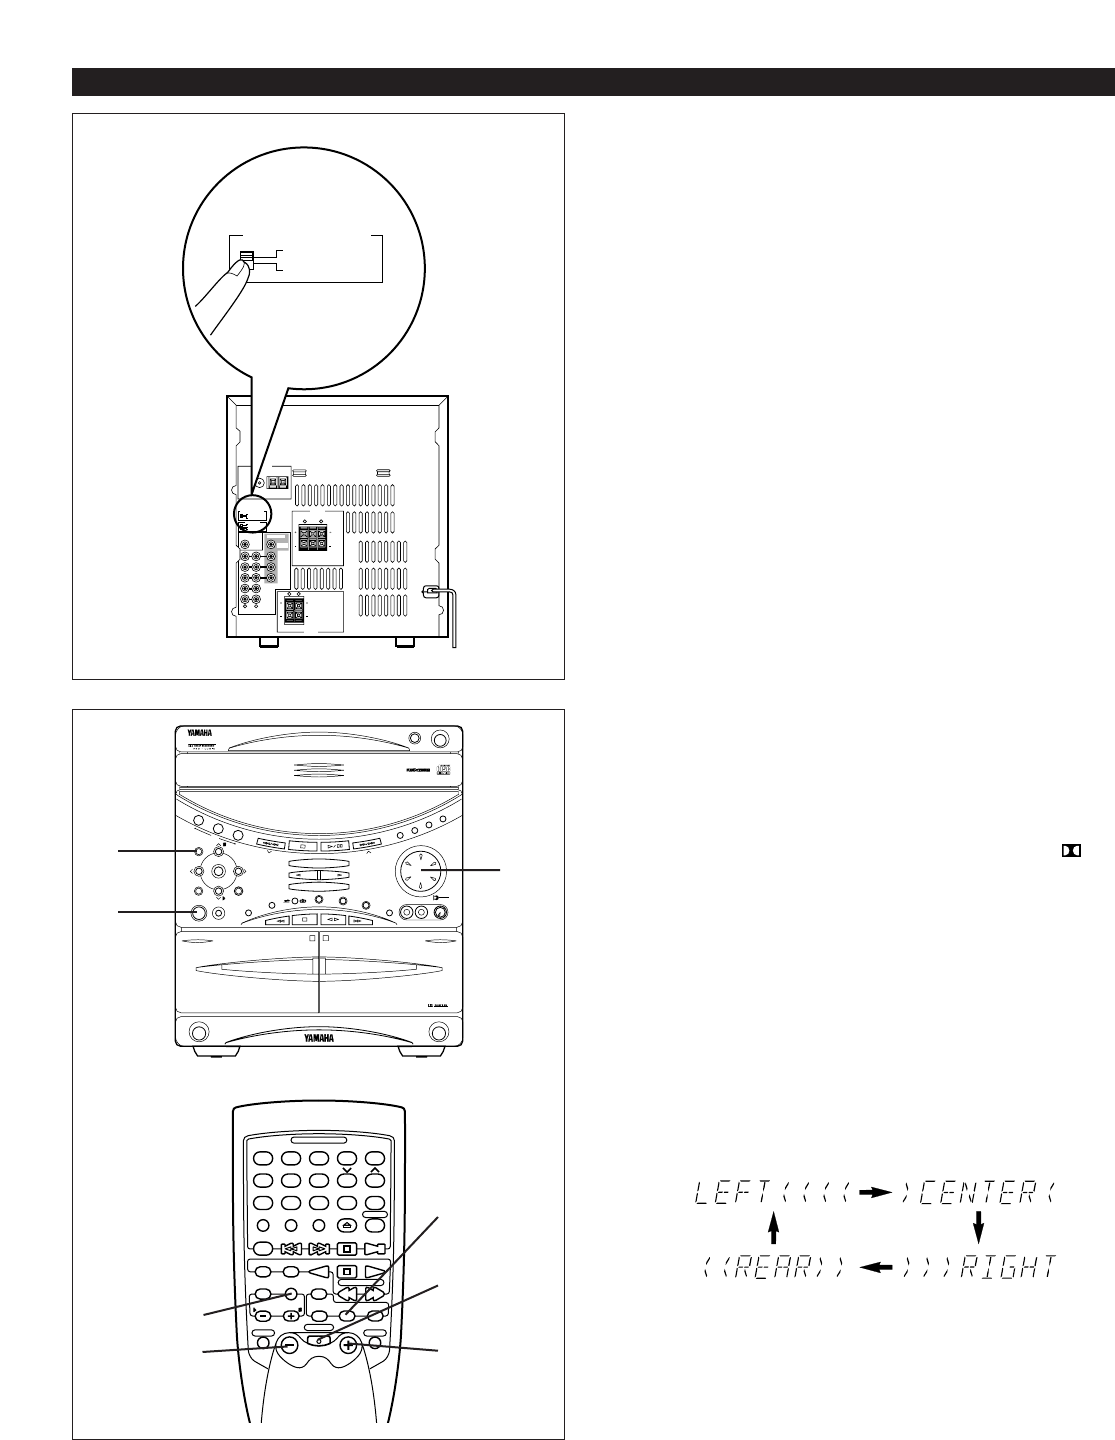
Set the CENTER MODE switch on the rear panel of the main
unit to the position suitable for your speaker system
configuration. (Refer to page 9 for details.)
NORMAL (For 5 speaker configuration):
Select this position when you use the center speaker.
PHANTOM (For 4 speaker configuration):
Select this position when you do not use the center
speaker. The center sound will be output from the left
and right front speakers.
1 Press the POWER switch to turn the power on.
2 Turn the VOLUME control fully counterclockwise to
decrease the volume to minimum.
3 Press the PROGRAM button once or more so that “
PRO LOGIC” lights up on the sound field program
indicator.
4 Press the TEST button.
* “TEST” flashes on and off on the display.
5 Press the VOLUME + (up) button to increase the volume.
You will hear a test tone (like pink noise) from the left front
speaker, then the center speaker, then the right front
speaker, and then the rear speakers, for about two seconds
each. The display changes as shown below.
* The test tone from the left rear speaker and the right rear
speaker will be heard at the same time.
(L and R)
4
3
1
52
3
1
2, 5
26


Need help? Post your question in this forum.

Forumrules


Report abuse

Libble takes abuse of its services very seriously. We're committed to dealing with such abuse according to the laws in your country of residence. When you submit a report, we'll investigate it and take the appropriate action. We'll get back to you only if we require additional details or have more information to share.

Product:

For example, Anti-Semitic content, racist content, or material that could result in a violent physical act.

For example, a credit card number, a personal identification number, or an unlisted home address. Note that email addresses and full names are not considered private information.

Forumrules

To achieve meaningful questions, we apply the following rules:

Register

Register getting emails for Yamaha GX-90VCD at:


You will receive an email to register for one or both of the options.


Get your user manual by e-mail

Enter your email address to receive the manual of Yamaha GX-90VCD in the language / languages: English as an attachment in your email.

The manual is 2,03 mb in size.


You will receive the manual in your email within minutes. If you have not received an email, then probably have entered the wrong email address or your mailbox is too full. In addition, it may be that your ISP may have a maximum size for emails to receive.

The manual is sent by email. Check your email

If you have not received an email with the manual within fifteen minutes, it may be that you have a entered a wrong email address or that your ISP has set a maximum size to receive email that is smaller than the size of the manual.

The email address you have provided is not correct.

Please check the email address and correct it.

Your question is posted on this page

Would you like to receive an email when new answers and questions are posted? Please enter your email address.


Info