E-8
Loading the batteries for the
remote control transmitter
(See figure 6 on page 77.)
1 Remove the battery compartment cover.
(Slide the cover in the direction of the arrow.)
2 Insert 2 “AA” size batteries (UM/SUM-3, R6, HP-7 or
equivalent) into the battery compartment.
* Installing the batteries improperly may cause failure.
3 Replace the battery compartment cover.
Precautions for battery use
•
Insert the batteries according to the direction indicated in
the battery compartment.
•
Replace all batteries with new ones at the same time.
•
Remove the batteries if they are weak or if the unit is not
in use for long periods.
•
Don’t mix normal batteries with rechargeable batteries.
Proper use of the remote control
transmitter
(See figure 7 on page 77.)
Aim (within the range of 60° with no obstacles) the remote
control transmitter at the remote control sensor and operate
as shown.
Notes concerning use
•
Replace the batteries if control distance decreases or
operation becomes unstable.
•
Periodically clean the transmitter window on the remote
control transmitter and the sensor on the main unit with a
soft cloth.
•
Exposing the sensor on the main unit to strong light
(especially an inverter type of fluorescent lamp etc.) may
interfere with operation. In this case, reposition the main
unit to avoid direct lighting.
•
Keep the remote control transmitter away from moisture,
excessive heat, shock and vibrations.
•
The remote control transmitter’s usable range is within
0.2m (8”) and 6m (20’) away from the sensor.
REMOTE CONTROL TRANSMITTER
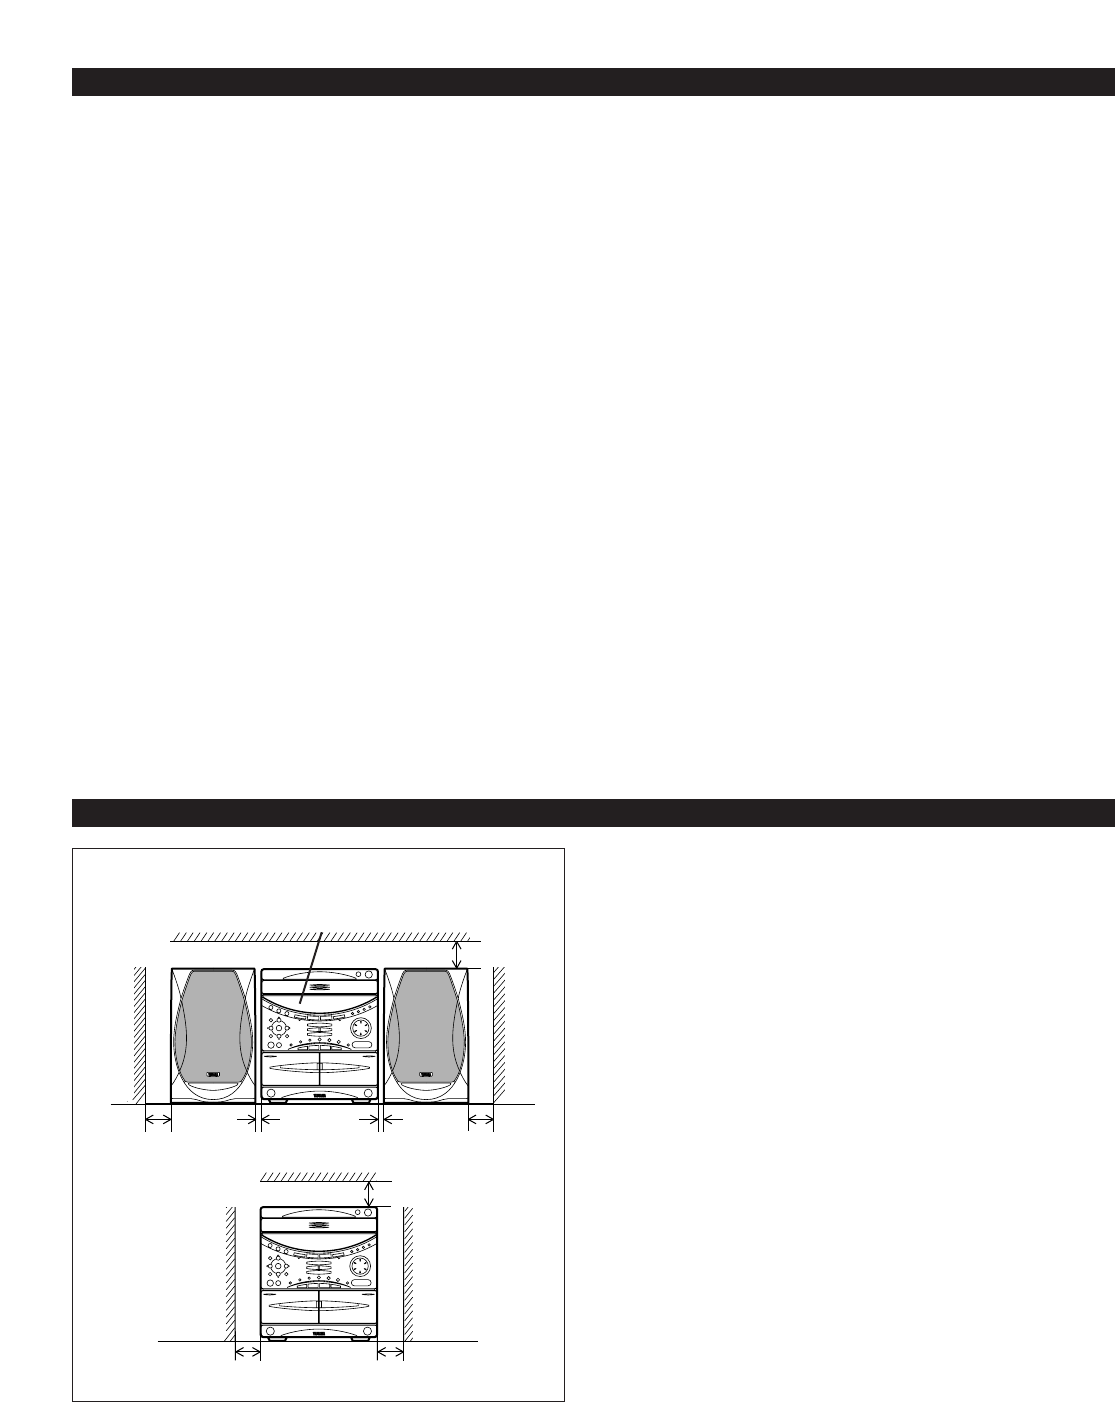
SETTING UP THE MAIN UNIT
Setup examples
Place the main unit as illustrated on the left and allow spaces
more than indicated around the main unit and more than 10
cm (3-15/16”) behind the main unit to assure good
ventilation. Be sure not to place another unit or any object on
top of the main unit to prevent the ventilation holes on the top
panel of the main unit from being obstructed. Otherwise, it
may cause fire or damage to the main unit.
Notes
•
When placing the front speakers apart from the main unit,
allow a space of at least 10 cm (3-15/16”) above, behind
and on the both sides of the main unit.
•
If the main unit is put in a rack, the front of it must be fully
opened.
•
Disconnect the AC supply lead from the AC outlet before
connecting or disconnecting any component.
Main unit