484462
268
Zoom out
Zoom in
Previous page
1/297
Next page
06 Maintenance and specifications
Wheels and tires
06
266
* Option/accessory, for more information, see Introduction.
WARNING
The jack must correctly engage the jack
attachment.
Be sure the jack is on a firm, level, non-
slippery surface.
Never allow any part of your body to be
extended under a vehicle supported by
a jack.
Use the jack intended for the vehicle
when changing a tire. For any other job,
use stands to support the vehicle.
Apply the parking brake and put the
gear selector in the Park (P) position.
Block the wheels standing on the
ground, use rigid wooden blocks or
large stones.
The jack should be kept well-greased
and clean, and should not be damaged.
No objects should be placed between
the base of jack and the ground, or
between the jack and the attachment
bar on the vehicle.
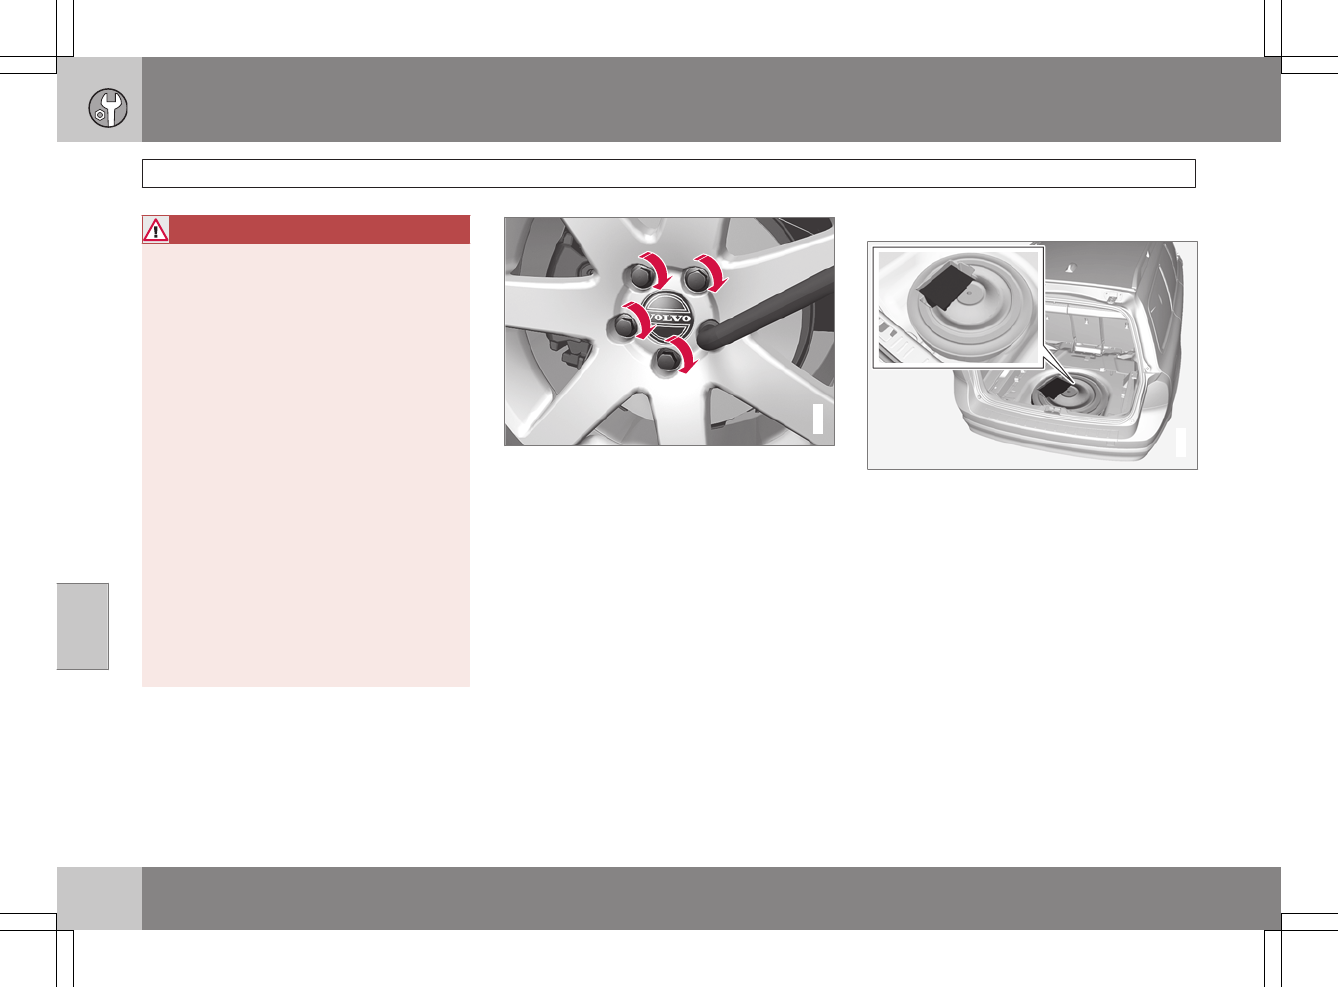
Re-installing the wheel
1. Clean the contact surfaces on the wheel
and hub.
2. Lift the wheel and place it on the hub.
G022916
Tighten the lug nuts
3. Install the wheel nuts and tighten hand-
tight. Using the lug wrench, tighten cross-
wise until all nuts are snug.
4. Lower the vehicle to the ground and alter-
nately tighten the bolts crosswise to
102 ft. lbs. (140 Nm).
5. Install the wheel cap (where applicable).
Tire Sealing System
G023309
Introduction
Certain models are equipped with a tire sealing
system that enables you to temporarily seal a
hole in the tread surface and re-inflate a flat tire,
or to adjust a tire’s inflation pressure.
The system consists of an air compressor, a
container for the sealing compound, wiring to
connect the system to the vehicle’s electrical
system via one of the 12-volt sockets, and a
hose used to connect the system to the tire’s
inflation valve.
The 12-volt sockets are located in the front
tunnel console, on the rear side of the center
console in the rear seat, and in the cargo com-
partment*.See page 199.
268


Need help? Post your question in this forum.

Forumrules


Report abuse

Libble takes abuse of its services very seriously. We're committed to dealing with such abuse according to the laws in your country of residence. When you submit a report, we'll investigate it and take the appropriate action. We'll get back to you only if we require additional details or have more information to share.

Product:

For example, Anti-Semitic content, racist content, or material that could result in a violent physical act.

For example, a credit card number, a personal identification number, or an unlisted home address. Note that email addresses and full names are not considered private information.

Forumrules

To achieve meaningful questions, we apply the following rules:

Register

Register getting emails for Volvo XC60 - 2009 at:


You will receive an email to register for one or both of the options.


Get your user manual by e-mail

Enter your email address to receive the manual of Volvo XC60 - 2009 in the language / languages: English as an attachment in your email.

The manual is 22,19 mb in size.


You will receive the manual in your email within minutes. If you have not received an email, then probably have entered the wrong email address or your mailbox is too full. In addition, it may be that your ISP may have a maximum size for emails to receive.

Others manual(s) of Volvo XC60 - 2009

Volvo XC60 - 2009 User Manual - German - 322 pages

Volvo XC60 - 2009 User Manual - Dutch - 306 pages

Volvo XC60 - 2009 User Manual - French - 322 pages


The manual is sent by email. Check your email

If you have not received an email with the manual within fifteen minutes, it may be that you have a entered a wrong email address or that your ISP has set a maximum size to receive email that is smaller than the size of the manual.

The email address you have provided is not correct.

Please check the email address and correct it.

Your question is posted on this page

Would you like to receive an email when new answers and questions are posted? Please enter your email address.


Info