EXPLANATION OF THE SYMBOLS
Observe the safety instructions!
Read the instruction manual before use!
Position: Parking brakes activated (electronic driving possible)
Position: Parking brakes deactivated (free running and pushing possible, no electronic driving)
During free running, be careful with slopes and inclinations
Separate recovery and recycling of electric and electronic devices
THE OPERATING ELEMENTS
The electric wheelchair is delivered fully assembled. Your dealer delivers the wheelchair fully
assembled and explains the various operating elements and their use. However, for your own safety
we provide a further, detailed explanation of the different parts.
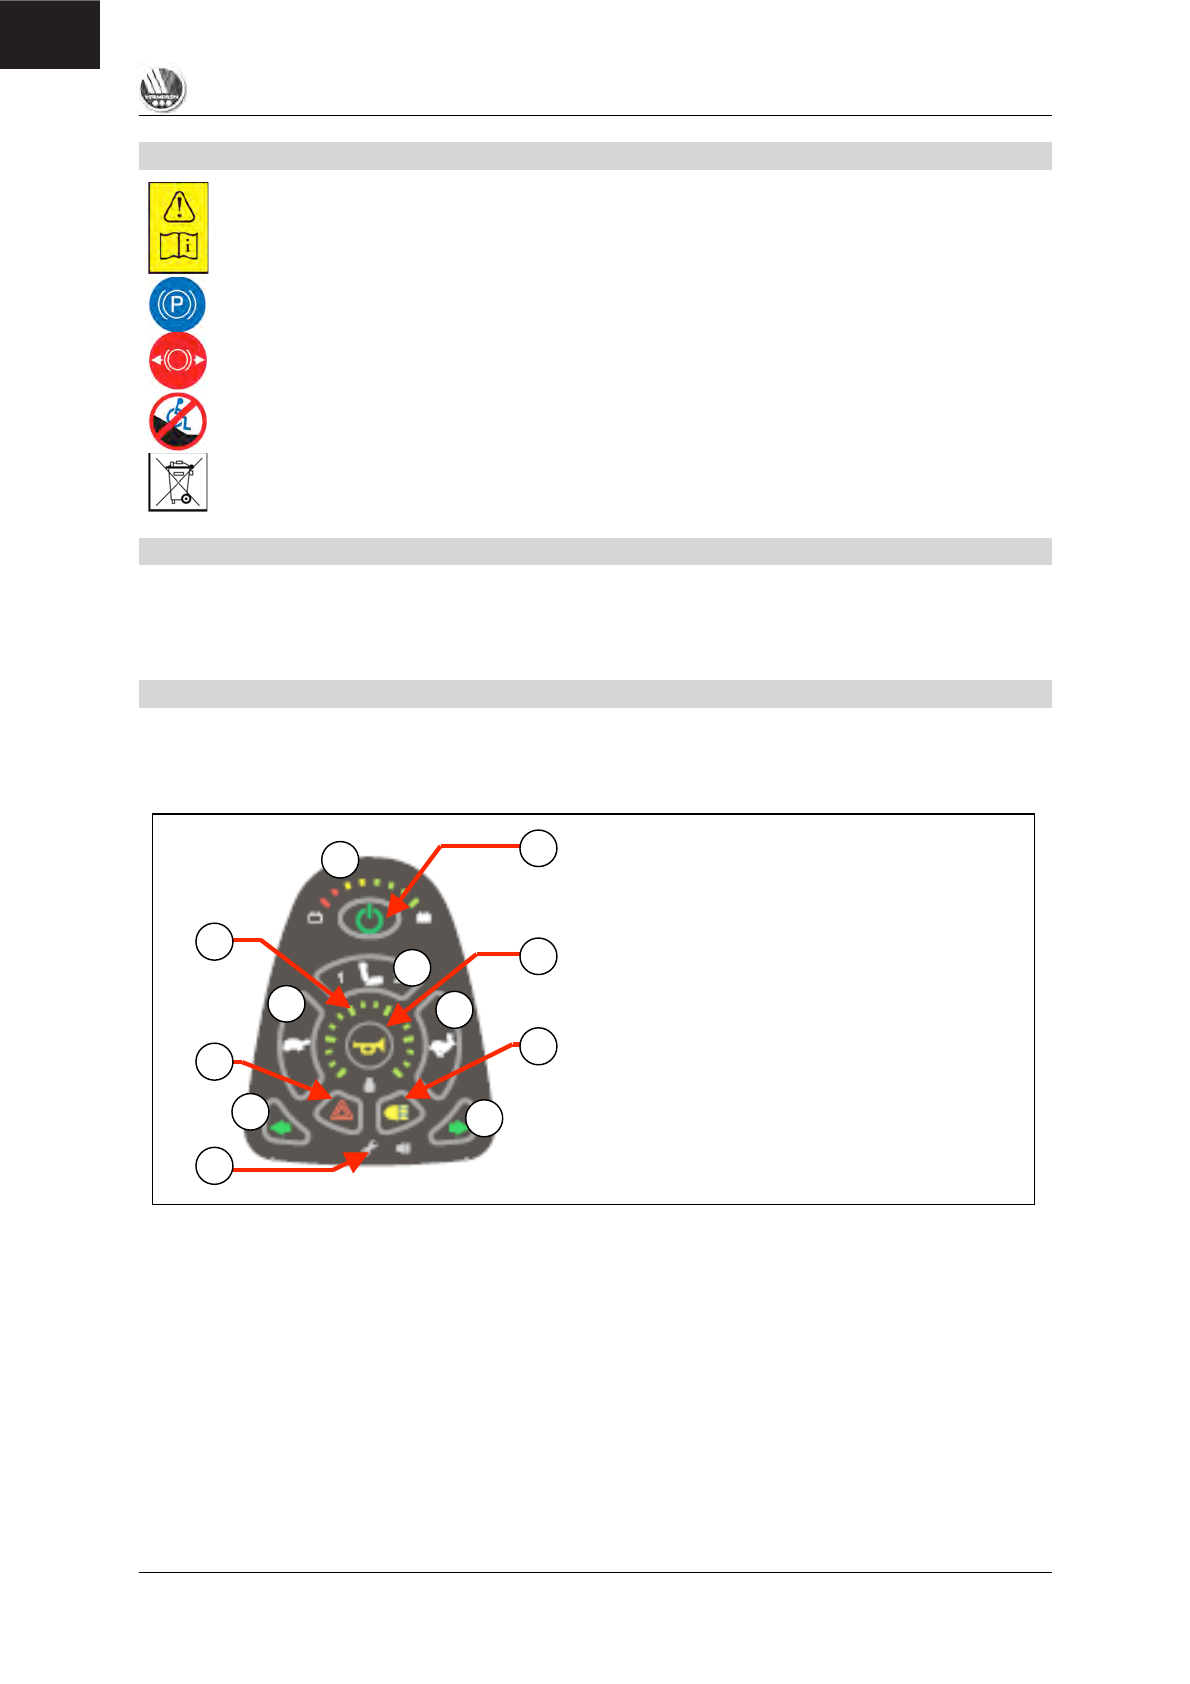
SHARK 2 CONTROLS
The control unit built into your electric wheelchair enables you to manage all the vehicle's driving,
steering, braking and operating procedures. The wheelchair's electrical unit and electronics are
constantly being monitored internally. Any fault in the electronics is indicated on the steering unit and,
if necessary, the wheelchair is switched off for reasons of safety (see the "Error codes" section).
Press the "ON/OFF" button (1). The charge indicator (2), which also indicates the batteries' charge
level, lights up for a moment. If all the lights come on, the batteries are sufficiently charged. If the lights
do not all come on, you must adjust your driving activities to suit the low capacity of the batteries. If the
battery charger display lights do not come on, check the plug connections of the electronic system.
Now select the driving program you want by pressing the “Tortoise” (3) or “Hare” (4) buttons.
The selected speed can be set on the 5-level speed indicator (5). If you have any special needs, you
can ask your dealer to enter a personalised driving program.
To set the wheelchair in motion, push the joystick forwards slowly. The speed will increase when you
push the joystick further forwards. If you want to turn left or right, simply push the joystick in the
desired direction. To reverse, pull the joystick backwards from the central position.
1 = On/Off button
2 = Battery charge indicator
3 = Reduce speed (“Tortoise” symbol)
4 = Increase speed (“Hare” symbol)
5 = Speed indicator
6 = Left indicator light
7 = Right indicator light
8 = Seated/standing function
9 = Horn
10 = Hazard warning lights
11 = Lights
12 = Service indicator (fault analysis)