8. Schiebegriffe (Fig. 2)
VORSICHT: Sturzgefahr - Prüfen Sie
vor jeder Nutzung des Rollators, ob
die Schiebegriffe sicher festgestellt
sind.
VORSICHT: Sturzgefahr –
Überschreiten Sie nicht die max.
Schiebegriffhöhe, da Ihr Rollator
sonst nicht mehr stabil und sicher
genutzt werden kann.
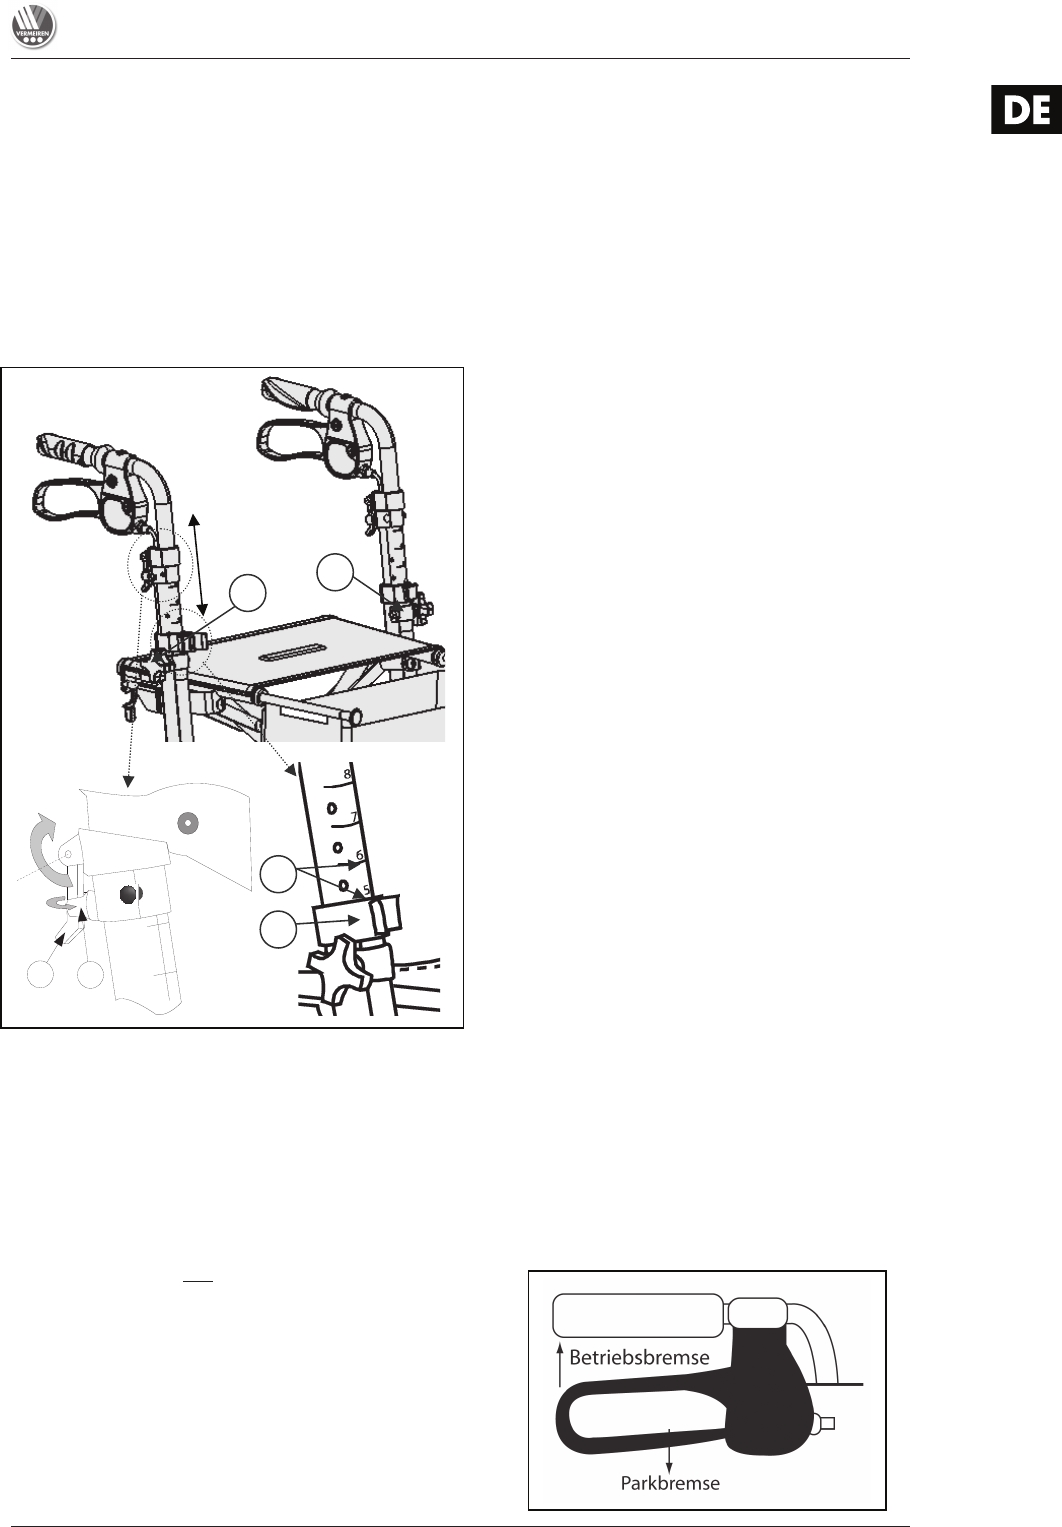
Fig. 2 – Verstellen der Schiebegriffe
Die Schiebegriffe können mit folgenden
Schritten in der Höhe verstellt werden:
• Ziehen Sie den Hebel c nach oben.
• Turn the button (just below the lever c)
d to the outside of the frame.
• Entfernen Sie den star knob e aus dem
Schraube.
• Turn the clip f around the axle of the
pushing handle.
• Entfernen Sie clip f.
• Stellen Sie die Schiebegriffe in die
gewünschte Position (Bei aufrechtem
Stehen sollten die Griffe in Höhe Ihrer
Handgelenke stehen). Lassen Sie dazu
Ihre Arme locker nach unten hängen. Der
Bereich der Minimal und Maximal
Höhenverstellung ist an den
Einschubrohren durch die Kerbelung des
Rohres und durch den Endpunkt
erkennzeichnet. Achten Sie darauf,
dass die Markierungen g der
Einschubrohre h immer in Höhe der
Außenrohre sind, wenn sie die
Schiebegriffe in den Rahmen gleiten
lassen, da sonst Schäden am
Handgriffmechanismus entstehen
können.
• Montieren Sie der Clip f in the hole of
the frame.
• Turn the clip f around the axle of the
pushing handle until the hole comes over
the screw.
• Montieren Sie den star knob e um die
Schraube.
• Turn the button d to the begin position
(to the inside).
• Drücken Sie den Hebel c herunter, till
the lever c is mounted in button d.
9. Bremssystem (Fig. 3)
WARNUNG: Die ordnungsgemäße
Funktion der Bremsen kann durch
Verschleiß oder Schmutz (auch
Wasser, Ol, Schlamm usw.)
beeinträchtigt werden. - Überprüfen
Sie daher vor jeder Nutzung den
Zustand der Räder.
WARNUNG: Die Bremsen sind
einstellbar und können verschleißen.
Überprüfen Sie daher vor jeder
Nutzung den Zustand der Bremsen.
Ihr Rollator ist mit einer Multifunktionsbremse
ausgerüstet. Die Bremshebel, jeweils unter
den Handgriffen, dienen sowohl als
Betriebsbremse als auch als Parkbremse.
Für das kurzzeitige Bremsen
(Betriebsbremse) ziehen Sie den Bremshebel
nach oben in Richtung Handgriff an.
Zur dauerhaften Bremsung des Rollators
(Parkbremse) drücken Sie den Bremsgriff
komplett nach unten, bis dieser hörbar und
fühlbar einrastet. Das so gebremste Rad ist
blockiert, bis Sie den Bremshebel wieder
leicht nach oben anziehen. Zum zeitlich
begrenzten Blockieren beider Räder führen
Sie die Funktion an beiden Bremsen (links
und rechts) durch.
Fig. 3 – Schiebegriff / Bremsgriff
9
8
1
2
1
2