Precautions for Use ................................................................................................................................. 1-4
EN ISO 7779 ............................................................................................................................................ 1-5
Security Precautions when Using Wireless LAN (If equipped) ................................................................ 1-6
Limited Use of This Product (If equipped) ............................................................................................... 1-7
Legal Information ..................................................................................................................................... 1-8
Energy Saving Control Function ............................................................................................................ 1-12
Automatic 2-Sided Print Function .......................................................................................................... 1-12
Resource Saving - Paper ....................................................................................................................... 1-12
Environmental benefits of "Power Management" ................................................................................... 1-12
Energy Star (ENERGY STAR®) Program .............................................................................................. 1-12
1-2
Legal and Safety Information > Notice
Notice
Safety Conventions in This Guide
The sections of this guide and parts of the machine marked with symbols are safety warnings meant to protect the user,
other individuals and surrounding objects, and ensure correct and safe usage of the machine. The symbols and their
meanings are indicated below.
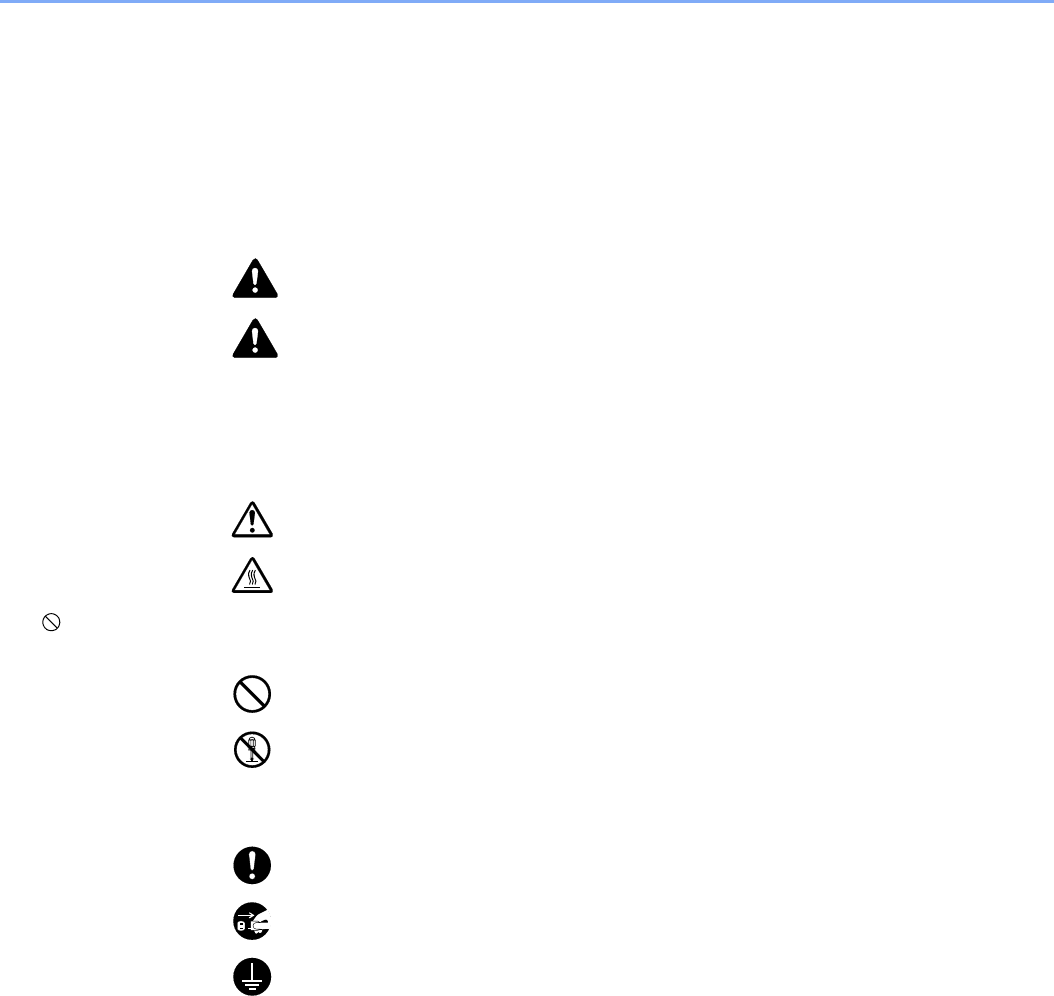
WARNING: Indicates that serious injury or even death may result from insufficient
attention to or incorrect compliance with the related points.
CAUTION: Indicates that personal injury or mechanical damage may result from
insufficient attention to or incorrect compliance with the related points.
Symbols
The symbol indicates that the related section includes safety warnings. Specific points of attention are indicated
inside the symbol.
... [General warning]
... [Warning of high temperature]
The symbol indicates that the related section includes information on prohibited actions. Specifics of the prohibited
action are indicated inside the symbol.
... [Warning of prohibited action]
... [Disassembly prohibited]
The symbol indicates that the related section includes information on actions which must be performed. Specifics of
the required action are indicated inside the symbol.
... [Alert of required action]
... [Remove the power plug from the outlet]
... [Always connect the machine to an outlet with a ground connection]
Please contact your service representative to order a replacement if the safety warnings in this Operation Guide are
illegible or if the guide itself is missing (fee required).
1-3
Legal and Safety Information > Notice
Environment
The service environmental conditions are as follows:
Avoid the following locations when selecting a site for the machine.
•Avoid locations near a window or with exposure to direct sunlight.
•Avoid locations with vibrations.
•Avoid locations with drastic temperature fluctuations.
•Avoid locations with direct exposure to hot or cold air.
•Avoid poorly ventilated locations.
If the floor is delicate against casters, when this machine is moved after installation, the floor material may be damaged.
During printing, some ozone is released, but the amount does not cause any ill effect to one's health. If, however, the
machine is used over a long period of time in a poorly ventilated room or when making an extremely large number of
prints, the smell may become unpleasant. To maintain the appropriate environment for print work, it is suggested that the
room be properly ventilated.
Temperature50 to 90.5°F (10 to 32.5°C)
Humidity10 to 80%
1-4
Legal and Safety Information > Notice
Precautions for Use
Cautions when handling consumables
CAUTION
Do not attempt to incinerate parts which contain toner. Dangerous sparks may cause burns.
Keep parts which contain toner out of the reach of children.
If toner happens to spill from parts which contain toner, avoid inhalation and ingestion, as well as contact with your eyes
and skin.
•If you do happen to inhale toner, move to a place with fresh air and gargle thoroughly with a large amount of water. If
coughing develops, contact a physician.
•If you do happen to ingest toner, rinse your mouth with water and drink 1 or 2 cups of water to dilute the contents of
your stomach. If necessary, contact a physician.
•If you do happen to get toner in your eyes, flush them thoroughly with water. If there is any remaining tenderness,
contact a physician.
•If toner does happen to get on your skin, wash with soap and water.
Do not attempt to force open or destroy parts which contain toner.
Other precautions
Return the exhausted toner container to your dealer or service representative. The collected toner container will be
recycled or disposed in accordance with the relevant regulations.
Store the machine while avoiding exposure to direct sunlight.
Store the machine in a place where the temperature stays below 40°C while avoiding sharp changes of temperature and
humidity.
If the machine will not be used for an extended period of time, remove the paper from the cassette and the Multipurpose
(MP) Tray, return it to its original package and reseal it.
1-5
Legal and Safety Information > Notice
Laser Safety (Europe)
Laser radiation could be hazardous to the human body. For this reason, laser radiation emitted inside this machine is
hermetically sealed within the protective housing and external cover. In the normal operation of the product by user, no
radiation can leak from the machine.
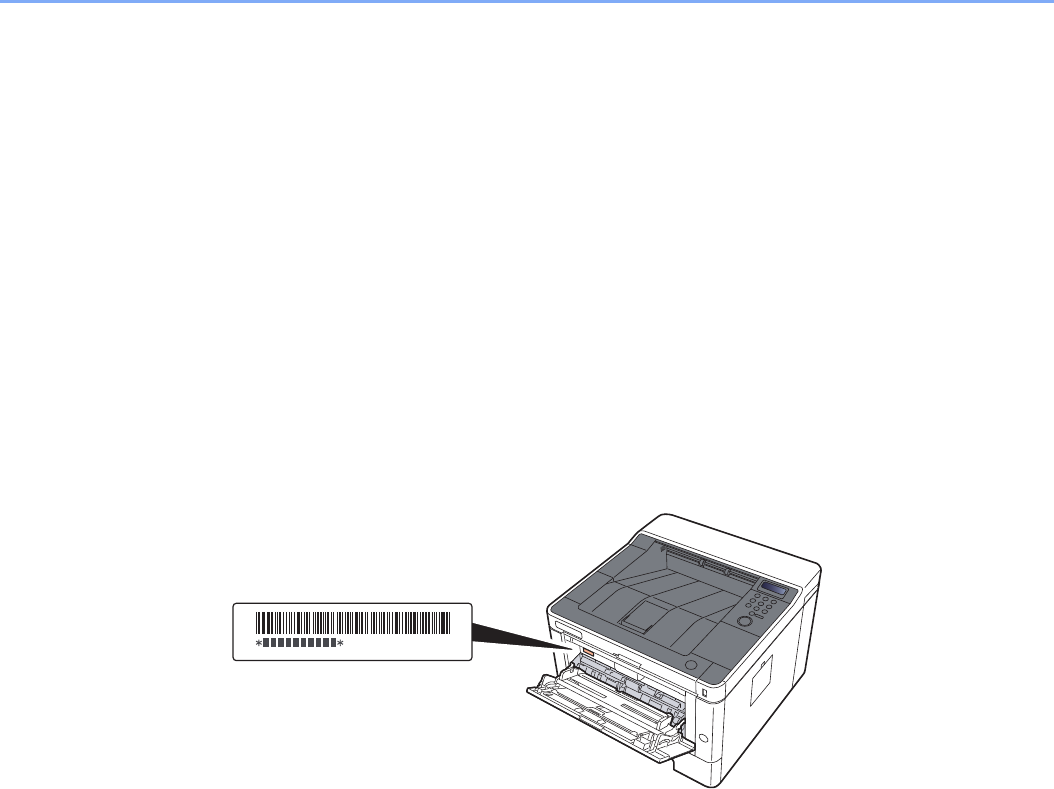
This machine is classified as Class 1 laser product under IEC/EN 60825-1:2014.
Regarding CLASS 1 laser products, information is provided on the rating label.
EN ISO 7779
Maschinenlärminformations-Verordnung 3. GPSGV, 06.01.2004: Der höchste Schalldruckpegel beträgt 70 dB (A) oder
weniger gemäß EN ISO 7779.
1-6
Legal and Safety Information > Notice
EK1-ITB 2000
Das Gerät ist nicht für die Benutzung im unmittelbaren Gesichtsfeld am Bildschirmarbeitsplatz vorgesehen. Um
störende Reflexionen am Bildschirmarbeitsplatz zu vermeiden, darf dieses Produkt nicht im unmittelbaren Gesichtsfeld
platziert werden.
Wireless Connection (Mexico only)
The operation of this equipment is subject to the following two conditions:
(1) it is possible that this equipment or device may not cause harmful interference, and (2) this equipment or device must
accept any interference, including interference that may cause undesired operation.
La operación de este equipo está sujeta a las siguientes dos condiciones:
(1) es posible que este equipo o dispositivo no cause interferencia perjudicial y (2) este equipo o dispositivo debe
aceptar cualquier interferencia, incluyendo la que pueda causar su operación no deseada.
Security Precautions when Using Wireless LAN
(Ifequipped)
Wireless LAN allows information to be exchanged between wireless access points instead of using a network cable,
which offers the advantage that a LAN connection can be established freely within an area in which radio waves can be
transmitted.
On the other hand, the following problems may occur if security settings are not configured, because radio waves can
pass through obstacles (including walls) and reach everywhere within a certain area.
Secretly Viewing Communication Contents
A third person with malicious objectives may intentionally monitor radio waves and gain unauthorized access to the
following communication contents.
•Personal information including ID, passwords, and credit card numbers
•Contents of email messages
1-7
Legal and Safety Information > Notice
Illegal Intrusion
A third party with malicious intent may gain unauthorized access to personal or company networks and conduct the
following illegal actions.
•Extracting personal and confidential information (information leak)
•Entering into communication while impersonating a specific person and distributing unauthorized information
(spoofing)
•Modifying and retransmitting intercepted communications (falsification)
•Transmitting computer viruses and destroying data and systems (destruction)
Wireless LAN cards and wireless access points contain built-in security mechanisms to address these problems and to
reduce the possibility of these problems occurring by configuring the security settings of wireless LAN products when
the product is used.
We recommend that customers take responsibility and use their judgment when configuring the security settings and
that they ensure that they fully understand the problems that can occur when the product is used without configuring the
security settings.
Limited Use of This Product (If equipped)
•Radio waves transmitted from this product may affect medical equipment. When using this product in a medical
institution or in the vicinity of medical instruments, either use this product according to the instructions and
precautions provided by the administrator of the institution or those provided on the medical instruments.
•Radio waves transmitted from this product may affect automatic control equipment including automatic doors and fire
alarms. When using this product in the vicinity of the automatic control equipment, use this product according to the
instructions and precautions provided on the automatic control equipment.
•If this product is used in devices that are directly related to service including airplanes, trains, ships, and automobiles
or this product is used in applications requiring high reliability and safety to function and in devices requiring accuracy
including those used in disaster prevention and crime prevention and those used for various safety purposes, please
use this product after considering the safety design of the entire system including adoption of a failsafe design and
redundancy design for reliability and safety maintenance of the entire system. This product is not intended for use in
applications requiring high reliability and safety including aerospace instruments, trunk communication equipment,
nuclear power control equipment, and medical equipment; hence, the decision as to whether to use this product in
these applications needs to be fully considered and determined.
1-8
Legal and Safety Information > Notice
Legal Information
Copying or other reproduction of all or part of this guide without the prior written consent of Copyright owner is
prohibited.
Regarding Trade Names
•PRESCRIBE is a registered trademark of Kyocera Corporation.
•KPDL is a trademark of Kyocera Corporation.
•Microsoft, Windows, Windows XP, Windows Server 2003, Windows Vista, Windows Server 2008, Windows 7,
Windows Server 2012, Windows 8, Windows 8.1, Windows 10 and Internet Explorer are registered trademarks or
trademarks of MicrosoftCorporation in the U.S.A. and/or other countries.
•PCL is a trademark of Hewlett-Packard Company.
•Adobe Acrobat, Adobe Reader and PostScript are trademarks of Adobe Systems Incorporated.
•Ethernet is a registered trademark of Xerox Corporation.
•Novell and NetWare are registered trademarks of Novell, Inc.
•IBM and IBM PC/AT are trademarks of International Business Machines Corporation.
•AppleTalk, Bonjour, Macintosh, and Mac OS are trademarks of Apple Inc., registered in the U.S. and other countries.
•All European language fonts installed in this machine are used under licensing agreement with Monotype Imaging
Inc.
•Helvetica, Palatino and Times are registered trademarks of Linotype GmbH.
•ITC Avant Garde Gothic, ITC Bookman, ITC ZapfChancery and ITC ZapfDingbats are registered trademarks of
International Typeface Corporation.
•ThinPrint is a trademark of Cortado AG in Germany and other countries.
•UFST™ MicroType® fonts by Monotype Imaging Inc. are installed in this machine.
•This machine contains the software having modules developed by Independent JPEG Group.
•iPad, iPhone and iPod touch are trademarks of Apple Inc., registered in the U.S. and other countries.
•AirPrint and the AirPrint logo are trademarks of Apple Inc.
•iOS is a trademark or registered trademark of Cisco in the U.S. and other countries and is used under license by
Apple Inc.
•Google and Google Cloud Print™ are trademarks and/or registered trademarks of Google Inc.
•Mopria™ is registered trademarks of Mopria™ Alliance.
•Wi-Fi and Wi-Fi Direct are trademarks and/or registered trademarks of Wi-Fi Alliance.
All other brands and product names are registered trademarks or trademarks of their respective companies. The
designations ™ and ® will not be used in this Operation Guide.
1-9
Legal and Safety Information > Notice
GPL/LGPL
This product contains GPL (http://www.gnu.org/licenses/gpl.html) and/or LGPL (http://www.gnu.org/licenses/lgpl.html)
software as part of its firmware. You can get the source code, and you are permitted to copy, redistribute and modify it
under the terms of GPL/LGPL.
OpenSSL License
Copyright (c) 1998-2006 The OpenSSL Project. All rights reserved.
Redistribution and use in source and binary forms, with or without modification, are permitted provided that the following
conditions are met:
1. Redistributions of source code must retain the above copyright notice, this list of conditions and the following
disclaimer.
2. Redistributions in binary form must reproduce the above copyright notice, this list of conditions and the following
disclaimer in the documentation and/or other materials provided with the distribution.
3. All advertising materials mentioning features or use of this software must display the following acknowledgment:
"This product includes software developed by the OpenSSL Project for use in the OpenSSL Toolkit.
(http://www.openssl.org/)"
4. The names "OpenSSL Toolkit" and "OpenSSL Project" must not be used to endorse or promote products derived
from this software without prior written permission.
For written permission, please contact openssl-core@openssl.org.
5. Products derived from this software may not be called "OpenSSL" nor may "OpenSSL" appear in their names without
prior written permission of the OpenSSL Project.
6. Redistributions of any form whatsoever must retain the following acknowledgment: "This product includes software
developed by the OpenSSL Project for use in the OpenSSL Toolkit (http://www.openssl.org/)"
THIS SOFTWARE IS PROVIDED BY THE OpenSSL PROJECT "AS IS" AND ANY EXPRESSED OR IMPLIED
WARRANTIES, INCLUDING, BUT NOT LIMITED TO, THE IMPLIED WARRANTIES OF MERCHANTABILITY AND
FITNESS FOR A PARTICULAR PURPOSE ARE DISCLAIMED. IN NO EVENT SHALL THE OpenSSL PROJECT OR
ITS CONTRIBUTORS BE LIABLE FOR ANY DIRECT, INDIRECT, INCIDENTAL, SPECIAL, EXEMPLARY, OR
CONSEQUENTIAL DAMAGES (INCLUDING, BUT NOT LIMITED TO, PROCUREMENT OF SUBSTITUTE GOODS OR
SERVICES; LOSS OF USE, DATA, OR PROFITS; OR BUSINESS INTERRUPTION) HOWEVER CAUSED AND ON
ANY THEORY OF LIABILITY, WHETHER IN CONTRACT, STRICT LIABILITY, OR TORT (INCLUDING NEGLIGENCE
OR OTHERWISE) ARISING IN ANY WAY OUT OF THE USE OF THIS SOFTWARE, EVEN IF ADVISED OF THE
POSSIBILITY OF SUCH DAMAGE.
Original SSLeay License
Copyright (C) 1995-1998 Eric Young (eay@cryptsoft.com) All rights reserved.
This package is an SSL implementation written by Eric Young (eay@cryptsoft.com). The implementation was written so
as to conform with Netscapes SSL.
This library is free for commercial and non-commercial use as long as the following conditions are adhered to. The
following conditions apply to all code found in this distribution, be it the RC4, RSA, lhash, DES, etc., code; not just the
SSL code. The SSL documentation included with this distribution is covered by the same copyright terms except that the
holder is Tim Hudson (tjh@cryptsoft.com).
Copyright remains Eric Young's, and as such any Copyright notices in the code are not to be removed.
If this package is used in a product, Eric Young should be given attribution as the author of the parts of the library used.
This can be in the form of a textual message at program startup or in documentation (online or textual) provided with the
package.
Redistribution and use in source and binary forms, with or without modification, are permitted provided that the following
conditions are met:
1-10
Legal and Safety Information > Notice
1.Redistributions of source code must retain the copyright notice, this list of conditions and the following disclaimer.
2. Redistributions in binary form must reproduce the above copyright notice, this list of conditions and the following
disclaimer in the documentation and/or other materials provided with the distribution.
3. All advertising materials mentioning features or use of this software must display the following acknowledgement:
"This product includes cryptographic software written by Eric Young (eay@cryptsoft.com)"
The word 'cryptographic' can be left out if the routines from the library being used are not cryptographic related :-).
4.If you include any Windows specific code (or a derivative thereof) from the apps directory (application code) you must
include an acknowledgement: "This product includes software written by Tim Hudson (tjh@cryptsoft.com)"
THIS SOFTWARE IS PROVIDED BY ERIC YOUNG "AS IS" AND ANY EXPRESS OR IMPLIED WARRANTIES,
INCLUDING, BUT NOT LIMITED TO, THE IMPLIED WARRANTIES OF MERCHANTABILITY AND FITNESS FOR A
PARTICULAR PURPOSE ARE DISCLAIMED. IN NO EVENT SHALL THE AUTHOR OR CONTRIBUTORS BE LIABLE
FOR ANY DIRECT, INDIRECT, INCIDENTAL, SPECIAL, EXEMPLARY, OR CONSEQUENTIAL DAMAGES
(INCLUDING, BUT NOT LIMITED TO, PROCUREMENT OF SUBSTITUTE GOODS OR SERVICES; LOSS OF USE,
DATA, OR PROFITS; OR BUSINESS INTERRUPTION) HOWEVER CAUSED AND ON ANY THEORY OF LIABILITY,
WHETHER IN CONTRACT, STRICT LIABILITY, OR TORT (INCLUDING NEGLIGENCE OR OTHERWISE) ARISING IN
ANY WAY OUT OF THE USE OF THIS SOFTWARE, EVEN IF ADVISED OF THE POSSIBILITY OF SUCH DAMAGE.
The licence and distribution terms for any publically available version or derivative of this code cannot be changed. i.e.
this code cannot simply be copied and put under another distribution licence [including the GNU Public Licence.]
Monotype Imaging License Agreement
1Software shall mean the digitally encoded, machine readable, scalable outline data as encoded in a special format as
well as the UFST Software.
2You agree to accept a non-exclusive license to use the Software to reproduce and display weights, styles and
versions of letters, numerals, characters and symbols (Typefaces) solely for your own customary business or
personal purposes at the address stated on the registration card you return to Monotype Imaging. Under the terms of
this License Agreement, you have the right to use the Fonts on up to three printers. If you need to have access to the
fonts on more than three printers, you need to acquire a multiuser license agreement which can be obtained from
Monotype Imaging. Monotype Imaging retains all rights, title and interest to the Software and Typefaces and no rights
are granted to you other than a License to use the Software on the terms expressly set forth in this Agreement.
3To protect proprietary rights of Monotype Imaging, you agree to maintain the Software and other proprietary
information concerning the Typefaces in strict confidence and to establish reasonable procedures regulating access
to and use of the Software and Typefaces.
4You agree not to duplicate or copy the Software or Typefaces, except that you may make one backup copy. You
agree that any such copy shall contain the same proprietary notices as those appearing on the original.
5This License shall continue until the last use of the Software and Typefaces, unless sooner terminated. This License
may be terminated by Monotype Imaging if you fail to comply with the terms of this License and such failure is not
remedied within thirty (30) days after notice from Monotype Imaging. When this License expires or is terminated, you
shall either return to Monotype Imaging or destroy all copies of the Software and Typefaces and documentation as
requested.
6You agree that you will not modify, alter, disassemble, decrypt, reverse engineer or decompile the Software.
7Monotype Imaging warrants that for ninety (90) days after delivery, the Software will perform in accordance with
Monotype Imaging-published specifications, and the diskette will be free from defects in material and workmanship.
Monotype Imaging does not warrant that the Software is free from all bugs, errors and omissions.
The parties agree that all other warranties, expressed or implied, including warranties of fitness for a particular
purpose and merchantability, are excluded.
8Your exclusive remedy and the sole liability of Monotype Imaging in connection with the Software and Typefaces is
repair or replacement of defective parts, upon their return to Monotype Imaging.
In no event will Monotype Imaging be liable for lost profits, lost data, or any other incidental or consequential
damages, or any damages caused by abuse or misapplication of the Software and Typefaces.
9
Massachusetts U.S.A. law governs this Agreement.
1-11
Legal and Safety Information > Notice
10You shall not sublicense, sell, lease, or otherwise transfer the Software and/or Typefaces without the prior written
consent of Monotype Imaging.
11Use, duplication or disclosure by the Government is subject to restrictions as set forth in the Rights in Technical Data
and Computer Software clause at FAR 252-227-7013, subdivision (b)(3)(ii) or subparagraph (c)(1)(ii), as appropriate.
Further use, duplication or disclosure is subject to restrictions applicable to restricted rights software as set forth in
FAR 52.227-19 (c)(2).
12You acknowledge that you have read this Agreement, understand it, and agree to be bound by its terms and
conditions. Neither party shall be bound by any statement or representation not contained in this Agreement. No
change in this Agreement is effective unless written and signed by properly authorized representatives of each party.
By opening this diskette package, you agree to accept the terms and conditions of this Agreement.
1-12
Legal and Safety Information > Notice
Energy Saving Control Function
The device comes equipped with a Sleep where printer functions remain in a waiting state but power consumption is
reduced to a minimum after a certain amount of time elapses since the device was last used. If the machine is not used
while in sleep mode, the power automatically turns off.
Auto Sleep (page 2-27)
Power Off Rule (models for Europe) (page 6-20)
Automatic 2-Sided Print Function
This device includes 2-sided printing as a standard function. For example, by printing two 1-sided originals onto a single
sheet of paper as a 2-sided print, it is possible to lower the amount of paper used.
Printing in duplex mode reduces paper consumption and contributes to the conservation of forest resources. Duplex
mode also reduces the amount of paper that must be purchased, and thereby reduces cost. It is recommended that
machines capable of duplex printing be set to use duplex mode by default.
Resource Saving - Paper
For the preservation and sustainable use of forest resources, it is recommended that recycled as well as virgin paper
certified under environmental stewardship initiatives or carrying recognised ecolabels, which meet EN 12281:2002
*
or
an equivalent quality standard, be used.
This machine also supports printing on 64 g/m
2
paper. Using such paper containing less raw materials can lead to
further saving of forest resources.
* : EN12281:2002 "Printing and business paper - Requirements for copy paper for dry toner imaging processes"
Your sales or service representative can provide information about recommended paper types.
Environmental benefits of "Power Management"
To reduce power consumption when idle, this machine is equipped with a power management function that
automatically activates energy-saving mode when the machine is idle for a certain period of time.
Although it takes the machine a slight amount of time to return to READY mode when in energy-saving mode, a
significant reduction in energy consumption is possible. It is recommended that the machine be used with the activation
time for energy-saving mode set to the default setting.
Energy Star (ENERGY STAR
®
) Program
We have determined as a participating company in the International Energy Star Program that this
product is compliant with the standards laid out in the International Energy Star Program.
ENERGY STAR
®
is a voluntary energy efficiency program with the goal of developing and promoting the
use of products with high energy efficiency in order to help prevent global warming. By purchasing
ENERGY STAR
®
qualified products, customers can help reduce emissions of greenhouse gases during
product use and cut energy-related costs.
2-1
2Installing and Setting
up the Machine
This chapter provides information for the administrator of this machine, such as part names, cable connection, and
software installation.
Part Names (Machine Exterior) .......................................................................................................................... 2-2
Part Names (Connectors/Interior) ...................................................................................................................... 2-3
Part Names (With Optional Equipments Attached) ............................................................................................ 2-5
Connecting the Machine and Other Devices ..................................................................................................... 2-6
Connecting LAN Cable ............................................................................................................................ 2-7
Connecting USB Cable ............................................................................................................................ 2-8
Connecting the Power Cable ................................................................................................................... 2-8
Power On/Off ..................................................................................................................................................... 2-9
Power On ................................................................................................................................................. 2-9
Power Off ................................................................................................................................................. 2-9
Using the Operation Panel ............................................................................................................................... 2-10
Selecting a Menu ................................................................................................................................... 2-12
Setting a Menu ....................................................................................................................................... 2-12
Cancelling Menu Selection .................................................................................................................... 2-12
Help Screen ........................................................................................................................................... 2-12
Default Settings of the Machine ....................................................................................................................... 2-15
Setting Date and Time ........................................................................................................................... 2-15
Configuring the Wired Network .............................................................................................................. 2-17
Configuring the Wireless Network ......................................................................................................... 2-19
Setting Wi-Fi Direct ................................................................................................................................ 2-24
Energy Saver function ...................................................................................................................................... 2-27
Auto Sleep ............................................................................................................................................. 2-27
Software on DVD (Windows) ................................................................................................................. 2-31
Installing Software in Windows .............................................................................................................. 2-32
Uninstalling the Software ....................................................................................................................... 2-38
Installing Software in Mac Computer ..................................................................................................... 2-39
Checking the Counter ...................................................................................................................................... 2-41
Additional Preparations for the Administrator ................................................................................................... 2-42
Strengthening the Security ..................................................................................................................... 2-42
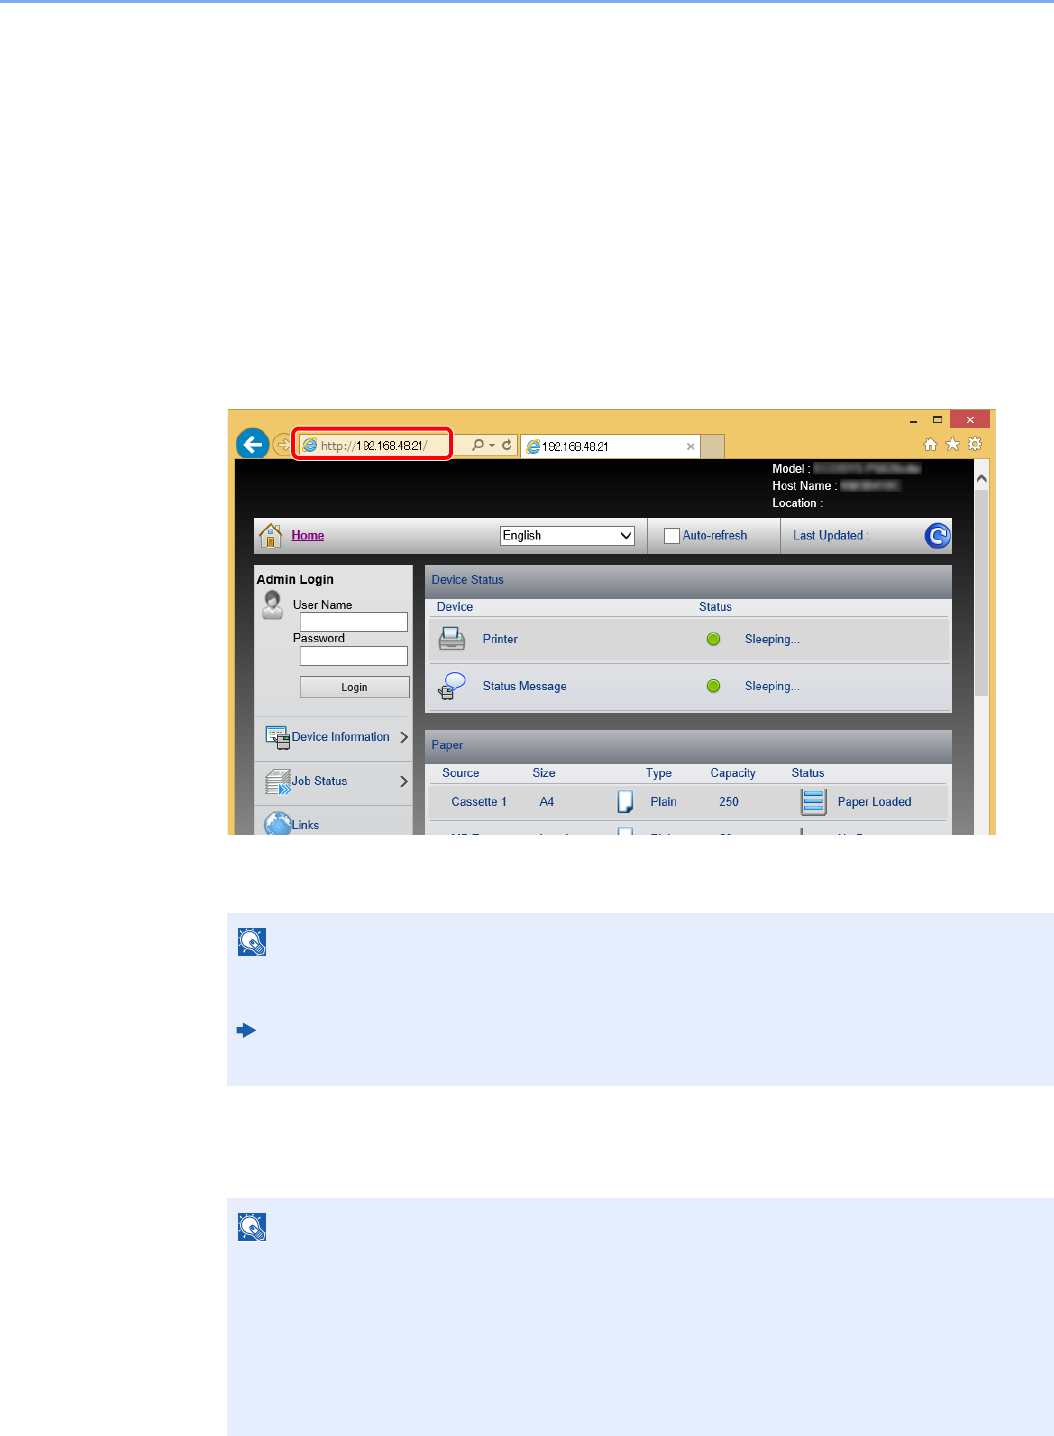
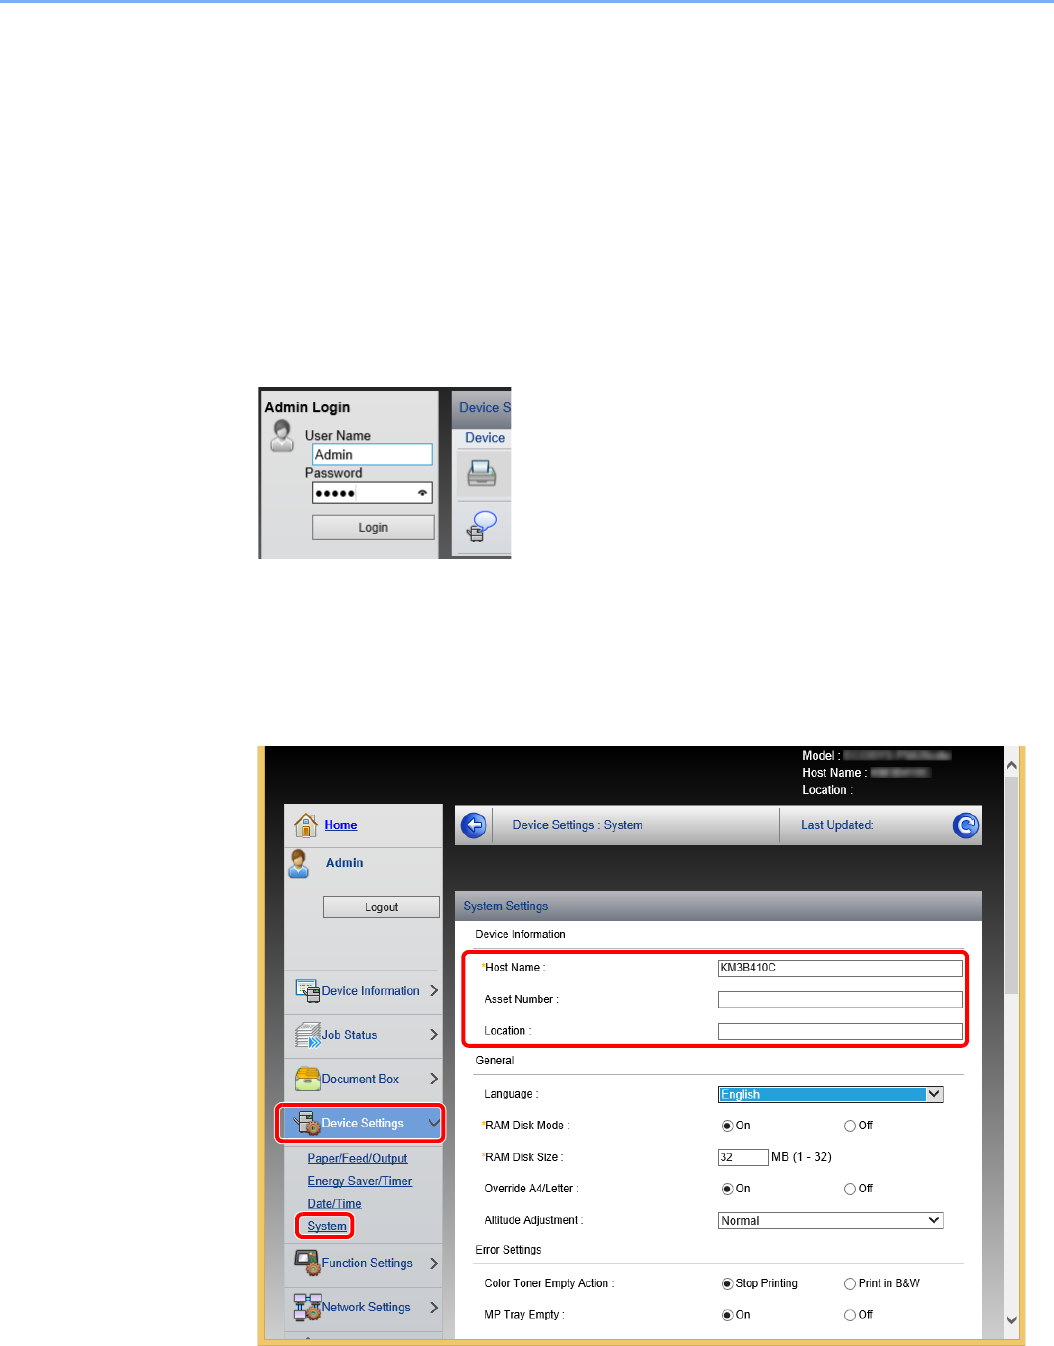
Embedded Web Server RX .............................................................................................................................. 2-43
Accessing Embedded Web Server RX .................................................................................................. 2-44
Libble takes abuse of its services very seriously. We're committed to dealing with such abuse according to the laws in your country of residence. When you submit a report, we'll investigate it and take the appropriate action. We'll get back to you only if we require additional details or have more information to share.
Product:
Forumrules
To achieve meaningful questions, we apply the following rules:
First, read the manual;
Check if your question has been asked previously;
Try to ask your question as clearly as possible;
Did you already try to solve the problem? Please mention this;
Is your problem solved by a visitor then let him/her know in this forum;
To give a response to a question or answer, do not use this form but click on the button 'reply to this question';
Your question will be posted here and emailed to our subscribers. Therefore, avoid filling in personal details.
Register
Register getting emails for Triumph-Adler P-4020DN at:
new questions and answers
new manuals
You will receive an email to register for one or both of the options.
Get your user manual by e-mail
Enter your email address to receive the manual of Triumph-Adler P-4020DN in the language / languages: English as an attachment in your email.
The manual is 7,67 mb in size.
You will receive the manual in your email within minutes. If you have not received an email, then probably have entered the wrong email address or your mailbox is too full. In addition, it may be that your ISP may have a maximum size for emails to receive.
If you have not received an email with the manual within fifteen minutes, it may be that you have a entered a wrong email address or that your ISP has set a maximum size to receive email that is smaller than the size of the manual.
The email address you have provided is not correct.
Please check the email address and correct it.
Your question is posted on this page
Would you like to receive an email when new answers and questions are posted? Please enter your email address.