CONTENTS 3
CONTENTS
Preface....................................................................................................................................... 1
Chapter 1 BEFORE USING EQUIPMENT
BASIC Menu for the Copier Function ..................................................................................... 8
Placing Paper.......................................................................................................................... 11
Acceptable copy paper ........................................................................................................ 11
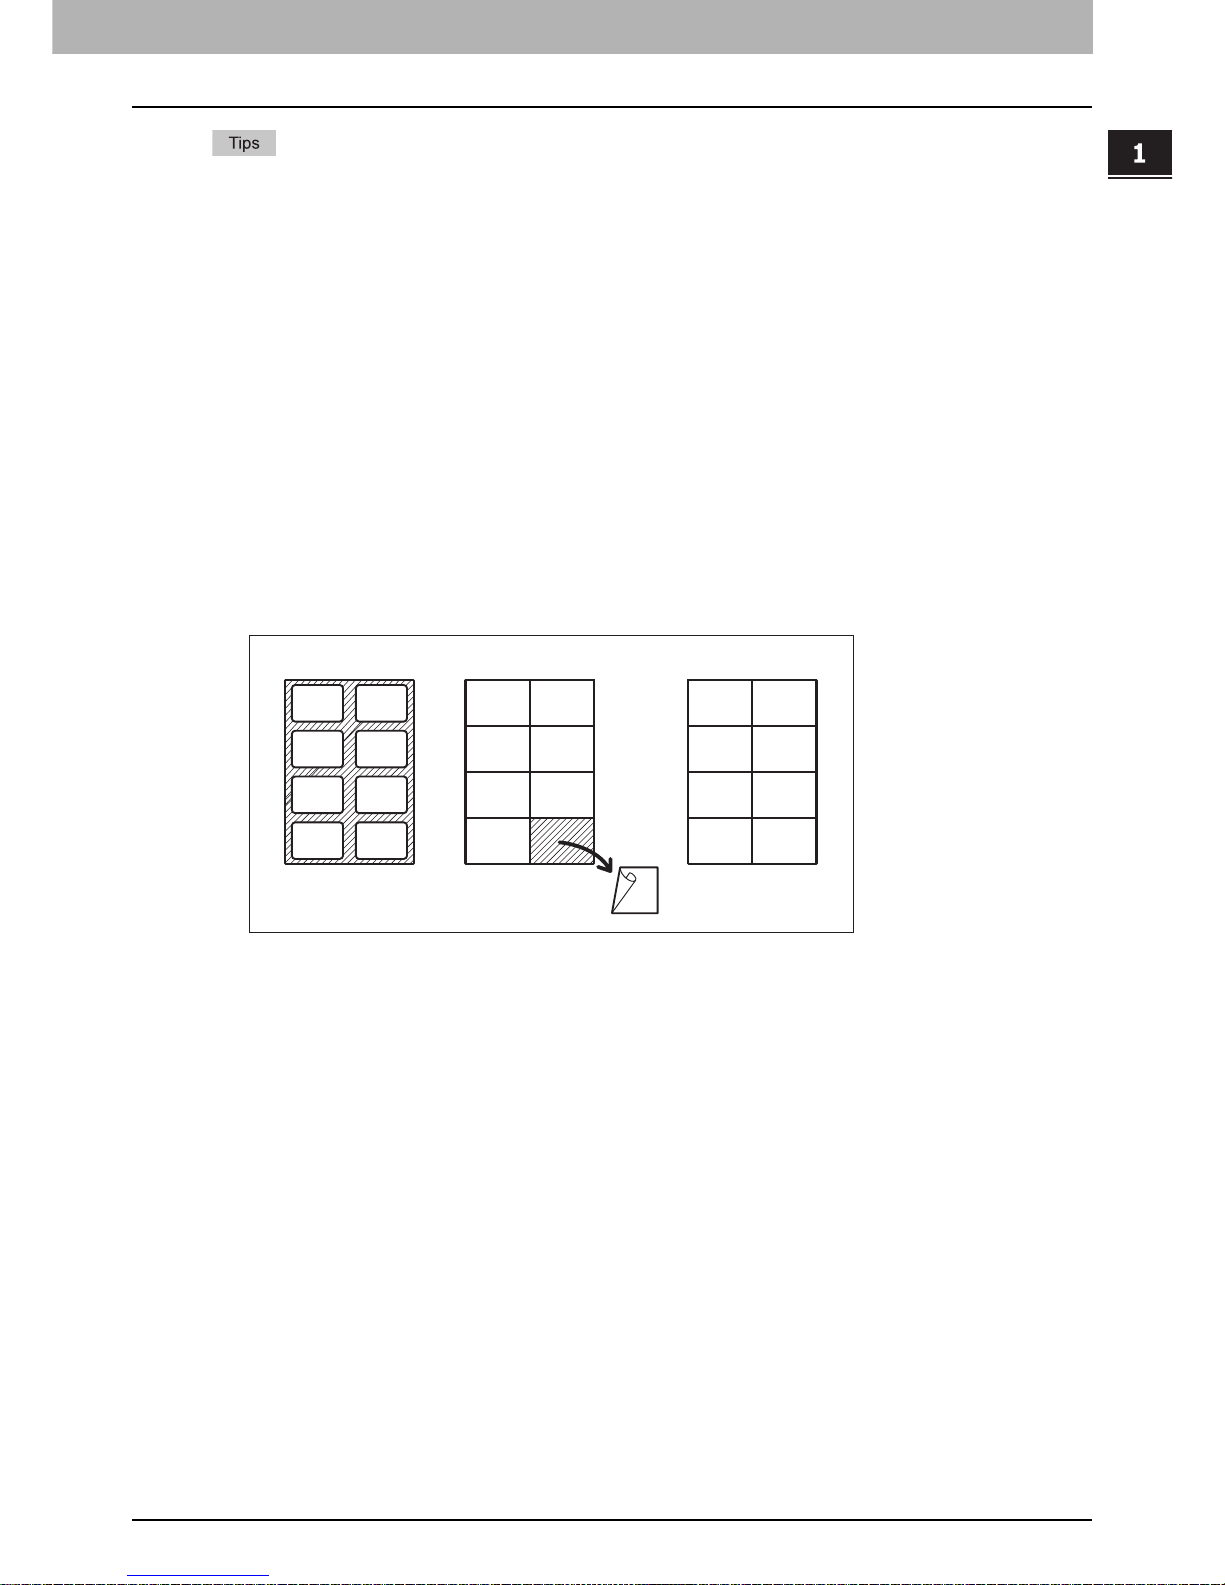
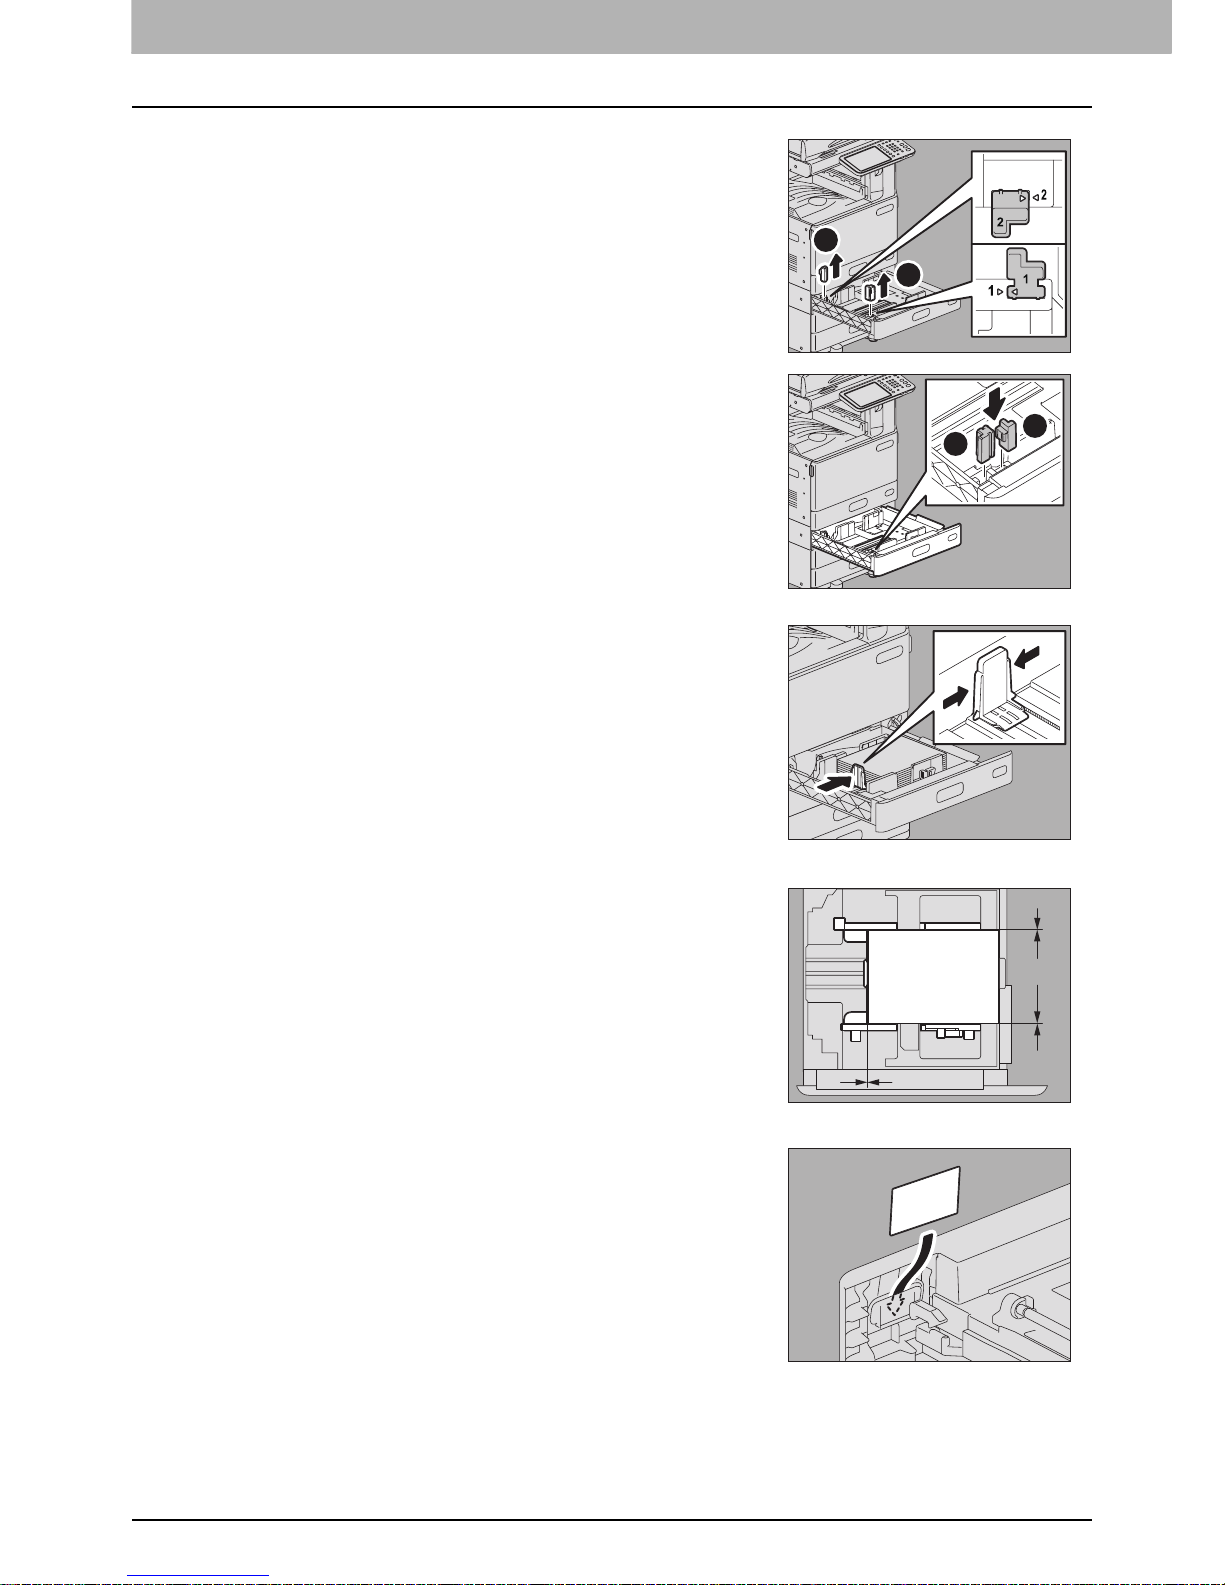
Placing paper in drawers..................................................................................................... 16
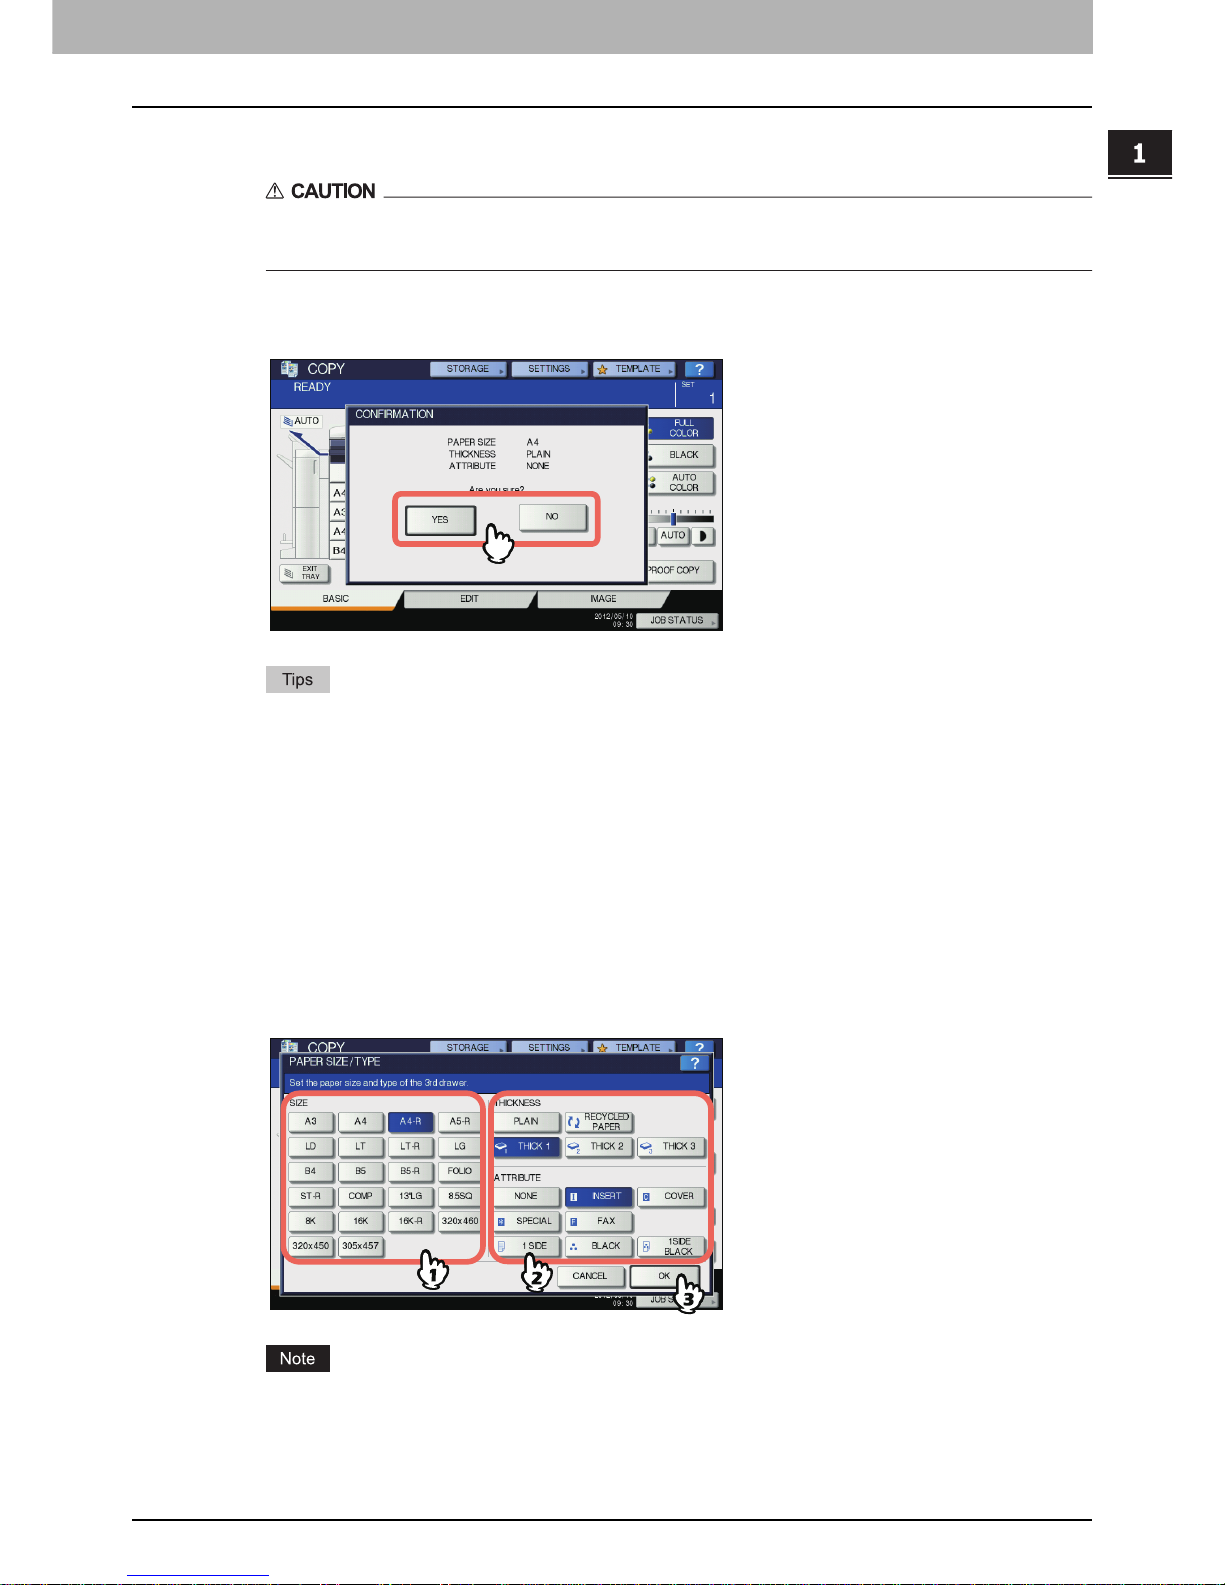
Registering paper size......................................................................................................... 22
Setting paper type ............................................................................................................... 23
Placing paper in the Large Capacity Feeder ....................................................................... 27
Chapter 2 HOW TO MAKE COPIES
Before Making Copies............................................................................................................32
Storage of color copies........................................................................................................ 32
Forgery prevention function................................................................................................. 32
Placing Originals .................................................................................................................... 33
Acceptable originals ............................................................................................................33
Placing originals on the original glass ................................................................................. 34
Book-type originals .............................................................................................................. 35
Using the RADF (Reversing Automatic Document Feeder) ................................................ 36
Making Copies ........................................................................................................................ 39
Basic copying procedure ..................................................................................................... 39
Scanning the next original during copying........................................................................... 42
Interrupting copying and making other copies..................................................................... 43
Proof copy ........................................................................................................................... 44
Selecting exit tray ................................................................................................................ 46
Bypass Copying ..................................................................................................................... 47
Bypass copying on standard size paper.............................................................................. 48
Bypass copying on non-standard size paper....................................................................... 58
Chapter 3 BASIC COPY MODES
Before Using Copying Functions.......................................................................................... 64
Default settings.................................................................................................................... 64
Confirming the set functions ................................................................................................ 64
Clearing the set functions .................................................................................................... 65
Restrictions on function combinations ................................................................................. 65
Paper Selection....................................................................................................................... 66
Automatic Paper Selection (APS)........................................................................................ 66
Selecting desired paper manually ....................................................................................... 67
Copying mixed-size originals in one operation .................................................................... 68
Switching Color Modes.......................................................................................................... 70
Setting Original Modes ..........................................................................................................71
Density Adjustment................................................................................................................ 73
Enlargement and Reduction Copying .................................................................................. 74
Automatic Magnification Selection (AMS) ........................................................................... 74
Specifying both the original size and the copy paper size separately ................................. 76
Specifying reproduction ratio manually................................................................................ 78