USER FUNCTIONS ...............................................................................................................................................8
TopAccess top page.............................................................................................................................................10
Registering from TopAccess.................................................................................................................................11
Setting up from TopAccess...................................................................................................................................13
Maintaining from TopAccess.................................................................................................................................16
Registering from TopAccess.................................................................................................................................16
Software Included in the Client Utilities CD-ROM...............................................................17
1 RESTRICTIONS
6 Operations from the Control Panel
Operations from the Control Panel
The e-STUDIO4520C series machine with the GA-1211 controller attached has several restrictions in the following
operations:
P.6 “COPY”
P.6 “SCAN”
P.7 “PRINT”
P.7 “FAX”
P.8 “USER FUNCTIONS”
P.9 “JOB STATUS”
Buttons and items enclosed in red lines on the following screenshots in this section disappear or become dim when the
GA-1211 controller is connected to the equipment.
COPY
The following related to the [COPY] button cannot be used when the GA-1211 controller is connected to the equipment:
yThe COPY&FILE function for copying originals and storing the data in the shared folder or a specified network folder at
the same time
To learn more about STORE TO E-FILING, refer to the e-Filing Guide.
SCAN
The following related to the [SCAN] button cannot be used when the GA-1211 controller is connected to the equipment:
yThe Scan to File function for sending and storing scans to a shared folder in the equipment's hard disk or a specified
network folder
yThe Web Service (WS) Scan function for scanning images from a client computer through the network by using the
functions of Windows Vista
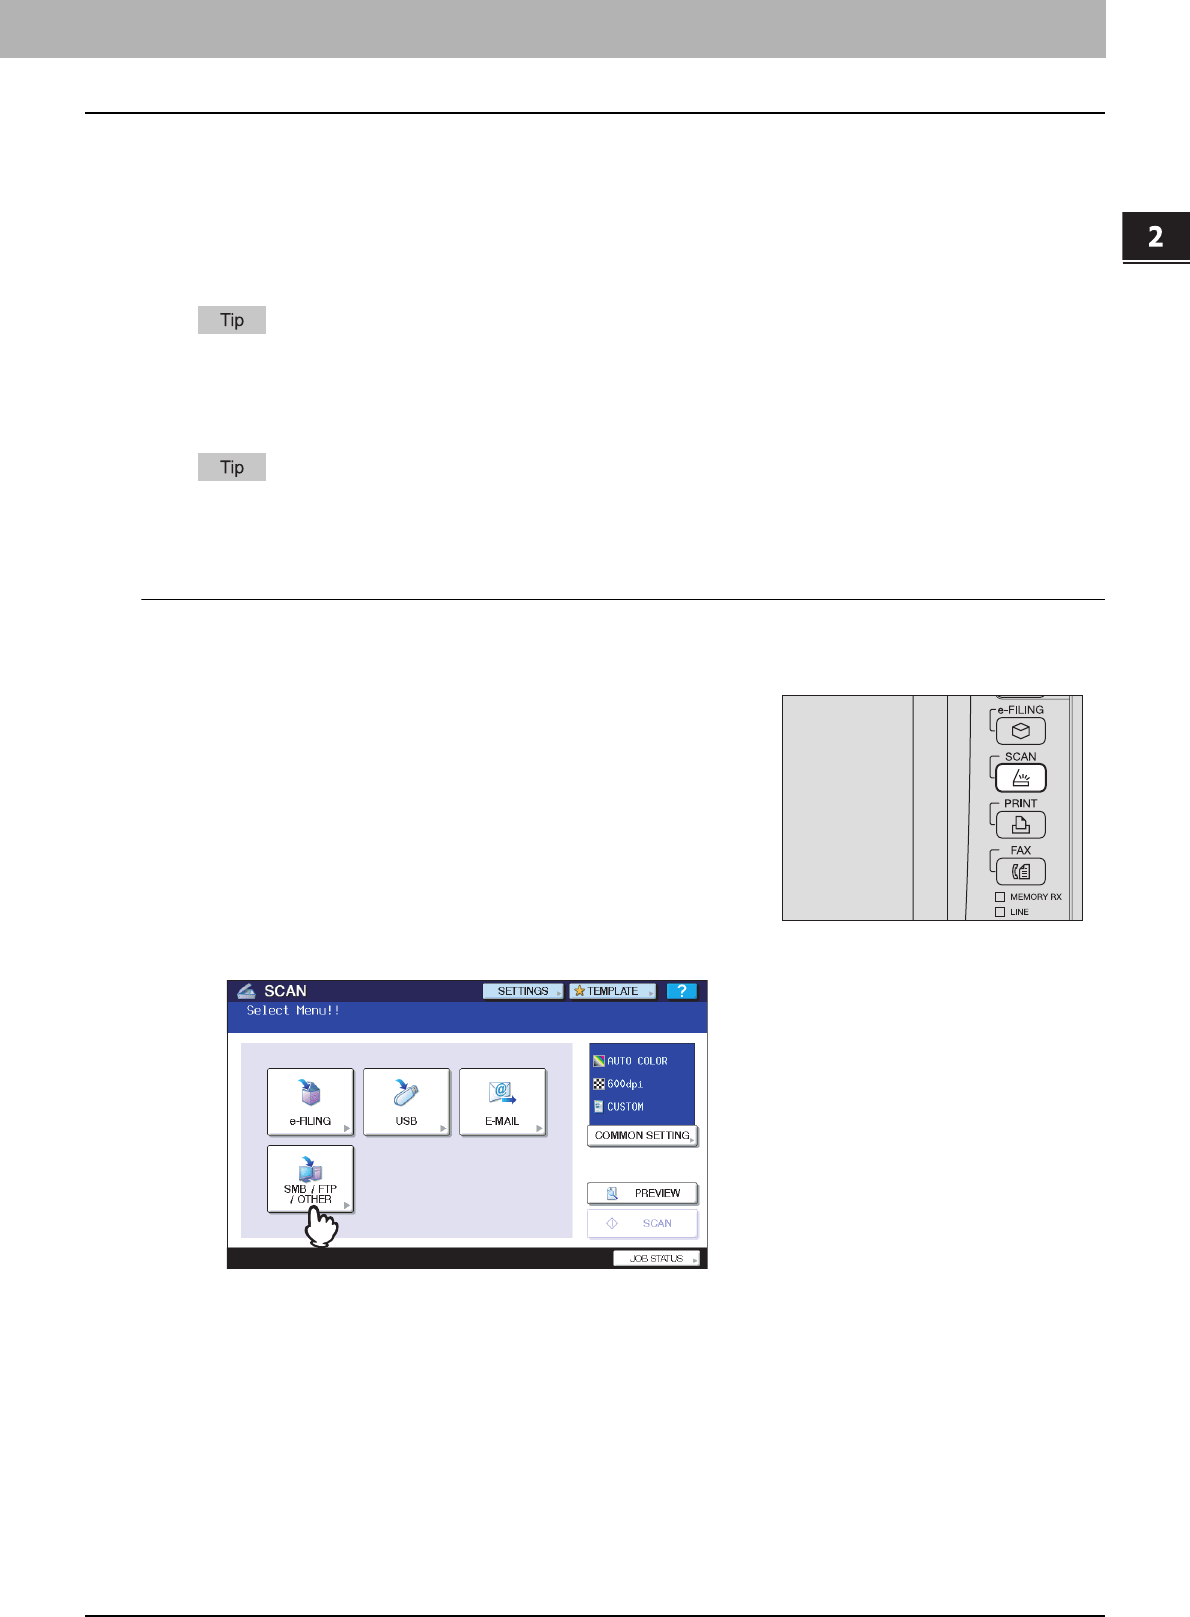
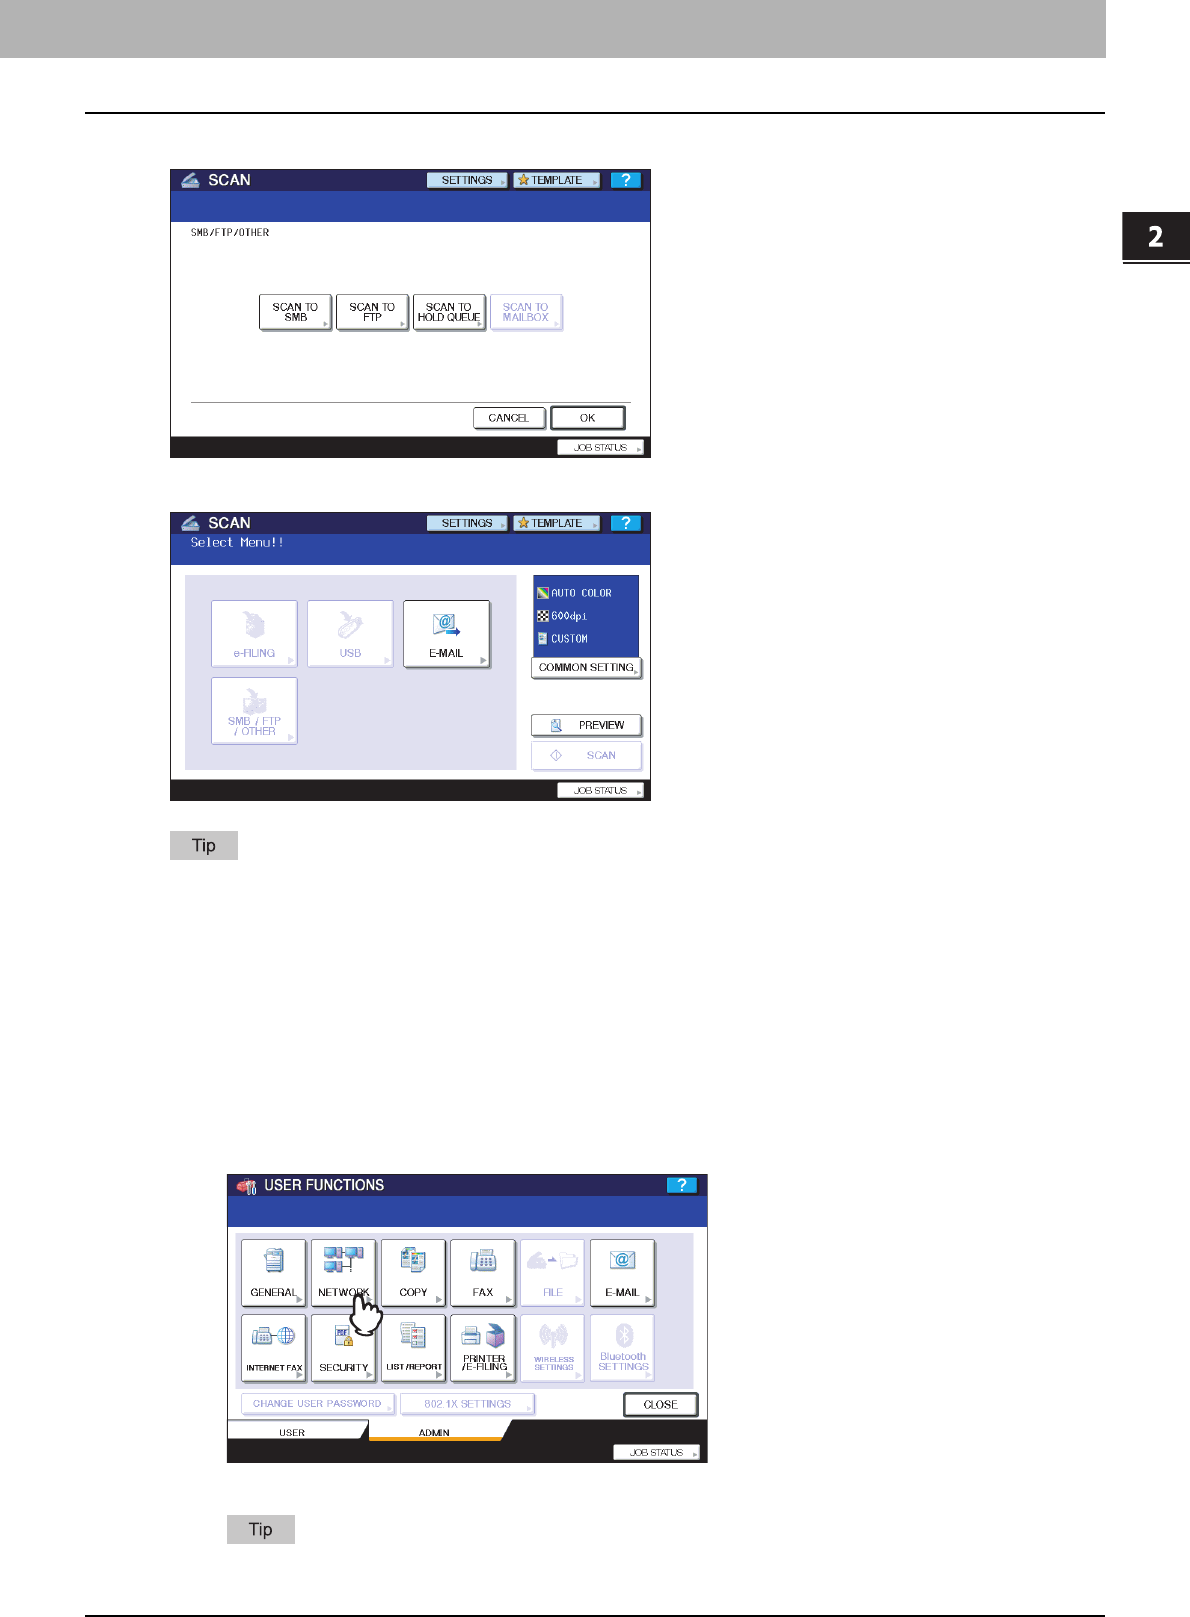
The SCAN menu displayed by pressing the [SCAN] button contains the GA-1211 specific functions. For details, see
the following section:
P.21 “SCAN”
e-STUDIO4520C series
e-STUDIO4520C series with the GA-1211 controller or
e-STUDIO4520C Pro series
1.RESTRICTIONS
Operations from the Control Panel 7
1 RESTRICTIONS
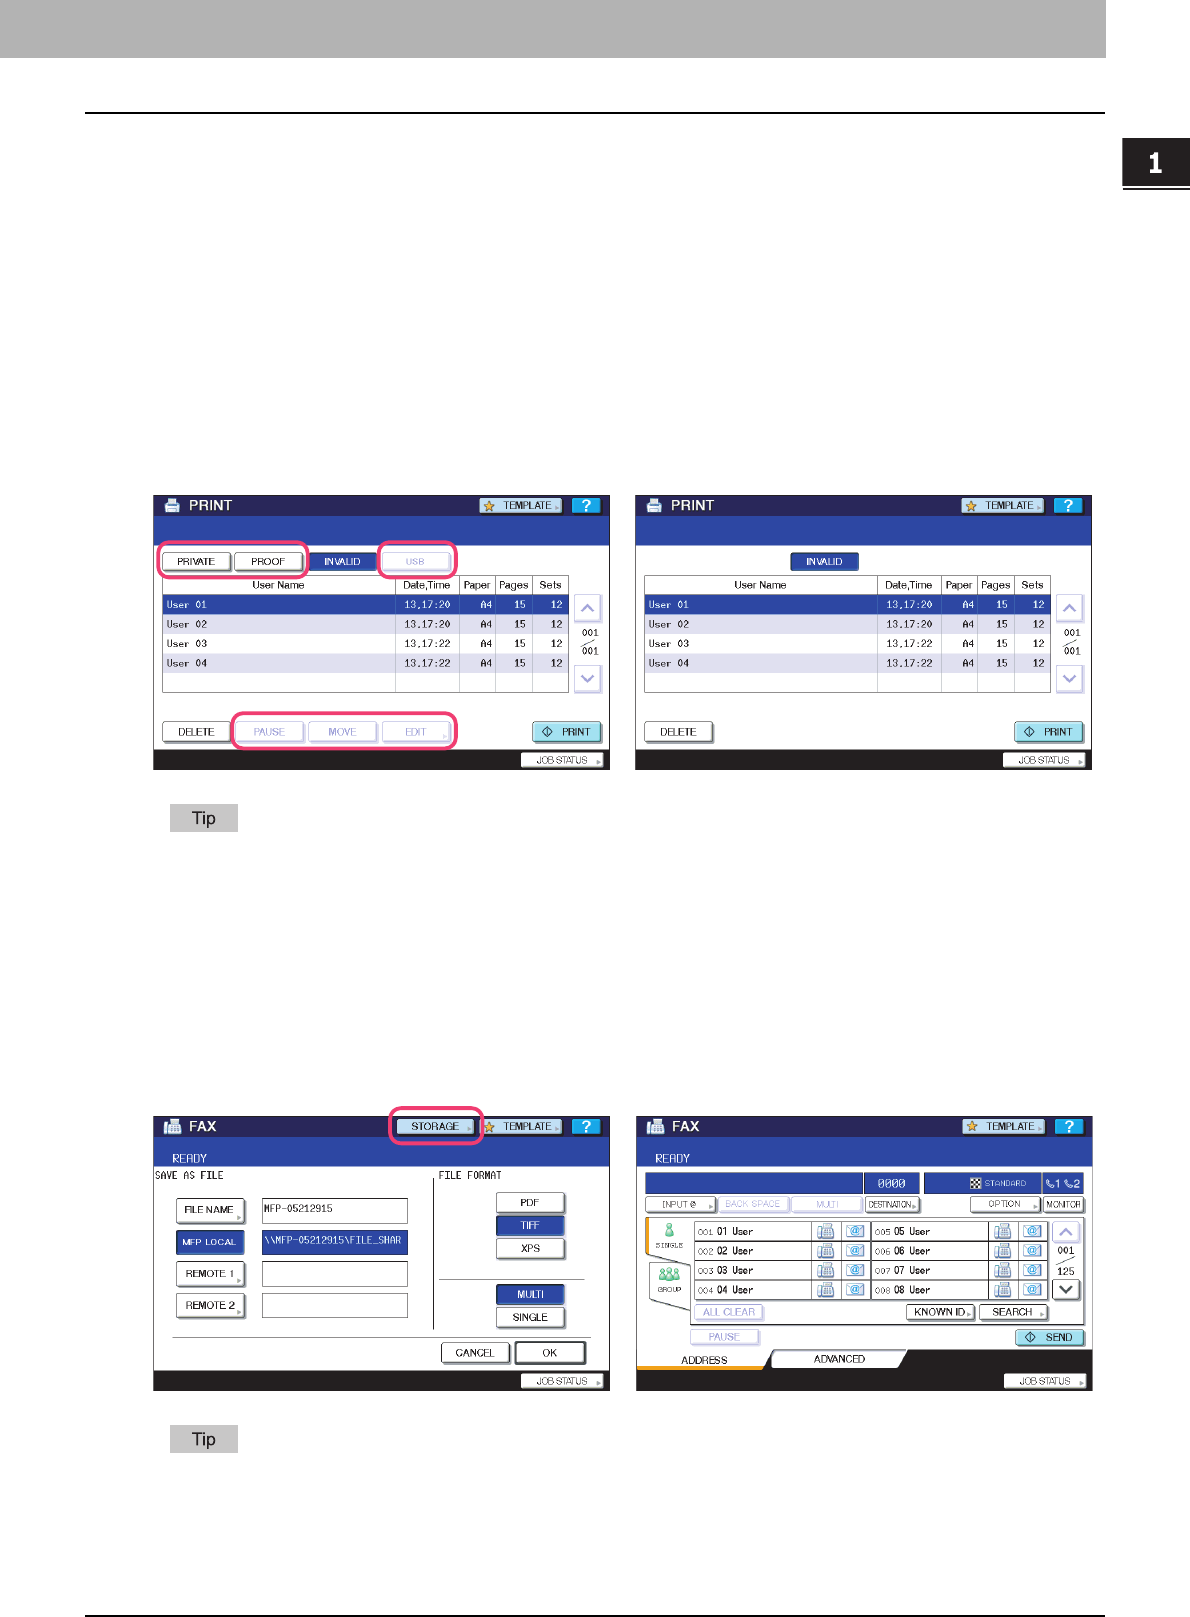
PRINT
The following related to the [PRINT] button cannot be used when the GA-1211 controller is connected to the equipment:
yThe Private Print function for printing a document from a computer on the network only when a set password is keyed
in to the equipment's control panel
yThe Proof Print function for printing only a single copy as a sample and suspending the rest of the job when you print
multiple copies from a computer on the network
yThe USB Direct Print function for printing files saved in a USB storage device that is connected to the USB port on the
equipment
yThe [PAUSE]/[RESUME]] buttons for pausing/resuming jobs in the list
yThe [MOVE] button for changing the order of the jobs by moving them within the list
yThe [EDIT] button for changing the number of copies to print
For details on the PRINT screen, refer to the Printing Guide.
FAX
The following related to the [FAX] button cannot be used when the GA-1211 controller is connected to the equipment:
yThe FAX&FILE function for sending originals and storing the data in the shared folder or a specified network folder at
the same time
For details on the FAX screen, refer to the GD-1250/GD-1260/GD-1270 Operator’s Manual for FAX Unit.
e-STUDIO4520C series
e-STUDIO4520C series with the GA-1211 controller or
e-STUDIO4520C Pro series
e-STUDIO4520C series
e-STUDIO4520C series with the GA-1211 controller or
e-STUDIO4520C Pro series
1 RESTRICTIONS
8 Operations from the Control Panel
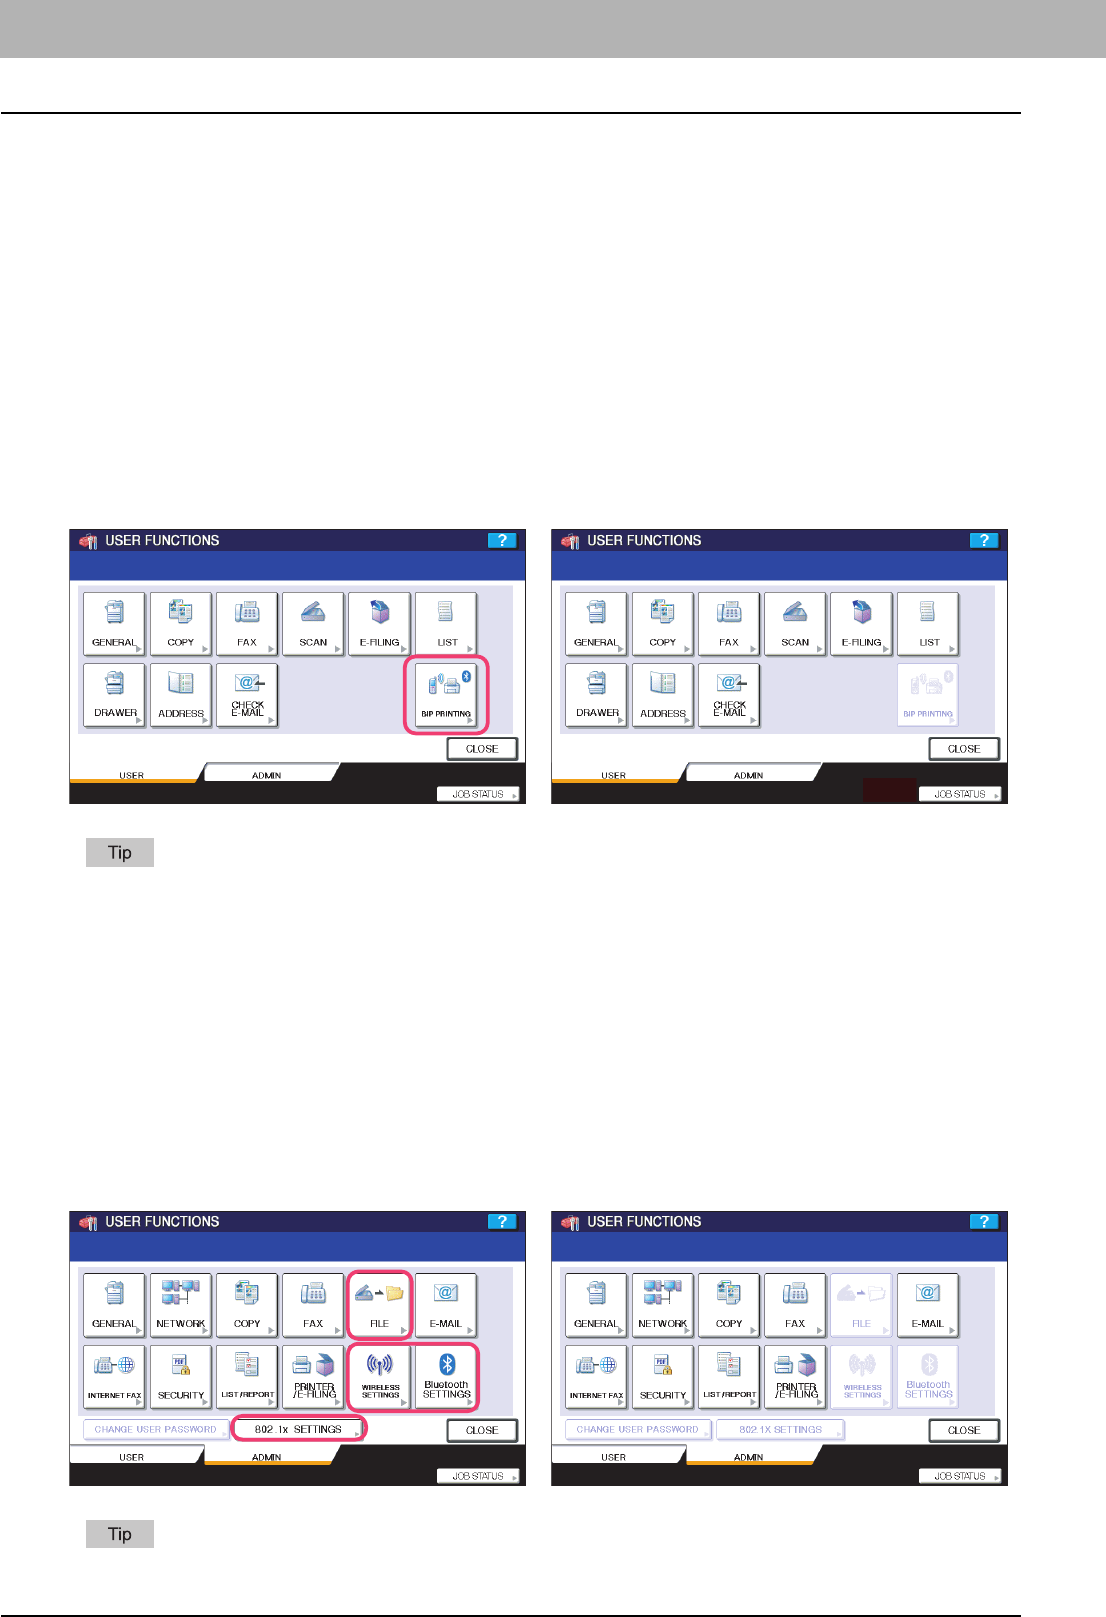
USER FUNCTIONS
The e-STUDIO4520C series machine with the GA-1211 controller attached has several restrictions in the following
operation menus:
P.8 “USER menu in USER FUNCTIONS”
P.8 “ADMIN menu in USER FUNCTIONS”
USER menu in USER FUNCTIONS
The following related to the USER menu cannot be used when the GA-1211 controller is connected to the equipment:
yThe BLUETOOTH PRINTING setting that allows you to print an image from any devices, such as mobile phones or
digital cameras, which the Bluetooth module is equipped and standard BIP/OPP/FTP printing is supported
For details on the USER menu in the USER FUNCTIONS screen, refer to the MFP Management Guide.
ADMIN menu in USER FUNCTIONS
The following related to the ADMIN menu cannot be used when the GA-1211 controller is connected to the equipment:
yThe FILE setting that allows you to automatically delete files stored by the Scan to File operation
yThe WIRELESS SETTINGS menu that allows you to set up the equipment for wireless networks
yThe BLUETOOTH SETTINGS menu that allows you to configure the Bluetooth setting options
yThe 802.1X SETTINGS menu that allows you to make settings for IEEE 802.1X authentication that will apply to wired
networks
For details on the ADMIN menu in the USER FUNCTIONS screen, refer to the MFP Management Guide.
e-STUDIO4520C series
e-STUDIO4520C series with the GA-1211 controller or
e-STUDIO4520C Pro series
e-STUDIO4520C series
e-STUDIO4520C series with the GA-1211 controller or
e-STUDIO4520C Pro series
1.RESTRICTIONS
Operations from the Control Panel 9
1 RESTRICTIONS
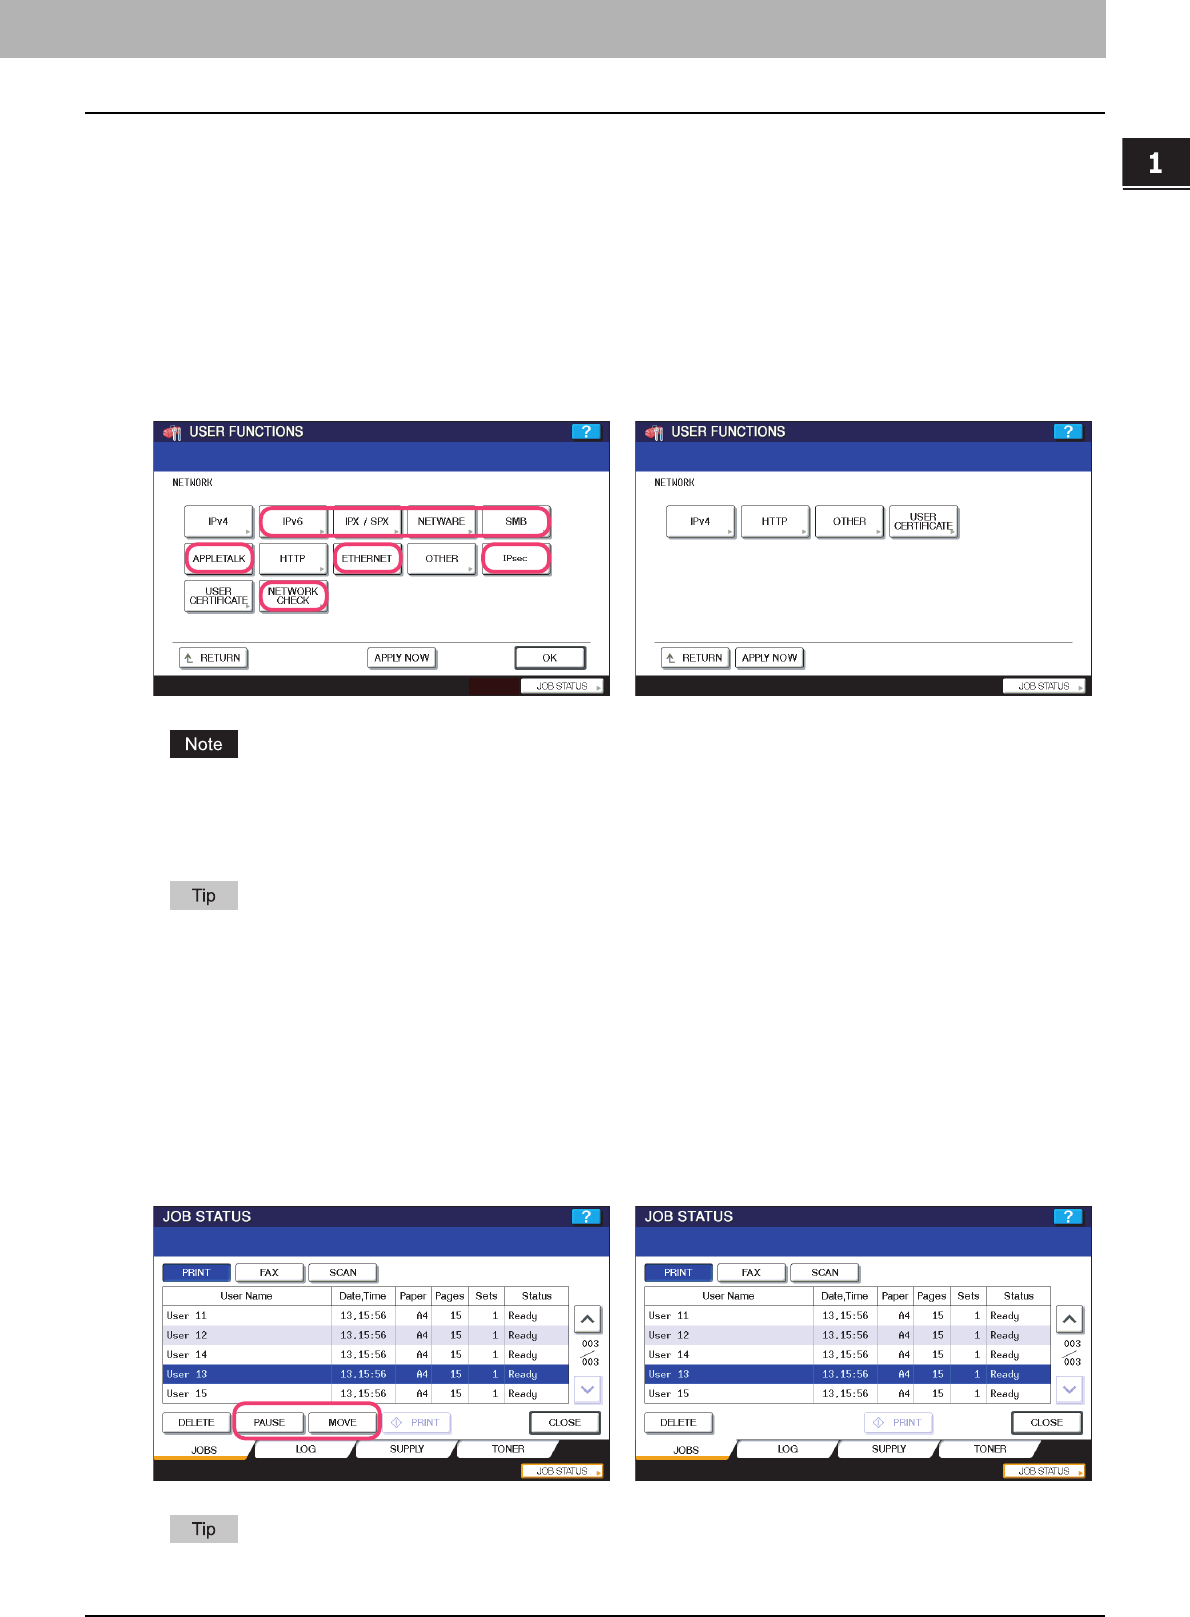
NETWORK menu in ADMIN menu
The following provided for the NETWORK menu are unavailable.
The setting operations for [IPv4] and [HTTP] differ depending on the equipment with or without the GA-1211 controller.
For instructions on how to make settings for [IPv4] and [HTTP] on the equipment with the GA-1211 controller, see the
following section:
P.31 “USER FUNCTIONS”
To learn more about OTHER and USER CERTIFICATE, refer to the MFP Management Guide.
JOB STATUS
The following related to the PRINT JOB STATUS screen cannot be used when the GA-1211 controller is connected to the
equipment:
yThe [PAUSE]/[RESUME]] buttons for pausing/resuming jobs in the list
yThe [MOVE] button for changing the order of the jobs by moving them within the list
For details on the PRINT JOB STATUS screen, refer to the Printing Guide.
y[IPv6]y[IPX/SPX]
y[NETWARE]y[SMB]
y[APPLETALK]y[ETHERNET]
y[IPsec]y[NETWORK CHECK]
e-STUDIO4520C series
e-STUDIO4520C series with the GA-1211 controller or
e-STUDIO4520C Pro series
e-STUDIO4520C series
e-STUDIO4520C series with the GA-1211 controller or
e-STUDIO4520C Pro series
1 RESTRICTIONS
10 TopAccess USER Mode
TopAccess USER Mode
The e-STUDIO4520C series machine with the GA-1211 controller attached has several restrictions in the following
TopAccess USER mode operations:
P.10 “Launching TopAccess”
P.10 “TopAccess top page”
P.11 “Registering from TopAccess”
Launching TopAccess
The following methods for launching TopAccess cannot be used when the GA-1211 controller is connected to the
equipment:
yLaunching TopAccess by using the TopAccessDocMon link
yLaunching TopAccess from Network Map (Windows Vista)
The operation for launching TopAccess differs depending on the equipment with or without the GA-1211 controller. For
instructions on how to launch TopAccess on the equipment with the GA-1211 controller, see the following section:
P.35 “Launching TopAccess from the WebTools home page”
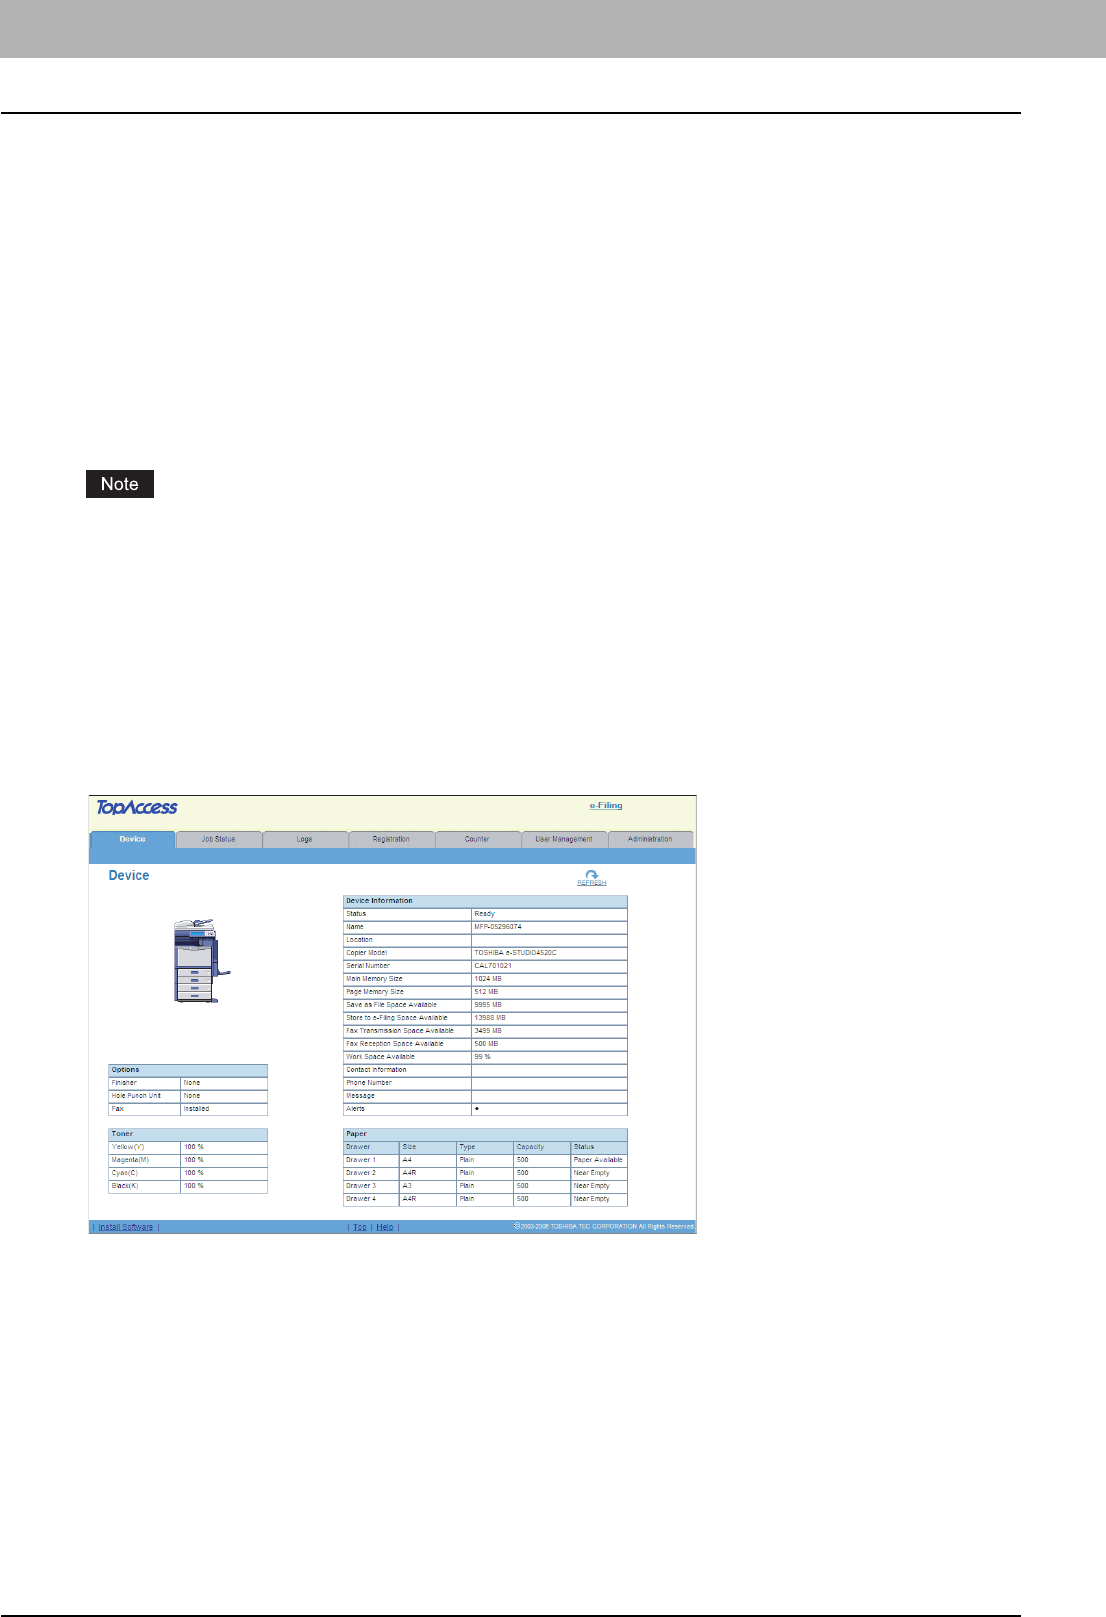
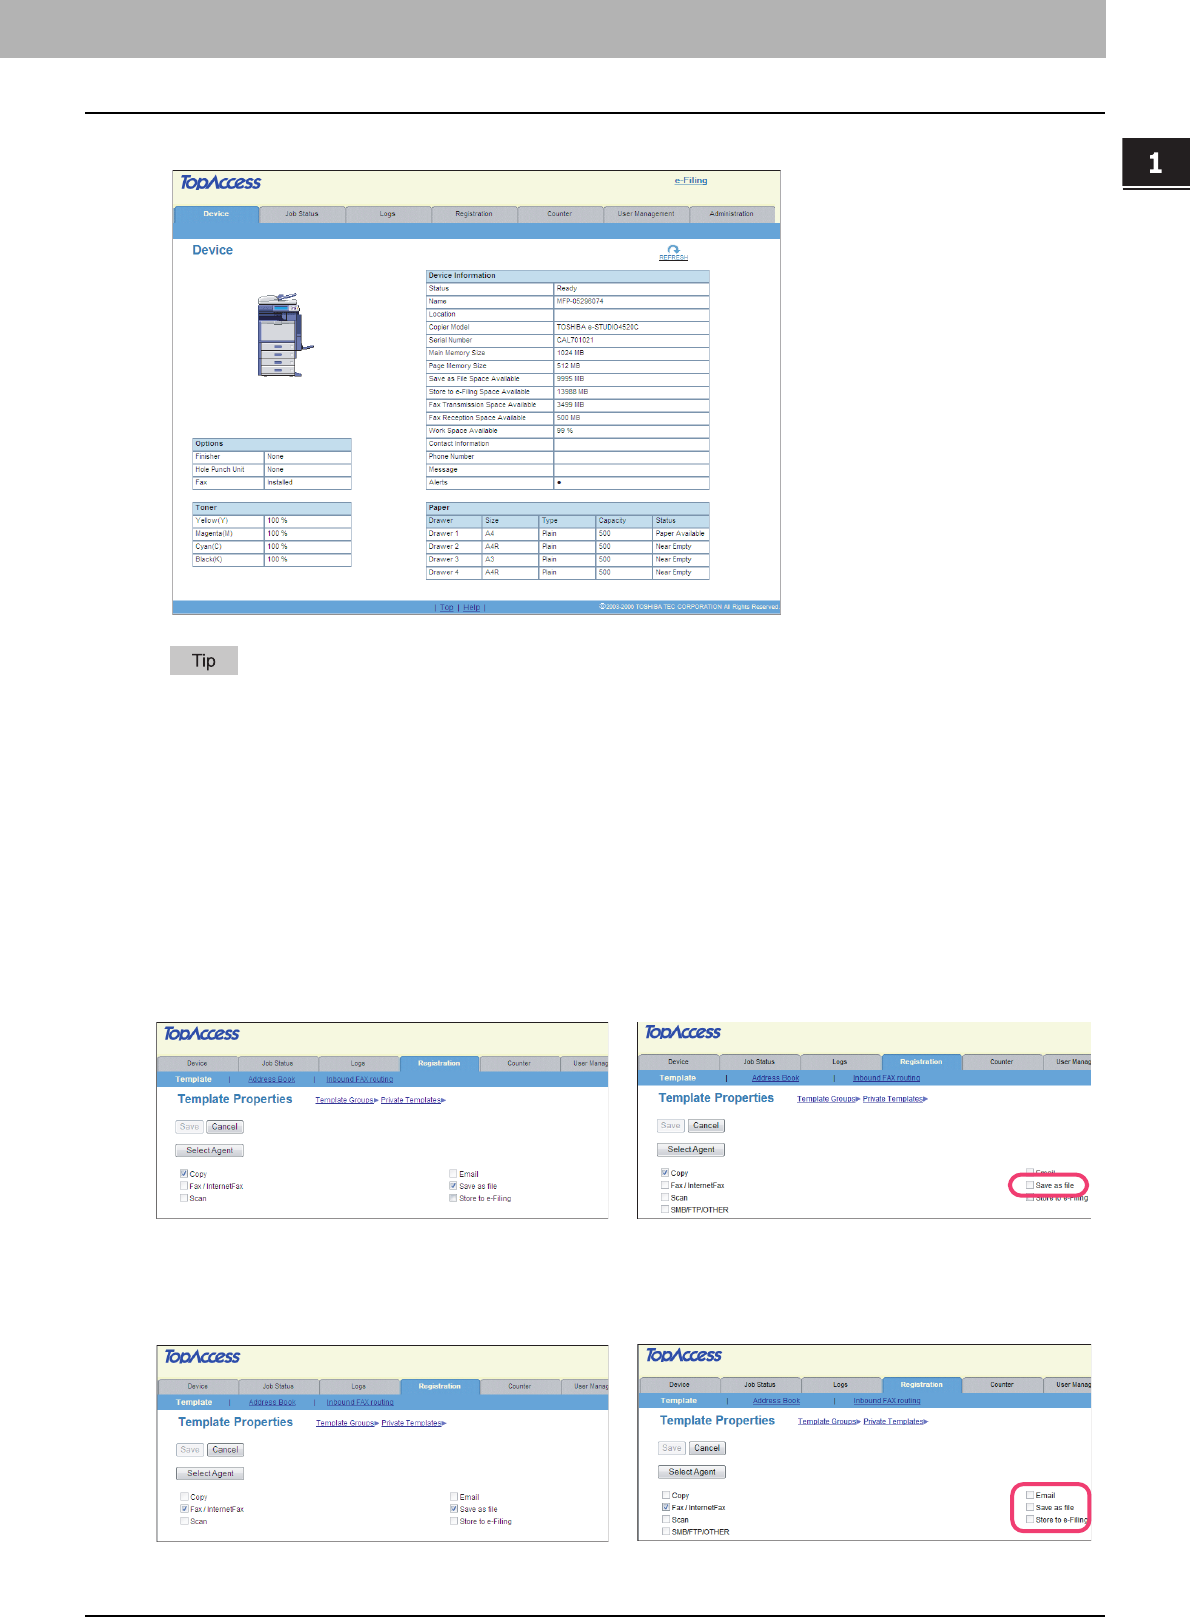
TopAccess top page
The following link for downloading the client software cannot be used when the GA-1211 controller is connected to the
equipment:
yThe [Install Software] link
e-STUDIO4520C series
1.RESTRICTIONS
TopAccess USER Mode 11
1 RESTRICTIONS
e-STUDIO4520C series with the GA-1211 controller or e-STUDIO4520C Pro series
For details on the TopAccess top page, refer to the TopAccess Guide.
Registering from TopAccess
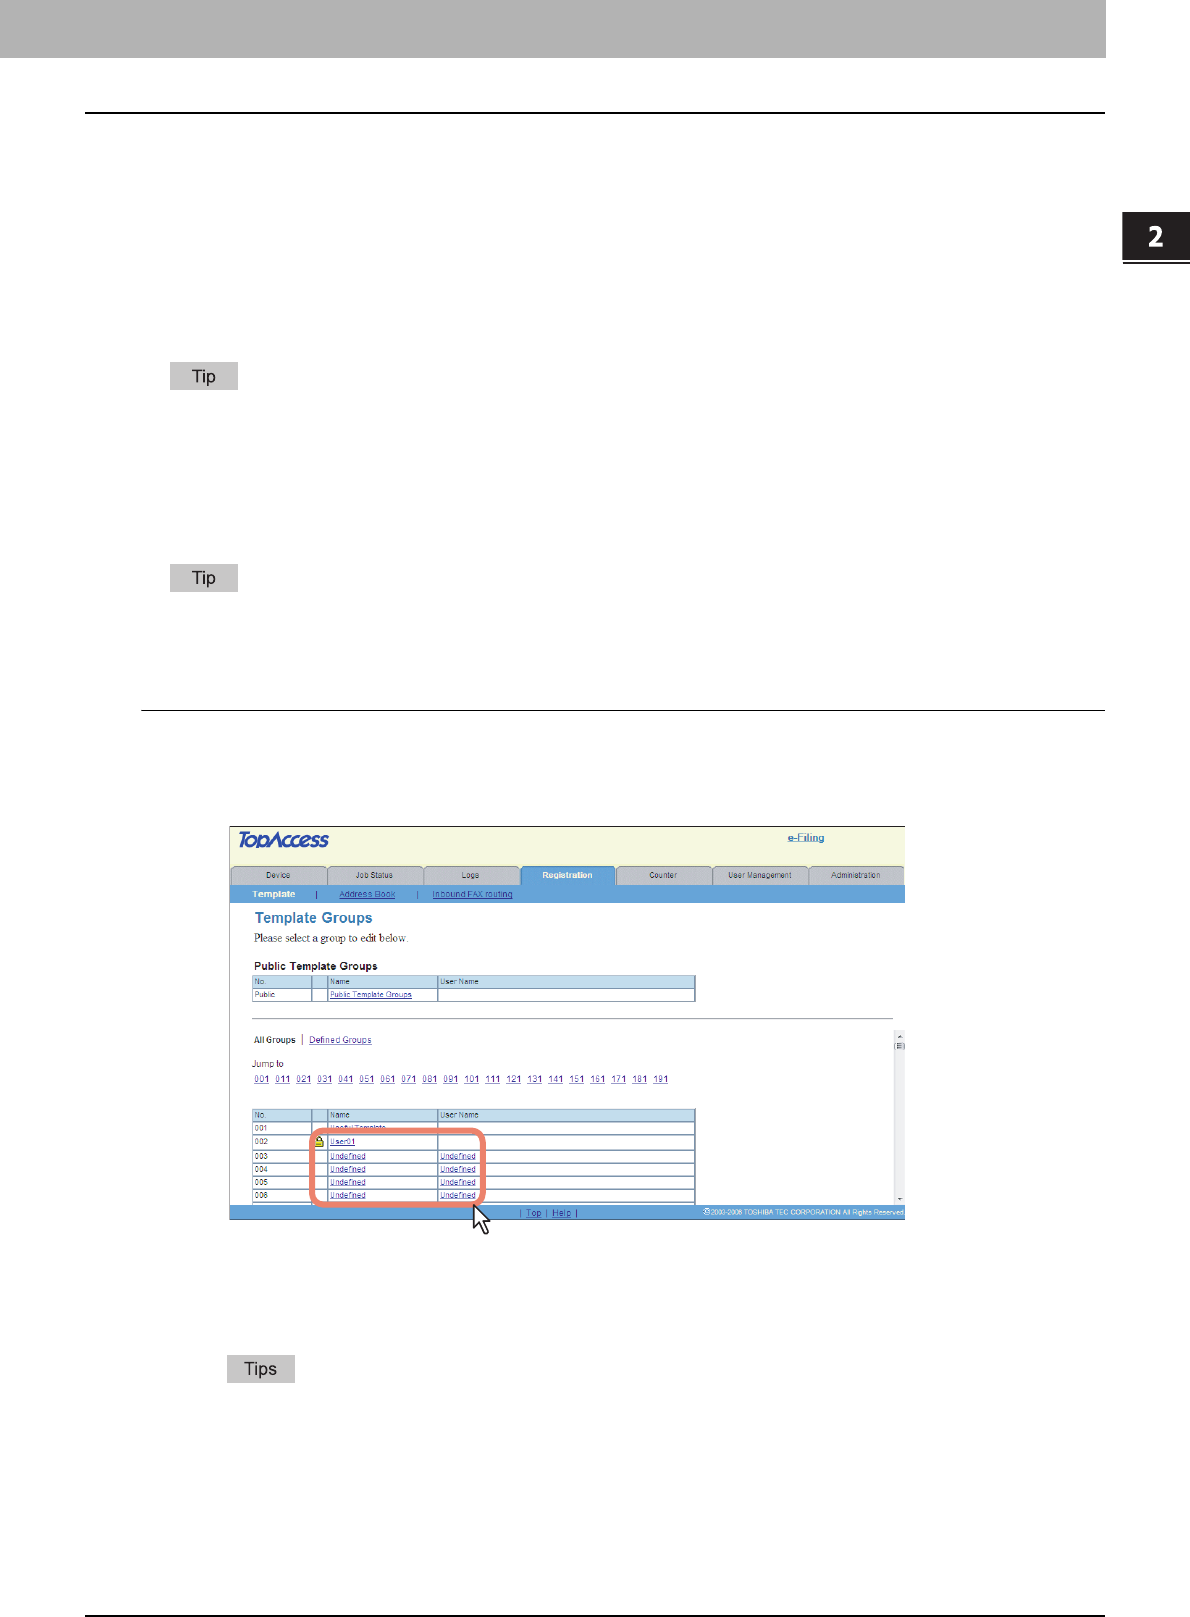
Registering private templates
The following combinations of private template agents cannot be used when the GA-1211 controller is connected to the
equipment:
yThe Copy agent cannot be combined with the Save as file agent.
yThe Fax / InternetFax agent cannot be combined with any other agents.
e-STUDIO4520C series
e-STUDIO4520C series with the GA-1211 controller or
e-STUDIO4520C Pro series
e-STUDIO4520C series
e-STUDIO4520C series with the GA-1211 controller or
e-STUDIO4520C Pro series
1 RESTRICTIONS
12 TopAccess USER Mode
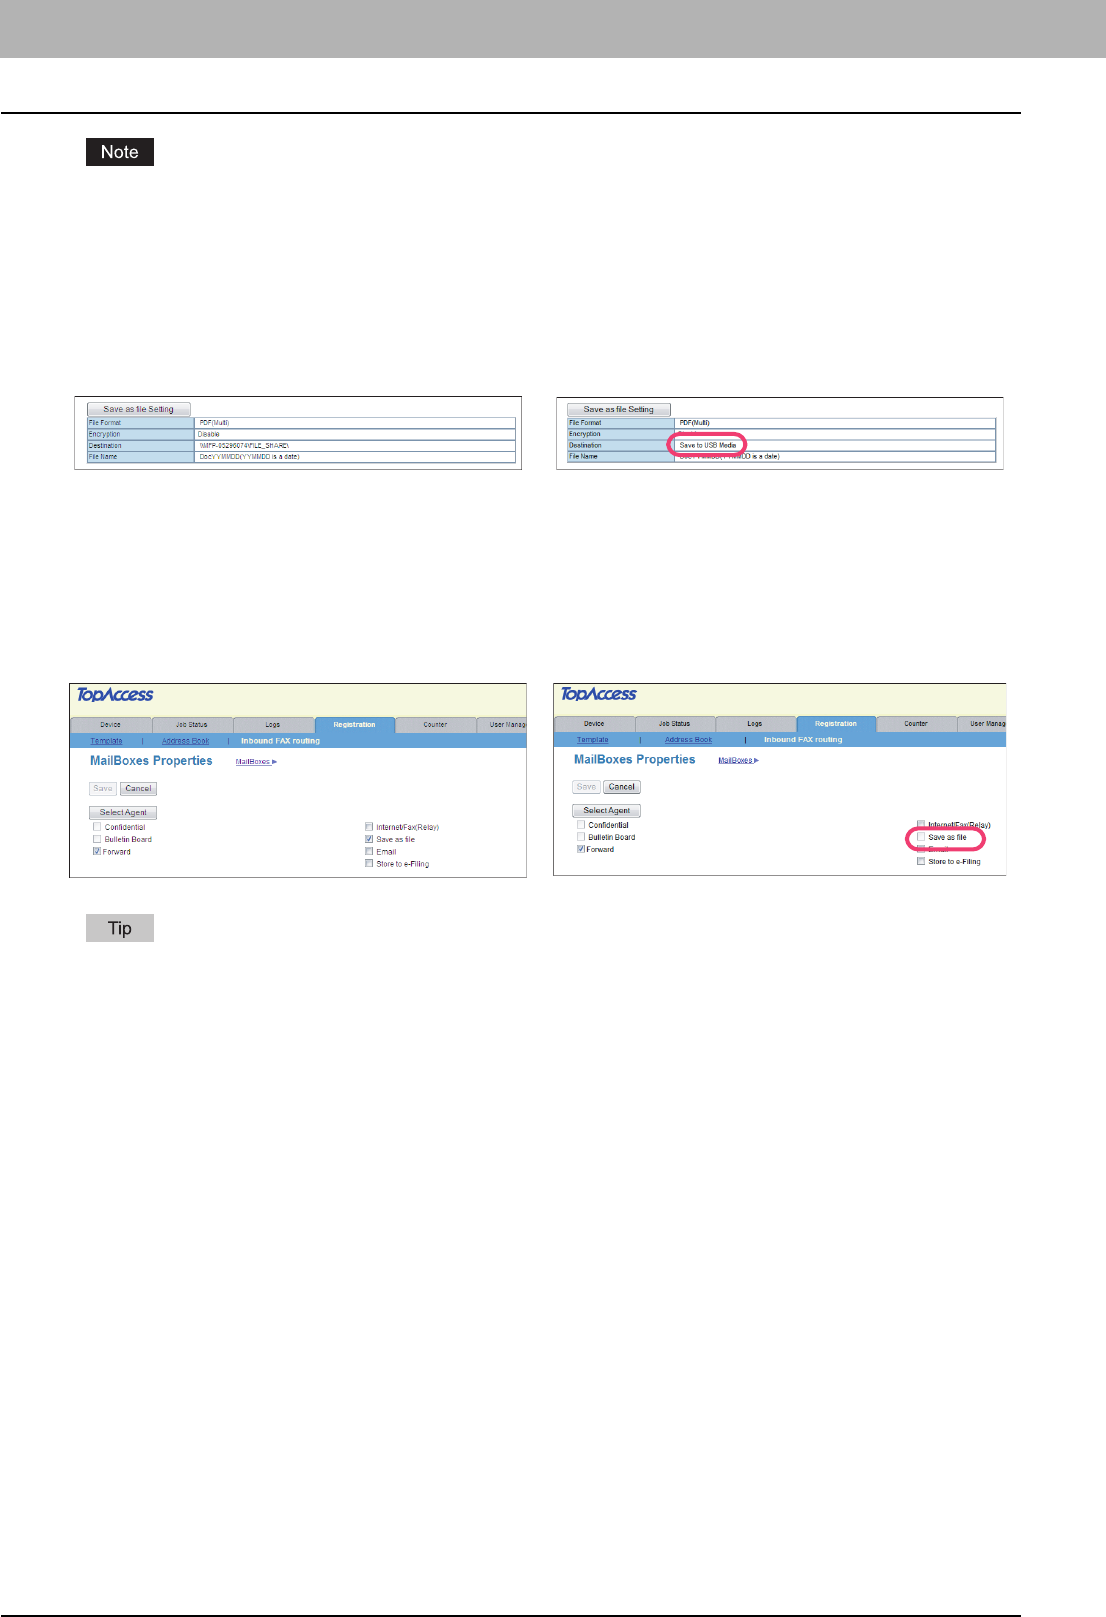
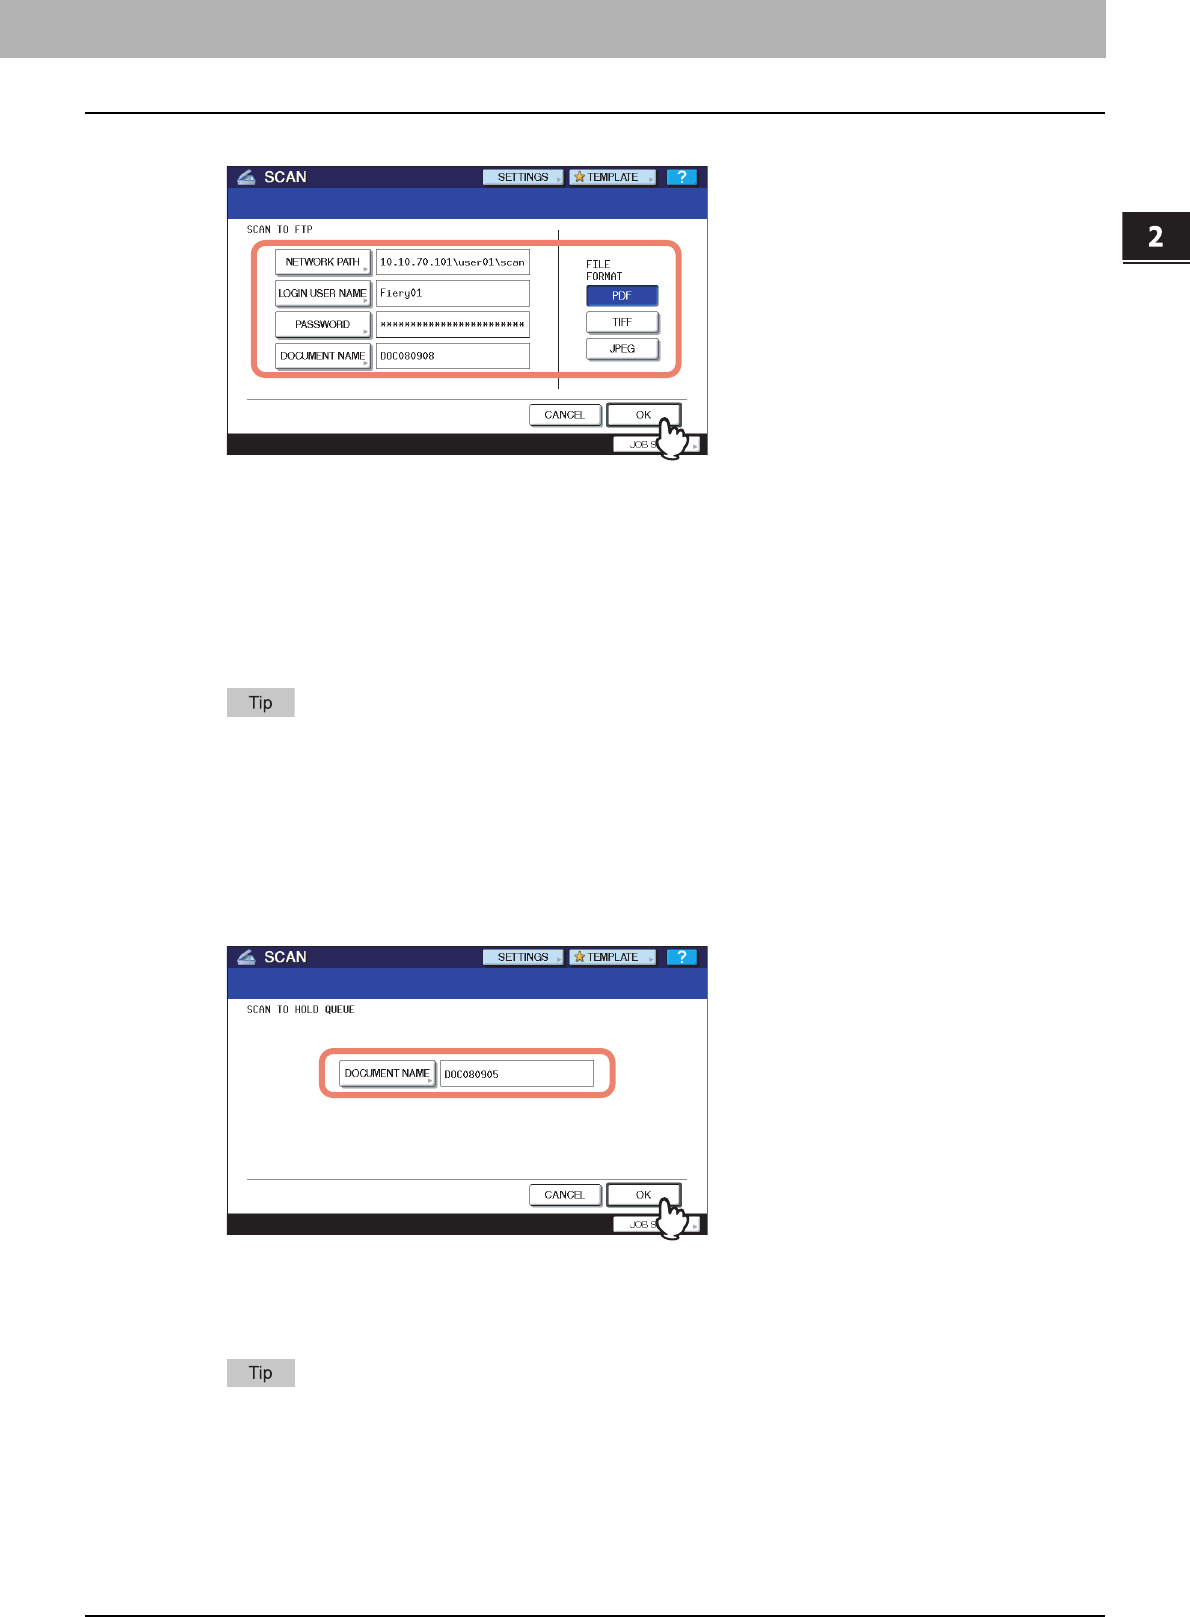
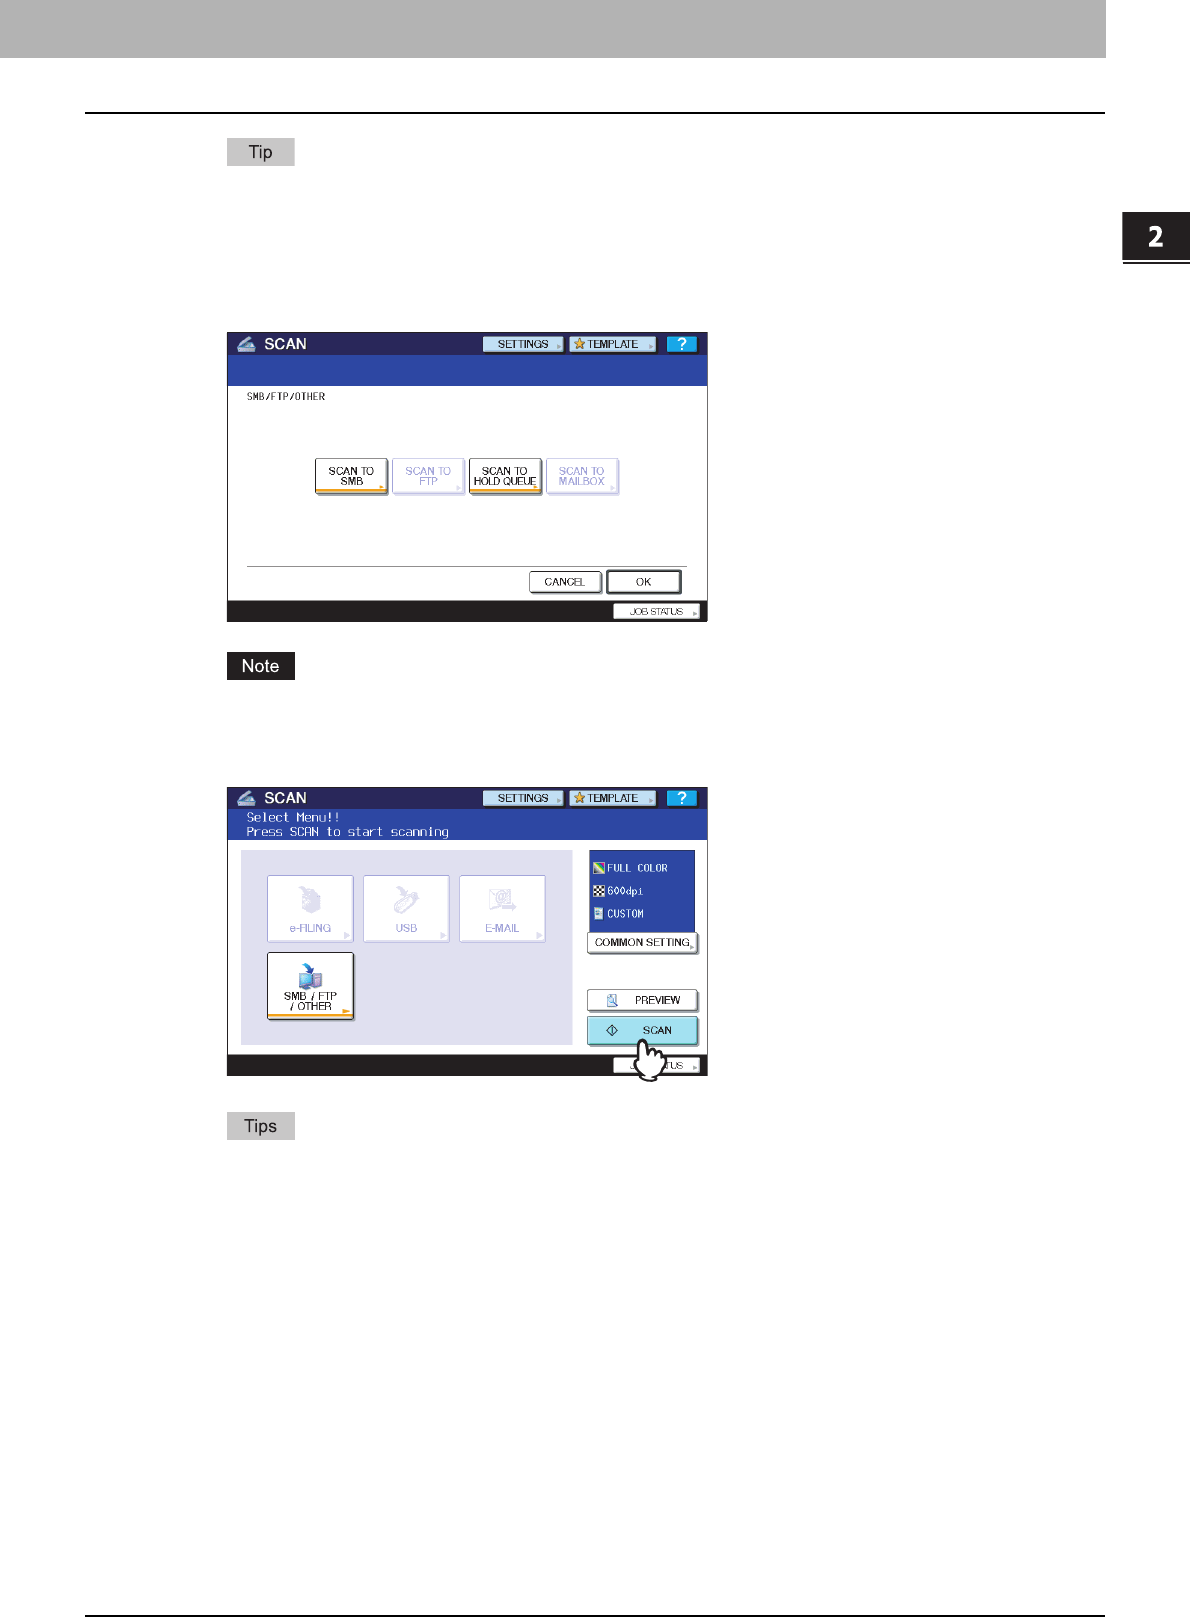
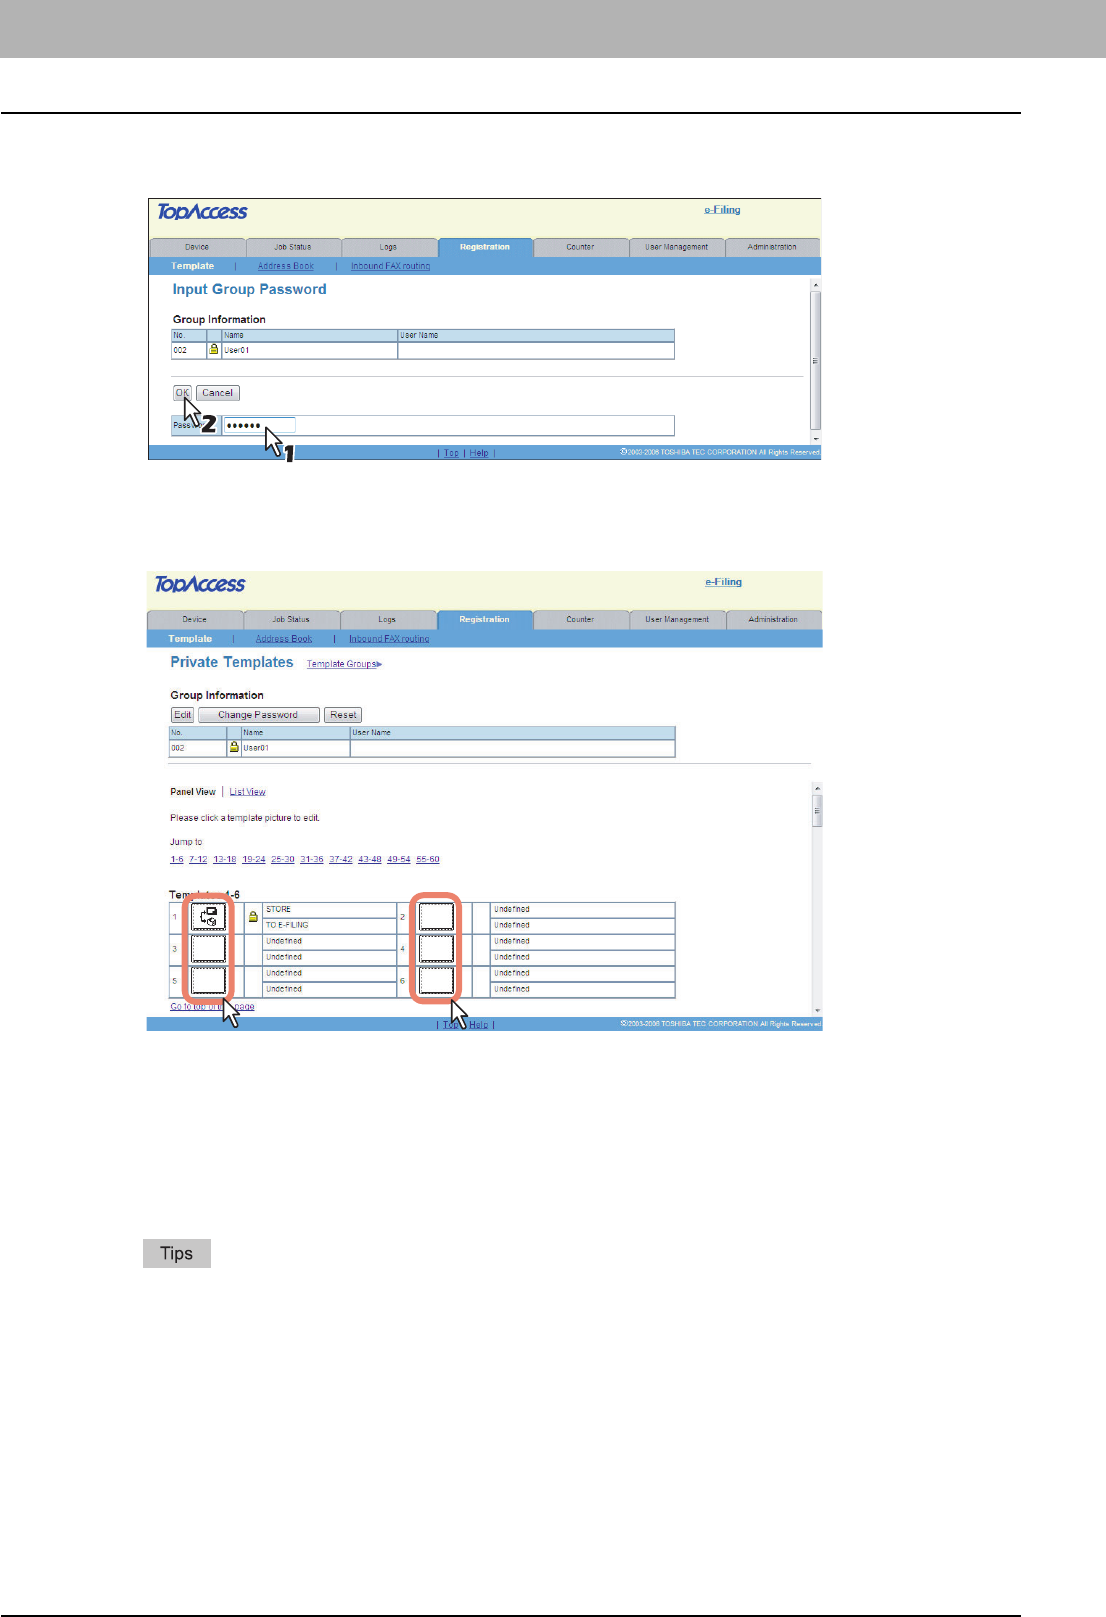
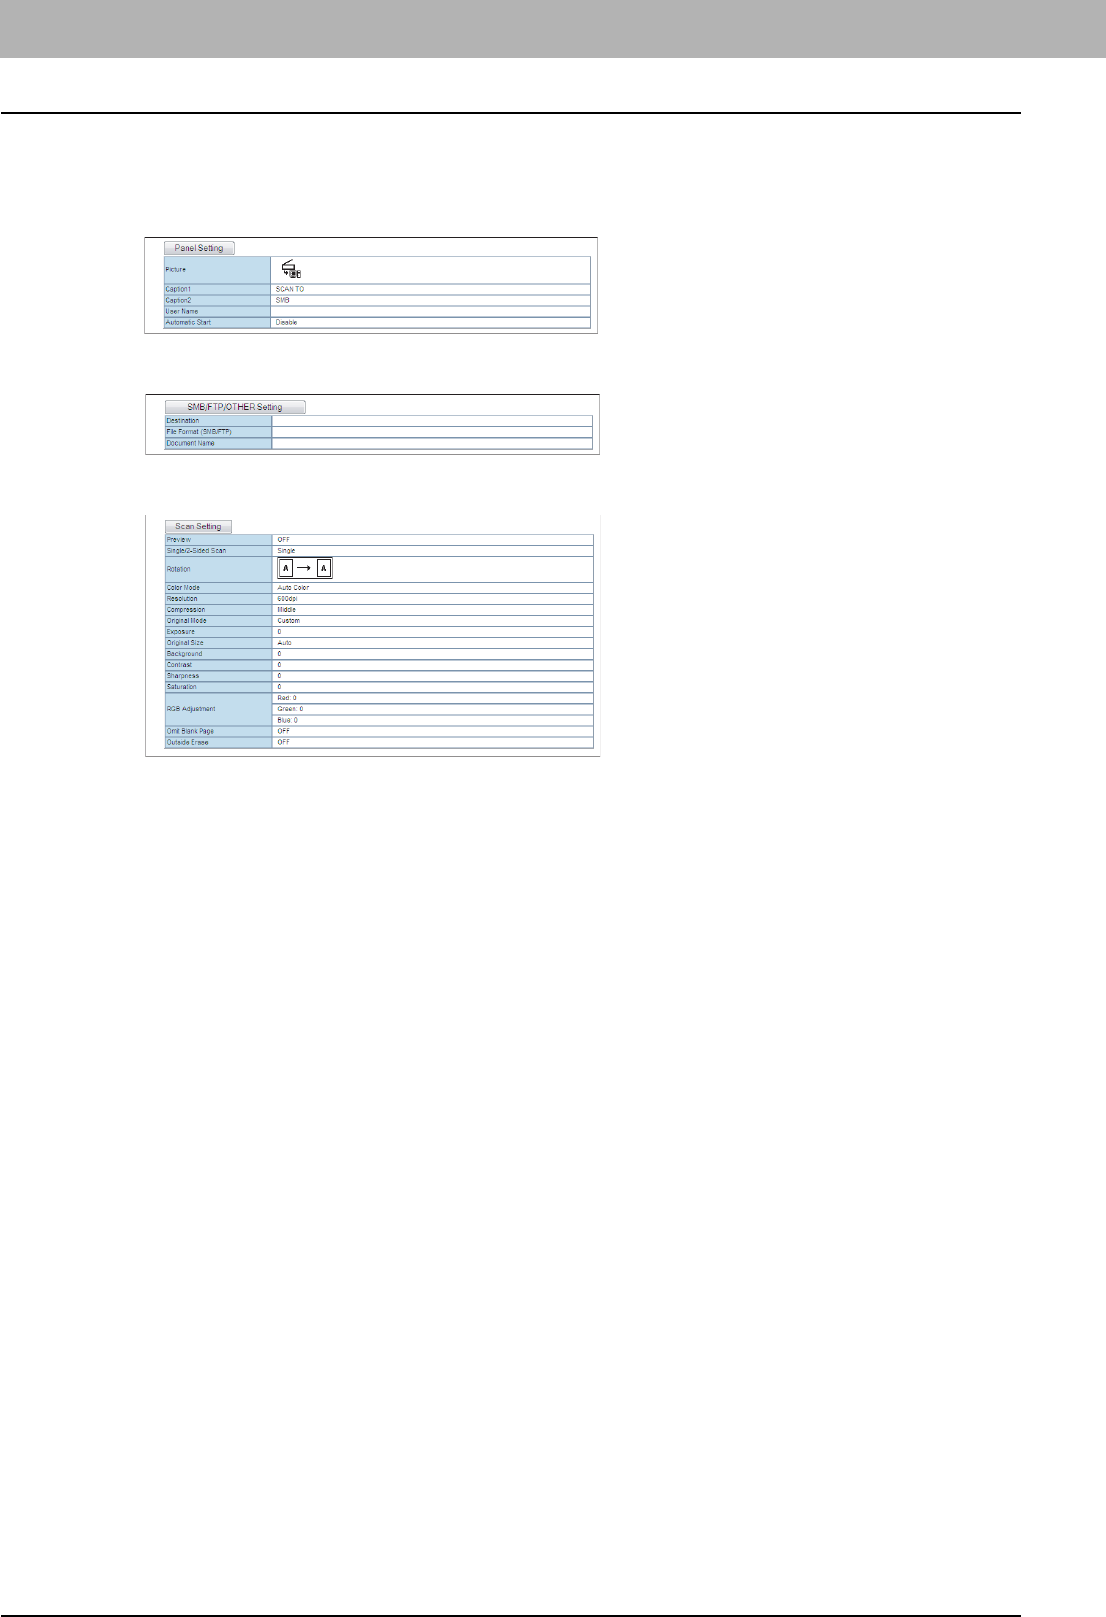
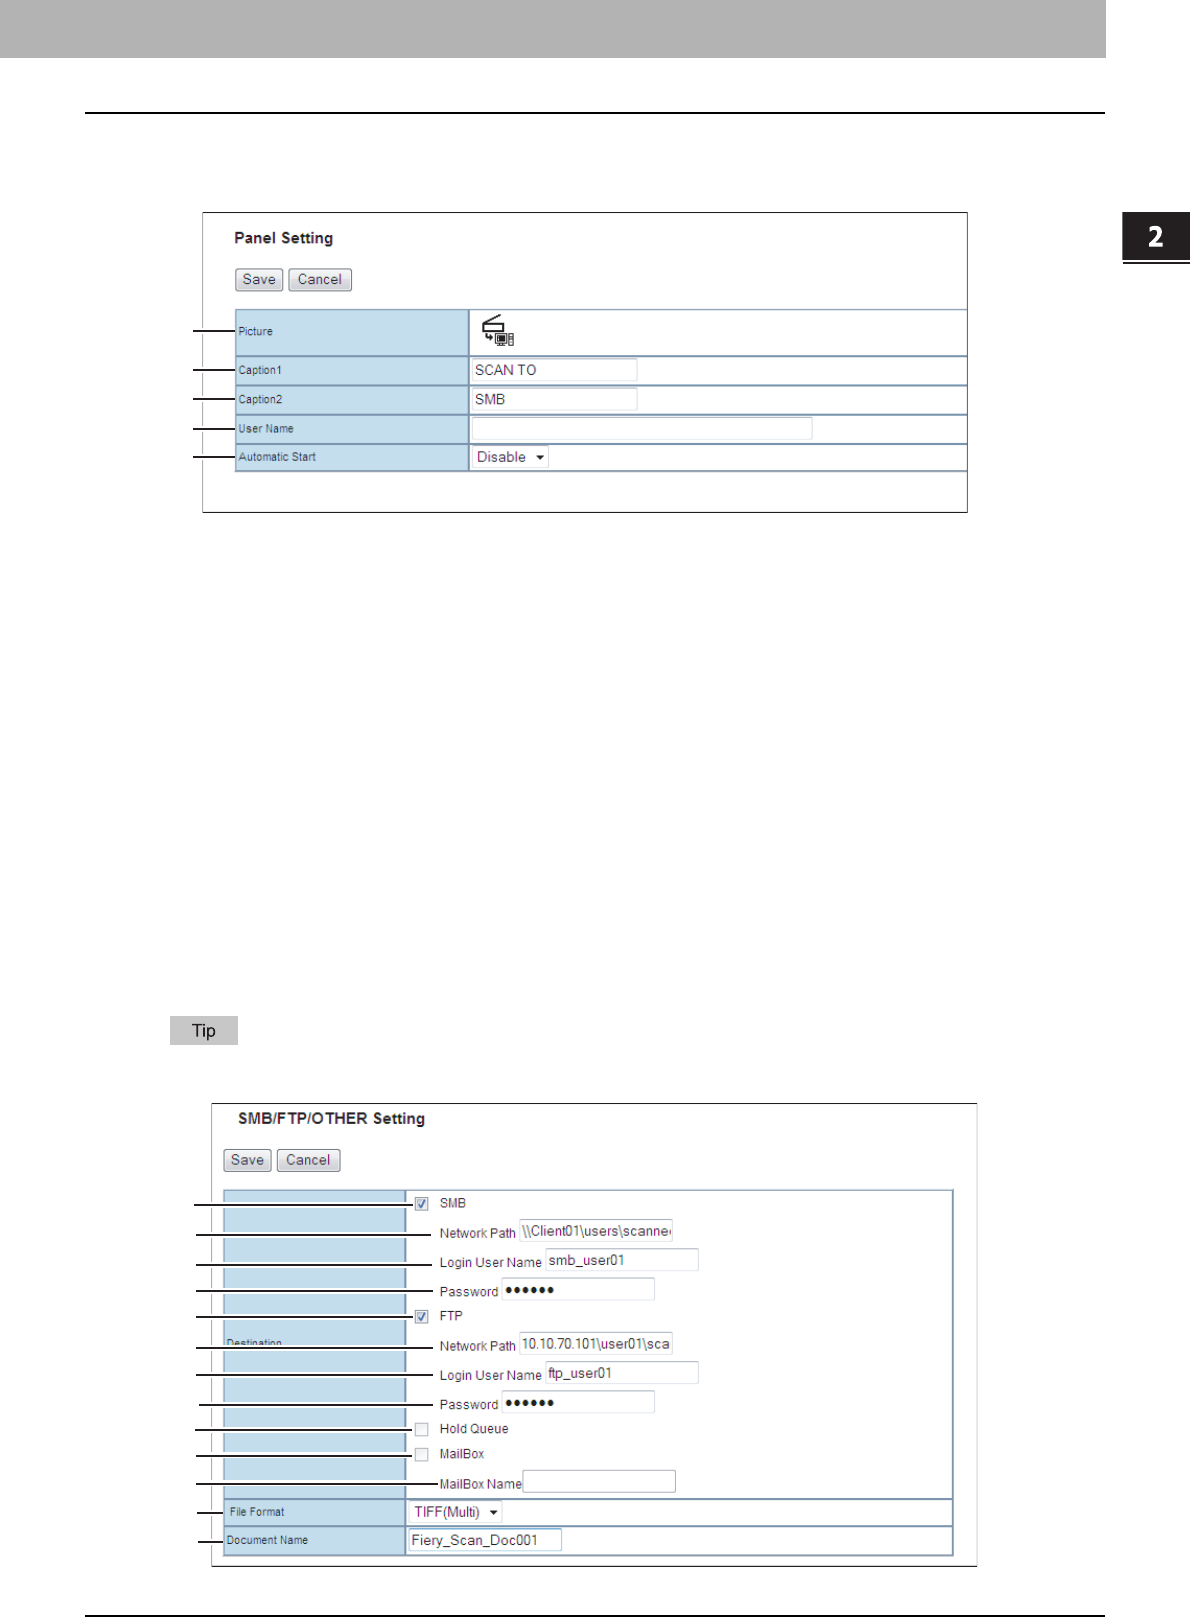
When the GA-1211 controller is connected to the equipment, the GA-1211 specific agents ([SMB/FTP/OTHER] check
box) appear in the above page. From this page, you can create the GA-1211 specific private templates. For
instructions on how to create them, see the following section:
P.35 “Registering or editing GA-1211 specific private templates”
Furthermore, the data destination of the Save as file agent is fixed to “Save to USB Media”.
Setting up mailboxes
Creating a Forward mailbox combined with the Save as file agent is unavailable when the GA-1211 controller is connected
to the equipment.
For details on the mailbox setting, refer to the TopAccess Guide.
e-STUDIO4520C series
e-STUDIO4520C series with the GA-1211 controller or
e-STUDIO4520C Pro series
e-STUDIO4520C series
e-STUDIO4520C series with the GA-1211 controller or
e-STUDIO4520C Pro series
1 RESTRICTIONS
TopAccess ADMIN Mode 13
TopAccess ADMIN Mode
The e-STUDIO4520C series machine with the GA-1211 controller attached has several restrictions in the following
TopAccess ADMIN mode operations:
P.13 “Setting up from TopAccess”
P.16 “Maintaining from TopAccess”
P.16 “Registering from TopAccess”
Setting up from TopAccess
Setup page
The following menus are unavailable when the GA-1211 controller is connected to the equipment:
ySave as file
yPrinter
yICC Profile
For details on the Setup page, refer to the TopAccess Guide.
Setting up Network settings
The following provided for the Network submenu are unavailable when the GA-1211 controller is connected to the
equipment:
e-STUDIO4520C series
e-STUDIO4520C series with the GA-1211 controller or
e-STUDIO4520C Pro series
yTCP/IPyFilteringyIPv6
yIPX/SPXyAppleTalkyBonjour
yDDNS SessionySMB SessionyNetWare Session
ySNTP ServiceyFTP ClientyWeb Services Setting
yLLTD SessionyIP Security
1 RESTRICTIONS
14 TopAccess ADMIN Mode
Setting up SNMP Network Service
The following provided for the SNMP Network Service are unavailable when the GA-1211 controller is connected to the
equipment.
Setting up Security Service
The following related to Security Service cannot be used when the GA-1211 controller is connected to the equipment:
yCertificate for Wireless LAN
yCertificate for IP SEC
yCertificate for IEEE802.1X
e-STUDIO4520C series
e-STUDIO4520C series with the GA-1211 controller or
e-STUDIO4520C Pro series
yEnable SNMP V3ySNMP V3 User Information/
Number
yEnable SNMP V3 Trap
ySNMP V3 Trap User NameySNMP V3 Trap Authentication
Protocol
ySNMP V3 Trap Privacy
Protocol
yIPX Trap Address
e-STUDIO4520C series
e-STUDIO4520C series with the GA-1211 controller or
e-STUDIO4520C Pro series
1.RESTRICTIONS
TopAccess ADMIN Mode 15
1 RESTRICTIONS
For details on the Network settings screen, refer to the TopAccess Guide.
Setting up Print Service settings
The following related to Print Service cannot be used when the GA-1211 controller is connected to the equipment:
yRaw TCP Print
yLPD Print
yIPP Print
yFTP Print
yNetWare Print
To learn more about Email Print, refer to the TopAccess Guide.
e-STUDIO4520C series
e-STUDIO4520C series with the GA-1211 controller or
e-STUDIO4520C Pro series
e-STUDIO4520C series
e-STUDIO4520C series with the GA-1211 controller or
e-STUDIO4520C Pro series
1 RESTRICTIONS
16 TopAccess ADMIN Mode
Maintaining from TopAccess
The following menus are unavailable when the GA-1211 controller is connected to the equipment:
yUpload Software
yRemove Software
For details on the Maintenance screen, refer to the TopAccess Guide.
Registering from TopAccess
Registering public templates
The restrictions applied for making public templates are the same as those for private templates. For details, see the
following section:
P.11 “Registering private templates”
Registering Fax and Internet Fax received forward
Creating a Forward mailbox combined with the Save as file agent is unavailable when the GA-1211 controller is connected
to the equipment.
For details on the mailbox setting, refer to the TopAccess Guide.
e-STUDIO4520C series
e-STUDIO4520C series with the GA-1211 controller or
e-STUDIO4520C Pro series
e-STUDIO4520C series
e-STUDIO4520C series with the GA-1211 controller or
e-STUDIO4520C Pro series
1 RESTRICTIONS
Software Included in the Client Utilities CD-ROM 17
Software Included in the Client Utilities CD-ROM
Several drivers and utilities are included in the Client Utilities CD-ROM, however, you can use only the following of them
when the GA-1211 controller is connected to the equipment:
yRemote Scan driver
yWIA driver
yTWAIN driver
yFile Downloader
ye-Filing Backup/Restore Utility
yFor instructions on how to install the software shown above, refer to the Software Installation Guide.
yFor details on the Remote Scan driver, refer to the Operator’s Manual for Remote Scan Driver.
yFor details on the WIA driver, refer to the Scanning Guide.
yFor details on the TWAIN driver and File Downloader, refer to the Operator’s Manual for TWAIN Driver/File
Downloader.
yFor details on the e-Filing Backup/Restore Utility, refer to the Operator’s Manual for Backup/Restore Utility.
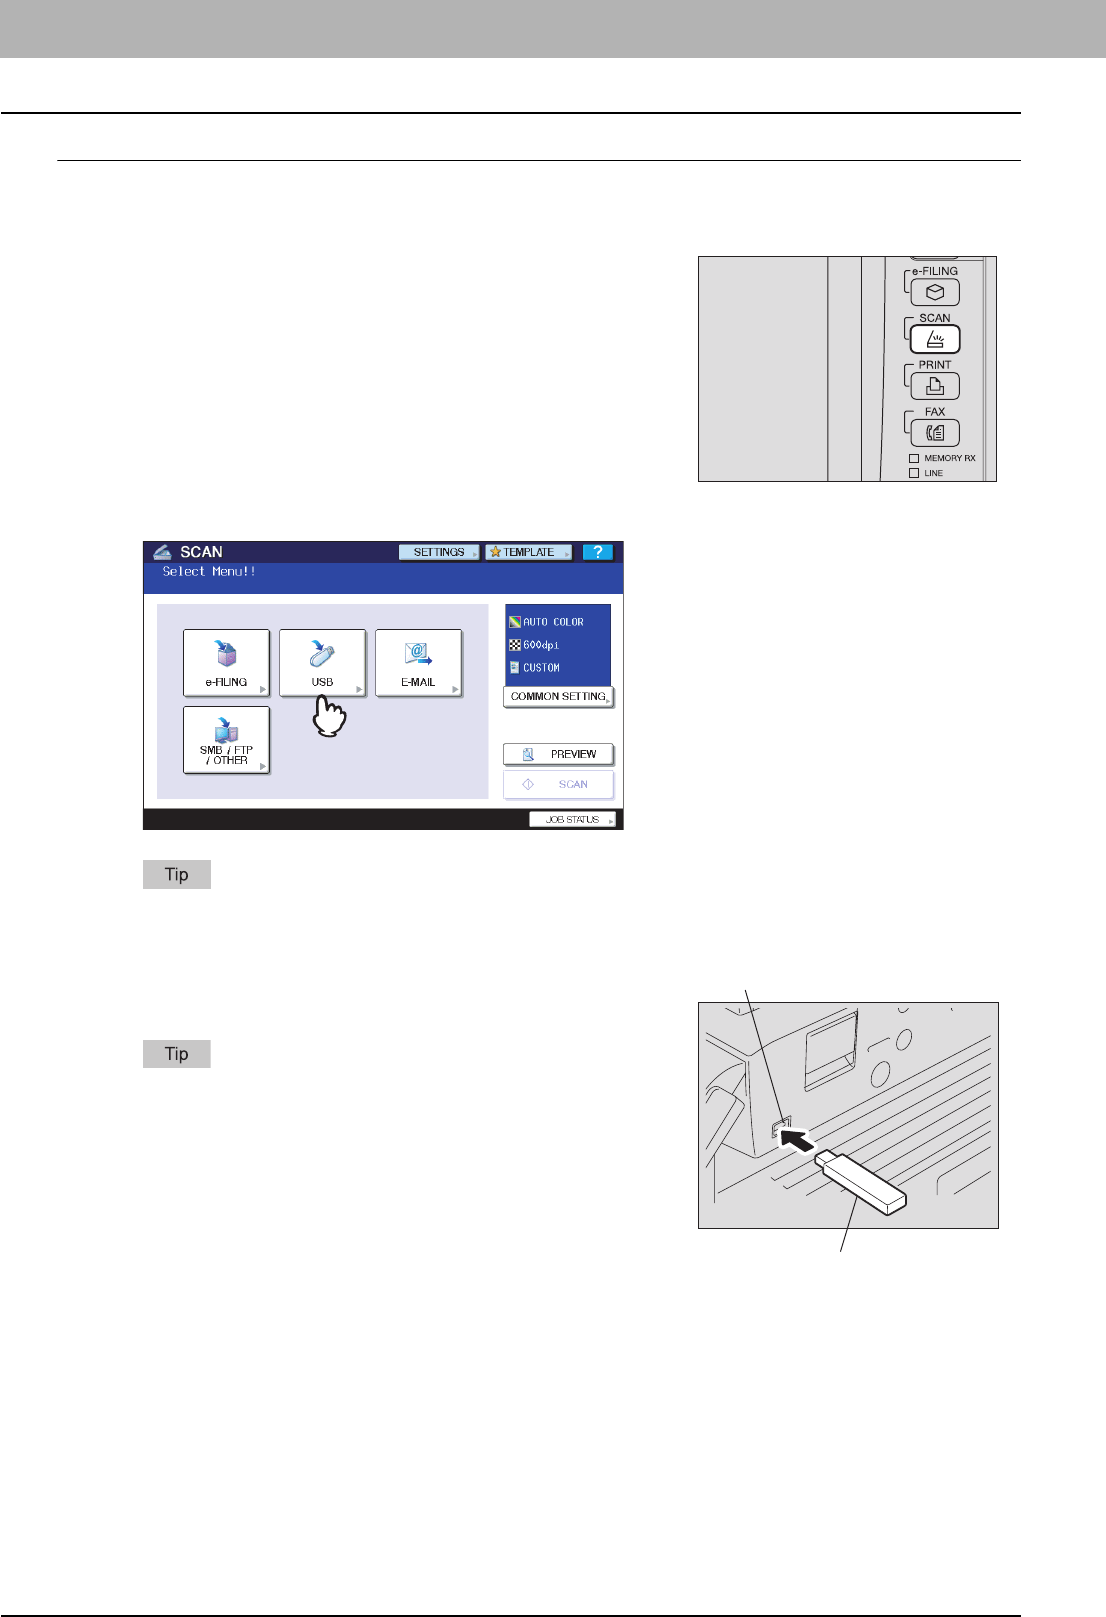
2.GA-1211 SPECIFIC FUNCTIONS
This chapter describes the GA-1211 specific functions which are available when the GA-1211 controller is connected to
e-STUDIO4520C series.
Operations from the Control Panel.......................................................................................20
Turning power off (Shutdown)..............................................................................................................................20
USER FUNCTIONS .............................................................................................................................................31
TopAccess USER Mode.........................................................................................................35
Launching TopAccess from the WebTools home page.........................................................................................35
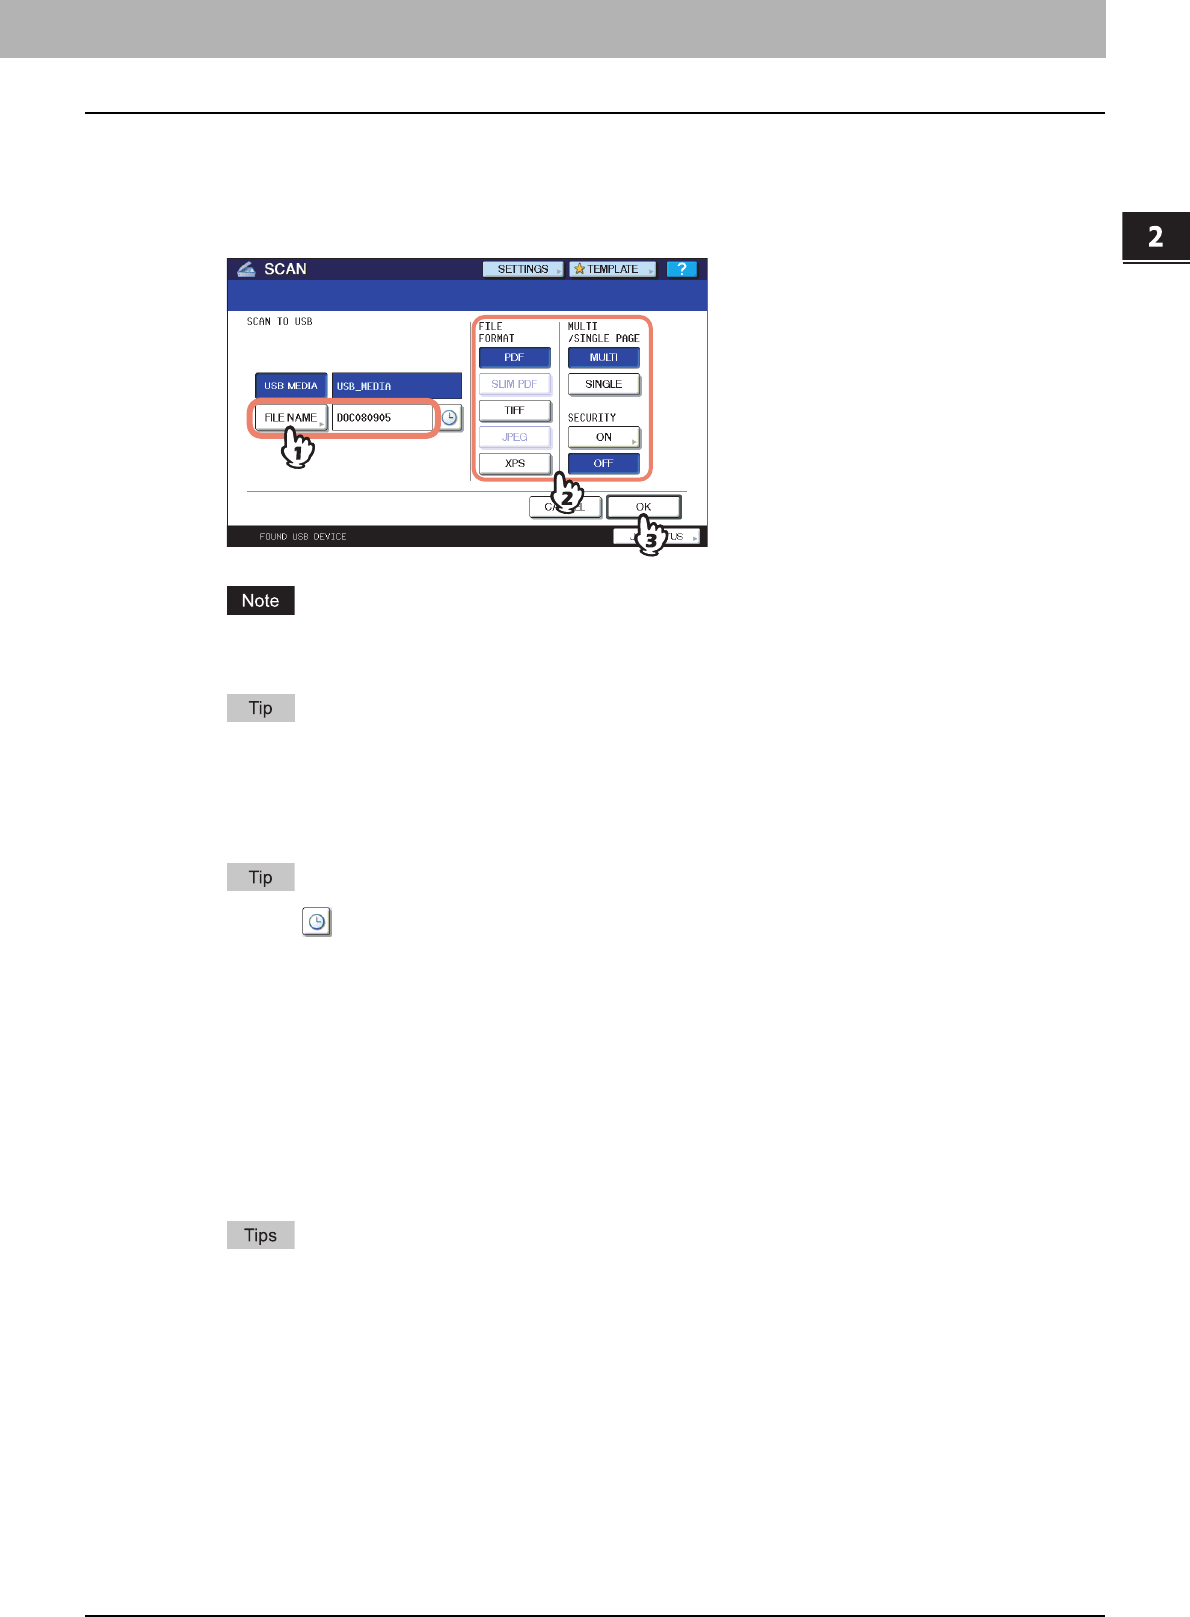
Registering or editing GA-1211 specific private templates...................................................................................35
Error codes on print jobs......................................................................................................................................47
3 TROUBLESHOOTING
46 Scanning Problems
Scanning Problems
This section describes troubleshooting for using scan data.
The scanned data cannot be saved in the network folder or the folder in the FTP
server
Problem Description
I have scanned a document from the [SCAN] button on the control panel by using SCAN TO SMB or SCAN TO FTP in the
SMB/FTP/OTHER menu, but the data is not saved in the specified folder.
Corrective Action
Check the following points:
yThe network path to the folder where you want to store the scanned data is correctly specified.
yThe path to the folder in the FTP server where you want to store the scanned data is correctly specified.
yThe FTP server is operating properly.
yThe option to enable sending scan jobs over SMB is enabled. For instructions on how to enable this option, refer to the
Configuration and Setup.
yThe option to enable sending scan jobs to an FTP server is enabled. For instructions on how to enable this option,
refer to the Configuration and Setup.
To find information about troubleshooting other than the above, refer to the Troubleshooting Guide.
3 TROUBLESHOOTING
Error Codes 47
Error Codes
TopAccess has the pages for the job lists; print, transmission, reception, and scan jobs. The following error codes are
shown on these pages in the [Logs] tab (successful jobs have no codes). These codes help you specify the cause of an
error you might encounter.
The error codes are also shown on the [LOG] window of the touch panel. See the following lists when you find an error
code on the touch panel.
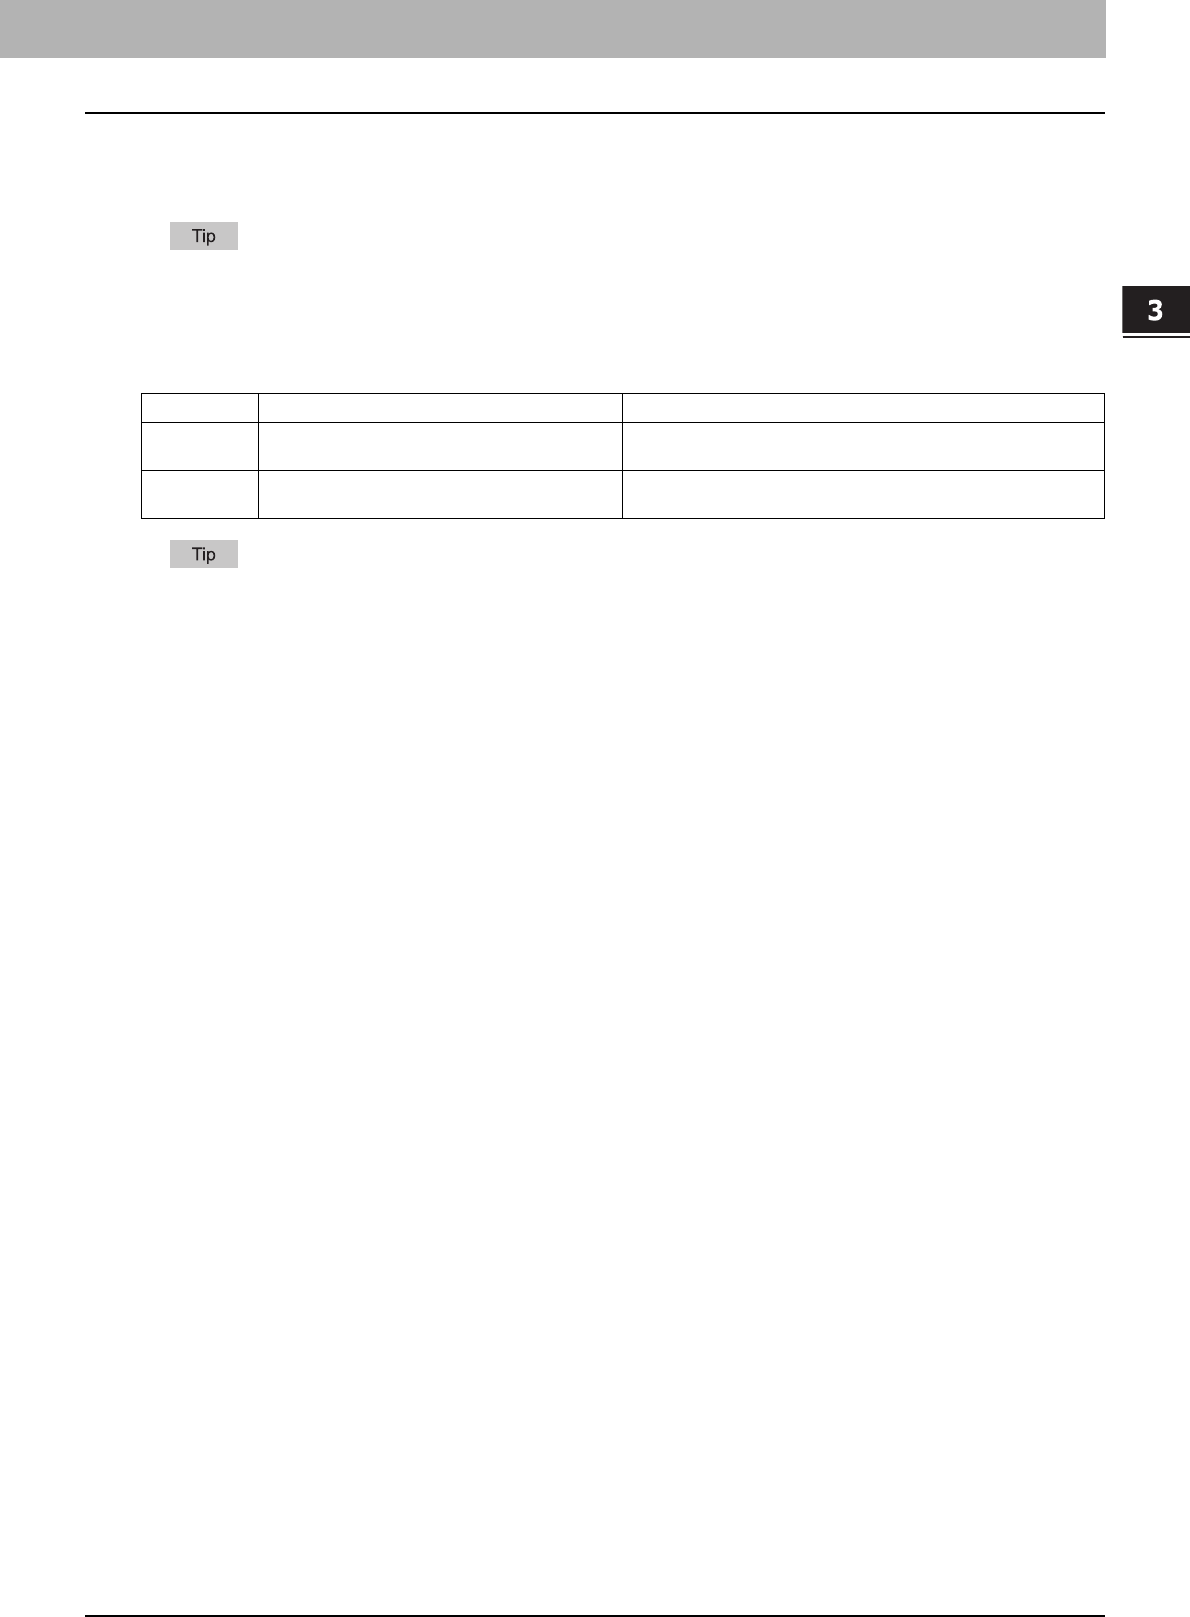
Error codes on print jobs
To find information about error codes other than the above, refer to the Troubleshooting Guide.
Error CodeProblem DescriptionCorrective Action
4501Job was canceled because the unacceptable
paper size was specified.
Select the appropriate paper size and perform printing again.
4502Job was canceled because the unacceptable
paper type was specified.
Select the appropriate paper type and perform printing again.
Libble takes abuse of its services very seriously. We're committed to dealing with such abuse according to the laws in your country of residence. When you submit a report, we'll investigate it and take the appropriate action. We'll get back to you only if we require additional details or have more information to share.
Product:
Forumrules
To achieve meaningful questions, we apply the following rules:
First, read the manual;
Check if your question has been asked previously;
Try to ask your question as clearly as possible;
Did you already try to solve the problem? Please mention this;
Is your problem solved by a visitor then let him/her know in this forum;
To give a response to a question or answer, do not use this form but click on the button 'reply to this question';
Your question will be posted here and emailed to our subscribers. Therefore, avoid filling in personal details.
Register
Register getting emails for Toshiba e-STUDIO 4520c at:
new questions and answers
new manuals
You will receive an email to register for one or both of the options.
Get your user manual by e-mail
Enter your email address to receive the manual of Toshiba e-STUDIO 4520c in the language / languages: English as an attachment in your email.
The manual is 2,49 mb in size.
You will receive the manual in your email within minutes. If you have not received an email, then probably have entered the wrong email address or your mailbox is too full. In addition, it may be that your ISP may have a maximum size for emails to receive.
If you have not received an email with the manual within fifteen minutes, it may be that you have a entered a wrong email address or that your ISP has set a maximum size to receive email that is smaller than the size of the manual.
The email address you have provided is not correct.
Please check the email address and correct it.
Your question is posted on this page
Would you like to receive an email when new answers and questions are posted? Please enter your email address.