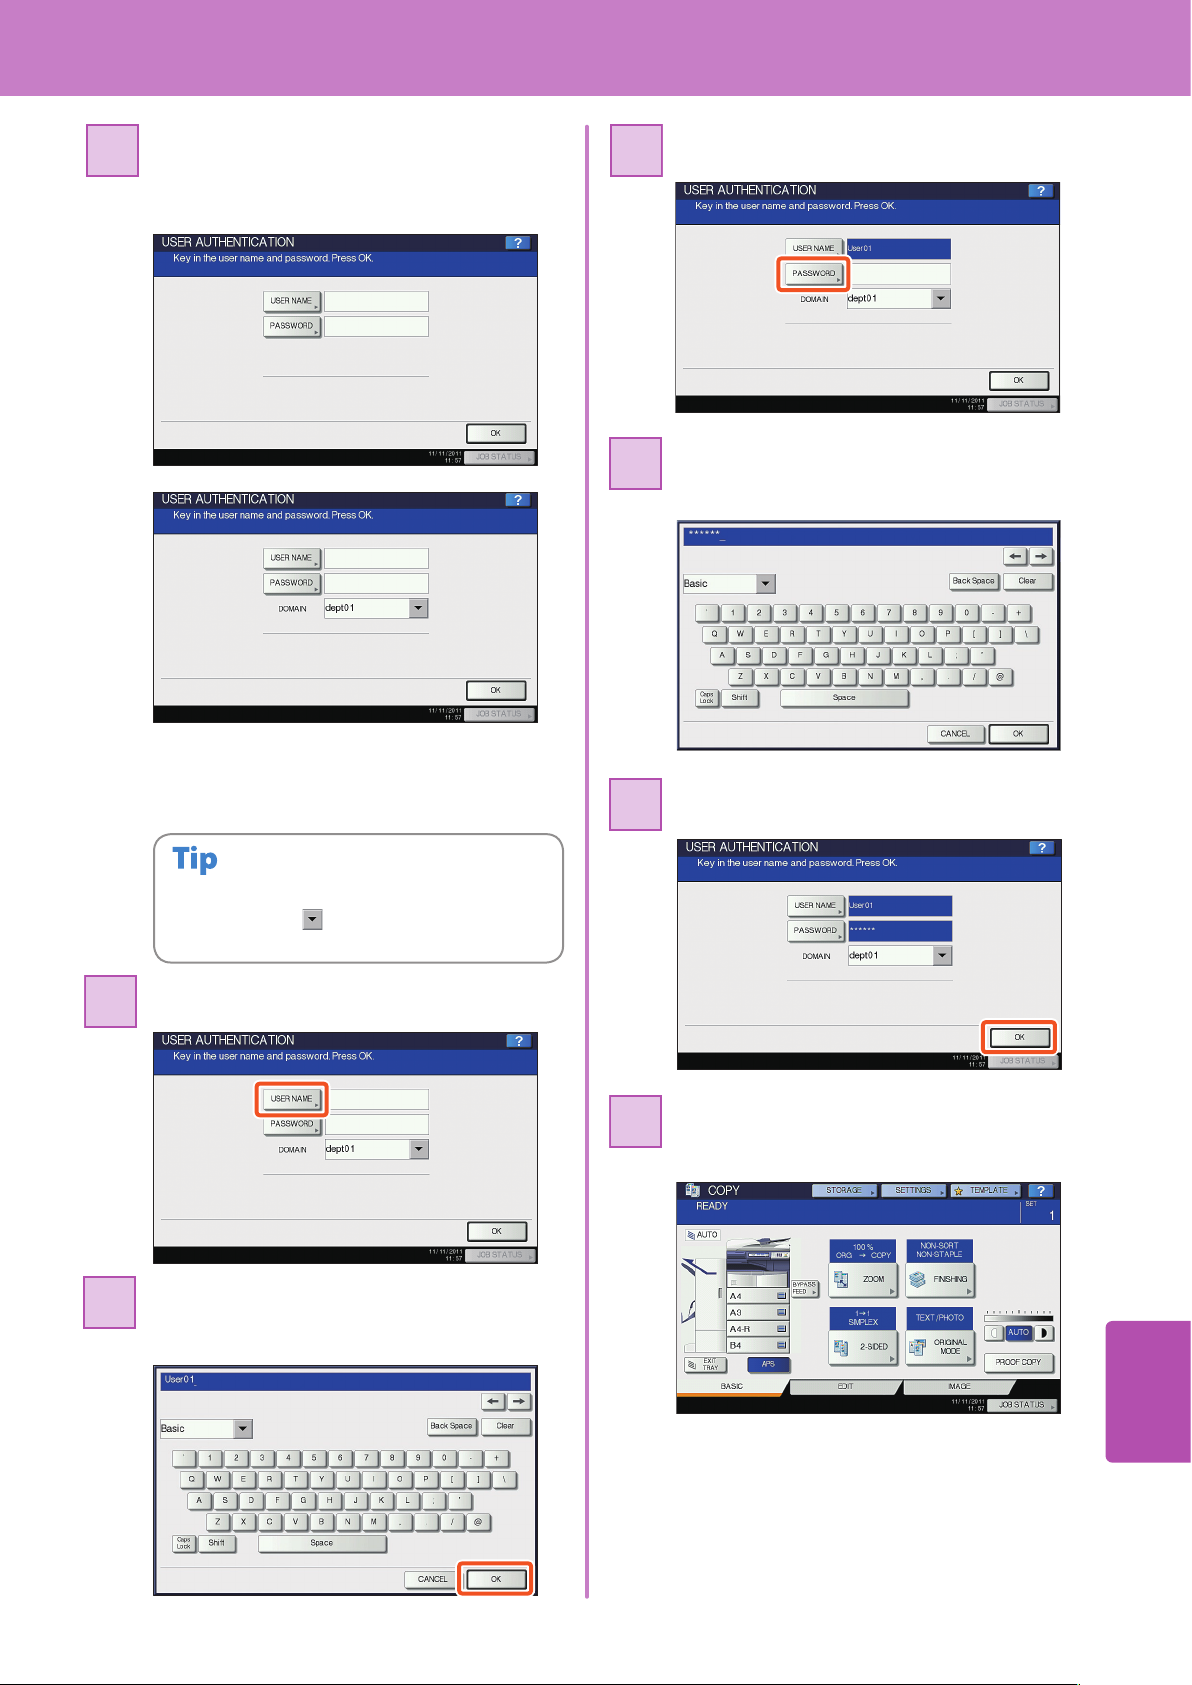
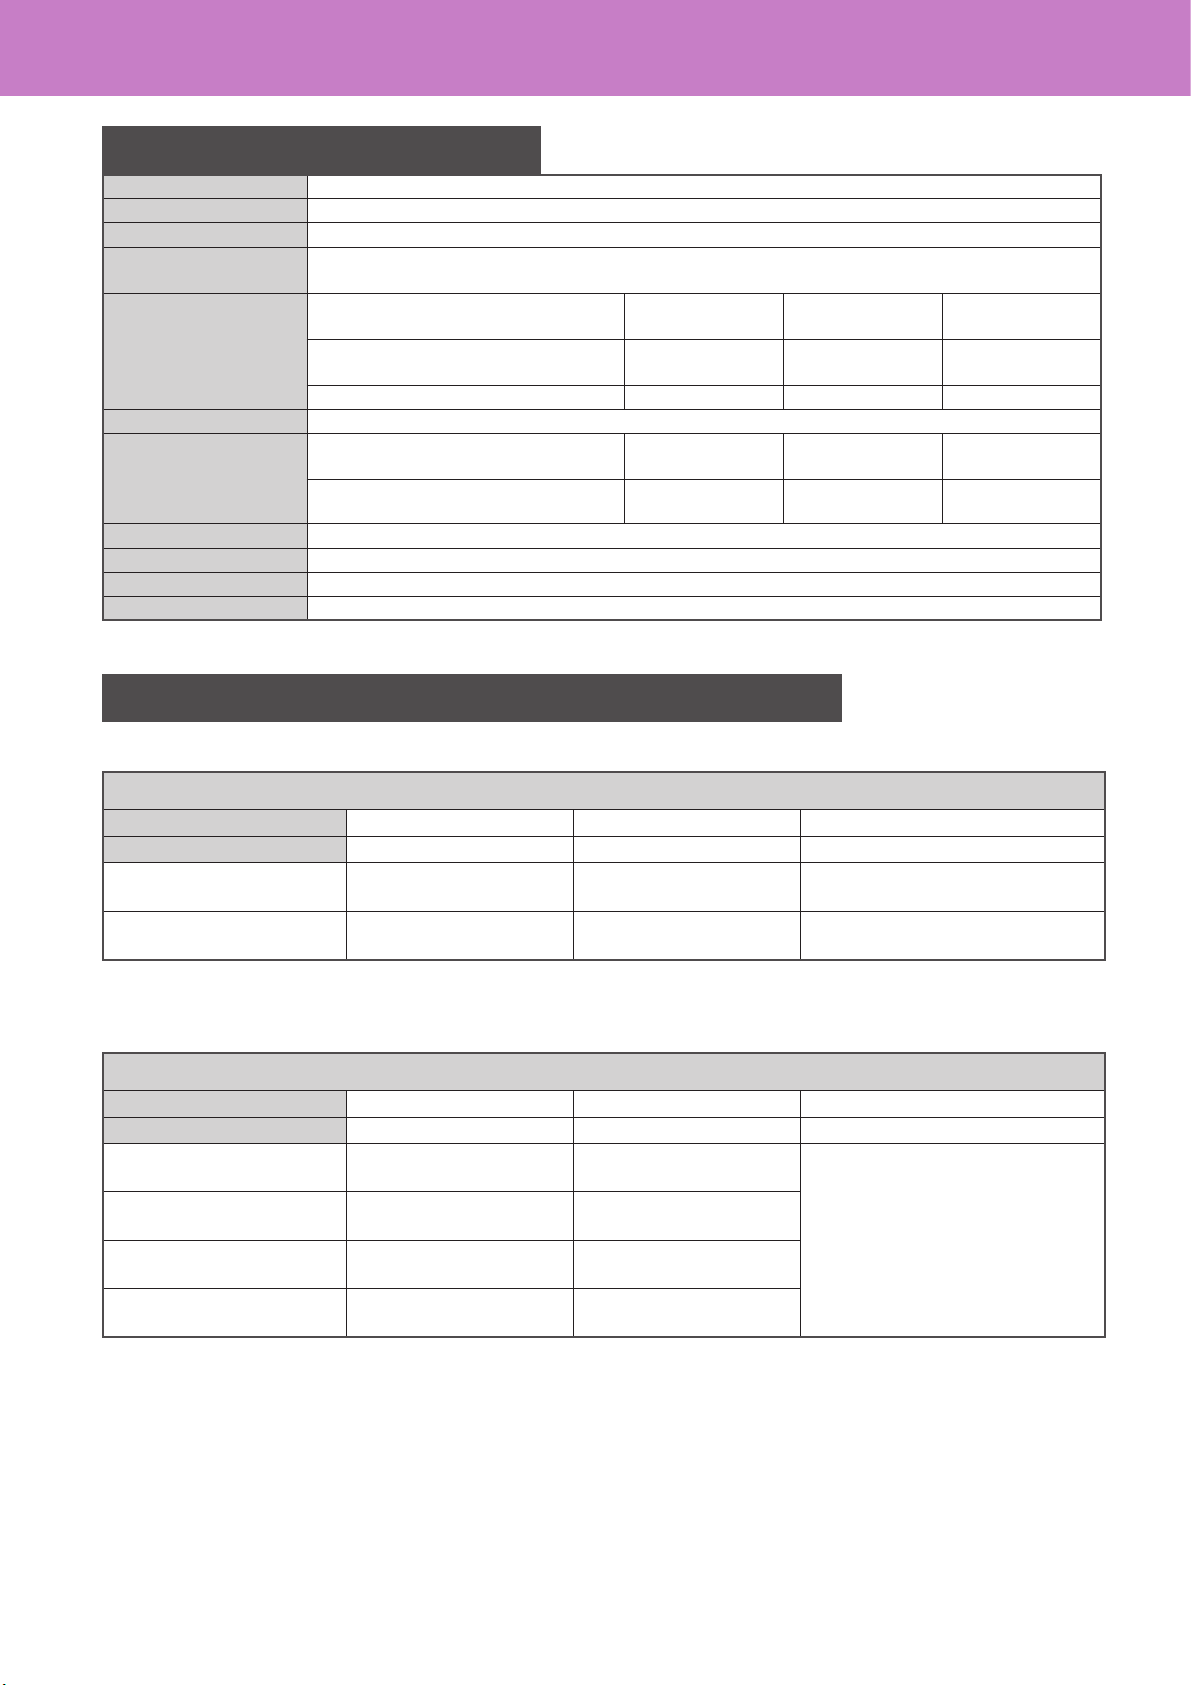
The following menu is displayed when the entry of any letter is required for scanning or e-Filing, etc.
Use the buttons on the touch panel for letter entry.
After entering the letters, press [OK]. The menu will be changed.
The following buttons are used for letter entry.
[Basic]: Press this to access the basic keys.
[Symbol]: Press this to access the symbol keys.
[Other]: Press this to access the special keys.
[Caps Lock]: Press this to switch capital letters and small letters.
[Shift]: Press this to enter capital letters.
[Space]: Press this to enter a space.
: Press these to move the cursor.
[Back Space]: Press this to delete the letter before the cursor.
[Clear]: Press this to delete all letters entered.
[CANCEL]: Press this to cancel the entry of letters.
[OK]: Press this to x all entered letters.
Chapter 1 PREPARATIONS
Turning Power ON/OFF
This section explains how to turn the power ON and OFF as well as the energy saving mode. How to turn the power ON diers
between when the MAIN POWER lamp (red) on the control panel is lit and when it is not.
12
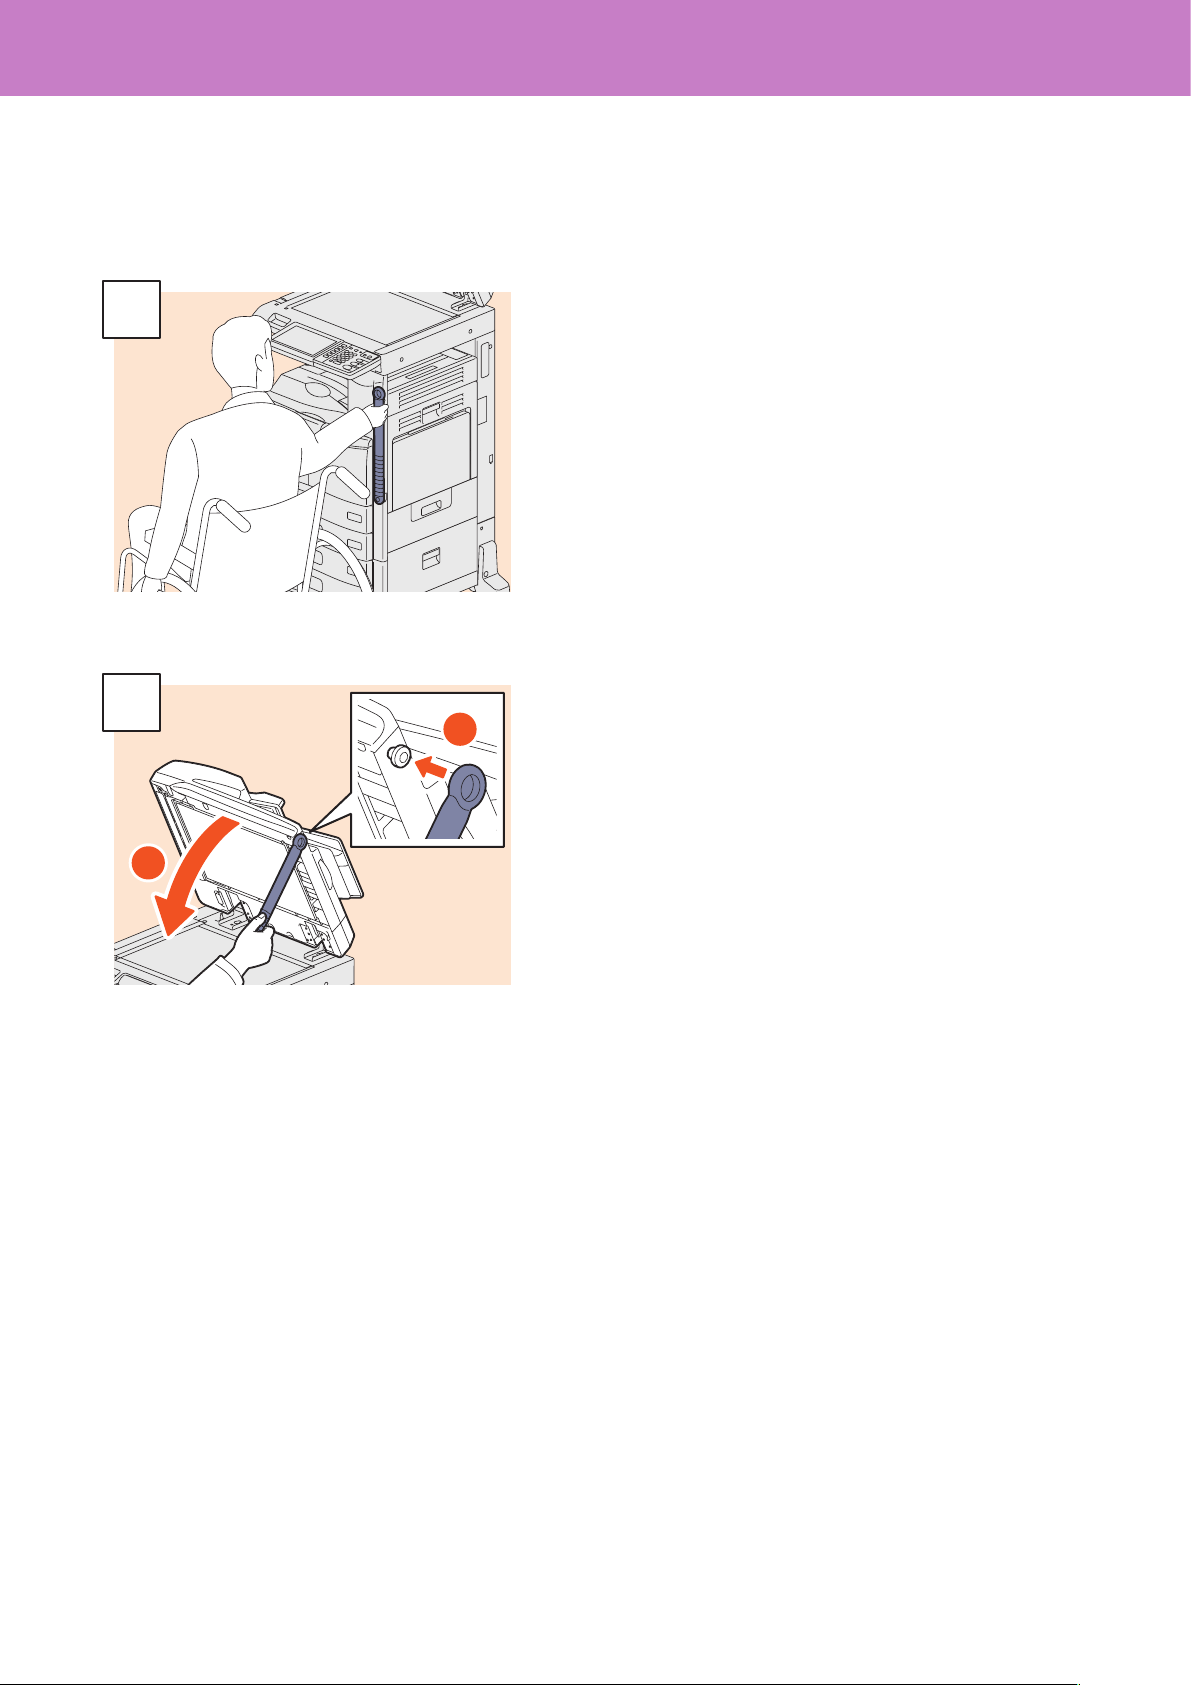
Turning the power ON
When the MAIN POWER lamp (red) on the control panel does not light:
Open the main power switch cover and turn the power ON
there.
When the MAIN POWER lamp (red) on the control panel lights:
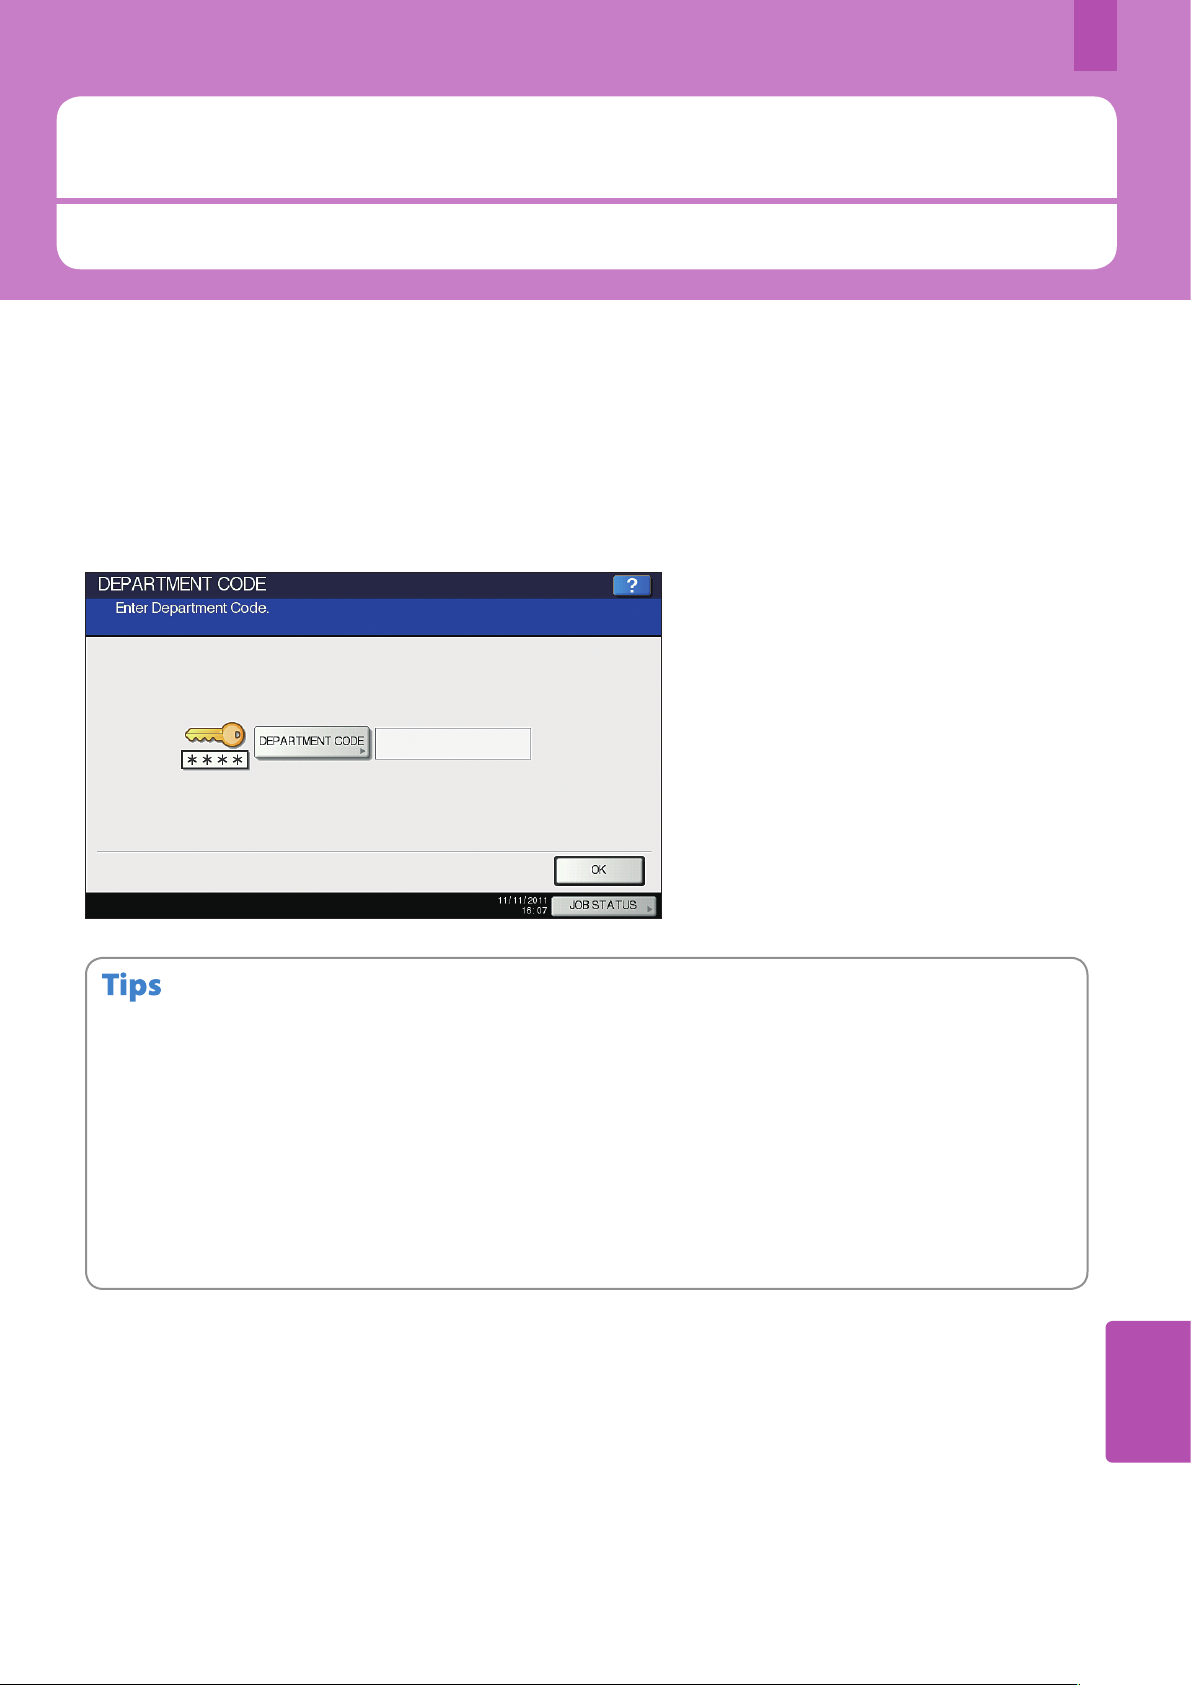
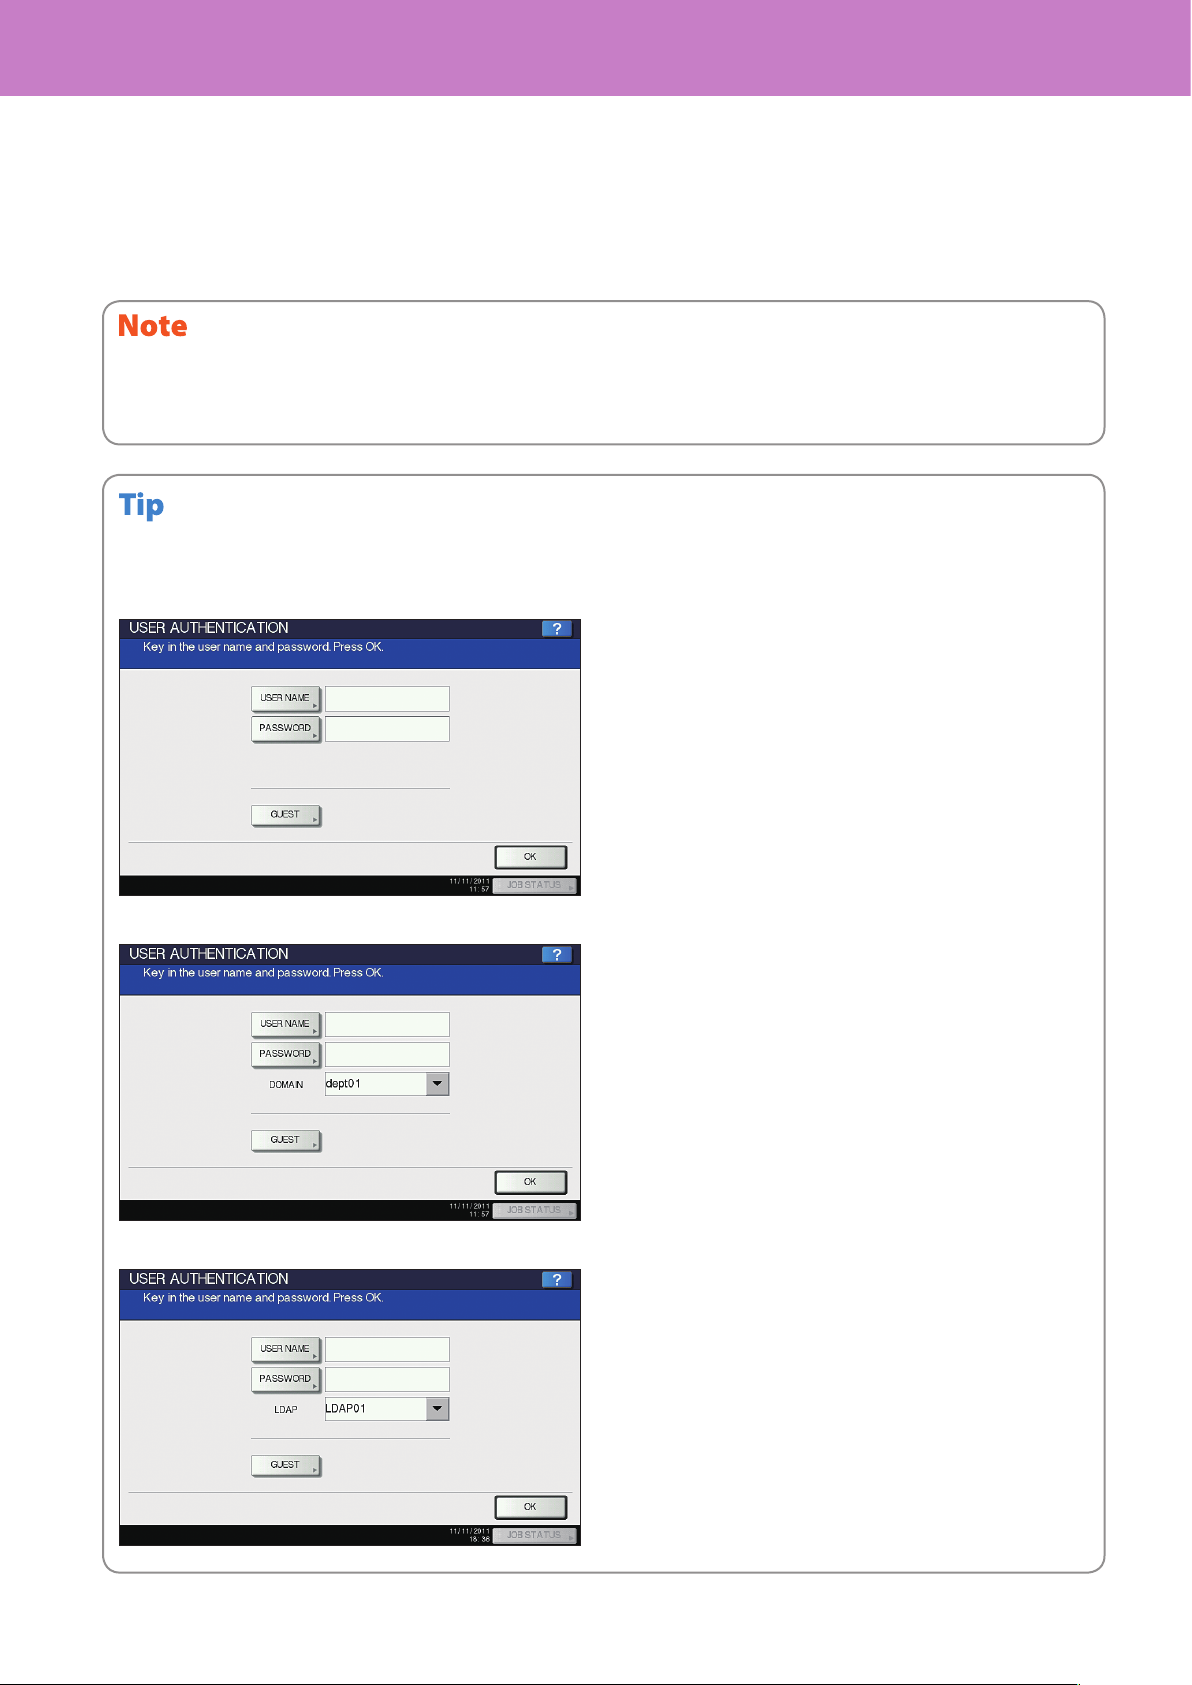
When the equipment is controlled under the department or user management function, enter the department code or user
information rst. For details, see the following page:
&P.71 “Logging in” in this manual
The equipment will be ready for copying after about 20 seconds and “READY” appears.
When you turn the power of the equipment OFF, be sure also to shut it down by pressing the [POWER] button on the
control panel. Do not simply turn the main power switch OFF. For details, see the following page:
& P.13 “Turning the power OFF (Shutdown)” in this manual
When “ERASING DATA” appears
This message appears when the Data Overwrite Enabler (optional) has been installed. It appears immediately after the
power is turned ON or after the equipment has been operated. You can operate the equipment even if it is displayed.
Press the [POWER] button.
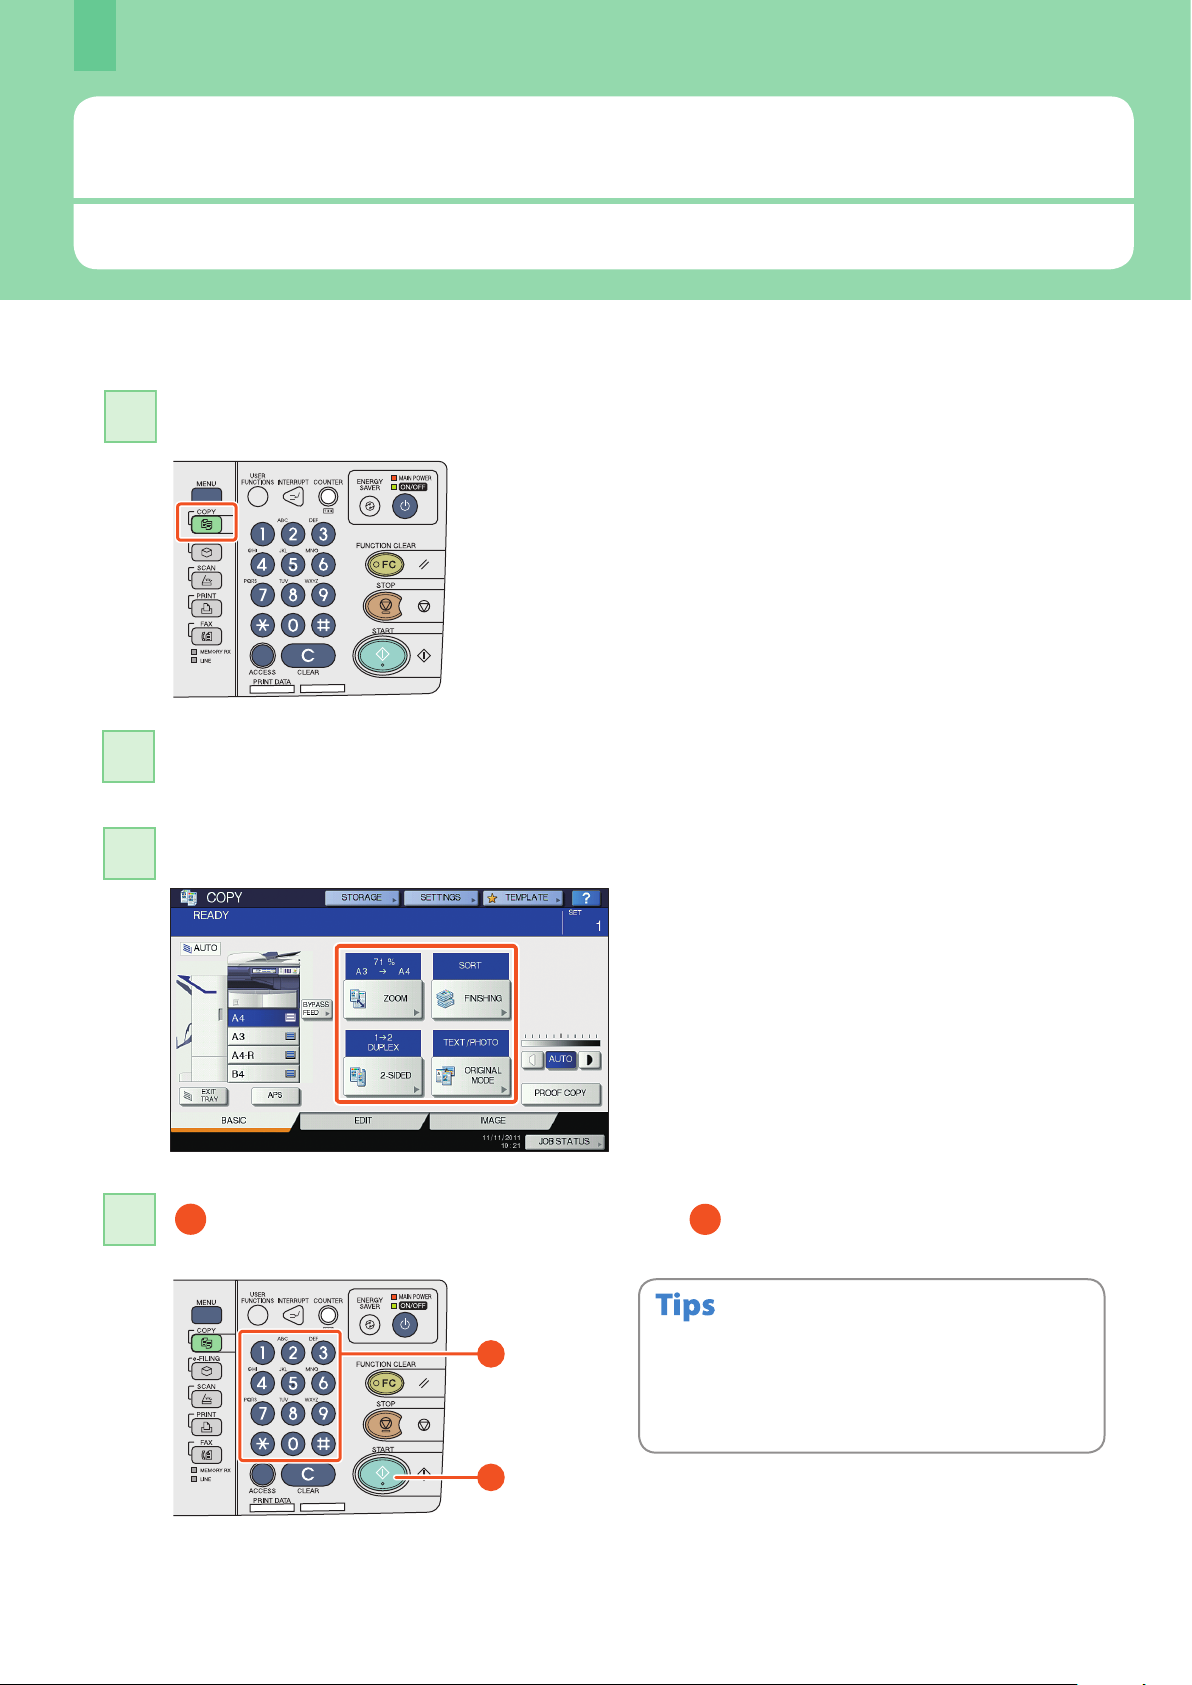
The equipment starts warming-up. “Wait Warming Up” appears
during warming-up.
While the equipment is warming up, you can use the auto job
start function. For details, refer to the following guide:
&Copying Guide (PDF): “Chapter 2: HOW TO MAKE COPIES” -
“Making Copies”
•
•
1
Turning Power ON/OFF
13
Turning the power OFF (Shutdown)
When turning the power of the equipment OFF, be sure to shut it down according to the procedure below. Check the
following three points before shutdown.
No jobs should be left in the print job list.
None of the PRINT DATA lamp or the MEMORY RX / LINE lamps should be blinking.
(If the equipment is shut down while any of the above lamps is blinking, jobs in progress such as FAX reception will be
aborted.)
No computer should access the equipment via the network, such as TopAccess.
•
•
•
When the ON/OFF lamp (green) lights or blinks on the control panel, do not simply press the main power switch to turn the power
OFF. The stored data may be lost or the hard disk may be damaged.
If a job in process exists when the [POWER] button of the control panel is pressed, “Processing job will be deleted. Are you sure you
want to shutdown?” appears.
•
•
When the equipment is not used for a long period of time:
Press the [POWER] button on the control panel to
shut down the equipment, check that the ON/OFF
lamp (green) stops blinking and is denitely not lit,
and then turn the power OFF with the main power
switch.
When the power is turned OFF with the main power switch, the
MAIN POWER lamp (red) will go out.
Press the [POWER] button until a “pip” sound is
heard.
“Shutdown is in progress.” appears for a while, and then the
power is turned OFF.
Chapter 1 PREPARATIONS
14
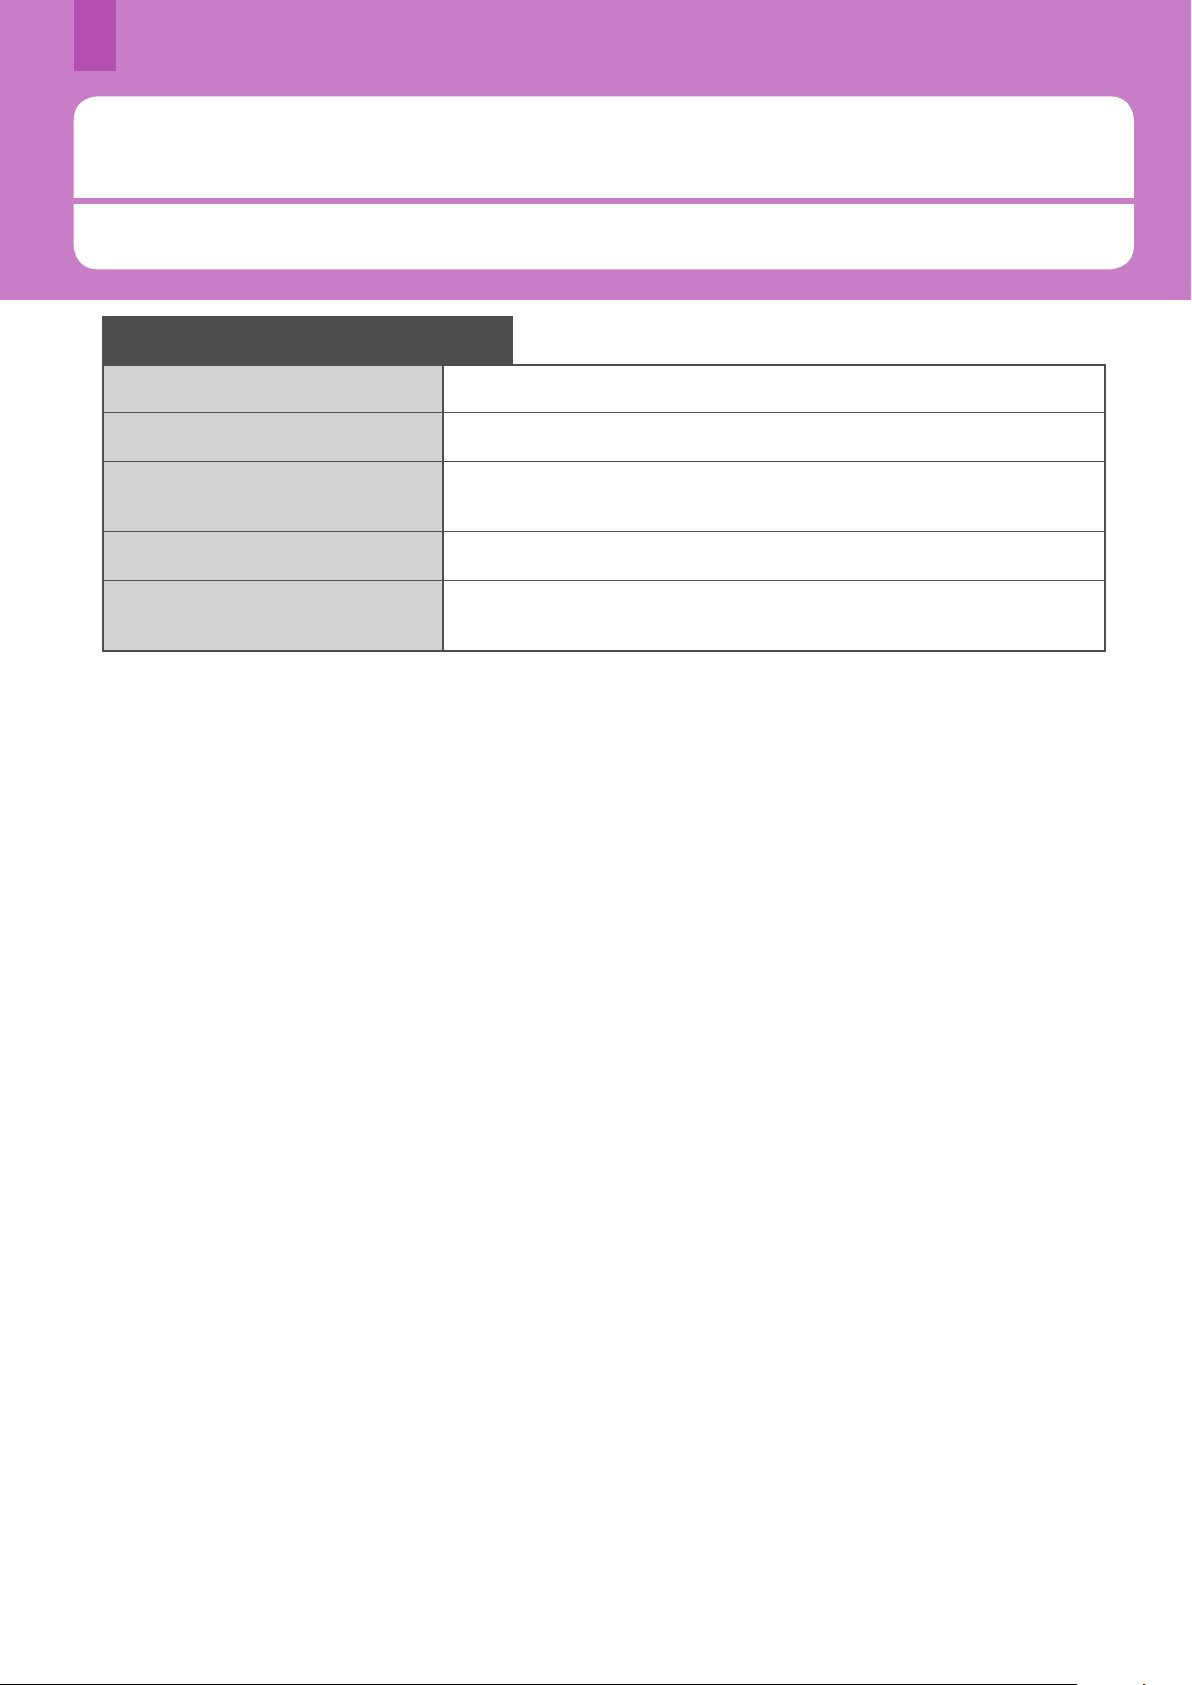
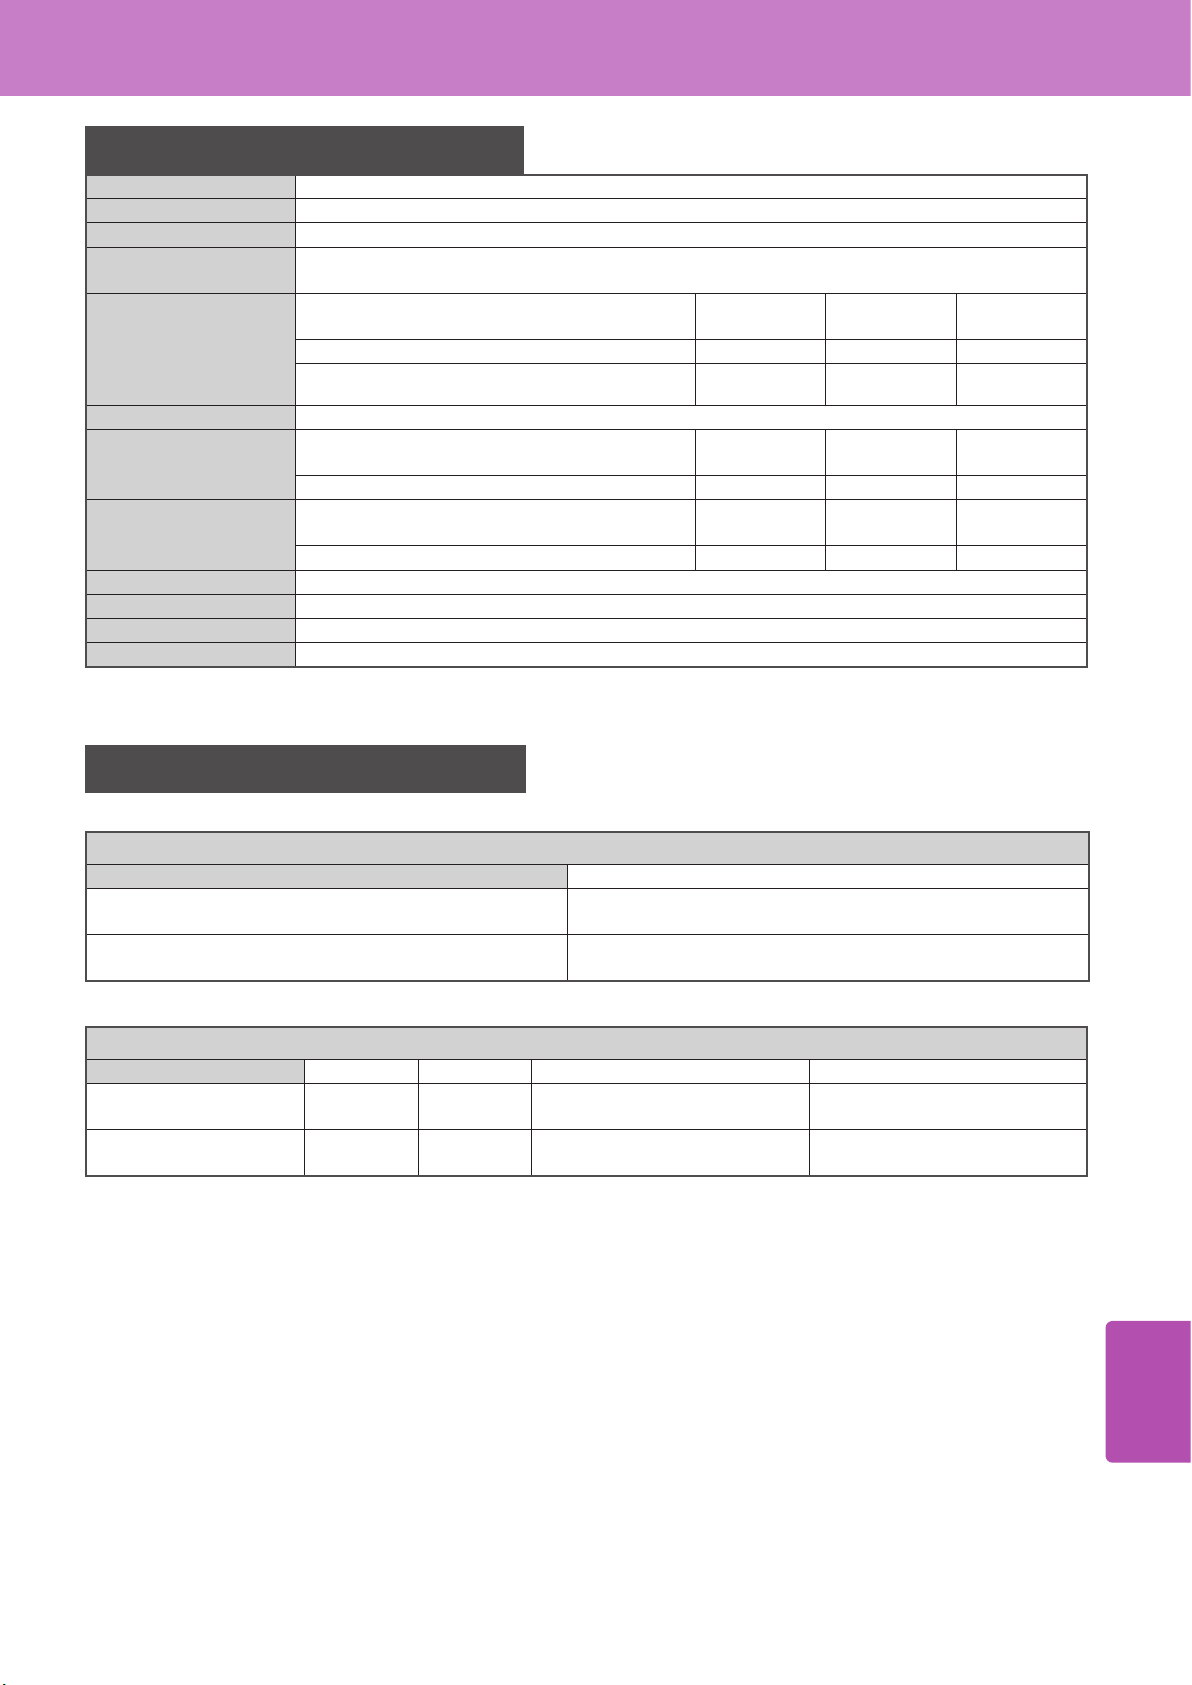
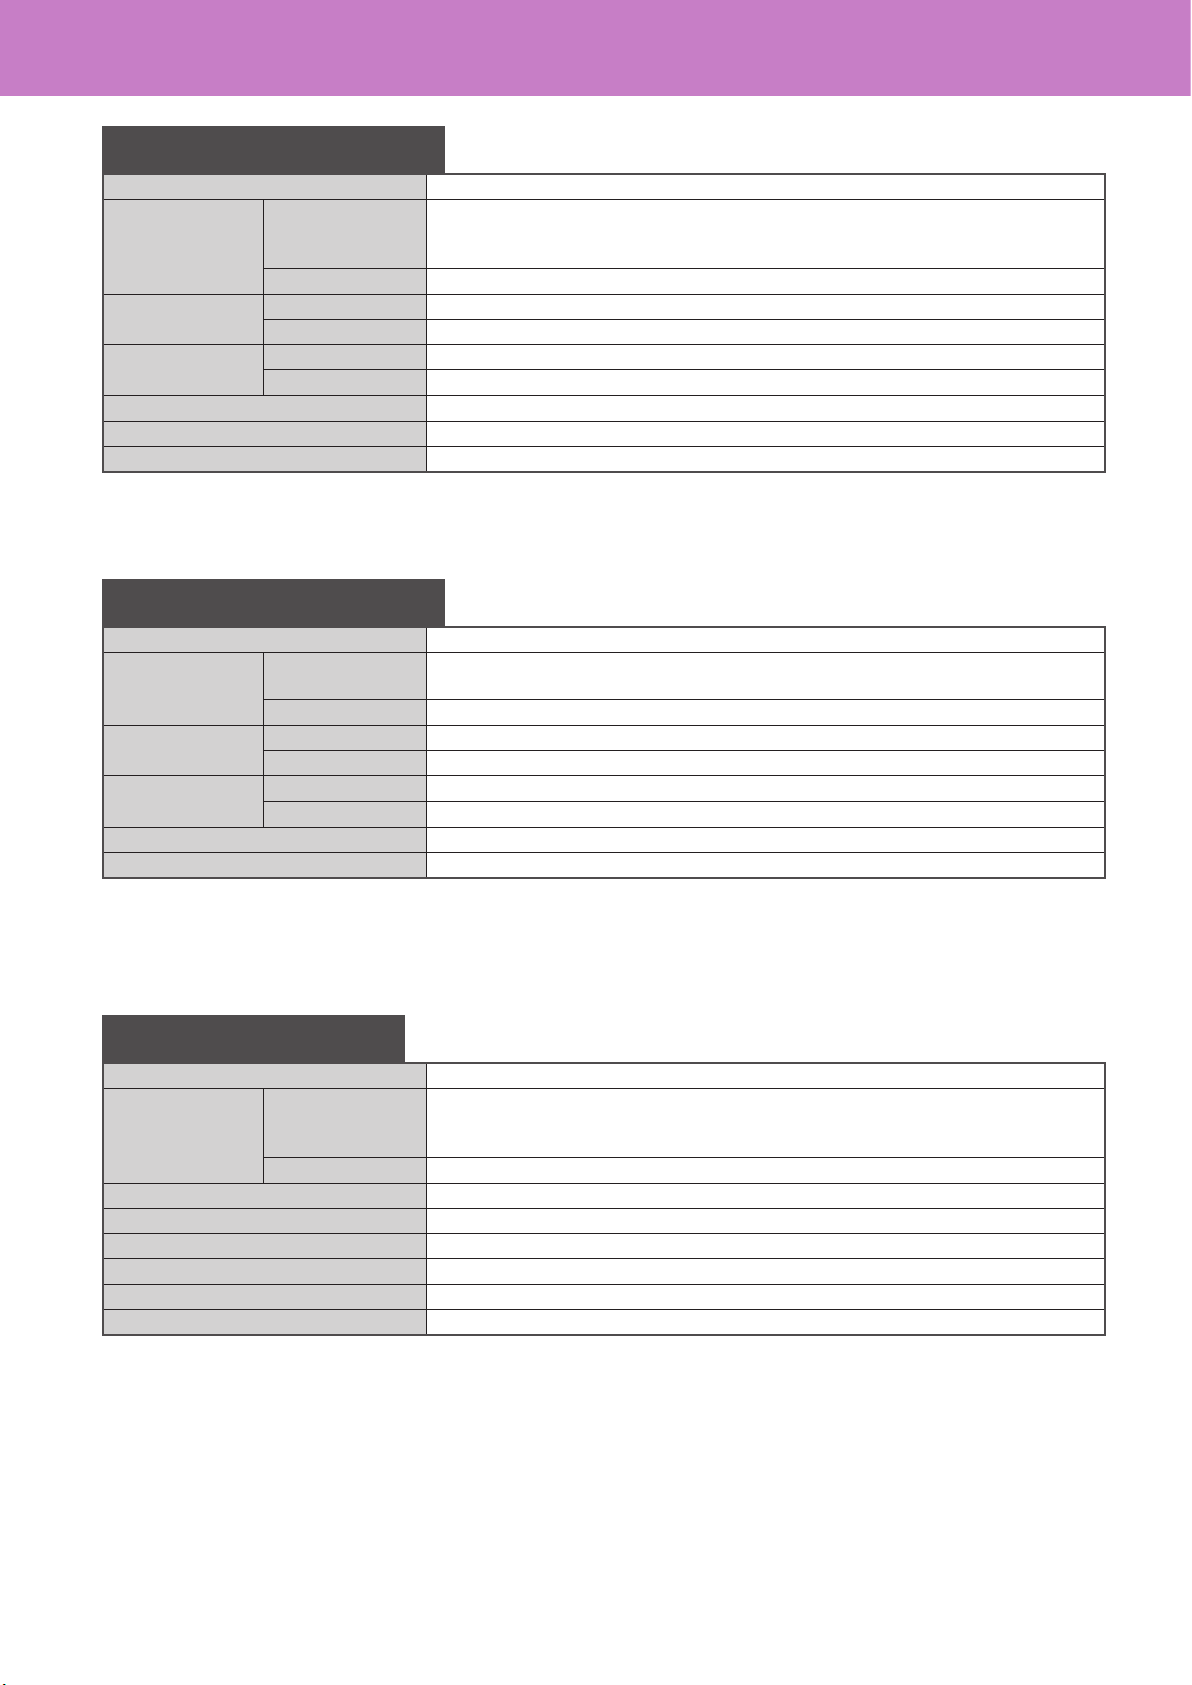
Saving energy when not in use – energy saving modes –
This equipment supports three energy saving modes; the Automatic Energy Save mode, Sleep mode and Super Sleep
mode. The table below shows the procedures to switch modes manually and the conditions under which the equipment
enters into or recovers from each mode.
Energy saving
modes
Procedure to switch
modes
Conditions to enter into
the modeStatus of equipmentConditions to recover
from the mode
Automatic
Energy Save
mode
When a specied period of
time *1 has passed since the
last use of the equipment.—
“Saving energy - press
START button.” appears on
the touch panel.
When a button on the
control panel *2 is pressed
or when print data or fax
data are received.
Sleep mode
When the [ENERGY SAVER]
button *3 is pressed or
when a specied period of
time *4 has passed since the
last use of the equipment.
When a particular option *5
is installed or when a
particular protocol *6 is
enabled.
The touch panel display
goes o and the [ENERGY
SAVER] button lights in
green.
Same as the Automatic
Energy Save mode.
Super Sleep
mode
When the [ENERGY SAVER]
button *3 is pressed or
when a specied period of
time *4 has passed since the
last use of the equipment.
When a particular option *5
is not installed and also
when a particular protocol
*6 is disabled.
Only the MAIN POWER
lamp (red) lights.
When the [POWER] button
is pressed, when print or
fax data are received
through a wired LAN or
when the time set for
Scheduled Print has come.
*1 The default value set at the factory shipment is 1 minute.
*2 Any of the [START], [ENERGY SAVER], [COPY], [e-FILING], [SCAN], [PRINT] and [FAX] buttons.
*3 [ENERGY SAVER] button on the control panel.
*4 The default value set at the factory shipment is 1 minute (The default value set at the factory shipment of the European version is 10 minutes).
*5 Any of the Wireless LAN Module, Bluetooth Module and e-BRIDGE ID Gate.
*6 Any of IPX, AppleTalk and other protocols. When the IPsec function is enabled or the Ethernet speed is set to [AUTO (-1000MB)] or [1000BASE FULL], the
equipment enters into the Sleep mode. For details, refer to the following guide:
Libble takes abuse of its services very seriously. We're committed to dealing with such abuse according to the laws in your country of residence. When you submit a report, we'll investigate it and take the appropriate action. We'll get back to you only if we require additional details or have more information to share.
Product:
Forumrules
To achieve meaningful questions, we apply the following rules:
First, read the manual;
Check if your question has been asked previously;
Try to ask your question as clearly as possible;
Did you already try to solve the problem? Please mention this;
Is your problem solved by a visitor then let him/her know in this forum;
To give a response to a question or answer, do not use this form but click on the button 'reply to this question';
Your question will be posted here and emailed to our subscribers. Therefore, avoid filling in personal details.
Register
Register getting emails for Toshiba e-STUDIO 256 at:
new questions and answers
new manuals
You will receive an email to register for one or both of the options.
Get your user manual by e-mail
Enter your email address to receive the manual of Toshiba e-STUDIO 256 in the language / languages: English as an attachment in your email.
The manual is 32.85 mb in size.
You will receive the manual in your email within minutes. If you have not received an email, then probably have entered the wrong email address or your mailbox is too full. In addition, it may be that your ISP may have a maximum size for emails to receive.
If you have not received an email with the manual within fifteen minutes, it may be that you have a entered a wrong email address or that your ISP has set a maximum size to receive email that is smaller than the size of the manual.
The email address you have provided is not correct.
Please check the email address and correct it.
Your question is posted on this page
Would you like to receive an email when new answers and questions are posted? Please enter your email address.