In addion to cooling, the air condioner has two other funcons, i.e. air circulaon and dehumidicaon.
The air condioner can be operated via the control panel on the appliance and with the provided remote control.
• Choose a locaon near a socket.
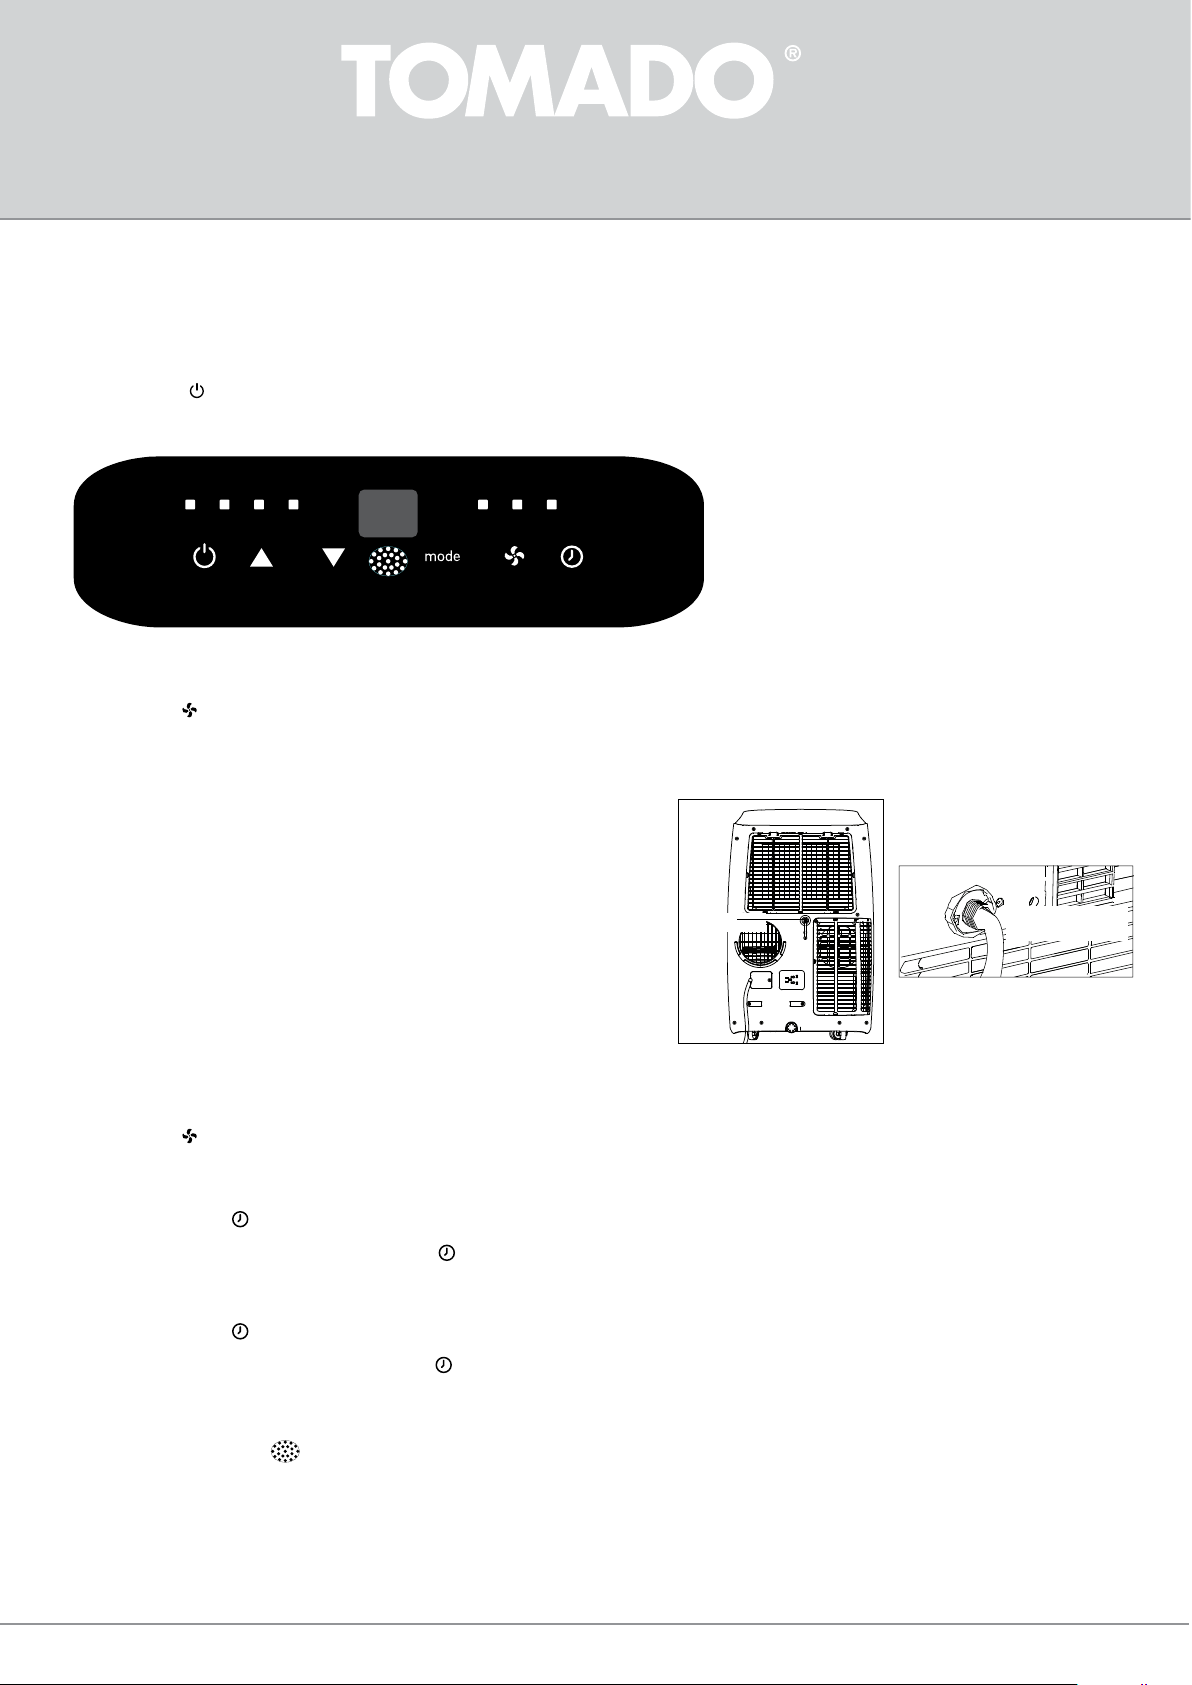
• Install the discharge hose in accordance with the gures and make sure the window is closed as much as possible.
• Insert the plug in an earthed socket.
• Press the on/o key to switch on the air condioner.
• The temperature range of the air condioner is: 16 to 31°C.
• Check that the discharge hose is mounted correctly.
• Do not share the socket with any other appliances.
COOLING
• Press the mode key [mode] unl the indicator light for cooling [ cool ] lights up on the display.
• Press the [ temp + / and temp - / ] keys to set the required room temperature (between 16°C and 31°C).
• Press the [ speed / ] key to set the wind speed.
DEHUMIDIFICATION
• Press the mode key [mode] unl the indicator light for dehumidicaon [ dry ] lights up on the display.
• The air condioner automacally adjusts the temperature to the current room temperature minus 2°C.
• The wind speed is at low speed automacally [ low ]. This cannot be changed.
When using this posion, a garden hose (not included in the delivery) or something similar must be
connected to discharge condensaon water.
• Unscrew the screw cap on the back of the appliance.
• Mount the end of a garden hose or a similar discharge hose to the drain and place the other end in
a receptacle, such as a bucket, situated lower than the drain of the appliance, so that the condensate
water can be discharged properly.
Cauon:
• Condensaon water may run out of the drain when the screw cap is removed and the appliance has been
used in cooling mode. Keep a drip tray at hand when removing the screw cap, in order to collect the
condensaon water.
• Make sure the discharge hose for the condensaon water properly descends and is not higher than the
drain of the appliance.
• When using this posion, the air discharge hose does not have to be connected.
• When using the cooling posion, it is recommended to not discharge the condensaon water
connuously, but to close the screw cap again. In this way the appliance is able to provide its best
performance.
AIR CIRCULATION
When using this posion, the air discharge hose does not have to be connected.
• Press the mode key [mode] unl the indicator light for air circulaon [ fan ] lights up on the display.
• Press the [ speed / ] key to adjust the wind speed - [low] or [high].
ADJUSTING THE TIMER
The mer funcon can be used to allow the air condioner to switch on automacally (delayed start) or switch o automacally at a set me (automac deacvaon).
Delayedstart
• Press the mer key [ mer/ ] when the air condioner is o and select the required me at which you want the air condioner to switch on
by means of the [ temp + / en temp - / ] keys. The delayed start can be set between 0 and 24 hours.
• Conrm the number of hours by pressing the mer key [ mer/ ] once more.
• The set number of hours is shown in the display.
• When the set number of hours have passed, the air condioner switches on automacally.
Automacdeacvaon
• Press the mer key [ mer/ ] when the air condioner is on and select the required me at which you want the air condioner to switch o using the
temperature and me [ temp + / and temp - / ] keys. Automac deacvaon can be set between 0 and 24 hours.
• Conrm the number of hours by pressing the mer key [ mer/ ] once more.
• The set number of hours is shown in the display.
• When the set number of hours have passed, the air condioner switches o automacally.
THE REMOTE CONTROL
Aim the remote control to the sensor of the appliance. The range of the remote control is approx. 8 metres (without obstacles between the appliance and the remote control).
Insert the two supplied AAA 1.5 Volt baeries in the remote control. Do take the plus and minus symbols on the inside of the remote control into account.
Note:
• If the remote control is replaced or is no longer used, remove the baeries and dispose them in accordance with applicable legislaon, as they are harmful to the environment.
• Do not mix old and new baeries. Do not use a mix of alkaline, standard (carbon-zinc) or chargeable (nickel-cadmium) baeries.
• Baeries could explode or leak when exposed to open re. Hand in baeries at a waste collecon facility or recognised waste collecon point.
• Remove the baeries from the remote control when the appliance is not being used for a longer period of me (winter storage) and keep them on a cool, dry place.
Libble takes abuse of its services very seriously. We're committed to dealing with such abuse according to the laws in your country of residence. When you submit a report, we'll investigate it and take the appropriate action. We'll get back to you only if we require additional details or have more information to share.
Product:
Forumrules
To achieve meaningful questions, we apply the following rules:
First, read the manual;
Check if your question has been asked previously;
Try to ask your question as clearly as possible;
Did you already try to solve the problem? Please mention this;
Is your problem solved by a visitor then let him/her know in this forum;
To give a response to a question or answer, do not use this form but click on the button 'reply to this question';
Your question will be posted here and emailed to our subscribers. Therefore, avoid filling in personal details.
Register
Register getting emails for Tomado TMA1201W at:
new questions and answers
new manuals
You will receive an email to register for one or both of the options.
Get your user manual by e-mail
Enter your email address to receive the manual of Tomado TMA1201W in the language / languages: English, German, Dutch, Danish, French, Italian, Polish, Spanish as an attachment in your email.
The manual is 19,04 mb in size.
You will receive the manual in your email within minutes. If you have not received an email, then probably have entered the wrong email address or your mailbox is too full. In addition, it may be that your ISP may have a maximum size for emails to receive.
The manual is sent by email. Check your email
If you have not received an email with the manual within fifteen minutes, it may be that you have a entered a wrong email address or that your ISP has set a maximum size to receive email that is smaller than the size of the manual.
The email address you have provided is not correct.
Please check the email address and correct it.
Your question is posted on this page
Would you like to receive an email when new answers and questions are posted? Please enter your email address.