SLIM-TOUCH – Wireless weather station
╞
SLIM-TOUCH – Wireless weather station
╞
18 19
8.1.1 Setting of the time zone
•
In the setting mode you can make the time zone correction
•
The time zone correction is needed for countries where the DCF signal can
be received but the time zone (+2/-2) is different from the German time
(e.g. +1=one hour later).
•
Press the ▼ or ▲ button.
•
Confirm the setting with the MODE button.
8.1.2 Day-of-the-week
• In the setting mode you can choose the language for the day-of-week.
• English (E), German (G), French (F), Spanish (S) and Italian (I).
8.1.3 Setting of the temperature display
• In the setting mode you can change between °C (Celsius) or °F (Fahrenheit)
as temperature unit.
• Press the ▼ or ▲ button.
• Confirm the setting with the MODE button.
8.1.4 Activate and deactivate the DCF reception
•
In the setting mode you can activate (ON) or deactivate (OFF) the DCF
reception.
•
Press the ▼ or ▲ button.
•
Confirm the setting with the MODE button.
8.2 Setting of the two alarm times
Touch the SNOOZE button and the control buttons appear on the display.
• Press three times the MODE button in normal mode, to enter the alarm
mode.
• A1 and 0:00 (default) or the last adjusted first alarm time appear on the dis-
play.
• Press and hold the MODE button.
• The hour digits will be flashing.
• Press the ▼ or ▲ button to adjust the hours.
• The alarm symbol appears on the display.
• Confirm the setting with the MODE button and set the minutes in the same
way.
• The minute digit will be flashing. Press the ▼ or ▲ button to adjust the
minutes.
• Confirm the setting with the button MODE.
• Press the MODE button again to adjust eventually the second alarm time in
the same way.
• Press the MODE button again to return to the current time.
• The current time and the activated alarm symbols 1 and/or 2 appear on the
display.
8.2.1 Activate and deactivate the alarm times
Touch the SNOOZE button and the control buttons appear on the display.
• To activate or deactivate the respective alarm function press three times the
MODE button in normal mode.
• A1 and the last adjusted first alarm time appear on the display.
• Press the ▼ or ▲ button to activate or deactivate the alarm function.
• The alarm symbol appears or disappears on the display.
• Press the MODE button again.
• A2 and the last adjusted second alarm time appear on the display.
• Press the ▼ or ▲ button to activate or deactivate the alarm function.
• The alarm symbol appears or disappears on the display.
• When the adjusted alarm time is reached, the alarm will ring.
• The corresponding alarm symbol will be flashing and all control buttons are
appearing on the display.
• Press any button and the alarm will stop.
• If the alarm is not stopped manually, the increasing alarm will automatically
turn off after certain minutes and will be reactivated at the same time.
• The alarm symbol stays in the display.
• When the alarm rings, press the SNOOZE button and the snooze function
will be activated.
• Once the snooze function is activated, the alarm symbol will be flashing on
the display.
• The alarm will be interrupted for 5 minutes.
8.3 Display
Touch the SNOOZE button and the control buttons appear on the display.
• Press the MODE button in normal mode and you can call up:
→ The day of the week
→ The calendar
→ The first alarm time
→ The second alarm time
• Press the MODE button again to return to normal mode.
8.4 Backlight
• Press the SNOOZE button to activate the backlight for 5 seconds.
8.5 Weather forecast symbols
• The weather station distinguishes between five different weather symbols
(sunny, slightly cloudy, cloudy, rainy, strong rain).
• The trend pointer on the display will show if the atmospheric pressure is
increasing, steady or decreasing.
9. Temperature and humidity
9.1 Maximum and minimum values
Touch the SNOOZE button and the control buttons appear on the display.
• Press the MEM button.
• appears on the display.
• The highest temperature and humidity for indoor and outdoor are dis-
played since the last reset.
• Press the MEM button again.
• appears on the display.
• The lowest temperature and humidity for indoor and outdoor are displayed
since the last reset.
• To return to the present values display, press the MEM button once more.
• The instrument will automatically quit the MAX/MIN mode if the MEM but-
ton is not pressed.
• Press and hold the MEM button, when the maximum or minimum values are
displayed to set the corresponding values to the current values.
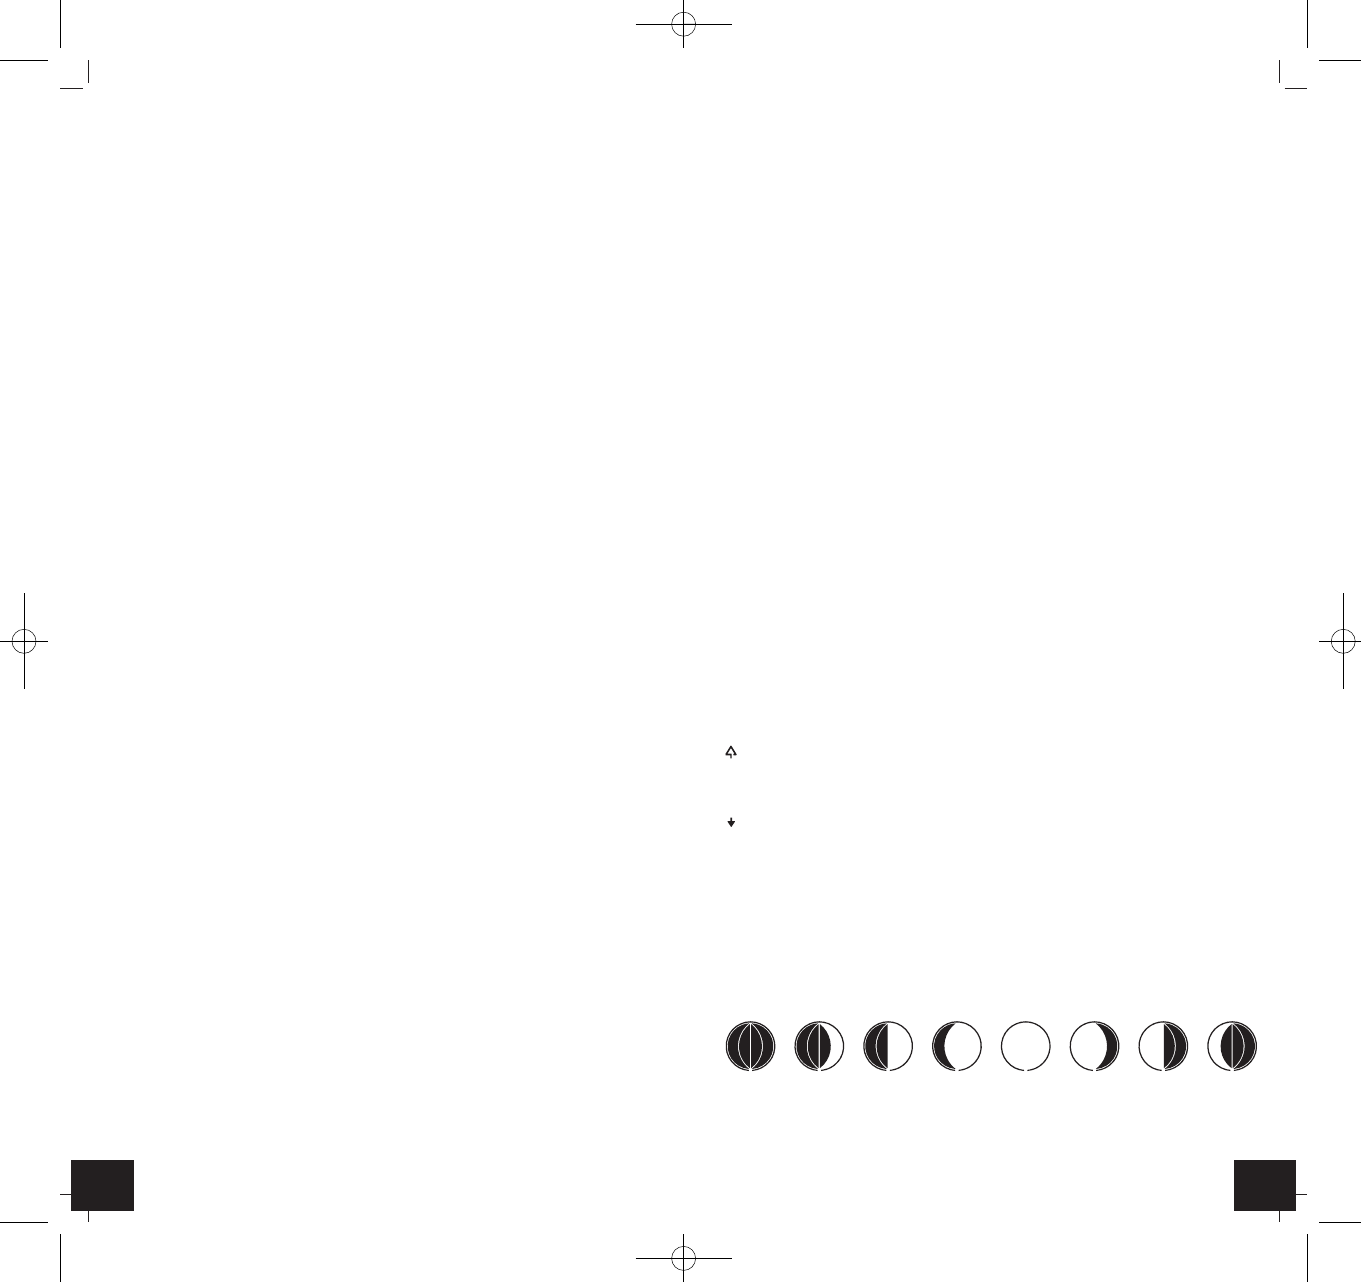
10. Moon phase
• The moon phase of each day is shown on the display.
A:New Moon B: Waxing Crescent
C: First Quarter D: Waxing Gibbous
ABCDEFGH
TFA_No. 35.1128_Anleit_04_14 07.04.2014 10:20 Uhr Seite 10