577031
23
Zoom out
Zoom in
Previous page
1/43
Next page
48
WIRELESS 433 MHz TEMPERATURE STATION
Instruction Manual
Cat. No. 30.3015
Thank you for choosing this wireless temperature station from TFA.
BEFORE YOU USE IT
Please be sure to read the instruction manual carefully.
This information will help you to familiarise yourself with your new device, learn all of its functions and
parts, find out important details about its first use and how to operate it, and get advice in the event of
faults.
Following the instruction manual for use will prevent damage to the device and loss of your statutory rights
arising from defects due to incorrect use.
We shall not be liable for any damage occurring as a result of not following these instructions.
Likewise, we take no responsibility for any incorrect readings and for any consequences which
may result from them.
Please take particular note of the safety advice!
Please look after this manual for future reference.
SCOPE OF SUPPLY:
Temperature station (basic unit)
Instruction manual
FIELD OF OPERATION AND ALL OF THE BENEFITS OF YOUR NEW TEMPERATURE
STATION AT A GLANCE
DCF radio controlled time with manual setting option
56
FUNCTION KEYS:
Temperature Station:
There are 5 function keys in the Temperature Station:
OK key (
)
In normal display mode, press and hold for 3 seconds to enter the manual setting mode for the
following:
a. LCD contrast level
b. Time zone
c. Daylight saving time (On/ Off)
d. Radio-controlled time reception (On/ Off)
e. 12/ 24 hour Display
f. Time setting (Hour and Minute)
g. Calendar setting (Year, Month and Day)
h. Temperature unit (°C/ °F) setting
Mode
key
Alarm
key
Plus key
Minus key
70
Up to 5 outdoor transmitters can be received by the temperature station. User may decide the number of
transmitter data to be save to the permanent memory of the temperature station. For instant, user may
apply 5 transmitters but set to save the data only from particular 3 transmitters. To set the number of
transmitters whose data are to be saved in the system memory:
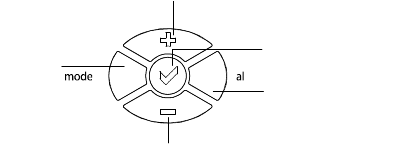
1. Press and hold the OK key until the digits “Lcd” starts flashing.
2. Press and release the OK key thirteen times to enter transmitter number setting. The digit “Enr” will
be flashing.
3. Use the Plus and Minus key to select the number of transmitter to be used with the temperature
station (up to 5 transmitters)
4. Press the OK key one more time to confirm and go back to the normal display mode.
Note:
If user has set “Enr = 2” and five transmitters are on, the data only from channel No. 1 and 2 will be
saved in the system memory. Similarly, if user set “Enr = 4”, data from channels No. 1 to 4 will be
saved.
On the other hand, if user has initially applied 5 transmitters but then remove the Channel 3, the
temperature station will thereafter display “--.-“ for Channel 3. And if the user has chosen “Enr = 3,
then data from Channel 1 to 3 will be stored in the memory, instead of Channel 1, 2 and 4. The data
stored in the memory for channel 3 will be “--.-“.
After the “Enr” number has been changed, the history data will be cleared and “mem” will be rest to
“000”.
TO EXIT THE MANUAL SETTING MODE
Press the Mode key or Alarm key to exit the manual setting mode anytime during the manual setting. The
mode will return to the normal time display.
75
d. The dew point temperature
In normal display mode, press the Mode key four times. The dew point temperature will be displayed next
to the flashing “td” icon.
Dew point temperature icon
76
e. The history data sets of temperature and humidity
In normal display mode, press the Mode key five times. The “hist” icon will be flashing and the last
recorded temperature and humidity reading with the time of record will be displayed.
By pressing the Minus key, the previous sets of readings which were measured at the user-selected
recording intervals may be viewed.
If the channel is not set to be saved in the system memory, no history values will be displayed and “--.-“ will
be shown on LCD.
CALIBRATION OF TEMPERATURE AND HUMIDITY READING
The temperature station allows user to calibrate the displayed temperature and humidity readings by a
better reference. User may enter the correction of temperature reading and humidity reading in the range
of ±2°C and ±10% respectively.
History data icon flashing
23


Need help? Post your question in this forum.

Forumrules


Report abuse

Libble takes abuse of its services very seriously. We're committed to dealing with such abuse according to the laws in your country of residence. When you submit a report, we'll investigate it and take the appropriate action. We'll get back to you only if we require additional details or have more information to share.

Product:

For example, Anti-Semitic content, racist content, or material that could result in a violent physical act.

For example, a credit card number, a personal identification number, or an unlisted home address. Note that email addresses and full names are not considered private information.

Forumrules

To achieve meaningful questions, we apply the following rules:

Register

Register getting emails for TFA 30.3015 Klima Logger at:


You will receive an email to register for one or both of the options.


Get your user manual by e-mail

Enter your email address to receive the manual of TFA 30.3015 Klima Logger in the language / languages: English as an attachment in your email.

The manual is 0,55 mb in size.


You will receive the manual in your email within minutes. If you have not received an email, then probably have entered the wrong email address or your mailbox is too full. In addition, it may be that your ISP may have a maximum size for emails to receive.

Others manual(s) of TFA 30.3015 Klima Logger

TFA 30.3015 Klima Logger User Manual - German - 47 pages

TFA 30.3015 Klima Logger User Manual - Dutch - 45 pages


The manual is sent by email. Check your email

If you have not received an email with the manual within fifteen minutes, it may be that you have a entered a wrong email address or that your ISP has set a maximum size to receive email that is smaller than the size of the manual.

The email address you have provided is not correct.

Please check the email address and correct it.

Your question is posted on this page

Would you like to receive an email when new answers and questions are posted? Please enter your email address.


Info