Power and Plug ..................................................................................................................................................................................................
Power Cord and Signal Cable ............................................................................................................................................................................
Use Environment ................................................................................................................................................................................................
Hanging the TV Set on the Wall ..........................................................................................................................................................................
Side Panel Buttons ...............................................................................................................................................................................................
Remote Control Functions ...................................................................................................................................................................................
Important Information
Switching on .........................................................................................................................................................................................................
Switching off .........................................................................................................................................................................................................
Using Menu System .............................................................................................................................................................................................
Digital Test Reception .........................................................................................................................................................................................
Rearrange TV Channels .......................................................................................................................................................................................
Adjusting the Picture ............................................................................................................................................................................................
Adjusting the Sound .............................................................................................................................................................................................
Special Functions .................................................................................................................................................................................................
TV Channel Instillation .......................................................................................................................................................................................
Base Installation ....................................................................................................................................................................................................
Introduction
3
Chapter 1
Precautions
Product
Read all of the instructions before operating the set. Keep these
instructions well for future use.
Do not block or cover the ventilation openings on the back cover.
Do not push objects of any kind into this unit through the cabinet
slots as they could touch the current carrying parts or short-circuit
parts, resulting in fire, electric shock, or damage to the unit.
as this may cause damage
Do not touch the screen surface with fingers as this may scratch
or mar the LCD screen.
Do not impact the LCD screen with hard pressure as this may
damage the LCD screen severely.
The appliance is not intended for use by young children or infirm
persons without supervision. Young children should be supervised
to ensure that they do not play with the appliance.
Do not attempt to open the cabinet .
There are no parts inside you can service by yourself. Refer all
servicing to qualified personnel.
Cleaning
Dust the set by wiping the screen and the cabinet with a soft, clean
cloth or some special liquid cleaner.
Do not apply excessive force to the screen when cleaning.
Do not use water or other chemical cleaners to clean the screen as
this may damage the surface of the LCD screen.
Unplug the set under the following conditions:
- If the set will not be used for a long period of time.
- If the power cord or the power outlet/plug is damaged.
- Follow the instructions to install and adjust the product. Adjust
those controls that are covered in these operating instructions
as improper adjustment of other controls may result in damage. If
this happens, unplug the set and refer to the service personnel.
- If the set is subject to impact or has been dropped to have the
cabinet damaged.
Power and Plug
Do not allow anything to rest on or roll over the power cord and
the signal cable.
Protect the power cord and the signal cable from being trampled.
Do not overload the power cord or the power outlet.
Do not expose the power cord and the signal cable to moisture.
Power Cord and Signal Cable
Do not place the set on an unstable cart, stand, or table.
Place the set on a place that allows good ventilation.
Do not use the set near damp, and cold areas. Protect the set
from overheating.
Keep the set away from direct sunlight.
The Set shall not be exposed to dripping or splashing and no
objects filled with liquids, such as vases, shall be placed on the
set.
Do not use the set in dusty environments.
Use Environment
Hanging the TV Set on the Wall
Warning: This operation requires two people.
To ensure a safe installation, observe the following safety notes:
Check that the wall can support the weight of the TV set and wall
mount assembly.
Follow the mounting instructions provided with the wall mount.
The TV set must be installed on a vertical wall.
Make sure to use only screws suitable for the material of the wall.
Make sure that the TV set cables are placed so that there is not
danger of tripping over them.
All other safety instructions about our TV sets are also applicable
here.
Important Information
Using cabinets or stands recommended by the manufacturer of the
television.
Only using furniture that can safely support the television.
Ensuring the television is not overhanging the edge of the
supporting furniture.
Not placing the television on tall furniture (for example, cupboards
or bookcases) without anchoring both the furniture and the
television to a suitable support.
Not standing the televisions on cloth or other materials placed
between the television and supporting furniture.
Educating children about the dangers of climbing on furniture to
reach the television or its controls.
If a television is not positioned in a sufficiently stable location, it can
be potentially hazardous due to falling. Many injuries, particularly to
children, can be avoided by taking simple precautions such as:
Graphics contained within this publication are presentation only.
Note:
Introduction
4
Side Panel Buttons
1
2
3
4
5
MENU
PRO.
VOL.
VOL.
PRO.
POWER
1. POWER button
Turns the TV on or to standby mode.
2. MENU button
Brings up the menu system.
3
. PROGRAM UP/DOWN button
Scans up/down through the channel list. In the menu system, and adjust menu
controls.
. STANDBY INDICATOR
When the TV is in standby mode, this standby indicator lights up; when the TV is turned on, the indicator turns off.
. VOLUME UP/DOWN button
Increases/decreases the volume. In the menu system, they act like the right/left direction buttons on the remote and adjust menu controls.
4
act like the up/down direction buttons on the remote
5
they
1
2
3
4
Fig1: for models L26E9AD,
L32E9AD, L42E9ADF,
L42E9ADZ, L46E9ADF and
L46E9ADZ.
Fig2: for models L42E77DF
and L32E77D
Headphone socket (output) at the side
This socket can be used to connect headphones or stereo earphones.
AV2 RCA audio + video sockets (input) at the side
These sockets can be used to connect a range of equipment, including video
recorders, camcorders, decoders, satellite receivers, DVD players, or games
consoles. The VIDEO IN2 socket p
rovides composite video connection.
USB socket (input) at the side
This socketused for software upgrading only. is
Sockets
VIDEO
AV2 IN
R
L
AUDIO
Note: The location of
the s at the side
of the television might
differ depending on
the model.
ockets
Introduction
5
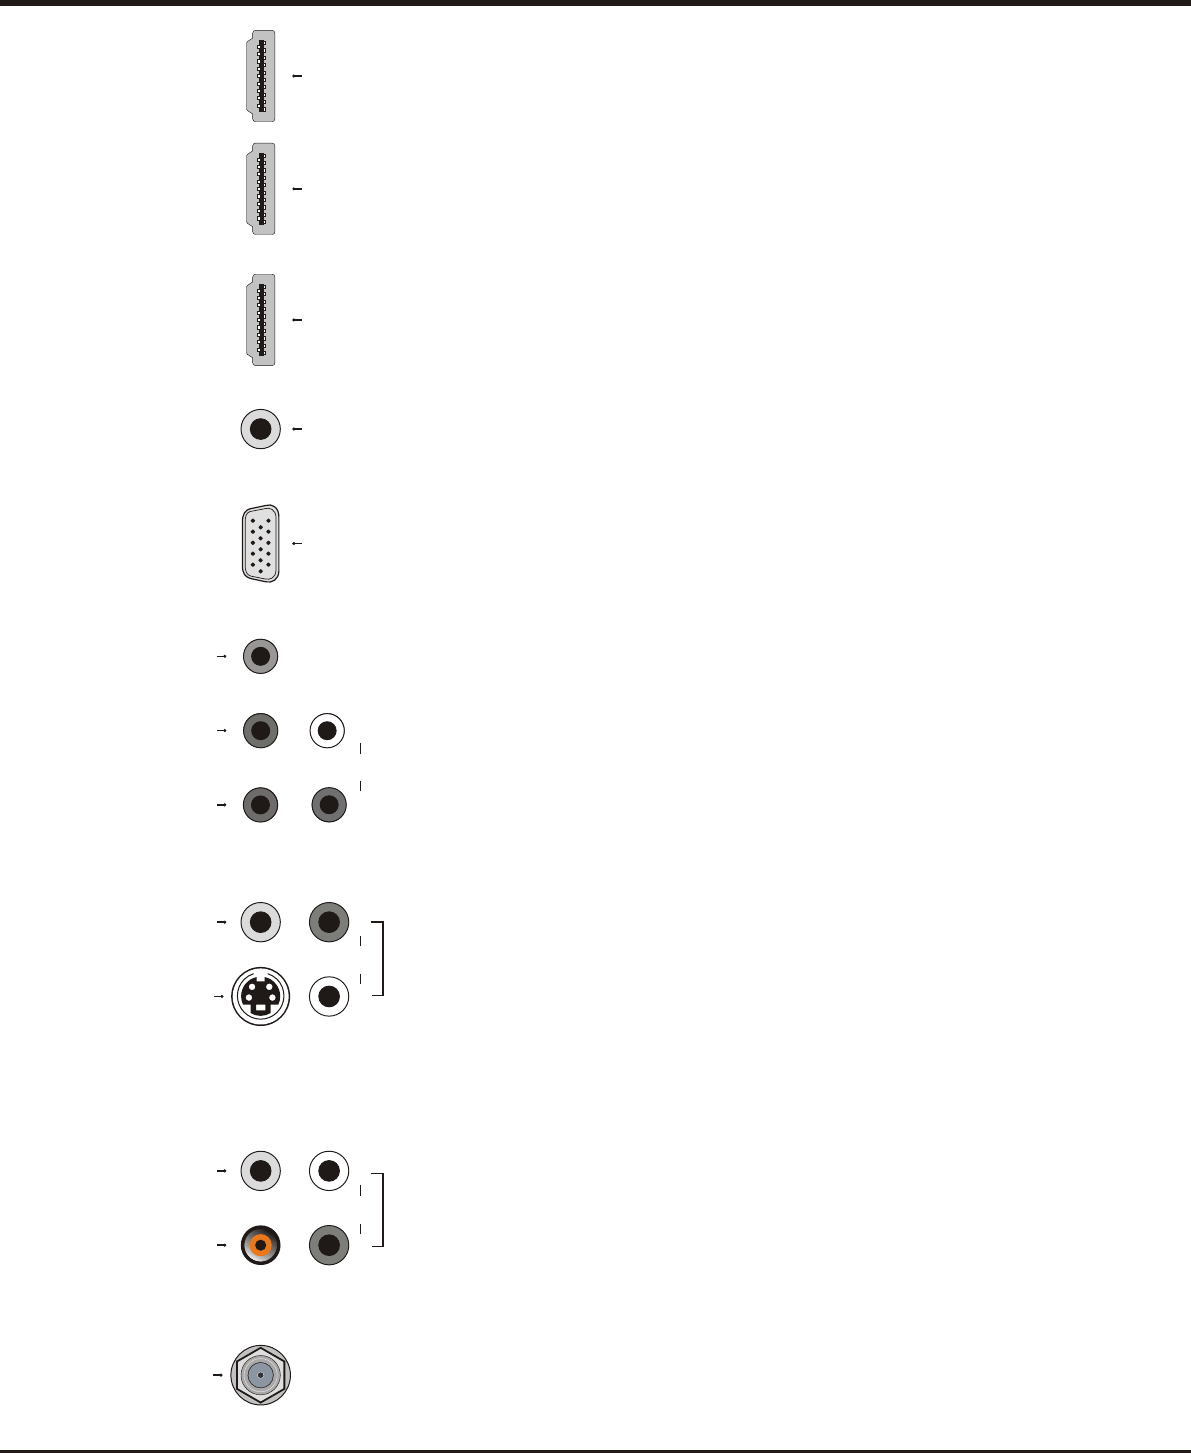
HDMI1/HDMI2/HDMI3 sockets (input) at the back
The HDMI
p
(High-Definition Multimedia Interface) socket lets you connect a device,
such as a digital cable box, with an HDMI output for best picture quality. It also
rovides an uncompressed digital connection that carries both video and audio data
by way of an integrated mini-plug cable.
VGA socket (input) at the back
This socket can be used to connect a computer, or other device with a VGA output.
AUDIO/VIDEO OUT sockets (output) at the back
a VCR to record programs. You must leave
the TV on the same channel you are recording.
composite video connection. (Note: these sockets are only used for AV or S-VIDEO
ouput, but the S-Video output has no color).
These sockets can be used to connect
The VIDEO OUT socket p
rovides
YPBPR component sockets (input) at the back
These can be used to connect a device that has component video sockets, such as
a DVD player. The component sockets can recognize if the device you're connecting
to is Y Pb Pr compatible or Y Cb Cr compatible. The component sockets provide
excellent picture quality because the video is separated into three separate parts.
YPBPR component audio sockets (input) at the back
The two sockets can be used to obtain sound when using the YPBPR component
sockets
.
AV1 RCA audio + video sockets (input) at the back
These sockets can be used to connect a range of equipment, including video
recorders, camcorders, decoders, satellite receivers, DVD players, or games
consoles. The VIDEO IN1 socket p
rovides composite video connection.
S-VIDEO socket (input) at the back
The S-Video socket provides better picture quality than the regular video socket
because the color (chrominance, also called chroma) part of the signal is separated
from the black and white (luminance) part of the picture. Remember to connect the
left and right audio cables to the AUDIO IN1 L and R sockets because the S-Video
cable carries only the picture signal, not the sound.
VGA/DVI AUDIO socket (input) at the back
This socket provides audio connection when using the HDMI jack for DVI, or use to
obtain sound when a PC is connected to the VGA INPUT.
SPDIF OUT socket (output) at the back
Use a digital coaxial cable to connect your TV to a digital amplifier. It always keeps
output and keeps the same as the audio frequency of the current source.
ANTENNA IN socket (input) at the back
This socket can be used to connect to an external antenna.
HDMI 1
HDMI 2
VGA
INPUT
VIDEO
HDMI 3
VGA/DVI
AUDIO
INPUT
SPDIF
ANTENNA IN
R
L
Y
Pb/
Cb
Pr/
Cr
AUDIO
L
VIDEO
S-VIDEO
R
AUDIO
R
L
AUDIO
AV1 INPUTOUTPUT
Note: The location of the s at the back of the television might differ depending
on the model.
ockets
6
Introduction
Remote Control Functions
Most of your television's functions are available via the menus that appear on the
screen. The remote control supplied with your set can be used to navigate through
the menus and to configure all the general settings.
Mute
(On/Off button) Turns the TV on or off.
Switches sound off and back again.
SourceBrings up the signal source selection menu.
Picture
Toggles through the picture preset settings: Standard,Dynamic,
Power saving, Personal and Bright.
SoundToggles through the sound modes: Standard, Movie, Music,
Personal and News.
0-9(numeric buttons) Enters channel numbers.
Aspect
Selects the picture size: 16:9 Format and 4:3 format. (Note: You are
recommended to use the full screen mode. Do not use the display
mode with black bars on both sides of the picture (such as 4:3) for
long time, otherwise the LCD screen may be damaged permanently.)
PR +/-
Increases or decreases the TV's volume.
MenuBrings up the main menu or press to return to the previous menu.
ExitExits the menu system.
(up, down, left and right direction buttons) Highlights different items
in the menu system and adjusts the menu controls.
OK
Displays the channel list of your favorite programs. When in the menu
system, confirms your selection or changes settings.
INFO
Displays the status information of the current program.
Scans up or down through the current channel list.
(Vol) +/-
FAV.
Activates the Favorites Program List menu.
Guide
Toggles the Electronic Programme Guide between on and off. Only
available for digital channels.
Return
Returns you to the previous channel.
Subtitle
Toggles between On (to display the subtitle), On during mute and
Off mode.
View
Toggles between Full View and Part View.
Text
(Purple button) Toggles teletext between on and off.
Colored buttons
(Red/green/yellow/blue) To select tasks and teletext pages.
CEC function buttons: following buttons only used to control the
HDMI CEC
compliant DVD player connected to the TV:
CECToggles between On and Off to enable or disable HDMI CEC function.
DeviceDisplays the DVD menu or disc menu if disc loaded.
Power Turns the DVD on or to standby mode.
EjectOpens or closes the disk tray.
Skips to previous title/chapter/track.
Skips to next title/chapter/track.
Starts fast reverse.
Starts fast forward.
Stops playback.
Starts playback.
Pauses playback.
Note: Various brands of DVD s CEC functions may differ, and because of this, some
functions operation cannot be guaranteed.
7
Switching on
Follow the instructions on this page on how to switch on your TV set and the remote
control before going on to following pages describing how to use the channel set-up
procedure.
1. Insert two AAA batteries in the remote control.
Precautions on using batteries:
- Only use the battery types specified.
- Make sure you use the correct polarity.
- Do not mix new and used batteries.
- Do not use rechargeable batteries.
- Do not expose batteries to excessive heat, throw them in a fire, recharge them
or try to open them, as this could cause them to leak or explode.
- Remove the batteries from the remote control if you are not using it for a long
period of time.
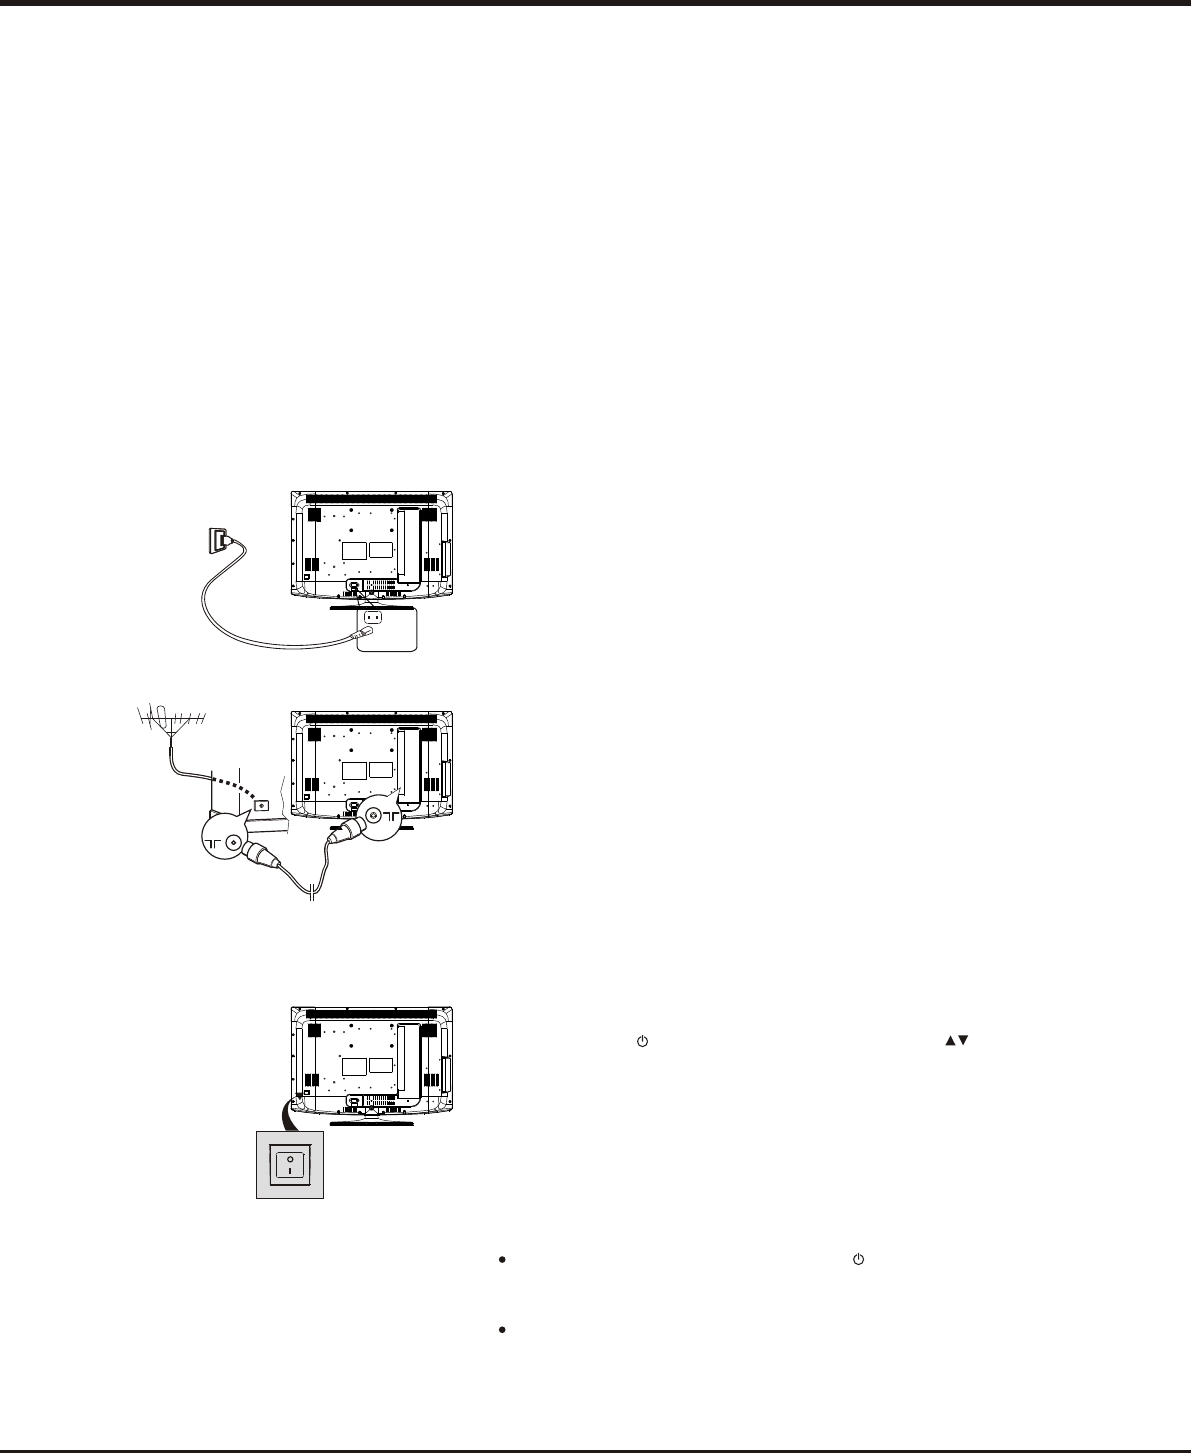
3. Connect the outside aerial or cable network to the ANTENNA IN socket at the
back of the TV set.
The aerial socket (75 OHM - VHF / UHF / cable) can be used for connecting
an external aerial or other equipment fitted.
4. Switch the TV on by pressing the AC power button located at the back.
If the power indicator light up (buttons on the side of the TV), the TV set is in standby
mode. Press the button on the remote control or the PRO. , POWER buttons
at the side of the TV set to turn on the TV.
2. Connect the power cable FIRST to the television, THEN to a mains socket.
Your TV set should only be connected to an AC supply. It must not be connected
to a DC supply. If the plug is detached from the cable, do not, under any
circumstances, connect it to a mains socket, as there is a risk of electric shock.
Note: The figures are for representation only. The location of the power socket at
the back of the television might differ depending on the model.
Chapter 2
General Operation
Switching off
POWER
POWER button at the side of the TV set
press the power button at the back
To put the TV set into standby mode, press the button on the remote control or
press the . The TV set remains powered up,
but with low energy consumption.
To switch off the TV set, .
POWER
POWER
8
TV menu
Sound
Features
Install
The picture menu contains the settings that affect the quality of the picture.
Picture
Channel installation
Preferences
Source labels
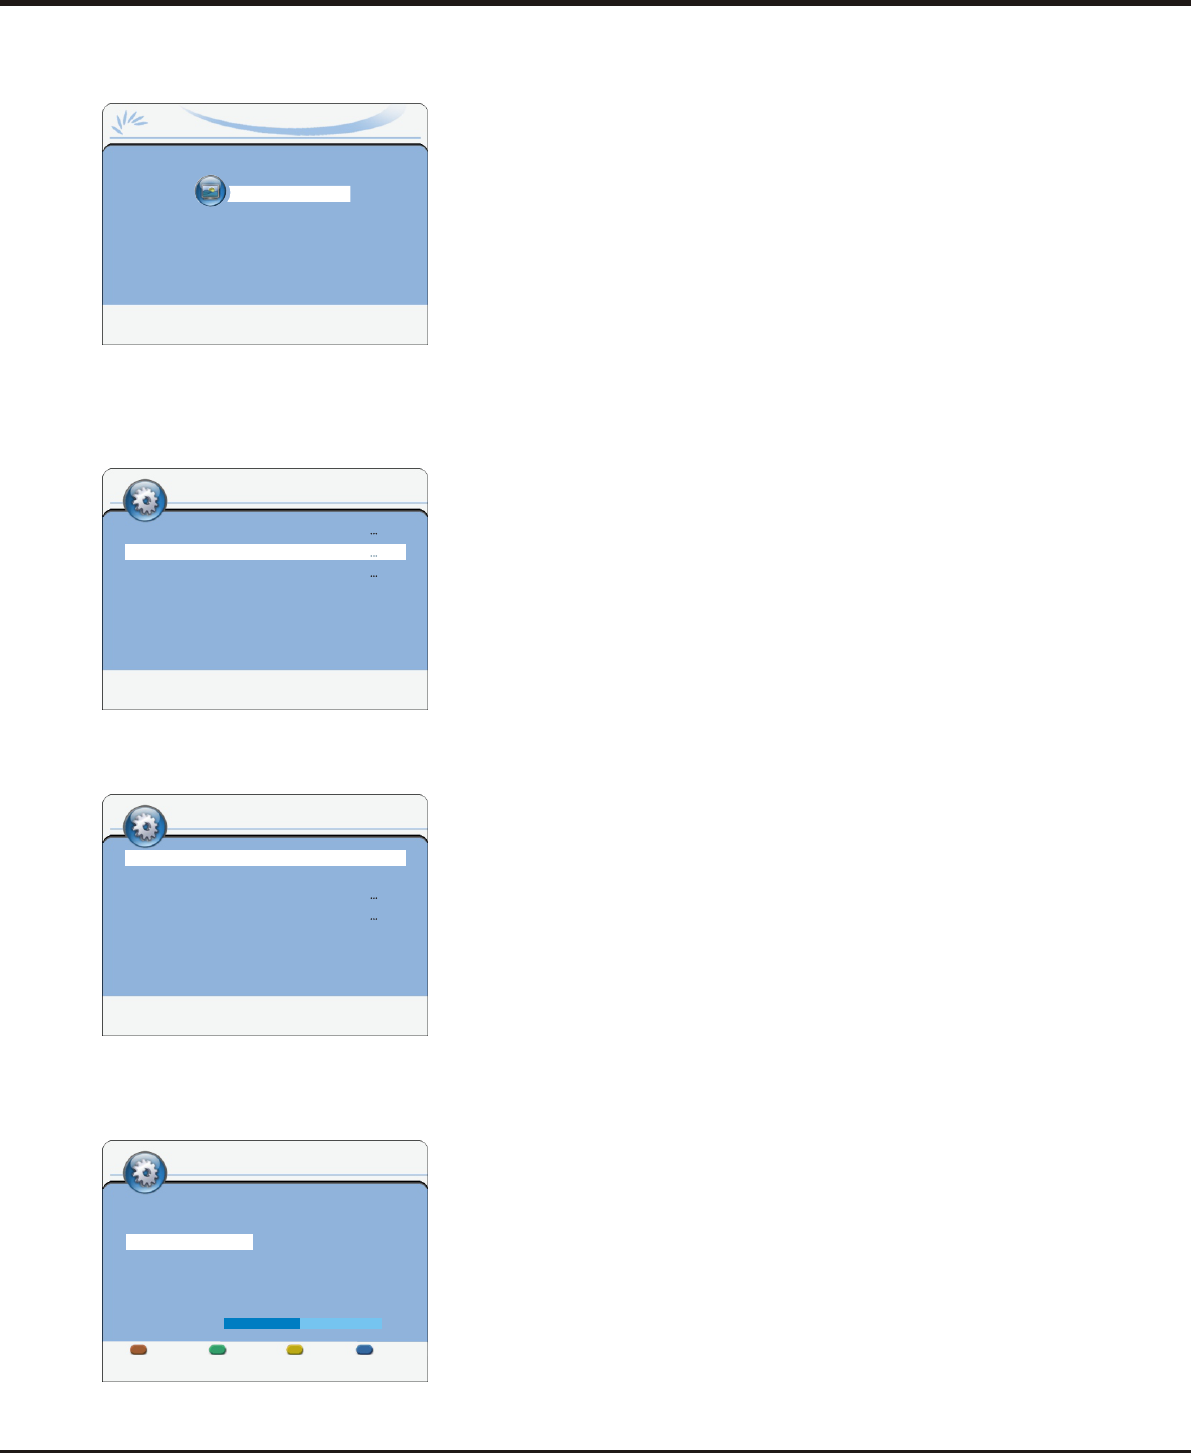
Here you can install your channels.
TV menu \ Install
Factory resetStart
Automatic Channel Set-up
This option allows the TV to search for, find and store all the available analog and
digital channels for the antenna or cable input selected. F
1.
2. Press the up or down direction button to select Install, and press the OK button or
the right direction button to display its submenus.
3. Press the up or down direction button to highlight Channel installation, press the
OK button or the right direction button to display its options.
4. Highlight Automatic Search, then press the OK button to begin the channel search.
The search takes a while because it is looking for both digital and analog channels.
The search first looks for digital channels and places the number of channels found
next to Digital channels found, then looks for analog channels and places the
number of channels found next to Analogue channels found. If you want to stop the
search process, press the red button, the channels already found will not be stored.
(Note: Look for an A before the channel number to see if you are watching an analog
channel)
5. When the search is completed, press the red button to finish or press the Menu
button to return, or press the Exit button to close the menu.
This allows you to tune or update all available channels, without altering the sorting
of existing channels.
1. Display the submenus of Channel installation, press the up or down direction
button to highlight Automatic update.
2. Press the OK button to start to update the channels. To stop the update process,
press the red button.
3. When the search is completed, press the red button to finish or press the Menu
button to return, or press the Exit button to close the menu.
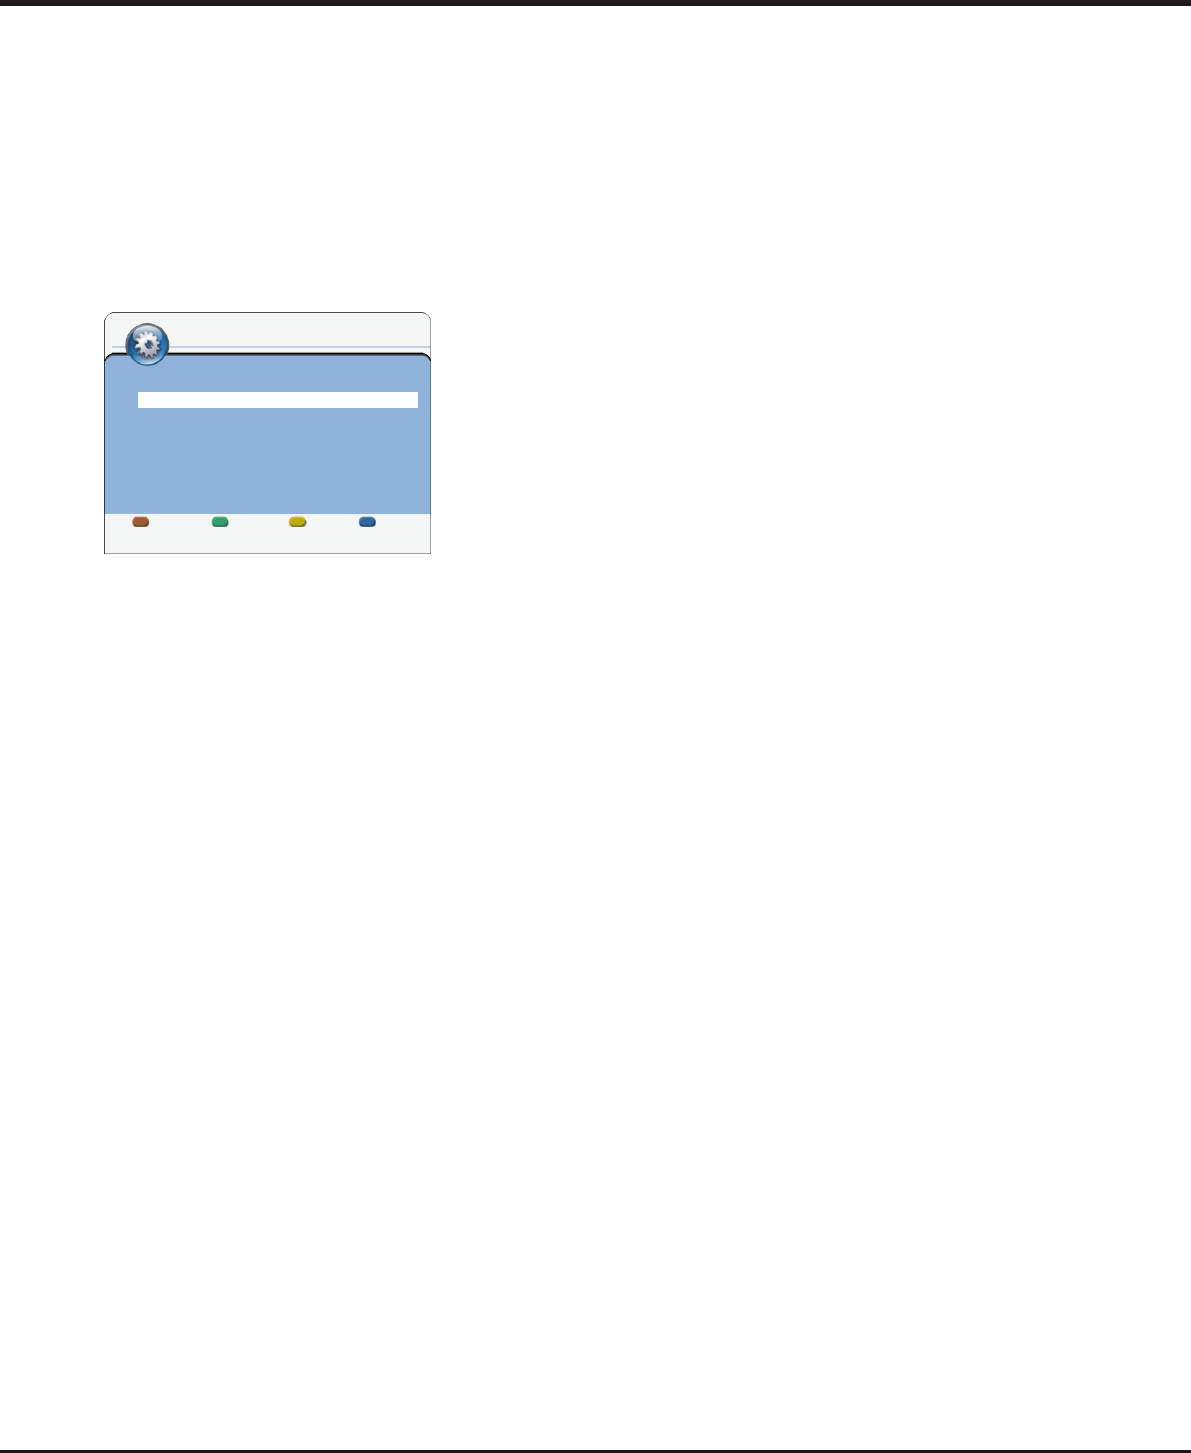
If using digital broadcasts, you can check the signal quality of digital channels.
This allows you to reposition the antenna for the best reception.
Display the submenus of Channel installation, press the up or down direction button
to highlight Digital: Test reception, then press the OK button or the right direction
button to enter it.
1. Press the green button to start the test automatically, or first use digit keys to
manually enter the frequency of the channel you want to test, then press the
green button to start the test from the current frequency.
ollow all the steps in turn
specified hereafter.
Press the Menu button to display the main menu.
Using Menu System
This section explores the menus of your TV. Each menu is outlined and detailed to
help you get the most from your TV. To access the menu system:
Press the Menu button to display the main menu(Picture, sound, Features and
Install).
1.
2. Use the up or down direction button to select different options within the menu. If
necessary, press the OK or right direction button to display the choices of the option
you have highlighted. Then use the up/down/left/right direction buttons or OK button
to adjust the menu controls. If available, use the text at the bottom of the each screen
for help.
3. Press the Exit button to exit the menu system directly, or press the Menu button
repeatedly until the menus disappear.
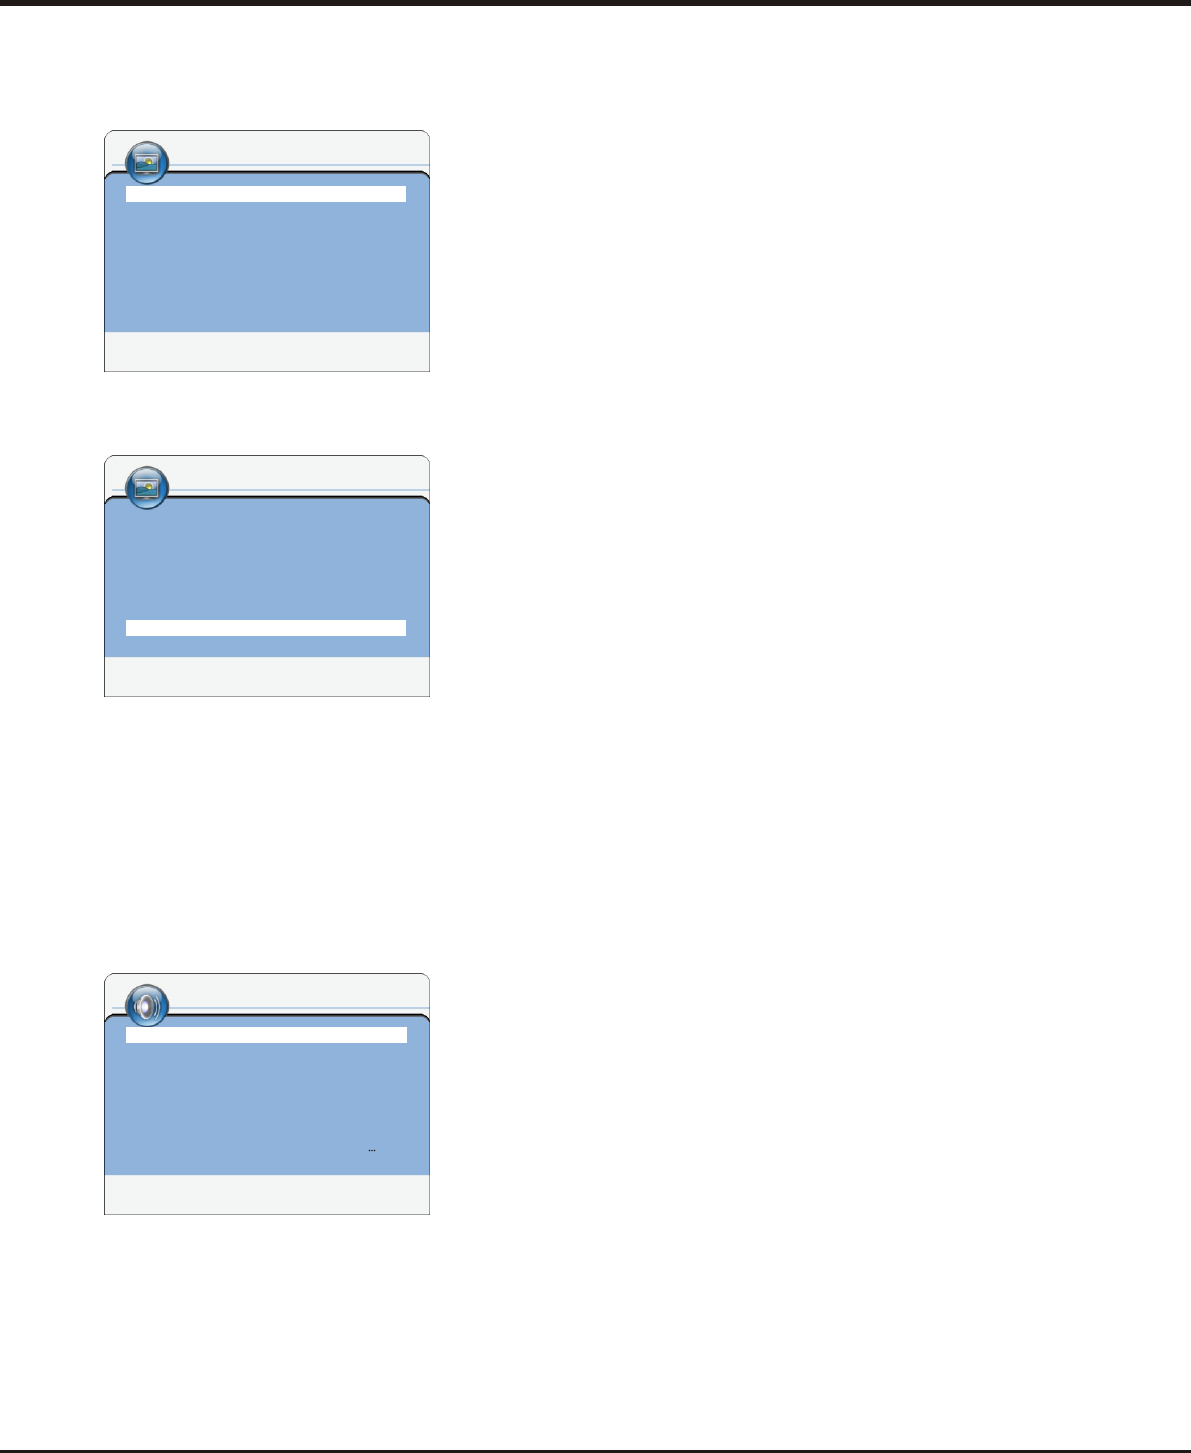
Digital: Test reception
TV menu \ Install \ Channel installation
Back
578.50 Mhz
StartStore
When the signal quality is poor, please check frequency, antenna
connection and position.
Network name: Network TEN
Signal Quality: Good
Signal strength:
Automatic Search
Automatic update
Digital: Test reception
Rearrange
The TV will search for, find and store all the available analog and digital
channels for the antenna or cable input selected.
TV menu \ Install \ Channel installation
Start
Start
Automatic Update
Digital Test Reception
General Operation
9
Rearrange TV Channels
This option allows you to rename, reshuffle, uninstall or reinstall the stored TV channels.
Display the submenus of Channel installation, press the up or down direction button
to highlight Rearrange, then press the OK button or the right direction button to enter it.
1. Press the yellow or blue button to move up or down to select a channel you want
to rearrange.
2. If you want to rename the selected channel, press the red button. Then use the left
or right button to select the input space, then enter new name with digit keys. Use
the colour buttons to edit the channel name following the text displayed at the screen.
3. To reinstall or uninstall the selected channel, press the green button. If the channel
is uninstalled and removed from your program list, TV will not display this channel
when you press Program up/down buttons to scroll through the channel list.
4. Press the Menu button to return or press the Exit button to close the menu.
Rearrange
TV menu \ Install \ Channel installation
This allows you to rename, to reshuffle and to install or reinstall the
stored channels. Press the corresponding colour keys.
2.If the signal quality is good, press the yellow button to store. If it is poor, please
check the frequency, antenna connection and position, and retest again.
3. When complete, press the red button to return to the previous menu.
4. Press the Menu button to return or press the Exit button to close the menu.
RenameUninstallMove upMove down
1 TBN Digital
2
3
4
5
6
7
General Operation
Tint
Brightness
This compensates for the color variations in NTSC transmissions
50
TV menu \ Picture
0
Color50
Sharpness9
ToneCool
Noise reductionOn
Back Light80
Picture format16:9 format
This allows you to reset your settings for viewing to predefined
factory settings
TV menu \ Picture
Picture Preset
Contrast
Brightness50
Standard
50
Color50
Sharpness9
ToneCool
Noise reductionOn
Back Light80
10
Advanced Functions
Chapter 3
The menus for adjusting the picture are used to obtain the best picture setting
according to your preference, the type of program you are watching and the ambient
lighting.
Display the menu by pressing the Menu button. Press the up or down direction button
to select PICTURE and press the OK button direction buttonto confirm.
The PICTURE options are as below:
Note: Some options may be not available for certain signal sources.
Picture Preset: usedirection through the picture preset
settings: Standard,Dynamic, Power saving, Personal and Bright.
Contrast: adjusts the difference between light and dark areas of the picture.
Brightness:
Color:
Back Light: this option can be used to adjust the brightness of the back light,
depending on room lighting. Use the left or right direction button to adjust.
Sharpness:
his function is not available in VGA mode.
Tone: adjusts the color temperature of the picture. Usedirection
.
Noise reduction:
Tint:
Picture format: usedirection elect the picture size:
16:9 format and 4:3 format. (Note: You are recommended to use the full screen
mode. Do not use the display mode with black bars on both sides of the picture (such
as 4:3) for long time, otherwise the LCD screen may be damaged permanently.)
P
or the right
ress the Menu button to return or press the Exit button to close the menu.
the left or right button to scroll
adjusts the brightness of the picture.
adjusts the richness of color.
adjusts the crispness of the edges in the picture.
Note: T
the left or right button
to scroll through the color settings: COOL for a more blue palette of picture colors;
NORMAL; and WARM for a more red palette of picture colors
Sets the level at which noise is measured and reduced in the
picture.
adjusts the balance between the red and green levels.
Note: Tint is only available for the NTSC system.
the left or right button to s
Adjusting the Sound
Display the menu by pressing the Menu button. Press the up or down direction button
to select SOUND and press the OK button direction buttonto confirm.
The SOUND options are as below:
Note: Some options may be not available for certain signal sources.
Sound Preset: usedirection through the sound preset
settings: Standard, Movie, Music, Personal and News.
Bass: Improve bass output
Treble: Improve treble output
Balance: Use the left and right arrow buttons to balance the sound between the left
and right speakers.
Incredible Surround: select On mode for more spatial or surround sound reproduction.
Auto Volume Leveling: turns on this option to keep the same sound level for all
channels.
Audio Language: select an audio language out of the list of the available broadcasted
languages for the current digital program. Press the OK button or the right direction
button to display the language list, then use the up or down direction button to select
your preferred language available in the list, press the OK button to confirm.
P
or the right
ress the Menu button to return or press the Exit button to close the menu.
the left or right button to scroll
This allows you to reset your settings to predefined factory settings.
Libble takes abuse of its services very seriously. We're committed to dealing with such abuse according to the laws in your country of residence. When you submit a report, we'll investigate it and take the appropriate action. We'll get back to you only if we require additional details or have more information to share.
Product:
Forumrules
To achieve meaningful questions, we apply the following rules:
First, read the manual;
Check if your question has been asked previously;
Try to ask your question as clearly as possible;
Did you already try to solve the problem? Please mention this;
Is your problem solved by a visitor then let him/her know in this forum;
To give a response to a question or answer, do not use this form but click on the button 'reply to this question';
Your question will be posted here and emailed to our subscribers. Therefore, avoid filling in personal details.
Register
Register getting emails for TCL L32E77D at:
new questions and answers
new manuals
You will receive an email to register for one or both of the options.
Get your user manual by e-mail
Enter your email address to receive the manual of TCL L32E77D in the language / languages: English as an attachment in your email.
The manual is 1,48 mb in size.
You will receive the manual in your email within minutes. If you have not received an email, then probably have entered the wrong email address or your mailbox is too full. In addition, it may be that your ISP may have a maximum size for emails to receive.
The manual is sent by email. Check your email
If you have not received an email with the manual within fifteen minutes, it may be that you have a entered a wrong email address or that your ISP has set a maximum size to receive email that is smaller than the size of the manual.
The email address you have provided is not correct.
Please check the email address and correct it.
Your question is posted on this page
Would you like to receive an email when new answers and questions are posted? Please enter your email address.