justment of the seat, you cannot adjust
the seat cushion angle or seat cushion
height.
2) Seat cushion angle control switch
To adjust the seat cushion angle, pull up
or push down the front end of the control
switch.
3) Seatback angle (reclining) control
switch
To adjust the angle of the seatback, tilt
the control switch forward or backward.
4) Seat height control switch
To adjust the seat height, pull up or push
down the rear end of the control switch.
5) Lumbar support control switch
To increase lumbar support, push the
front side of the switch. To decrease
lumbar support, push the rear side of the
switch.
WARNING
To prevent the passenger from slid-
ing under the seatbelt in the event of
a collision, always put the seatback
in the upright position while the
vehicle is in motion. Also, do not
place objects such as cushions
between the passenger and the
seatback. If you do so, the risk of
sliding under the lap belt and of the
lap belt sliding up over the abdomen
will increase, and both can result in
serious internal injury or death.
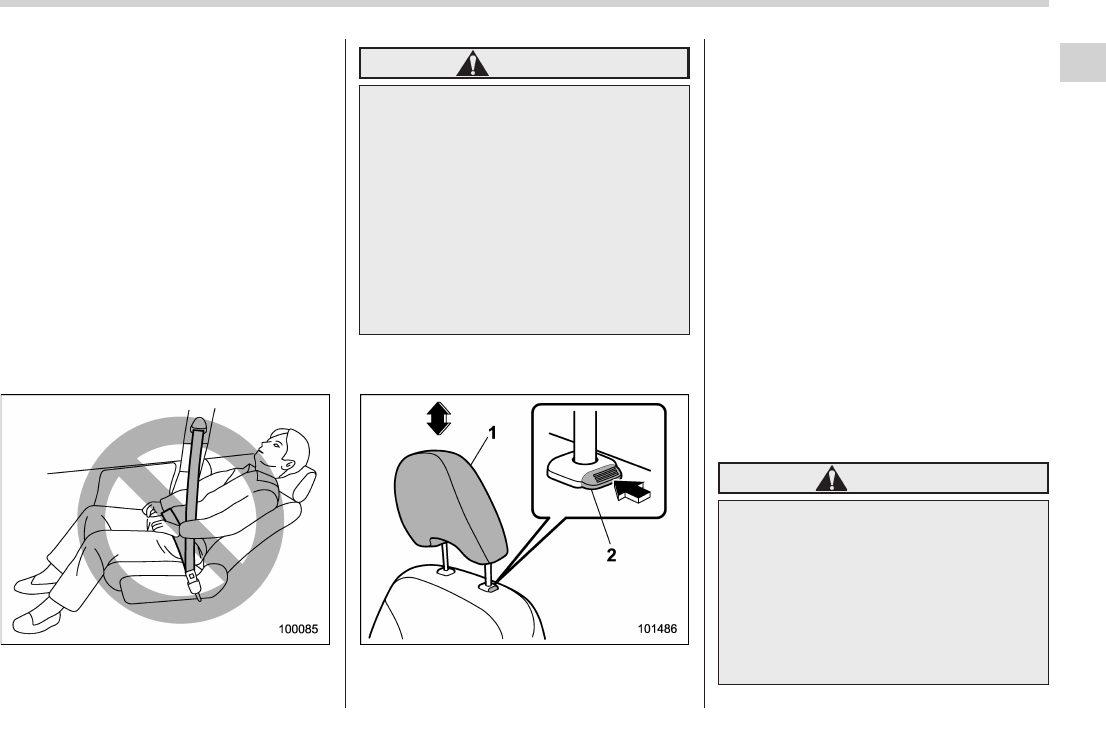
& Head restraint adjustment
1) Head restraint
2) Release button
Both the driver ’s seat a nd the front
passenger’s seat are equipped with head
restraints.
The head restraint should be adjusted so
that the center of the head restraint is
closest to the top of the occupant’s ears.
To raise:
Pull the head restraint up.
To lower:
Push the head restraint down while
pressing the release button on the top of
the seatback.
To remove:
While pressing the release button, pull out
the head restraint.
To install:
Install the head restraint into the holes that
are located on the top of the seatback until
the head restraint locks.
WARNING
. Never drive the vehicle with the
head restraints removed because
they are designed to reduce the
risk of serious neck injury in the
event that the vehicle is struck
from the rear. Therefore, when
you remove the head restraints,
you must reinstall all head re-
straints to protect vehicle occu-
Seat, seatbelt and SRS airbags 1-5
– CONTINUED –