S16-IME-6L
12-07
26
S16-IME-6L
12-07
27
A
proprement
-
pour
Si
appliqué
la
de
tolérance
chaque
Pour
"cadres et
- contrôler et
fumée
Si
- installer
extérieur
combusion
dans
tel
Stûv
souple
Pour
dans
coudes,
nécessaire dépasse
section plus
utiliser
les
inférieures.
- vérifier
pour
si
caisson
devra
pourvu
- vérifier
pour
[schéma
-
ventilateur
ligne
bipolaire,
- sceller
le
ventilateur
ventilateur
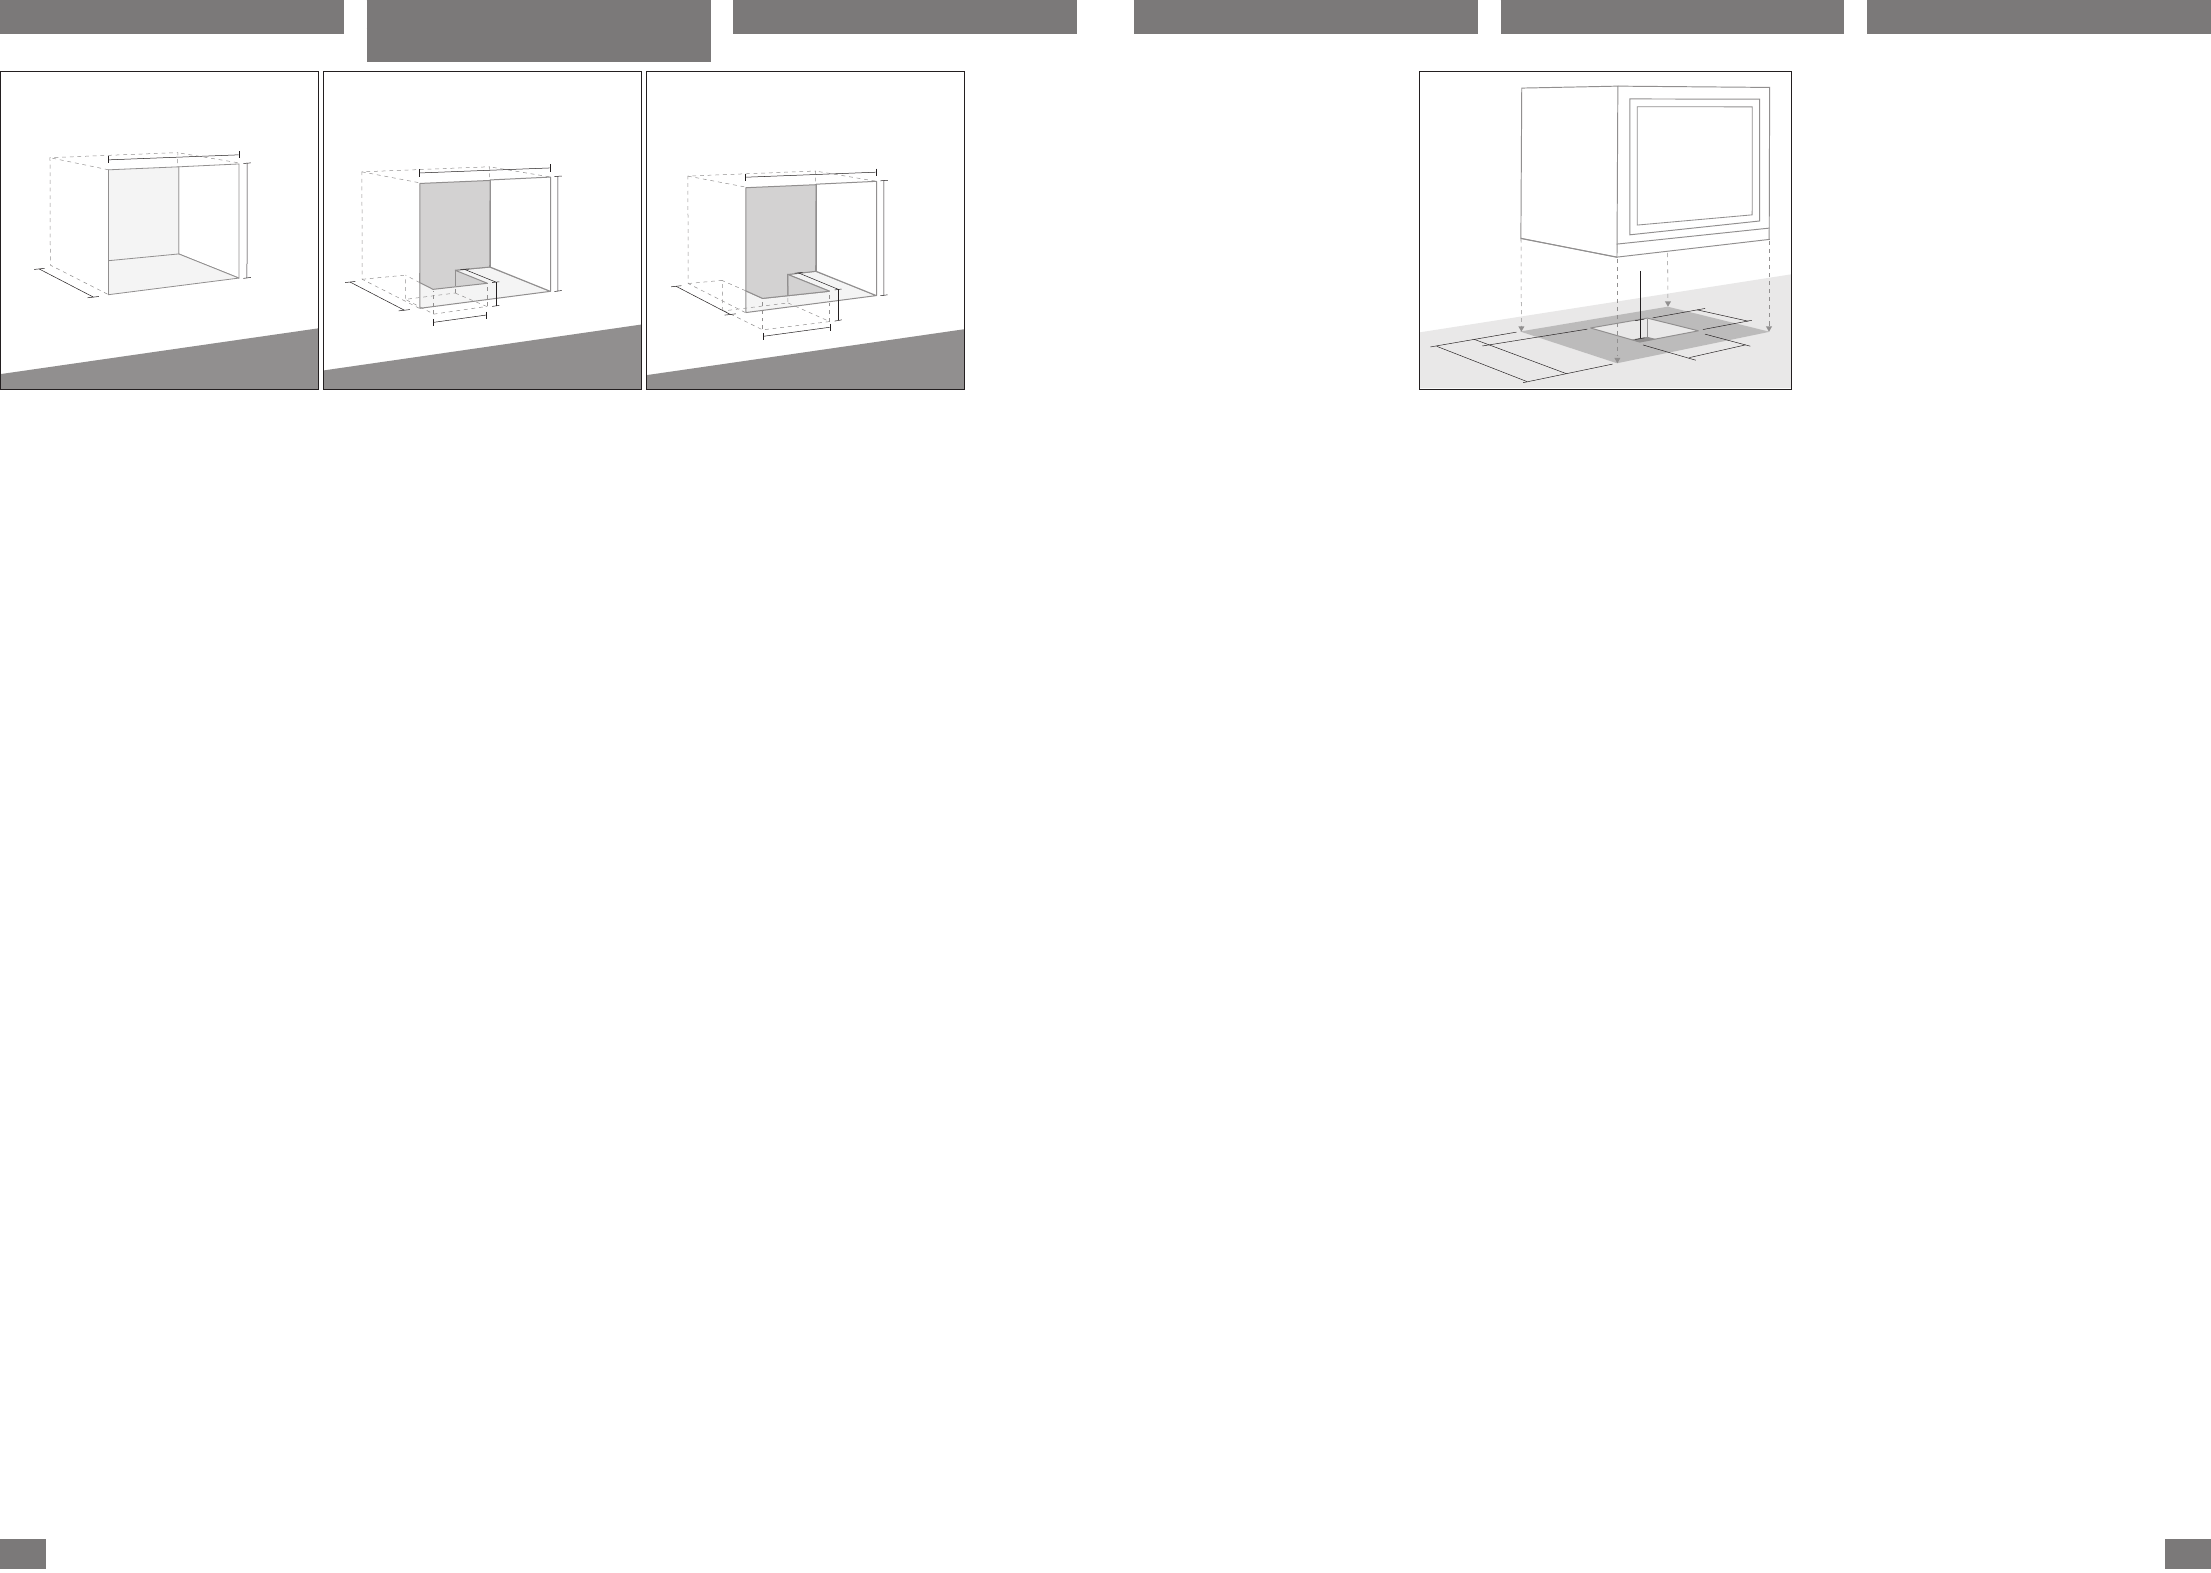
445
300
320
590/690
615
190
445
C
330
590/690
615
210
1 2 3
V
lijke
- vergewis u
te
Indien
gemonteerd kader
nen
uitvoering
mende
kant
haard worden
details,
bekledingen”.
- controleer en
voor
Indien
- installeer
tenlucht
verbrandingslucht
onttrokken of
goed
geventileerde ruimte,
te
Stûv
minium
verlies
het
platdrukken.
1
doorsnede.
buis
drukverlies
- zie
voor
indien
tiekast
hiervoor
van
- zie
voor
- ins
ven
verbinding
door
- verzegel
die
van
wordt met
Zie
Prima
propriamente
- verificare che
per
focolare è
applicato
dell’incavo),
momento
tolleranza
ciascun
Per
la
- controllare e
fumaria
Se
- installare il
d’aria
L
prelevata all’esterno
protetto ma
spazio
ventilata,
Stûv
flessibile
Per
condotto,
senza
necessaria
una
utilizzare un
perdite di
inferiori.
- V
per
è
cassone
gia
re e
- V
per
- Installare il
ventilatore (2
terra)
con
- Sigillare la
nente
del
me
Antes
propiamente
- Asegúrese de que
suficiente
Si
marco aplicado
perfiles
una
a
hogar
precisiones, lea
embellecedores”.
- Controle y
humos
Si
- Instale
exterior
de
o
aireado como
ventilada,
etc.
Stûv
conducto
mm.
Para
el
codos
necesaria
debe
conducto.
tubo
carga es
- Compruebe que hay
para
ha
ventilación,
estar
rejillas para
- Compruebe
necesario
[esquema 3].
- Instale
ventilador
tierra)
por
- Fije el
el
Antes
propriamente
- assegure-se de
ciente
1].
com
os
conceder
espaço,
de
recuperador
capítulo
- verifique
fumo
Se
- instale
exterior
combustão
ou
arejado, como
ventilado,
etc.
A
conduta
mm
perdas de
número de
a
necessário
preveja uma
se
PVC
nitidamente
- verifique
ventilador
previsto um
ventilação,
estar
com
- verifique
a
- instale
ventilador
terra);
com
- vede
o
ventilador
Before
itself
- make
the
If
conceals
an
sides
when
details,
and
- check
hereafter)
When
- install
Combustion
or from
space
ventilated
Stûv
aluminium
the
and
charge losses.
be
is
rigid
considerably
- make
space
2
has
fan,
dust-free and
vents.
- check
the
- install
fan,
must
- seal
the
supplied
page
- install
ducts,
ventilation
Preparación Preparação Preparation V
werkplaats
Allestimento
Stûv
Stûv
Stûv
4