21345
24
Zoom out
Zoom in
Previous page
1/186
Next page
24
Nederlands
Stap 3: Basisinstellingen van de recorder
TIPS: Nadat u de basisfuncties hebt ingesteld, kunt u de instellingen via het menu met systeeminstellingen
wijzigen of bijwerken. Zie pagina 75~80.
Wanneer u deze recorder voor de allereerste keer
inschakelt, wordt het menu met basisinstellingen
weergegeven. Met deze instellingen kunt u snel de
basisfuncties van de recorder instellen, zoals de
TV-kanalen, de taalopties en het GUIDE Plus+-
systeem.
BELANGRIJK!
Voer de basisinstellingen in voordat u een
disc plaatst om af te spelen of op te
nemen. De lade kan pas worden geopend
wanneer alle basisfuncties zijn ingesteld.
1 Druk op I/2 om de recorder in te schakelen.
2 Stel de TV in op het juiste programmanummer
voor de recorder (bijv. ‘EXT’, ‘0’, ‘AV’).
U kunt ook naar het eerste kanaal op de TV
gaan en vervolgens door de kanalen
bladeren totdat het menu { SMARTLINK }
of { LANGUAGE AND COUNTRY }
(Taal en land) wordt weergegeven op het
TV-scherm.
Als de TV is uitgerust met SMARTLINK of een
soortgelijke functie, worden de TV-kanalen
automatisch gedownload. Zodra de gegevens
zijn overgebracht, drukt u op ENTER op de
afstandsbediening om de tijd/datum te
downloaden. Ga vervolgens door met stap 7.
SMARTLINK
Loading data from TV. Please wait.
OF
Als het menu { Language and Country }
(Taal en Land) op de TV wordt weergegeven,
drukt u op ,. Gebruik vervolgens de toetsen
M/m om de gewenste menutaal te selecteren en
druk ter bevestiging op < .
EASY SETUP
LANGUAGE AND COUNTRY
Select OSD language and your country.
Done
Language � English
Country� A Austria
Press [ ] [ ] to navigate. [ENTER] : Select
3 Selecteer het land waar u woont.
i. Markeer{ Country } (Land) en druk op ,.
Maak uw selectie met de knoppen M/m en
bevestig met <. Als uw land niet in de lijst
voorkomt, selecteert u { Others } (Andere).
ii. Markeer {
Done } (Gereed) en druk op
ENTER op de afstandsbediening.
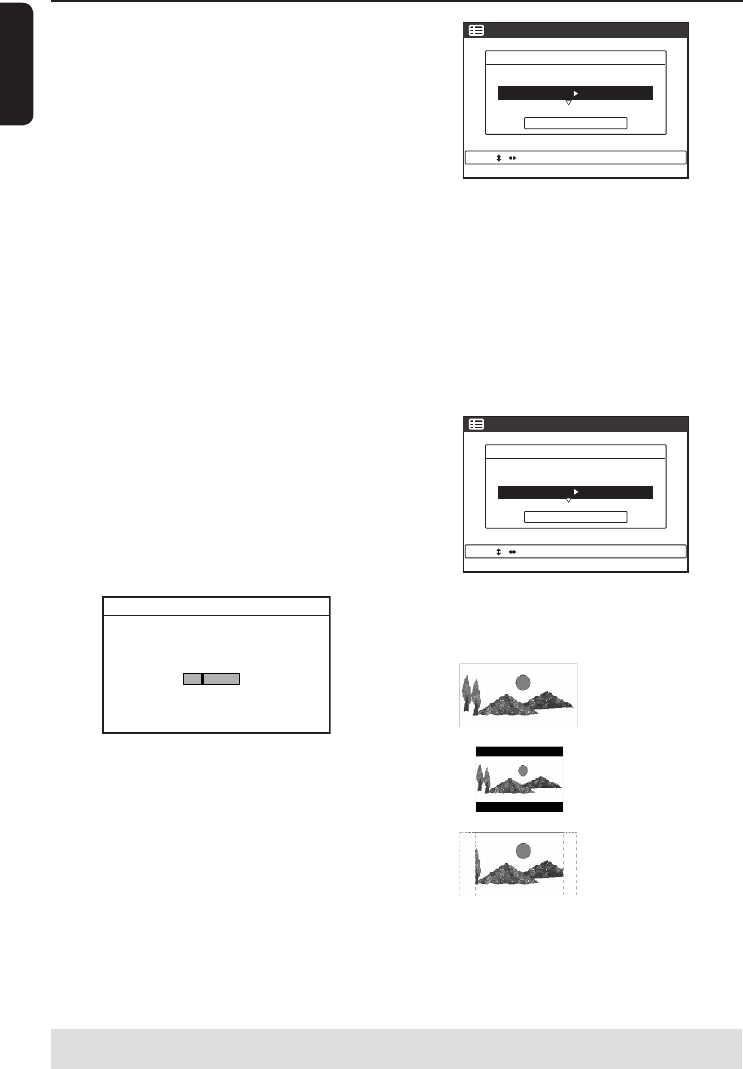
4 Het TV-typemenu wordt op de TV
weergegeven. Selecteer het juiste beeldformaat
overeenkomstig de TV die u hebt aangesloten.
EASY SETUP
TV TYPE
Select your TV screen type.
Done
TV type � 4:3 Letter Box
Press [ ] [ ] to navigate. [ENTER] : Select. [RETURN]:Back
i. Markeer{ TV Type } (TV-type) en druk op
,. Maak uw selectie met de knoppen
M/m en bevestig met <.
16:9
4:3 Letter Box
4:3 Pan Scan
ii. Markeer { Done } (Gereed) en druk op
ENTER op de afstandsbediening.
24


Need help? Post your question in this forum.

Forumrules


Report abuse

Libble takes abuse of its services very seriously. We're committed to dealing with such abuse according to the laws in your country of residence. When you submit a report, we'll investigate it and take the appropriate action. We'll get back to you only if we require additional details or have more information to share.

Product:

For example, Anti-Semitic content, racist content, or material that could result in a violent physical act.

For example, a credit card number, a personal identification number, or an unlisted home address. Note that email addresses and full names are not considered private information.

Forumrules

To achieve meaningful questions, we apply the following rules:

Register

Register getting emails for Sony RDRHX717 at:


You will receive an email to register for one or both of the options.


Get your user manual by e-mail

Enter your email address to receive the manual of Sony RDRHX717 in the language / languages: Dutch, French as an attachment in your email.

The manual is 17,17 mb in size.


You will receive the manual in your email within minutes. If you have not received an email, then probably have entered the wrong email address or your mailbox is too full. In addition, it may be that your ISP may have a maximum size for emails to receive.

Others manual(s) of Sony RDRHX717

Sony RDRHX717 User Manual - German, Italian - 186 pages


The manual is sent by email. Check your email

If you have not received an email with the manual within fifteen minutes, it may be that you have a entered a wrong email address or that your ISP has set a maximum size to receive email that is smaller than the size of the manual.

The email address you have provided is not correct.

Please check the email address and correct it.

Your question is posted on this page

Would you like to receive an email when new answers and questions are posted? Please enter your email address.


Info