3. Tryk på betjeningsknappen.
ð
Du kan nu aktivere eller deaktivere visning af
datoen.
8.3 Menuen Settings
Når apparatet er tændt kan du i menuen [Settings]
foretage følgende indstillinger:
n Indstilling af klokkeslætsformat.
n Indstilling af datoformat.
n Indstilling af Sleep Timer.
n Indstilling af displayets lysstyrke.
n Indstilling af automatisk opdatering af klokkeslæt/
dato.
n Indstilling af displaysprog.
n Aktivering/deaktivering af Demo Sound.
n Gendannelse af apparatets standardindstillinger.
Når du vil foretage indstillinger, skal du gøre føl-
gende:
1. Tryk på knappen [MENU] foran på apparatet
eller på fjernbetjeningen for at vælge den
ønskede undermenu.
2. Tryk på knappen[ Fremad] eller [Tilbage], eller
drej på betjeningsknappen for at bladre gennem
de forskellige menupunkter.
3. Hvis du vil åbne det markerede menupunkt skal
du trykke kort på betjeningsknappen eller på
knappen [OK] på fjernbetjeningen.
4. Du forlader menuen ved at trykke kort på
knappen [MENU] på apparatet eller på fjernbetj-
eningen.
i
Hvis du ikke foretager flere indstillinger, lukkes
menuen, og displayet skifter tilbage til den oprin‐
delige tilstand.
Indstilling af klokkeslætsformat
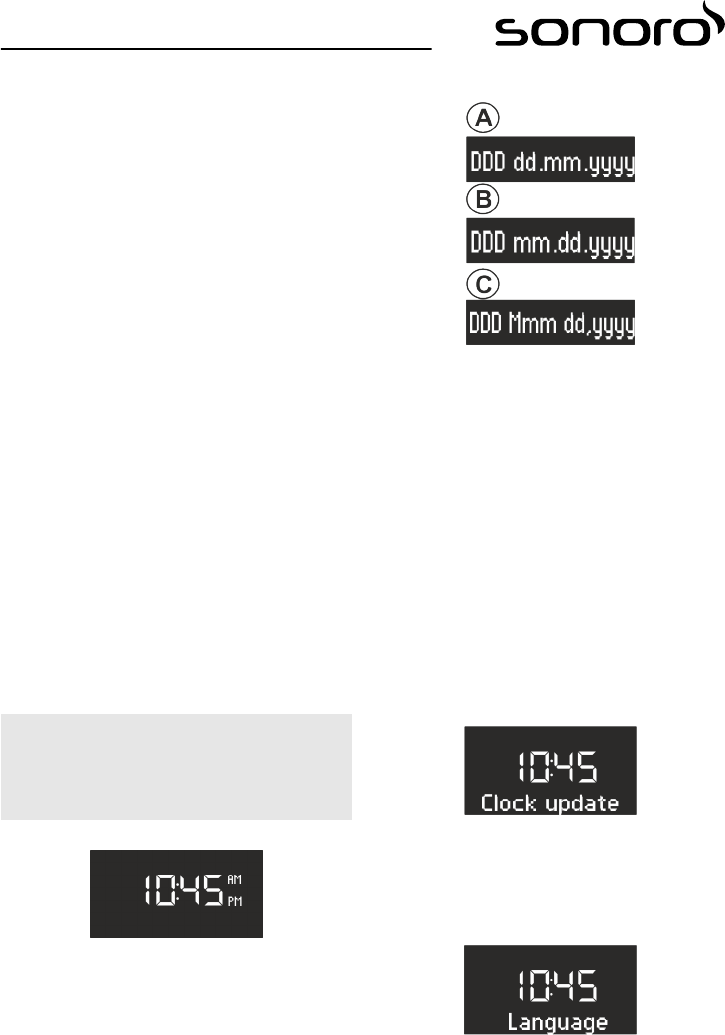
Fig. 13: Indstilling af klokkeslætsformat
Du kan vælge mellem 24-timers- og 12-timers-format.
I 12-timers-format indikeres tidspunktet på dagen
ved hjælp af [AM] og [PM].
Indstilling af datoformat
Fig. 14: Datumsformat einstellen
Du kan indstille tre forskellige datoformater (Fig. 14/
A, B und C) og den aktuelle dag. Indstillingsmulighe-
derne er:
n A: Aktuel dag, dag, måned, år.
n B: Aktuel dag, måned, dag, år.
n C: Aktuel dag, måned (skrevet med bogstaver),
dag, år.
Indstilling af Sleep Timer
I menu [Settings] kan du ændre Sleep Timer-indstillin-
gerne (
Ä
Kapitel 8.4 »Indstilling af Sleep Timer«
på side 221).
Indstilling af displayets lysstyrke
I menuen [Settings] kan du indstille displayets bag-
grundsbelysning (
Ä
Kapitel 8.5 »Indstilling af bag‐
grundsbelysning« på side 221).
Indstilling af automatisk opdatering af klokkeslæt/
dato
Fig. 15: Indstilling af automatisk opdatering
I undermenuen [Clock update] (Fig. 15) kan du vælge
automatisk opdatering. Hvis du aktiverer funktionen,
synkroniseres klokkeslæt og dato automatisk i funkti-
onen FM Radio og DAB Radio.
Indstilling af displaysprog
Fig. 16: Indstilling af sprog
220

