-9-
To prevent personal injury,
always disconnect plug
from power source before assembling
parts, making adjustments, or changing
blades.
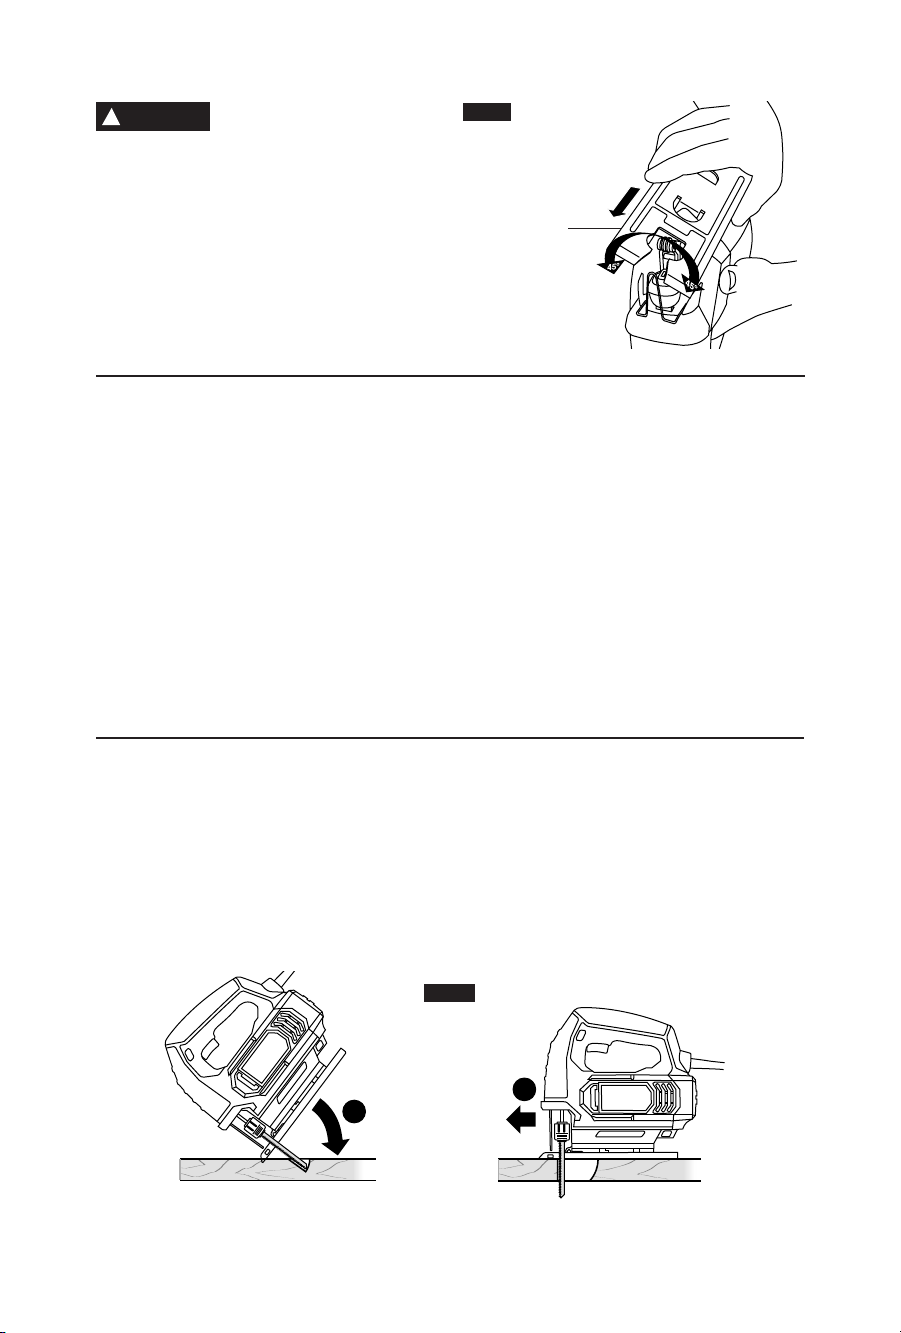
BEVEL OR ANGLE CUTTING
The foot can be adjusted to cut angles at 0˚ or
45˚ in either direction.
To adjust, push foot forward and pivot foot to
45˚. To lock, slide foot backward (Fig. 5).
To return to 90˚, push foot forward and pivot
foot to 90˚. To lock, slide foot backward (Fig. 5).
FIG. 5
FOOT
Cutting Tips
Face the good side of the material down and
secure it in a bench vise or clamp it down.
Draw cutting lines or designs on the side of the
material facing up towards you. Then place the
front edge of the saw foot on the work and line
up the blade with the line to be cut. Hold the
jigsaw firmly, turn it on, and press down (to
keep the saw foot flat against the work) as you
slowly push the saw in the direction of the cut.
Build up cutting rate gradually, cutting close to
the line (unless you want to leave stock for
finish sanding). As you cut you may have to
adjust or relocate the vise or clamps to keep
the work stable. Do not force the saw or the
blade teeth may rub and wear without cutting
and the blade may break. Let the saw do most
of the work. When following curves, cut slowly
so the blade can cut through cross grain. This
will give you an accurate cut and will prevent
the blade from wandering.
Choose blades carefully, as the ability of the
jigsaw to follow curves, provide smoother
finishes, or faster cutting is directly related to
the type of blade used (See your Skil Dealer).
For tight curves it is best to use a narrow or
scroll blade.
When sawing metal or similar materials, shut
off chip blower and apply coolant/lubricant
alongside the cutting line. Don’t use extraction.
PLUNGE CUTTING
Plunge cutting is useful and time-saving in
making rough openings in softer materials. It is
not necessary to drill a hole for an inside or
pocket cut. Draw lines for the opening, hold the
saw firmly, tilt it forward so that the toe of the
saw foot rests on the work, but with the blade
well clear of the work. Start the motor, and
then very gradually lower the blade. When it
touches, continue pressing down on the toe of
the saw foot slowly pivoting the saw like a
hinge until the blade cuts through and the foot
rests flat on the work. Then saw ahead on the
line of cut line. We do not recommend plunge
cutting with a scroll blade (Fig. 6).
To make sharp corners, cut up to the corner,
then back up slightly before rounding the
corner. After the opening is complete, go back
to each corner and cut it from the opposite
direction to square it off. Do not try to plunge
cut into hard materials such as steel.