26
1
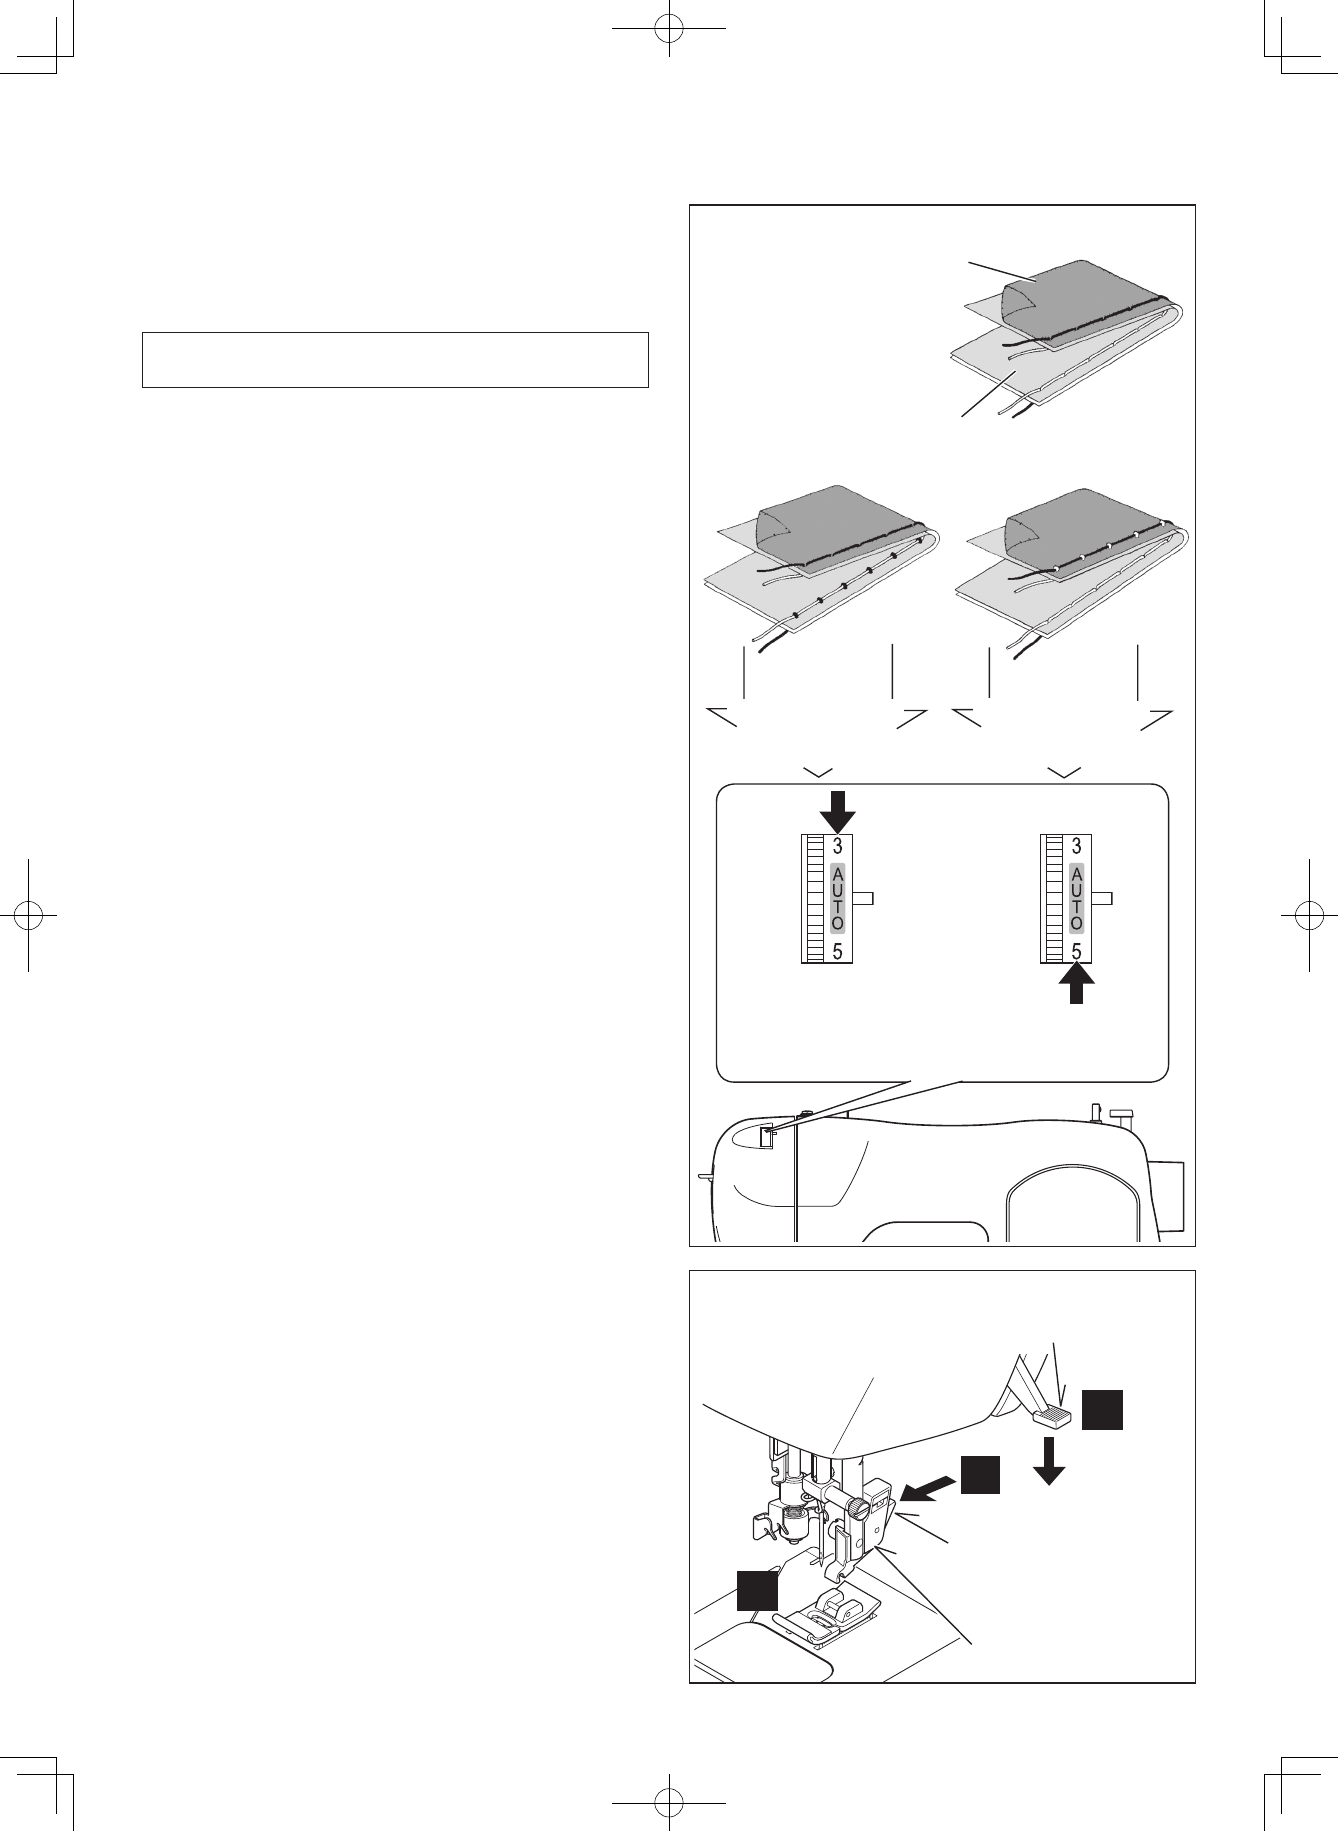
3
2
Rovescio
Onderkant
Unterseite
Diritto
Bovenkant
Oberseite
Bilanciamento corretto
Goede balans
korrekt
Diminuire la tensione
Verminder spanning
Spannung verringern
Aumentare la tensione
Vermeerder spanning
Spannung erhöhen
Punto superiore
troppo teso
Punto superiore
troppo poco teso
Bovendraad te zwak
Oberfadenspannung
zu niedrig
Bovendraad te strak
Oberfadenspannung
zu hoch
Tasto di sgancio del piedino
Ontgrendelknop
Nähfuß-Auslöser
Leva alza-piedino
Persvoethevel
Nähfußheber
Gambo del piedino
Voethouder
Nähfußhalter
COME REGOLARE LA TENSIONE DEL
FILO SUPERIORE
Il 90% delle vostre cuciture verrà effettuato tenendo impostata
su AUTO la manopola di regolazione della tensione del lo,
posta sul lato superiore della macchina.
PUNTO DIRITTO
L’aspetto delle vostre cuciture è determinato in gran parte
dal corretto bilanciamento tra la tensione del lo superiore e
la tensione del filo della bobina. Il bilanciamento è corretto
quando questi due li si “agganciano” a metà tra i due strati di
tessuto che state cucendo.
Se, quando iniziate a cucire, rilevate un’irregolarità nei punti,
dovrete regolare il comando della tensione. Tuttavia, realizzate
tale operazione solo dopo aver stabilito che la macchina è
inlata correttamente (consultate pagina 20-21).
Tutte le regolazioni vanno effettuate con il piedino abbassato.
Per il punto diritto, normalmente, è indicata una tensione
bilanciata (punti uguali sia sul diritto che sul rovescio).
PUNTO ZIG-ZAG e PUNTI DECORATIVI
Il punto a zig-zag e i punti decorativi richiedono una tensione
del lo minore, rispetto al punto diritto.
Il punto sarà più bello e si produrranno meno grinze, se il lo
superiore apparirà sul lato inferiore del tessuto.
TENSIONE DELLA BOBINA
La tensione della bobina è già stata regolata in fabbrica
sui valori corretti. Non c’è bisogno di regolarla.
SOSTITUZIONE DEL PIEDINO
Assicuratevi che il piedino sia sollevato. Sollevate la leva alza-
piedino.
1. Per togliere il piedino premete il tasto di sgancio del piedino.
2. Mettete sulla placca d’ago il piedino desiderato, allineando
il suo perno con il gambo del piedino.
3. Abbassate la leva alza-piedino di modo che il gambo si
agganci sul piedino.
Indicazioni utili: una leggera regolazione del lato + o –
rispetto ad AUTO migliorerà l’aspetto della cucitura.