663299
35
Zoom out
Zoom in
Previous page
1/73
Next page
KÜCHENWAAGE / KITCHEN SCALE
BALANCE DE CUISINE
IAN 282289
KÜCHENWAAGE
Bedienungs- und Sicherheitshinweise
KITCHEN SCALE
Operation and Safety Notes
BALANCE DE CUISINE
Instructions d‘utilisation et consignes de sécurité
KEUKENWEEGSCHAAL
Bedienings- en veiligheidsinstructies
BÁSCULA DE COCINA
Instrucciones de utilización y de seguridad
KUCHYŇSKÁ VÁHA
Pokyny pro obsluhu a bezpečnostní pokyny
BALANÇA DE COZINHA
Instruções de utilização e de segurança
DE / AT / CH Bedienungs- und Sicherheitshinweise Seite 5
GB / IE Operation and Safety Notes Page 15
FR / BE Instructions d‘utilisation et consignes de sécurité Page 24
NL / BE Bedienings- en veiligheidsinstructies Pagina 34
CZ Pokyny pro obsluhu a bezpečnostní pokyny Strana 44
ES Instrucciones de utilización y de seguridad Página 53
PT Instruções de utilização e de segurança Página 63
1X3V CR2032
1X3V CR2032
6
5 4
1
2
3
1X3V CR2032
1X3V CR2032
11 9
1012 8 7
1314
HG00496A - Weiß / White / Blanc
HG00496C - Beere / Berry / Baie
1X3V CR2032
1X3V CR2032
25
24
23
22
21
16
17
18
19
20
15
A
D
EC
5
1X3V CR2032
1X3V CR2032
B
14 11
12
5 DE/AT/CH
Einleitung ......................................................................................................................................... Seite 6
Bestimmungsgemäßer Gebrauch .......................................................................................................Seite 6
Teilebeschreibung ...............................................................................................................................Seite 6
Technische Daten ................................................................................................................................Seite 7
Funktionen............................................................................................................................................Seite 7
Lieferumfang ........................................................................................................................................ Seite 7
Sicherheitshinweise ................................................................................................................ Seite 7
Allgemeine Sicherheitshinweise .........................................................................................................Seite 7
Sicherheitshinweise für Batterien / Akkus .......................................................................................... Seite 9
Inbetriebnahme ......................................................................................................................... Seite 10
Batterie austauschen ........................................................................................................................... Seite 10
Umrechnungsschalter ..........................................................................................................................Seite 10
Wiegen ................................................................................................................................................ Seite 11
Wiegen und hinzufügen .....................................................................................................................Seite 11
Wiegegut teilweise entfernen ............................................................................................................. Seite 11
Automatisches oder manuelles Ausschalten ......................................................................................Seite 12
Anzeige von Volumeneinheiten .......................................................................................................... Seite 12
Fehler beheben ..........................................................................................................................Seite 13
Reinigung ........................................................................................................................................Seite 13
Entsorgung ..................................................................................................................................... Seite 13
Garantie ........................................................................................................................................... Seite 14
6 DE/AT/CH
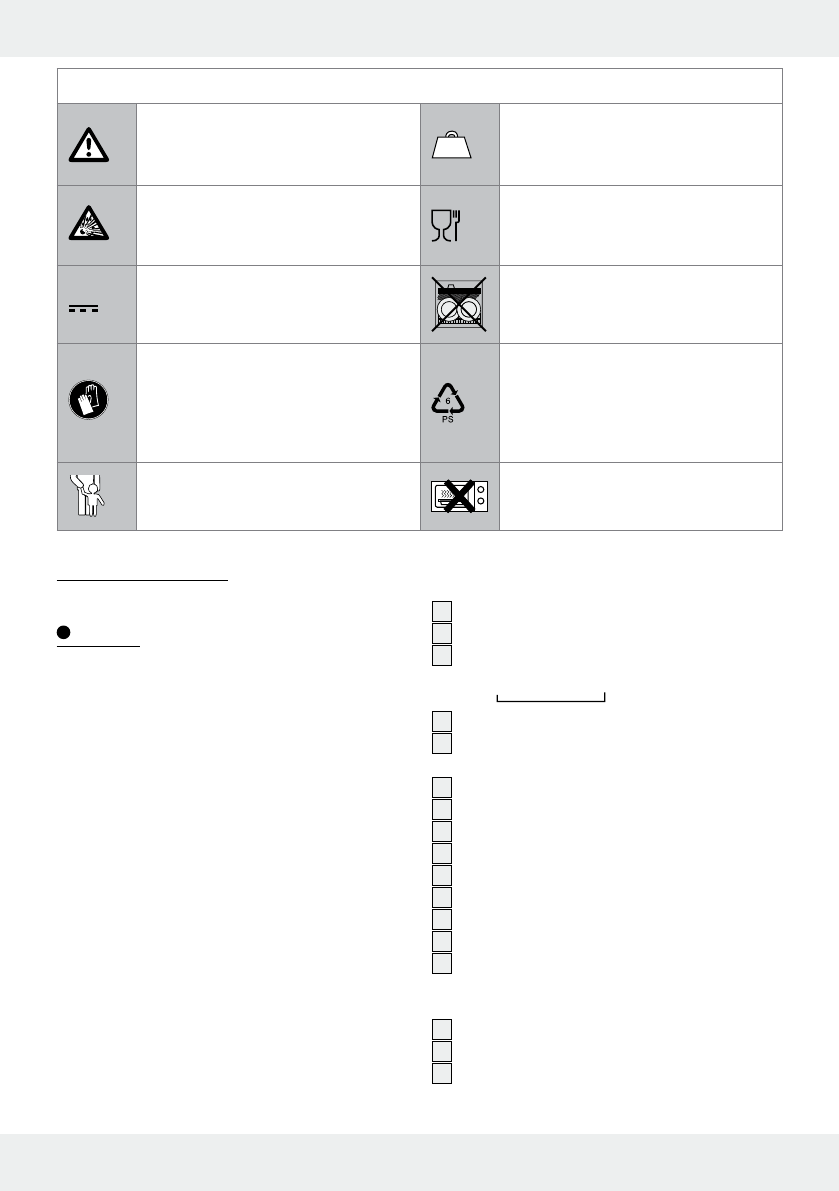
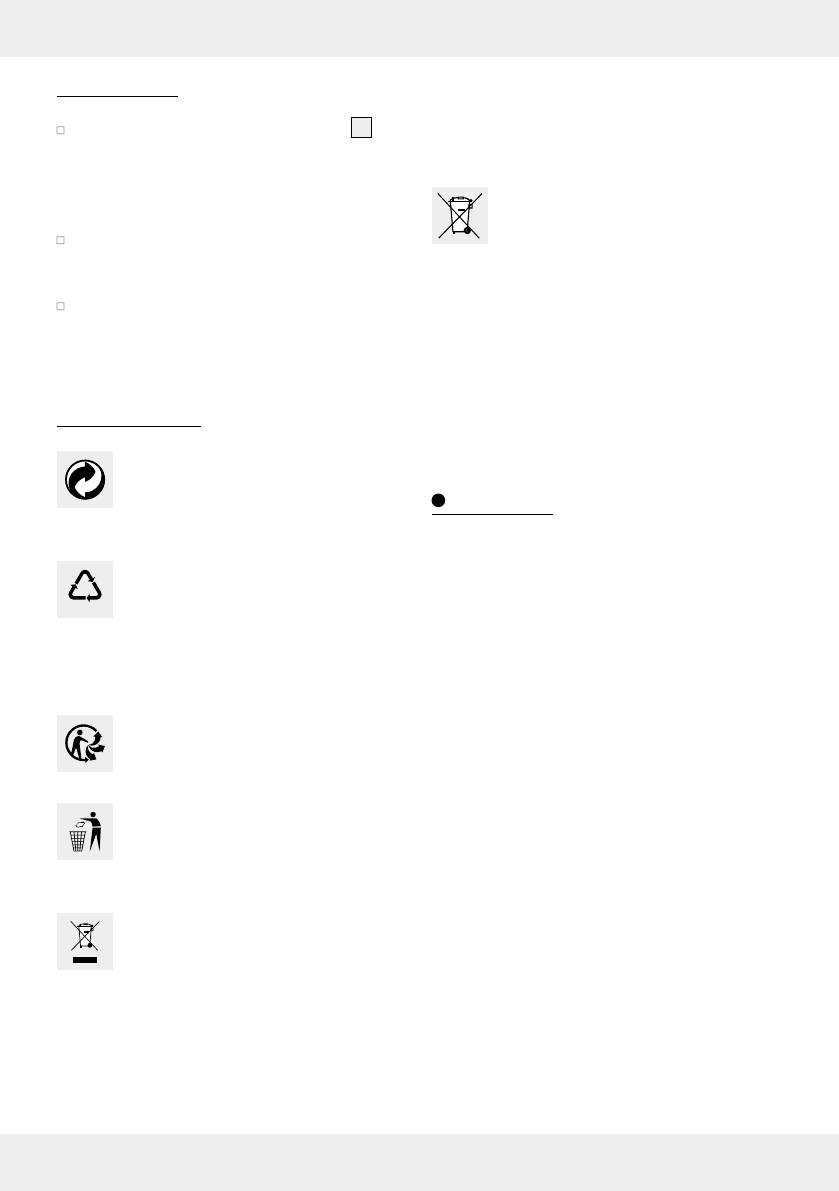
In dieser Bedienungsanleitung werden folgende Piktogramme / Symbole verwendet:
Warn- und Sicherheitshinweise
beachten!
5 kg
Belasten Sie das
Produkt
nicht über 5 kg.
Explosionsgefahr!
Lebensmittelecht! Geschmacks- und
Geruchseigenschaften werden durch
dieses Produkt nicht beeinträchtigt.
Gleichstrom
(Strom- und Spannungsart)
Die Waagschale ist nicht
spülmaschinengeeignet.
Tragen Sie Schutzhandschuhe.
Die Waagschale ist hergestellt aus
Polystyrene (PS 6). Entsorgen Sie diese
nicht in den Hausmüll. Entsorgen Sie
die Waagschale, wenn diese nicht
mehr benötigt wird, gemäß den örtlich
geltenden Vorschriften.
Lassen Sie Kinder niemals unbeauf-
sichtigt mit Verpackungsmaterial
und Produkt.
Das Produkt ist nicht für Mikrowellen
geeignet.
Küchenwaage
Einleitung
Wir beglückwünschen Sie zum Kauf Ihres neuen
Produkts. Sie haben sich damit für ein hochwertiges
Produkt entschieden. Die Bedienungsanleitung ist Teil
dieses Produkts. Sie enthält wichtige Hinweise für
Sicherheit, Gebrauch und Entsorgung. Machen Sie
sich vor der Benutzung des Produkts mit allen Bedien-
und Sicherheitshinweisen vertraut. Benutzen Sie das
Produkt nur wie beschrieben und für die angege-
benen Einsatzbereiche. Händigen Sie alle Unterla-
gen bei Weitergabe des Produkts an Dritte mit aus.
Q
Bestimmungsgemäßer
Gebrauch
Dieses Produkt ist zum Wiegen und Zuwiegen haus-
haltsüblicher Mengen von Lebensmitteln in privaten
Haushalten geeignet. Das Produkt dient zur Ermitt-
lung des Gewichts von nicht aggressiven, nicht
ätzenden und nicht schleifenden Flüssigkeiten oder
Feststoffen. Es ist nicht dafür vorgesehen, Medika-
mente oder unerlaubte Materialien zu wiegen. Das
Produkt ist nicht für den kommerziellen Gebrauch
vorgesehen.
Q
Teilebeschreibung
1
Waagschale
2
Küchenwaage
3
Modus-Schalter Gewicht / Milch / Wasser
(Weight ▸ Milk ▸ Water)
4
LC-Display
5
EIN- / AUS- / Null-Taste, Nulleinstellung (Tara)
(ON / OFF / ZERO)
6
Wiegeplattform
7
Spange am Batteriefachdeckel
8
Batteriefachdeckel
9
g / lb:oz Umrechnungsschalter
10
Metallkontakt der Batterie mit Sprungfedereffekt
11
Äußere Einbettung Batterie
12
Schwarzer Verschluss-Schalter für Batterie
7 DE/AT/CH
13
Batteriefach
14
Isolierungsstreifen Batterie
LCD-Anzeige:
15
Fehleranzeige
16
„g“ = Anzeige Gewichtseinheit (Gramm)
17
„ml“ = Anzeige Volumeneinheit (Milliliter)
18
“fl’oz” = Anzeige Volumeneinheit
(Flüssigkeit: Unze)
19
„lb:oz“= Anzeige Gewichtseinheit (Pfund: Unze)
20
“ = Zeichen über Wasser = Maßeinheit für
Volumenmodus (ml oder fl’oz Wasser)
21
“ = Zeichen über Milch = Maßeinheit für
Volumenmodus (ml oder fl’oz Milch)
22
“ = Zeichen über Gewicht = Wiegemodus
(Gramm oder Pfund: Unze)
23
„0“ Piktogramm = Null Gewicht
(linke untere Ecke des LC-Displays)
24
„–“ = Negativwert
(linke Seite des LC-Displays)
25
T“ = Gewicht Tara
(linke obere Ecke des LC-Displays)
Q
Technische Daten
Wiegebereich: 0,1 oz–11 lb (Pfund) /
1 g–5 kg (Kilogramm)
Einteilung: 0,1 oz / 1 g
Batterie: 1 x 3 V
Lithium Batterie
(CR2032 Lithium-Knopfzellen /
im Lieferumfang enthalten)
Q
Funktionen
Anzeige Volumeneinheiten für Wasser und Milch.
Zwei verschiedene Systeme für Gewichtseinheiten
Gramm (g) oder Pfund (lb:oz), umwandelbar.
Warnung bei niedrigem Betriebsstand / Überlas-
tung durch spezielle LCD-Piktogramm-Anzeige.
Verwendung von hochpräzisen Dehnungsmesser-
Sensoren.
Nullstellung oder Tara-Funktion möglich.
Automatische Ausschaltfunktion zur Einsparung
von Energie, wenn das Produkt für länger als
zwei Minuten nicht benutzt wird.
Manuell ausschalten – Drücken Sie den EIN- /
AUS- / Null-Taste
5
und halten Sie diesen für
drei Sekunden gedrückt (siehe Abb. A).
Q
Lieferumfang
Überprüfen Sie unmittelbar nach dem Auspacken
immer den Lieferumfang auf Vollständigkeit sowie
den einwandfreien Zustand des Produktes.
1 Küchenwaage
1 Waagschale
1 Lithium-Batterie (vorinstalliert im Batteriefach)
1 Bedienungsanleitung
Q
Sicherheitshinweise
Allgemeine
Sicherheitshinweise
LEBENS- UND UN-
FALLGEFAHREN FÜR KLEIN-
K
INDER UND KINDER! Lasse
n
Sie Kinder niemals unbeaufsichtigt
mit Verpackungsmaterial und
Produkt. Andernfalls besteht
Lebensgefahr durch Erstickung.
Halten Sie Kinder stets vom Pro-
dukt fern.
Dieses Produkt kann von Kindern
ab 8 Jahren und darüber sowie
von Personen mit verringerten
physischen, sensorischen oder
mentalen Fähigkeiten oder Mangel
an Erfahrung und Wissen benutzt
werden, wenn sie beaufsichtigt
oder bezüglich des sicheren
8 DE/AT/CH
Gebrauchs des Produkts unter-
wiesen wurden und die daraus
resultierenden Gefahren versteh
en.
Kinder dürfen nicht mit dem Pro-
dukt spielen. Reinigung und Be-
nutzerwartung dürfen nicht von
Kindern ohne Beaufsichtigung
durchgeführt werden.
5 kg
VORSICHT! VERLET-
ZUNGSGEFAHR!
Belasten Sie das Produkt nicht
über 5 kg. Das Produkt könnte
beschädigt werden.
Setzen Sie das Produkt
- keinen extremen Temperaturen,
- keinen starken Vibrationen,
- keinen starken mechanischen
Beanspruchungen,
- keiner direkten Sonneneinstrah-
lung,
- keiner magnetischen Umgebung,
- keiner Feuchtigkeit aus.
Andernfalls droht Beschädigung
des Produktes.
Schützen Sie das Produkt vor
elektrostatischer Ladung /
Entladung. Diese könnten eine
Behinderung des internen Daten-
austausches verursachen, was
Fehler im LC-Display erzeugt.
Kontrollieren Sie das Produkt
vor der Inbetriebnahme auf Be-
schädigungen. Nehmen Sie ein
beschädigtes Produkt nicht in
Betrieb.
Öffnen Sie
niemals das Gehäuse des Pro-
duktes. Verletzungen und Beschä-
digungen am Produkt können die
Folge sein. Lassen Sie Reparatur
en
nur von einer Elektrofachkraft
durchführen.
Lassen Sie keine unerfahrenen
Personen das Produkt nutzen.
Gehen Sie sicher, dass jeder, der
das Produkt nutzt, die Bedienungs-
anleitung gelesen hat, und in der
Lage ist, das Produkt sicher zu
bedienen.
Platzieren Sie das Produkt auf
einer festen, waagerechten und
flachen Unterlage.
Das Produkt enthält empfindliche
elektronische Bauteile. Daher ist
es möglich, dass es durch Funkü-
bertragungsgeräte in unmittel-
barer Nähe gestört wird. Dies
können z. B. Mobiltelefone, Funk-
sprechgeräte, CB-Funkgeräte,
Funkfernsteuerungen / andere
Fernbedienungen und Mikrowel-
lengeräte sein. Treten Fehlanzei-
gen im Display auf, entfernen Sie
solche Geräte aus der Umgebung
des Produkts.
Elektromagnetische Störungen /
hochfrequente Störaussendungen
9 DE/AT/CH
können zu Funktionsstörungen
führen. Entfernen Sie bei solchen
Funktionsstörungen kurzzeitig die
Batterie und setzen Sie diese er-
neut ein. Gehen Sie hierzu gemä
ß
dem Kapitel „Batterie austau-
schen” vor.
LEBENSMITTELECHT!
Geschmacks- und Geruchs-
eigenschaften werden durch die-
ses Produkt nicht beeinträchtigt.
Die Waagschale ist nicht
spülmaschinengeeignet.
Sicherheitshinweise
für Batterien / Akkus
LEBENSGE-
FAHR! Halten Sie Batterien / Ak-
kus
außer Reichweite von Kinder
n.
Suchen Sie im Falle eines Ver-
schluckens sofort einen Arzt auf!
EXPLOSIONSGE-
FAHR! Laden Sie nicht
aufladbare Batterien niemals wie-
der auf. Schließen Sie Batterien /
Akkus nicht kurz und / oder öffnen
Sie diese nicht. Überhitzung,
Brandgefahr oder Platzen können
die Folge sein.
Werfen Sie Batterien / Akkus
niemals in Feuer oder Wasser.
Setzen Sie Batterien / Akkus kei-
ner mechanischen Belastung aus.
Risiko des Auslaufens der
Batterien / Akkus
Vermeiden Sie extreme Bedin-
gungen und Temperaturen, die
auf Batterien / Akkus einwirken
können z. B. auf Heizkörpern /
direkte Sonneneinstrahlung.
Vermeiden Sie den Kontakt mit
Haut, Augen und Schleimhäuten!
Spülen Sie bei Kontakt mit Batte-
riesäure die betroffenen Stellen
sofort mit klarem Wasser und
suchen Sie umgehend einen
Arzt auf!
SCHUTZHAND-
SCHUHE TRAGEN!
Ausgelaufene oder beschädigte
Batterien / Akkus können bei Be-
rührung mit der Haut Verätzungen
verursachen. Tragen Sie deshalb
in diesem Fall geeignete Schutz-
handschuhe.
Im Falle eines Auslaufens der
Batterien entfernen Sie diese
sofort aus dem Produkt, um Be-
schädigungen zu vermeiden.
Verwenden Sie nur Batterien /
Akkus des gleichen Typs.
Mischen Sie nicht alte Batterien /
Akkus mit neuen!
10 DE/AT/CH
Entfernen Sie die Batterien /
Akkus, wenn das Produkt längere
Zeit nicht verwendet wird.
Risiko der Beschädigung
des Produkts
Verwenden Sie ausschließlich de
n
angegebenen Batterietyp /
Akkutyp!
Achten Sie beim Einlegen auf
die richtige Polarität! Diese wird
im Batteriefach angezeigt!
Reinigen Sie Kontakte an der
Batterie und im Batteriefach vor
dem Einlegen falls erforderlich!
Entfernen Sie erschöpfte Akkus /
Batterien umgehend aus dem
Produkt.
Q
Inbetriebnahme
1. Lösen Sie die Schraube, die sich auf der
Rückseite der Küchenwaage
2
befindet,
mittels eines Schraubendrehers.
2. Öffnen Sie das Batteriefach
13
unter der Kü-
chenwaage
2
, indem Sie die Spange
7
des
Batteriefachdeckels
8
in Richtung Batteriefach
bewegen und ihn nach oben abnehmen.
3. Entfernen Sie den Isolierungsstreifen
14
, der unter
dem Metallkontakt für die Batterie befestigt ist.
4. Setzen Sie den Batteriefachdeckel
8
wieder
auf das Batteriefach
13
. Drücken Sie den Bat-
teriefachdeckel
8
fest auf das Batteriefach
13
,
bis dieser hörbar einrastet.
5. Ziehen Sie die Schraube mittels eines Schrau-
bendrehers fest (siehe Abb. B).
Q
Batterie austauschen
1. Schalten Sie die Küchenwaage
2
aus. Drücken
und halten Sie die EIN- / AUS- / Null-Taste
5
3 Sekunden lang.
2. Lösen Sie die Schraube, die sich auf der
Rückseite der Küchenwaage
2
befindet,
mittels eines Schraubendrehers. Öffnen Sie das
Batteriefach
13
wie zuvor beschrieben.
3. Entfernen Sie die verbrauchte Batterie aus der
Einbettung
11
, indem Sie den schwarzen Ver-
schluss-Schalter
12
drücken und ziehen. Die Bat-
terie löst sich automatisch aus der Einbettung
11
.
Stellen Sie sicher, dass Sie nicht zu großen
Druck auf den Metallkontakt der Batterie
10
ausüben. Dieser kann sonst beschädigt werden,
weil das Anheben der Batterie zu einer Verfor-
mung führt. Entfernen Sie die Batterie aus der
äußeren Einbettung
11
.
4. Legen Sie die neue Batterie in die äußere Ein-
bettung
11
. Achten Sie auf die richtige Polarität.
Die „+“-Seite muss dabei nach oben zeigen. Die
Batterie muss in die äußere Einbettung
11
ge-
drückt werden.
5.
Schließen Sie das Batteriefach
13
und ziehen S
ie
die Schraube mittels eines Schraubendrehers fe
st.
Q
Umrechnungsschalter
Ein g / lb:oz Umrechnungsschalter
9
für die
Gewichtseinheiten befindet sich unten an der
Küchenwaage
2
. Mit einem einfachen Knopf-
druck wechselt die Maßeinheit zwischen metri-
schen Maßen (g, ml) zu imperialen Maßen
(lb:oz, fl’oz).
Hinweis:
Wenn die Gewichtseinheit als metrisches Maß
bestimmt ist (g), wird auch das Volumenmaß
automatisch als ml angezeigt.
Wenn die Gewichtseinheit als imperiales Maß
bestimmt ist (lb:oz), wird auch das Volumenmaß
automatisch als fl’oz angezeigt.
Die Standard-Einheit für Gewicht ist g (Gramm).
11 DE/AT/CH
Q
Wiegen
Hinweis: Ob Sie mit oder ohne Waagschale
1
beginnen, die Küchenwaage
2
startet immer auf
0 g / 0:0,0 lb:oz
16
/
19
, wenn die EIN- / AUS- /
Null-Taste
5
gedrückt wird.
Wenn Sie die Waagschale
1
aber erst nach dem
Einschalten auf der Küchenwaage
2
platzieren,
zeigt sie das Gewicht der Waagschale
1
an.
Drücken Sie 1 x die EIN- / AUS- / Null-Taste
5
, um
die Anzeige wieder auf 0 g / 0:0,0 lb:oz
16
/
19
zurückzusetzen; „T“ (TARE)
25
wird im LC-Display
4
angezeigt.
Stellen Sie die Küchenwaage auf eine feste
und ebene Oberfläche.
Drücken Sie die EIN- / AUS- / Null-Taste
5
, um
die Küchenwaage
2
einzuschalten (siehe
Abb. C).
Warten Sie, bis das LC-Display
4
anhält und
sich auf 0 g
16
, 0:0,0 lb:oz
19
oder 0 ml
17
oder 0,0 fl’oz
18
einpendelt, je nachdem in
welchem Modus sich die Küchenwaage befand,
bevor sie ausgeschaltet wurde.
Drücken Sie den Modus-Schalter
3
, um die
Küchenwaage auf den normalen Wiegemodus
umzustellen
22
.
Falls notwendig, wählen Sie die Gewichtseinheit
im Voraus aus, indem Sie den g / lb:oz Umrech-
nungsschalter
9
am Boden der Küchenwaage
drücke
n, bevor Sie mit dem Wiegen beginnen.
Zur Neukalibrierung der Küchenwaage
2
, wen
n
Sie die Gewichtseinheit ausgewählt haben,
drücken und halten Sie die EIN- / AUS- /
Null-Taste
5
3 Sekunden lang, um die Küchen-
waage
2
auszuschalten.
Stellen Sie die Küchenwaage
2
auf eine harte,
flache Tischfläche. Stellen Sie die Waagschale
1
auf die Wiegeplattform
6
.
Drücken Sie die EIN- / AUS- / Null-Taste
5
, um
die Küchenwaage einzuschalten und im norma-
len Wiegemodus zu betätigen.
Warten Sie, bis alle Segmente des LC-Displays
4
aufleuchten und die Küchenwaage
2
sich
auf 0 g
16
, 0:0,0 lb:oz
19
einpendelt.
Füllen Sie das Wiegegut in die Waagschale
1
um den Wiegevorgang zu starten. Das
LC-Dis
play
4
zeigt das Gewicht des Wiegeguts
in d
er gewählten Gewichtseinheit an (siehe
Abb. D).
Q
Wiegen und hinzufügen
Die Küchenwaage
2
erlaubt ein aufeinander fol-
gendes Abwiegen, ohne das Wiegegut aus der
Waagschale
1
zu entfernen.
Stellen Sie die Waagschale
1
auf die Wiege-
plattform
6
.
Drücken Sie die EIN- / AUS- / Null-Taste
5
, um
die Küchenwaage
2
einzuschalten.
Warten Sie, bis das LC-Display
4
anhält und
sich auf 0 g
16
, 0:0,0 lb:oz
19
oder 0 ml
17
oder 0,0 fl’oz
18
einpendelt, je nachdem in
welchem Modus sich die Küchenwaage
2
be-
fand, bevor sie ausgeschaltet wurde.
Drücken Sie den Modus-Schalter
3
, um die
Küchenwaage
2
in den Gewichts-Modus
22
zu versetzen (Voreinstellung entweder g oder
lb:oz).
Befüllen Sie die Waagschale
1
, um den Wiege-
vorgang zu starten. Das LC-Display
4
zeigt das
Gewicht des ersten, in der Waagschale
1
platzierten Wiegeguts an.
Drücken Sie die EIN- / AUS- / Null-Taste
5
, die
Küchenwaage
2
zeigt nun „T“ (TARE)
25
an.
Sie können weiteres Wiegegut auf die gleiche
Art und Weise abwiegen, das LC-Display
4
zeigt das Gewicht des neu hinzugefügten Wie-
geguts an.
Drücken Sie
die
EIN- / AUS- / Null-Taste
5
n
ach
jedem neu hinzugefügten Wiegegut.
Führen Sie diese Prozedur maximal so lange
durch, bis die Maximalbelastung der Küchen-
waage
2
erreicht ist, oder die Waagschale
1
voll beladen ist.
Q
Wiegegut teilweise entfernen
Stellen Sie die Waagschale
1
auf die Wiege-
plattform
6
.
12 DE/AT/CH
Drücken Sie die EIN- / AUS- / Null-Taste
5
, um
die Küchenwaage
2
einzuschalten.
Warten Sie, bis das LC-Display
4
anhält und
sich auf 0 g
16
, 0:0,0 lb:oz
19
oder 0 ml
17
oder 0,0 fl’oz
18
einpendelt, je nachdem in
welchem Modus sich die Küchenwaage
2
be-
fand, bevor sie ausgeschaltet wurde.
Drücken Sie den Modus-Schalter
3
, um den
Gewichts-Modus
22
einzustellen (Voreinstellung
entweder g oder lb:oz).
Befüllen Sie die Waagschale
1
, um den Wie-
gevorgang zu starten. Das LC-Display
4
zeigt
das Gewicht des ersten, in der Waagschale
1
platzierten Wiegeguts an.
Drücken Sie die EIN- / AUS- / Null-Taste
5
, um
das LC-Display
4
auf Null zurückzusetzen;
T“ (TARE)
25
wird angezeigt.
Entnehmen Sie nun die gewünschte Menge an
Wiegegut aus der Waageschale
1
. Das LC-
Display
4
zeigt das entnommene Gewicht des
Wiegeguts aus der Waageschale
1
als
Negativ-Wert an.
Drücken Sie die EIN- / AUS- / Null-Taste
5
, um
das LC-Display
4
auf Null zurückzusetzen; „T“
(TARE)
25
wird angezeigt.
Sie können der Küchenwaage
2
nun weiteres
Wiegegut hinzufügen bzw. dieses entfernen.
Q
Automatisches oder
manuelles Ausschalten
Die Küchenwaage schaltet sich automatisch aus,
wenn sie länger als 2 Minuten nicht benutzt wird.
Drücken Sie die EIN- / AUS- / Null-Taste
5
länger als 3 Sekunden, um die Küchenwaage
auszuschalten.
Q
Anzeige von Volumeneinheiten
Stellen Sie die Küchenwaage
2
auf eine feste
und ebene Oberfläche.
Drücken Sie die EIN- / AUS- / Null-Taste
5
, um
die Küchenwaage
2
einzuschalten.
Warten Sie, bis das LC-Display
4
anhält und
sich auf 0 g
16
, 0:0,0 lb:oz
19
oder 0 ml
17
oder 0,0 fl’oz
18
einpendelt, je nachdem in
welchem Modus sich die Küchenwaage
2
befand, bevor sie ausgeschaltet wurde.
Drücken Sie den Modus-Schalter
3
, bis Milch
21
oder Wasser
20
als Volumenmodus in ml
oder fl’oz angezeigt wird.
Stellen Sie einen Behälter für Flüssigkeiten oder
die Waagschale
1
auf die Wiegeplattform
6
.
Drücken Sie die EIN- / AUS- / Null-Taste
5
, um
das LC-Display
4
auf Null zu setzen (entweder
0 ml oder 0,0 fl’oz). Füllen Sie Milch oder Was-
ser (welches Sie vorher ausgewählt haben) in
den Behälter.
Das LC-Display
4
zeigt nun automatisch das
Volumen der in den Behälter gefüllten Flüssigkeit
an, je nach Voreinstellung entweder in ml oder
fl’oz.
Anschließend drücken Sie den Modus-Schalter
3
, um die Küchenwaage
2
wieder in den
Wiegemodus zu setzen und das entsprechende
Gewicht der Flüssigkeit abzulesen (siehe Abb. E).
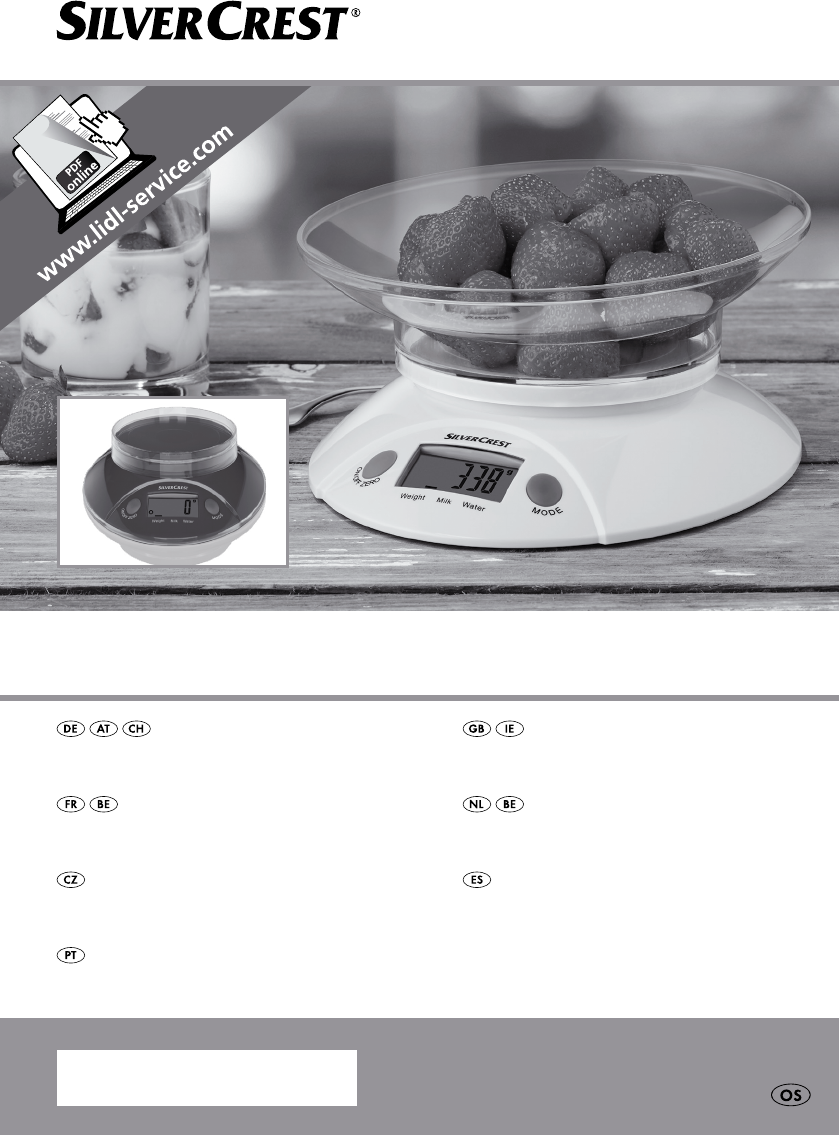
Hinweis: Ist die Küchenwaage
2
überlastet, zeigt
die Fehleranzeige
15
„Err“ an und schaltet sich
nach 6 Sekunden aus. Entfernen Sie das Wiegegut
von der Küchenwaage, dann drücken Sie die EIN- /
AUS- / Null-Taste
5
, um die Küchenwaage wied
er
einzuschalten.
13 DE/AT/CH
Q
Fehler beheben
Fehler Ursache Lösung
Die Fehleranzeige
15
zeigt „Err“ an und
bleibt so stehen.
Die Maximalbelastung
von 5 kg / 11 lb der
Küchenwaage
2
ist
überschritten.
Entfernen Sie das Wiegegut von der Küchen-
waage
2
.
Schalten Sie die Küchenwaage
2
aus und
anschließend wieder ein.
Reduzieren Sie das Wiegegut und wiegen Sie
es in mehreren Schritten.
Die Fehleranzeige
15
zeigt „Lo“ an.
Die Batterie ist verbraucht.
Tauschen Sie die Batterie gem. dem Kapitel
„Batterie austauschen“ aus.
Die Küchenwaage
2
lässt sich nicht
einschalten.
Die Batterie ist ggf.
verbraucht.
Tauschen Sie die Batterie gem. dem Kapitel
„Batterie austauschen“ aus.
Lässt sich die Küchenwaage
2
noch immer nicht
einschalten, setzen Sie sich bitte mit einem Fach-
mann in Verbindung.
Q
Reinigung
Reinigen Sie das Produkt und die Waagschale
1
mit einem leicht angefeuchteten, fusselfreien
Tuch. Bei stärkerer Verschmutzung können Sie
das Tuch auch mit einer leichten Seifenlauge
befeuchten.
Verwenden Sie zur Reinigung keine chemischen
Reiniger, Scheuermittel oder scharfe Gegenstände.
Andernfalls kann das Produkt beschädigt werden.
Tauchen Sie das Produkt niemals in Wasser
oder in andere Flüssigkeiten. Andernfalls kann
das Produkt beschädigt werden.
Q
Entsorgung
Die Verpackung besteht aus umwelt-
freundlichen Materialien, die Sie über
die örtlichen Recyclingstellen entsorgen
können. Der Grüne Punkt gilt nicht für
Deutschland.
b
a
Beachten Sie die Kennzeichnung der
Verpackungsmaterialien bei der Abfall-
trennung, diese sind gekennzeichnet mit
Abkürzungen (a) und Nummern (b) mit
folgender Bedeutung: 1–7: Kunststoffe /
20–22: Papier und Pappe / 80–98:
Verbundstoffe.
Das Produkt und die Verpackungsmateri-
alien sind recycelbar, entsorgen Sie diese
getrennt für eine bessere Abfallbehandlung.
Das Triman-Logo gilt nur für Frankreich.
Möglichkeiten zur Entsorgung des aus-
gedienten Produkts erfahren Sie bei Ihrer
Gemeinde- oder Stadtverwaltung.
Werfen Sie Ihr Produkt, wenn es ausge-
dient hat, im Interesse des Umweltschutz
es
nicht in den Hausmüll, sondern führen
Sie es einer fachgerechten Entsorgung
zu. Über Sammelstellen und deren Öff-
nungszeiten können Sie sich bei Ihrer zu-
ständigen Verwaltung informieren.
Defekte oder verbrauchte Batterien müssen gemäß
Richtlinie 2006 / 66 / EG und deren Änderungen
recycelt werden. Geben Sie Batterien und / oder
das Produkt über die angebotenen Sammeleinrich-
tungen zurück.
Umweltschäden durch falsche
Entsorgung der Batterien!
14 DE/AT/CH
Batterien dürfen nicht über den Hausmüll entsorgt
werden. Sie können giftige Schwermetalle enthalten
und unterliegen der Sondermüllbehandlung. Die
chemischen Symbole der Schwermetalle sind wie
folgt: Cd = Cadmium, Hg = Quecksilber, Pb = Blei.
Geben Sie deshalb verbrauchte Batterien bei einer
kommunalen Sammelstelle ab.
Garantie
Das Produkt wurde nach strengen Qualitätsrichtlini
en
sorgfältig produziert und vor Anlieferung gewissen-
haft geprüft. Im Falle von Mängeln dieses Produkts
stehen Ihnen gegen den Verkäufer des Produkts
gesetzliche Rechte zu. Diese gesetzlichen Rechte
werden durch unsere im Folgenden dargestellte
Garantie nicht eingeschränkt.
Sie erhalten auf dieses Produkt 3 Jahre Garantie
ab Kaufdatum. Die Garantiefrist beginnt mit dem
Kaufdatum. Bitte bewahren Sie den Original-Kassen-
bon gut auf. Diese Unterlage wird als Nachweis
für den Kauf benötigt.
Tritt innerhalb von 3 Jahren ab dem Kaufdatum
dieses Produkts ein Material- oder Fabrikationsfehler
auf, wird das Produkt von uns – nach unserer Wahl –
für Sie kostenlos repariert oder ersetzt. Diese Garanti
e
verfällt, wenn das Produkt beschädigt, nicht sach-
gemäß benutzt oder gewartet wurde.
Die Garantieleistung gilt für Material- oder Fabrika-
tionsfehler. Diese Garantie erstreckt sich nicht auf
Produktteile, die normaler Abnutzung ausgesetzt
sind
(z. B. Batterien) und daher als Verschleißteile ange-
sehen werden können oder für Beschädigungen an
zerbrechlichen Teilen, z. B. Schalter, Akkus oder die
aus Glas gefertigt sind.
15 GB/IE
Introduction ................................................................................................................................... Page 16
Proper Use ........................................................................................................................................... Page 16
Description of Parts .............................................................................................................................Page 16
Technical Data ....................................................................................................................................Page 17
Features ...............................................................................................................................................Page 17
Supply Scope ......................................................................................................................................Page 17
Safety Instructions ................................................................................................................... Page 17
General Safety Instructions ................................................................................................................Page 17
Safety instructions for batteries / rechargeable batteries .................................................................Page 18
Getting started............................................................................................................................Page 19
Replacing the battery ..........................................................................................................................Page 20
Unit conversion button ........................................................................................................................Page 20
Weighing ............................................................................................................................................. Page 20
Weigh and add ..................................................................................................................................Page 21
Removing part of the weight from the kitchen scale .........................................................................Page 21
Automatic or manual switch-off .......................................................................................................... Page 21
Volume units display mode .................................................................................................................Page 21
Troubleshooting ........................................................................................................................Page 22
Cleaning ...........................................................................................................................................Page 22
Disposal ............................................................................................................................................Page 22
Warranty ......................................................................................................................................... Page 23
16 GB/IE
The following icons / symbols are used in this instruction manual:
Observe caution and safety notes!
5 kg
Do not exceed the 5 kg capacity of
the product.
Risk of explosion!
Food-safe! This product has no
adverse effect on taste or smell.
Direct current
(Type of current and voltage)
The weighing bowl is not dishwasher
suitable.
Wear protective gloves.
The weighing bowl is made of
Polystyrene (PS 6). Do not dispose of
it in the household waste. Dispose of
the weighing bowl which is no longer
needed in accordance with applica-
ble local regulations.
Never leave children unattended with
packaging materials or the product.
This product is not suitable for
microwaves!
Kitchen Scale
Introduction
We congratulate you on the purchase of your new
product. You have chosen a high quality product.
The instructions for use are part of the product. They
contain important information concerning safety,
use and disposal. Before using the product, please
familiarise yourself with all of the safety information
and instructions for use. Only use the product as
described and for the specified applications. If you
pass the product on to anyone else, please ensure
that you also pass on all the documentation with it.
Q
Proper Use
This product is designed to weigh household quan-
tities of foods in private household. The product
measures the weight of non-aggressive, non-corrosive
and non-abrasive liquids or solids. It is not intended
for weighing medication or prohibited materials.
The product is not intended for commercial use.
Q
Description of Parts
1
Weighing bowl
2
Kitchen scale
3
Mode setting button (Weight ▸ Milk ▸ Water)
4
LC display
5
On / Off / Zero button (tare) (On / Off / Zero)
6
Weighing platform
7
Battery compartment cover clip
8
Battery compartment cover
9
Gram/lb:oz unit conversion button
10
Battery metal contact – spring action
11
Battery embedding case
12
Battery black locking tab
13
Battery compartment
14
Battery isolating strip
17 GB/IE
LC display:
15
Error code display
16
“g” = weight unit indication (gram)
17
“ml” = volume unit indication (millilitre)
18
“fl’oz” = volume unit indication (fluid ounce)
19
“lb:oz”= weight unit indication (pound: ounce)
20
” = sign over “Water” = measuring water
volume mode (ml or fl’oz water)
21
” = sign over “Milk” = measuring milk volume
mode (ml or fl’oz milk)
22
” = sign over “Weight” = weighing mode
(gram or lb:oz)
23
“0” icon = zero weight
(bottom left corner of the LC display)
24
“–” icon = negative value
(left side of LC display)
25
“T” icon = tare weight
(top left corner of the LC display)
Q
Technical Data
Weighing range: 0.1 oz–11 lb (pounds) /
1 g–5 kg (kilograms)
Graduation: 0.1 oz / 1 g
Battery:
1 x 3 V Lithium battery
(CR2032 Lithium round cells /
included)
Q
Features
Indicators for volume units for water and milk.
Two different weight unit systems – grams (g)
or pounds (lb:oz), switchable.
LC displays warning symbol to indicate Low
battery power / overload.
High precision strain gauge sensors.
Zero reset or tare function.
Auto-off function: switches the product off if not
used for two minutes to save power.
Manual switch off: press the On / Off / Zero
button
5
and keep it pressed for three seconds
(see Fig. A).
Q
Supply Scope
After unpacking the delivery, please check immediately
that it contains all parts and that the product is in
perfect condition.
1 kitchen scale
1 weighing bowl
1
lithium battery (pre-installed inside the battery case)
1 operating manual
Q
Safety Instructions
General Safety
Instructions
DANGER TO LIFE AN
D
RISK OF ACCIDENTS FOR
INFANTS AND CHILDREN!
Never leave children unattended
with packaging materials or the
product. There is otherwise a
risk of fatal injury by suffocation.
Always keep children away from
the product.
This product can be used by chil-
dren aged from 8 years and
above and persons with reduced
physical, sensory or mental ca-
pabilities or lack of experience
and knowledge if they have been
given supervision or instruction
concerning use of the product in
a safe way and understand the
hazards involved. Children shall
not play with the product.
18 GB/IE
Cleaning and user maintenance
shall not be made by children
without supervision.
5 kg
CAUTION! RISK OF
INJURY! Do not exceed
the 5 kg capacity of the product.
This could damage the product.
Do not expose the product to
- extreme temperatures,
- strong vibrations,
- heavy mechanical loads,
- direct sunlight
- magnetic fields,
- moisture.
These can damage the product.
Protect the product from electro-
static charge / discharge. This
could hinder the internal data
exchange, which causes errors
in the LCD readout.
Check the product for damage
before use. Never use a dam-
aged product.
Never open the
housing of the product. This can
result in injury and damage to
the product. Repairs must be car-
ried out by an electrician only.
Do not allow anyone inexperi-
enced to use the product. Make
sure that anyone intending to use
the product has read the operat-
ing manual and is capable of
operating the product safely.
Place the product on a solid,
horizontal and flat surface.
This product has delicate electro-
nic components. This means that
if it is placed near an object that
transmits radio signals, it could
cause interference. This could be,
for example, mobile telephones,
walkie talkies, CB radios, remote
controls and microwaves. If the
display indicates a problem, move
such objects away from it.
Electromagnetic interference /
high-frequency emissions can lead
to the product failing. In cases of
the product failing to work remo
ve
the battery for a short while and
then replace it. Do this as descri-
bed in the “Replacing the battery
section.
FOOD-SAFE! This
product has no adverse
effect on taste or smell.
The weighing bowl is not
dishwasher suitable.
Safety instructions
for batteries /
rechargeable batteries
DANGER TO
LIFE! Keep batteries / rechar-
geable batteries out of reach of
children. If accidentally
19 GB/IE
swallowed seek immediate me-
dical attention.
DANGER OF EXPLO-
SION! Never recharge
non-rechargeable batteries. Do
not short-circuit batteries / rechar-
geable batteries and / or open
them. Overheating, fire or bursting
can be the result.
Never throw batteries / rechargea-
ble batteries into fire or water.
Do not exert mechanical loads to
batteries / rechargeable batteries.
Risk of battery leakage /
rechargeable batteries
Avoid extreme environmental con-
ditions and temperatures, which
could affect batteries/rechargea-
ble batteries, e.g. radiators/direct
sunlight.
Avoid contact with the skin, eyes
and mucous membranes. In the
event of contact with battery acid,
thoroughly flush the affected area
with plenty of clean water and
seek immediate medical attention.
WEAR PROTECTIVE
GLOVES! Leaked or
damaged batteries / rechargeable
batteries can cause burns on
contact with the skin. Wear suita-
ble protective gloves at all times if
such an event occurs.
In the event of a battery leak,
immediately remove it from the
product to prevent damage.
Only use the same type of batte-
ries / rechargeable batteries. Do
not mix used and new batteries /
rechargeable batteries.
Remove the batteries / rechargea-
ble batteries if the product will
not be used for a longer period.
Risk of damage of the product
Only use the specified type of
battery / rechargeable battery!
When inserting ensure the correct
polarity! This is shown inside the
battery compartment!
Clean the contacts on the battery
and in the battery compartment
before inserting!
Remove exhausted batteries /
rechargeable batteries from the
product immediately.
Getting started
1. Loosen the screw located at the back of the
kitchen scale
2
by using a screwdriver.
2. Open the battery compartment
13
under the
kitchen scale
2
by pushing the battery compart-
ment cover clip
7
on the battery compartment
cover
8
towards the battery compartment and
lift up the cover.
3. Remove the battery isolating strip
14
from under
the battery metal contact to which it is attached.
4. Reattach the battery compartment cover
8
to
the battery compartment
13
. Firmly press the
20 GB/IE
battery compartment cover
8
onto the battery
compartment
13
until you hear it lock into place.
5. Tighten the screw by using a scewdriver
(see Fig. B).
Q
Replacing the battery
1.
Switch off the kitchen scale
2
. Press and hold
down the On / Off / Zero button
5
for 3 seconds.
2. Loosen the screw located at the back of the
kitchen scale
2
by using a screwdriver. Open
the battery compartment
13
as described above.
3. Remove the exhausted batteries from the battery
embedding case
11
by pressing and pulling
the black battery locking tab
12
. The battery is
automatically released from the battery embed-
ding case
11
. Ensure that you do not exert too
much force on the battery metal contact
10
,
otherwise it could be damaged by over-bending
as the battery is lifted. Remove the battery from
the battery embedding case
11
.
4. Insert a new battery into the battery embedding
case
11
. Make sure you fit the battery the right
way round (polarity). The “+”- side must face
upwards. The battery must be pressed inside
the battery embedding case
11
.
5. Close the battery compartment
13
and tighten
the screw by using a screwdriver.
Q
Unit conversion button
The g / lb:oz unit conversion button
9
for the
units of weight can be found on the bottom of
the kitchen scale
2
. By simply pressing the
button the units of measure change between
metric (g, ml) and imperial (lb:oz, fl’oz).
Note:
If the units of weight are set to metric (g) then the
units of volume will be automatically shown as ml.
If the units of weight are set to imperial (lb:oz)
then the units of volume will be automatically
shown as fl’oz.
The standard unit of weight is g.
Q
Weighing
Note: Starting with or without the weighing bowl
1
,
the kitchen scale
2
always starts from 0 g /
0:0.0 lb:oz
16
/
19
if the On / Off / Zero button
5
is pressed.
If you place the weighing bowl
1
on the kitchen
scale
2
after it has been switched on, then the dis-
play will show the weight of the weighing bowl
1
.
Press the On / Off / Zero button
5
once to reset the
display to 0 g / 0:0.0 lb:oz
16
/
19
, “T“ (TARE)
25
shows on the LC display
4
.
Place the kitchen scale on a solid, flat surface.
Press the On / Off / Zero button
5
to switch
on the kitchen scale
2
(see Fig. C).
Wait until the LC display
4
stops and stabilizes
on 0 g
16
, 0:0.0 lb:oz
19
or 0 ml
17
or 0.0 fl’oz
18
, which will be the mode the kitchen scale
was in when it was last switched off.
Press the mode setting button
3
to set the
kitchen scale to the normal weighing mode
22
.
If necessary select the units of weight in ad-
vance by pressing the g / lb:oz unit conversion
button
9
on the bottom of the kitchen scale
before you start weighing.
For re-calibrating the kitchen scale
2
, when
you have selected the units of weight press and
hold down the On / Off / Zero button
5
for 3
seconds to switch off the kitchen scale
2
.
Stand the kitchen scale
2
on a hard, flat table
surface. Place the weighing bowl
1
on the
weighing platform
6
.
Press the On / Off / Zero button
5
to switch on
the kitchen scale in the normal weighing mode.
Wait until all the segments of the LC display
4
have illuminated and the kitchen scale
2
has
stabilized at 0 g
16
, 0:0.0 lb:oz
19
.
Place the substance to be weighed into the
weighing bowl
1
to start the weighing process.
The LC display
4
shows the weight of the sub-
stance in the weighing bowl
1
in the selected
unit of weight (see Fig. D).
21 GB/IE
Q
Weigh and add
The kitchen scale
2
allows you to carry out con-
secutive weighings without emptying the weighing
bowl
1
between weighings.
Place the weighing bowl
1
on the weighing
platform
6
.
Press the On / Off / Zero button
5
to switch
on the kitchen scale
2
.
Wait until the LC display
4
stops and stabi-
lizes on 0 g
16
, 0:0.0 lb:oz
19
or 0 ml
17
or
0.0 fl’oz
18
, which will be the mode the kitchen
scale
2
was in when it was last switched off.
Press the mode setting button
3
to set the
kitchen scale
2
to weighing mode
22
(preset
to g or lb:oz).
Place the substance to be weighed into the
weighing bowl
1
to start the weighing process.
The LC display
4
shows the weight of the first
substance placed in the weighing bowl
1
.
Press the On / Off / Zero button
5
the kitchen
scale
2
now reads “T“ (TARE)
25
.
You can add further substances into the weighing
bowl
1
in the same way, the LC display
4
shows the weight of the added substance.
Press the On / Off / Zero button
5
between
each new substance.
Continue in this way only until the maximum
capacity of the kitchen scale
2
is reached or
the weighing bowl
1
is full.
Q
Removing part of the weight
from the kitchen scale
Place the weighing bowl
1
on the weighing
platform
6
.
Press the On / Off / Zero button
5
to switch
on the kitchen scale
2
.
Wait until the LC display
4
stops and stabilizes
on 0 g
16
, 0:0.0 lb:oz
19
or 0 ml
17
or
0.0 fl’oz
18
, which will be the mode the kitchen
scale
2
was in when it was last switched off.
Press the mode setting button
3
to set the
weighing mode
22
(preset to g or lb:oz).
Place the substance to be weighed into the
weighing bowl
1
to start the weighing process.
The LC display
4
shows the weight of the first
substance placed in the weighing bowl
1
.
Press the On / Off / Zero button
5
to reset the
LC display
4
to zero; the “T“ (TARE)
25
appears.
Now remove the desired amount of substance
from weighing bowl
1
. The LC display
4
shows the weight of the substance removed
from the weighing bowl
1
as a negative value.
Press the On / Off / Zero button
5
to reset the
LC display
4
to zero, the “T“ (TARE)
25
appears.
Now the kitchen scale
2
is ready for further
removal / adding substances.
Q
Automatic or manual switch-off
The kitchen scale switches itself off automatically
if it has not been used for 2 minutes.
Press the On / Off / Zero button
5
for longer
than 3 seconds to switch off the kitchen scale.
Q
Volume units display mode
Place the kitchen scale
2
on a solid, flat surface.
Press the On / Off / Zero button
5
to switch
on the kitchen scale
2
.
Wait until the LC display
4
stops and stabi-
lizes on 0 g
16
, 0:0.0 lb:oz
19
or 0 ml
17
or
0.0 fl’oz
18
, which will be the mode the kitchen
scale
2
was in when it was last switched off.
Press the mode setting button
3
until milk
21
or water
20
appears as the volume mode with
the units as ml or fl’oz.
Place a container for liquid or the weighing bowl
1
on the weighing platform
6
.
Press the On / Off / Zero button
5
to set the
LC display
4
to zero (0 ml or 0.0 fl’oz). Pour
milk or water (as selected previously) into the
container.
The LC display
4
now automatically shows
the volume of liquid poured into the container,
either in ml or in fl’oz, depending on the setting.
Then press the mode setting button
3
to set the
kitchen scale
2
to weighing mode again and
read off the equivalent weight of the liquid (see
Fig. E).
22 GB/IE
Note: If the kitchen scale
2
is overloaded, the
error code display
15
indicates “Err“ and it will
switch off within 6 seconds. Remove the substance
and press the On / Off / Zero button
5
to switch
on the kitchen scale again.
Q
Troubleshooting
Error Cause Solution
The error code dis-
play
15
indicates
“Err” and does not
change.
The maximum capacity of
the kitchen scale
2
of
5 kg / 11 lb has been
exceeded.
Remove the food from the kitchen scale
2
.
Switch the kitchen scale
2
off and then back
on again.
Reduce the amount of food and weigh it in
several steps.
The error code display
15
indicates “Lo”.
The battery is empty.
Replace the battery as described in the
“Replacing the battery” chapter.
It is not possible to
switch the kitchen
scale
2
on.
The battery may be
empty.
Replace the battery as described in the
“Replacing the battery” chapter.
If it is still not possible to switch the kitchen scale
2
on, please contact a specialist.
Q
Cleaning
Clean the product and the weighing bowl
1
with a slightly dampened, non-fluffing cloth.
To remove more stubborn dirt, you can also
dampen the cloth with a weak soap solution.
Do not use chemical cleaners, scouring agents
or sharp objects for cleaning. These can damage
the product.
Never immerse the product in water or other
liquids. This can damage the product.
Q
Disposal
The packaging is made entirely of recy-
clable materials, which you may dispose
of at local recycling facilities. The Green
Dot is not valid for Germany.
b
a
Observe the marking of the packaging
materials for waste separation, which
are marked with abbreviations (a) and
numbers (b) with following meaning:
1–7: plastics / 20–22: paper and fibre-
board / 80–98: composite materials.
The product and packaging materials
are recyclable, dispose of it separately
for better waste treatment. The Triman
logo is valid in France only.
Contact your local refuse disposal au-
thority for more details of how to dispose
of your worn-out product.
To help protect the environment, please
dispose of the product properly when it
has reached the end of its useful life and
not in the household waste. Information
on collection points and their opening
hours can be obtained from your local
authority.
Faulty or used batteries must be recycled in accord-
ance with Directive 2006 / 66 / EC and its amend-
ments. Please return the batteries and / or the product
to the available collection points.
Environmental damage
through incorrect disposal
of the batteries!
23 GB/IE
Batteries may not be disposed of with the usual do-
mestic waste. They may contain toxic heavy metals
and are subject to hazardous waste treatment rules
and regulations. The chemical symbols for heavy
metals are as follows: Cd = cadmium, Hg= mercury,
Pb = lead. That is why you should dispose of used
batteries at a local collection point.
Warranty
The product has been manufactured to strict quality
guidelines and meticulously examined before deli-
very. In the event of product defects you have legal
rights against the retailer of this product. Your legal
rights are not limited in any way by our warranty
detailed below.
The warranty for this product is 3 years from the
date of purchase. Should this product show any fault
in materials or manufacture within 3 years from the
date of purchase, we will repair or replace it – at
our choice – free of charge to you.
The warranty period begins on the date of purchase.
Please keep the original sales receipt in a safe lo-
cation. This document is required as your proof of
purchase. This warranty becomes void if the product
has been damaged, or used or maintained impro-
perly.
The warranty applies to defects in material or manuf-
acture. This warranty does not cover product parts
subject to normal wear, thus possibly considered
consumables (e.g. batteries) or for damage to fragile
parts, e.g. switches, rechargeable batteries or glass
parts.
24 FR/BE
Introduction ................................................................................................................................... Page 25
Utilisation conforme ............................................................................................................................Page 25
Description des pièces ........................................................................................................................ Page 25
Données techniques ............................................................................................................................ Page 26
Fonctions ..............................................................................................................................................Page 26
Contenu de la livraison .......................................................................................................................Page 26
Indications de sécurité .........................................................................................................Page 26
Conseils de sécurité ............................................................................................................................Page 26
Consignes de sécurité relatives aux piles / aux piles rechargeables ...............................................Page 28
Mise en service ...........................................................................................................................Page 29
Remplacement de la pile ....................................................................................................................Page 29
Interrupteur de conversion ..................................................................................................................Page 29
Pesée ....................................................................................................................................................Page 30
Peser et ajout d'aliments .....................................................................................................................Page 30
Enlever partiellement les aliments ......................................................................................................Page 31
Arrêt automatique ou manuel.............................................................................................................Page 31
Affichage des unités de volume .........................................................................................................Page 31
Solutions aux problèmes ...................................................................................................Page 32
Nettoyage ......................................................................................................................................Page 32
Traitement des déchets ........................................................................................................Page 32
Garantie ........................................................................................................................................... Page 33
25 FR/BE
Ce mode d‘emploi utilise les pictogrammes et symboles suivants :
Respecter les avertissements et les
consignes de sécurité !
5 kg
Ne chargez le produit pas à plus
de 5 kg.
Risque d‘explosion !
Les propriétés de goût et d'odeur ne
sont pas influencées par ce produit.
Courant continu
(courant et tension)
Le récipient de pesée ne peut pas être
nettoyé au lave-vaisselle.
Porter des gants de protection.
Le récipient de pesée est fabriqué en
polystyrène (PS 6). Ne pas le jeter
dans les ordures ménagères. Jetez le
récipient de pesée lorsque vous ne
l'utilisez plus, conformément à la ré-
glementation locale en vigueur.
Ne laissez jamais les enfants
manipuler sans surveillance le
matériel d'emballage et le produit.
Le produit n'est pas adapté au micro-
ondes.
Balance de cuisine
Introduction
Nous vous félicitons pour l‘achat de votre nouveau
produit. Vous avez opté pour un produit de grande
qualité. Avant la première mise en service, vous de-
vez vous familiariser avec toutes les fonctions du
produit. Veuillez lire attentivement le mode d’emploi
ci-dessous et les consignes de sécurité. N’utilisez le
produit que pour l’usage décrit et les domaines d’ap-
plication cités. Conservez ces instructions. Si vous
donnez le produit à des tiers, remettez-leur égale-
ment la totalité des documents.
Q
Utilisation conforme
Ce produit est destiné au pesage et au pesage ad-
ditionnel d'aliments en quantités répandues dans
le commerce de détail et présentes dans les foyers
privés. Le produit sert à déterminer le poids de li-
quides ou de produits solides non agressifs, non
caustiques et non abrasifs. Il n’est pas prévu pour
peser des médicaments ou d‘autres produits non
autorisés. Le produit n‘est pas destiné à un usage
commercial.
Q
Description des pièces
1
Récipient de pesée
2
Balance de cuisine
3
Interrupteur du mode Poids / Lait / Eau
(Weight ▸ Milk ▸ Water)
4
Écran à cristaux liquides
5
Touche MARCHE / ARRÊT / Zéro, réinitialisa-
tion (Tara) (ON / OFF / ZERO)
6
Plateforme de pesée
7
Languette du couvercle du compartiment à pile
8
Couvercle du compartiment à pile
9
Interrupteur de conversion g / lb:oz
10
Contact métallique de la pile avec effet de
ressort hélicoïdal
11
Encastrement extérieur de la pile
12
Interrupteur noir de fermeture pour la pile
26 FR/BE
13
Compartiment à pile
14
Bande isolante de la pile
Affichage LCD :
15
Affichage erreur
16
«g» = affichage de l'unité de poids (gramme)
17
«ml» = affichage de l'unité de volume (millilitre)
18
«fl'oz» = affichage de l'unité de volume
(liquide : once)
19
«lb:oz» = affichage de l'unité de poids
(livre : once)
20
«–» Signe au-dessus de l'eau = Unité de mesure
pour le mode de volume (eau en ml ou fl'oz)
21
«–» Signe au-dessus du lait = Unité de mesure
pour le mode de volume (lait en ml ou fl'oz)
22
«–» = Signe au-dessus du poids = Mode de
pesée (gramme ou livre : once)
23
Pictogramme «0» = Poids zéro (coin inférieur
gauche de l'écran à cristaux liquides)
24
«–» = Valeur négative (côté gauche de l'écran
à cristaux liquides)
25
«T» = Poids Tara (coin supérieur gauche de
l'écran à cristaux liquides)
Q
Données techniques
Plage de pesée : 0,1 oz–11 lb (livre) / 1 g–5 kg
(kilogramme)
Graduation : 0,1 oz / 1 g
Pile : 1 x pile lithium 3 V
(pile bou-
ton lithium CR2032 / fournie)
Q
Fonctions
Affichage des unités de volume pour l'eau et
le lait.
Deux systèmes différents pour les unités de poids
– Gramme (g) ou livre (lb:oz), convertissable.
Avertissement lors d'un niveau de batterie faible /
Surcharge par affichage spécial du picto-
gramme LCD.
Utilisation de capteurs ultra précis de jauge de
contrainte.
Position zéro ou fonction Tara possible.
Fonction d'arrêt automatique pour économiser
de l'énergie, lorsque le produit n'est pas utilisé
plus de deux minutes.
Arrêt manuel – Appuyez sur la touche ON /
OFF / Zéro
5
et la maintenir enfoncée durant
trois secondes (voir ill. A).
Q
Contenu de la livraison
Dès ouverture de l'emballage, veuillez vérifier que
le contenu de la livraison est complet et que le pro-
duit est en parfait état.
1 balance de cuisine
1 récipient de pesée
1 pile lithium (pré-installée dans le compartiment
à pile)
1 mode d'emploi
Q
Indications de sécurité
Conseils de sécurité
DANGER DE MORT ET
RISQUE D‘ACCIDENTS
POUR
ENFANTS EN BAS ÂGE ET
ENFANTS ! Ne laissez jamais
les enfants sans surveillance avec
le matériel d‘emballage et le
produit. Dans le cas contraire,
danger de mort par asphyxie.
Veuillez toujours tenir les enfants
éloignés de le produit.
27 FR/BE
Le produit peut être utilisé par des
enfants âgés de 8 ans et plus ainsi
que par des personnes ayant des
capacités physiques, sensorielles
ou mentales réduites ou manquant
d‘expérience ou de connaissances
,
s‘ils sont surveillés ou s‘ils ont été
informés de l‘utilisation sûre du
produit et comprennent les risques
liés à son utilisation. Les enfants
ne doivent pas jouer avec le pro-
duit. Le nettoyage et l‘entretien
du produit ne doivent pas être
effectués par des enfants laissés
sans surveillance.
5 kg
ATTENTION ! RISQUE
DE BLESSURE ! Ne
chargez le produit pas à plus de
5 kg. Le produit pourrait être en-
dommagé.
Ne pas exposer le produit
- à des températures extrêmes,
- à des vibrations trop fortes,
- des effets mécaniques extrêmes,
- aux rayons directs du soleil,
- à un environnement magnétique,
- à l‘humidité.
Dans le cas contraire, le produit
risque d‘être endommagé.
Protégez le produit contre les
chargements / déchargements
électrostatiques. Ceux-ci pour-
raient causer un empêchement de
l‘échange de données internes,
ce qui provoque des erreurs sur
l‘écran LCD.
Avant la mise en service, contrô-
ler si le produit présente des
dommages. Ne pas mettre le
produit endommagé en service.
N‘ou-
vrez jamais le couvercle du pro-
duit. Ceci risque d‘engendrer des
blessures et des dommages ma-
tériels. Les travaux de réparations
doivent être effectués par un élec-
tricien certifié.
Ne laissez pas des personnes
inexpérimentées utiliser le produit.
Veuillez vous assurer que tout utili-
sateur de ce produit ait lu le mode
d‘emploi et soit en mesure d‘utili-
ser le produit en toute sécurité.
Poser le produit sur un support
fixe, horizontal et plan.
Le produit contient des compo-
sants électroniques sensibles.
Certaines interférences dues aux
appareils à transmission radio
placés à proximité sont donc
possibles. Il peut s'agir par ex. de
téléphones mobiles, d'appareils
radio, de postes CB, de télécom-
mandes et de fours à micro-ondes.
En cas d'affichages erronés sur
l'écran, éloignez ces appareils
de l'environnement du produit.
28 FR/BE
Des interférences électromagné-
tiques / émissions parasites haute
fréquence peuvent entraîner des
dysfonctionnements. En cas de
dysfonctionnements de ce type,
retirez la pile pendant quelques
instants et remettez-la en place.
Procédez pour ce faire comme il
l'est décrit au chapitre «Rempla-
cement de la pile».
Les propriétés de goût et
d'odeur ne sont pas in-
fluencées par ce produit.
Le récipient de pesée ne
peut pas être nettoyé au
lave-vaisselle.
Consignes de sécurité
relatives aux piles /
aux piles
rechargeables
DANGER DE MORT! Rangez
les piles / piles rechargeables
hors de la portée des enfants.
En cas d’ingestion, consultez
immédiatement un médecin !
RISQUE D‘EXPLO-
SION ! Ne rechargez
jamais des piles non rechar-
geables. Ne court-circuitez pas
les piles / piles rechargeables
et / ou ne les ouvrez pas ! Autre-
ment, vous risquez de provoquer
une surchauffe, un incendie ou
une explosion.
Ne jetez jamais des piles / piles
rechargeables au feu ou dans
l’eau.
Ne pas soumettre les piles /
piles rechargeables à une charge
mécanique.
Risque de fuite des piles /
piles rechargeables
Évitez d’exposer les piles / piles
rechargeables à des conditions
et températures extrêmes suscep-
tibles de les endommager, par
ex. sur des radiateurs / exposition
directe aux rayons du soleil.
Évitez tout contact avec la peau,
les yeux ou les muqueuses! En
cas de contact avec l’acide d’une
pile, rincez la zone touchée à
l’eau claire et consultez immé-
diatement un médecin !
PORTER DES GANTS
DE PROTECTION! Les
piles / piles rechargeables en-
dommagées ou sujettes à des
fuites peuvent provoquer des
brûlures au contact de la peau.
Vous devez donc porter des gants
adéquats pour les manipuler !
29 FR/BE
En cas de fuite des piles, retirez-
les aussitôt du produit pour éviter
tout endommagement.
Utilisez uniquement des piles /
piles rechargeables du même
type. Ne mélangez pas des piles /
piles rechargeables usées et
neuves !
Retirez les piles / piles rechar-
geables, si vous ne comptez pas
utiliser le produit pendant une
période prolongée.
Risque d‘endommagement
du produit
Exclusivement utiliser le type de
pile / pile rechargeable spécifié.
Lors de la mise en place des
piles, veillez à respecter la pola-
rité! Celle-ci est indiquée dans
le compartiment à piles!
Nettoyez si nécessaire les c
ontacts
de la pile et du compartiment à
pile avant d‘insérer la pile !
Retirez immédiatement les piles /
piles rechargeables usées du
produit.
Q
Mise en service
1. Desserrez la vis se trouvant à l'arrière de la
balance de cuisine
2
, en vous servant d'un
tournevis.
2. Ouvrez le compartiment à pile
13
situé au dos
de la balance de cuisine
2
, en pressant la
languette
7
du couvercle du compartiment à
pile
8
vers le compartiment à pile et en le
soulevant vers le haut.
3. Retirez la bande isolante
14
fixée au contact
métallique de la pile.
4. Replacez le couvercle du compartiment à pile
8
sur le compartiment à pile
13
. Pressez le
couvercle du compartiment à pile
8
sur le
compartiment à pile
13
, de telle sorte que vous
l'entendiez s'encliqueter.
5. Serrez la vis en vous servant d'un tournevis
(voir ill. B).
Q
Remplacement de la pile
1. Éteignez la balance de cuisine
2
. Appuyez
et enfoncez la touche MARCHE / ARRÊT / Zéro
5
pendant 3 secondes.
2. Desserrez la vis se trouvant à l'arrière de la ba-
lance de cuisine
2
, en vous servant d'un tour-
nevis. Ouvrez le compartiment à pile
13
, comme
décrit ci-dessus.
3. Enlevez la pile usagée de son encastrement
11
,
en appuyant et en tirant sur l'interrupteur noir de
fermeture
12
. La pile se décroche automatique-
ment de son encastrement
11
. Assurez-vous de
ne pas exercer une pression trop grande sur le
contact métallique de la pile
10
. Vous risquez
sinon de l'endommager, car le soulèvement de
la pile entraîne une déformation. Enlevez la pile
de son encastrement extérieur
11
.
4. Insérez la nouvelle pile dans l'encastrement ex-
térieur
11
. Vérifier que la polarité est correcte.
Le côté marqué «+» doit être vers le haut. La
pile doit être pressée dans l'encastrement exté-
rieur
11
.
5. Fermez le compartiment à pile
13
et serrez la
vis, en vous servant d'un tournevis.
Q
Interrupteur de conversion
Un interrupteur de conversion g / lb:oz
9
pour
les unités de poids se trouvent sous la balance
de cuisine
2
. D'une simple pression de bouton,
30 FR/BE
l'unité de mesure bascule des unités métriques
(g, ml) aux unités impériales (lb:oz, fl'oz).
Remarque :
Lorsque l'unité de poids est déterminée comme
étant une mesure métrique (g), l'unité de volume
est également affichée en ml.
Lorsque l'unité de poids est déterminée comme
étant une mesure impériale (lb:oz), l'unité de
volume est également affichée en fl'oz .
L'unité standard du poids est le g (gramme).
Q
Pesée
Remarque : Que vous commenciez avec ou sans
récipient de pesée
1
, la balance de cuisine
2
démarre toujours à 0 g / 0:0.0 lb:oz
16
/
19
, lorsque
la touche MARCHE / ARRÊT / Zéro
5
est enfoncée.
Lorsque vous placez le récipient de pesée
1
après
avoir allumé la balance de cuisine
2
, celle-ci an-
nonce le poids du récipient de pesée
1
. Appuyez
1 x sur la touche MARCHE / ARRÊT / Zéro
5
, afin
de réinitialiser l'affichage sur 0 g / 0:0.0 lb:oz
16
/
19
; «T» (TARE)
25
s'affiche sur l'écran à cristaux
liquides
4
.
Posez la balance de cuisine sur une surface
plane et stable.
Appuyez sur la touche MARCHE / ARRÊT / Zéro
5
po
ur mettre en marche la balance de cuisine
2
(voir ill. C).
Attendez que que l'écran à cristaux liquides
4
s'arrête, et se stabilise sur 0 g
16
, 0:0,0 once
19
ou 0 ml
17
ou 0,0 fl'oz
18
, selon le mode sur
lequel se trouvait la balance de cuisine, avant
qu'elle soit éteinte.
Appuyez sur l'interrupteur du mode
3
, afin de
basculer la balance de cuisine sur le mode de
pesée normal
22
.
Si nécessaire, choisissez auparavant l'unité de
poids, en appuyant sur l'interrupteur de conver-
sion
9
situé sous la balance de cuisine, avant
de commencer la pesée.
Pour recalibrer la balance de cuisine
2
lorsque
vous avez sélectionné l'unité de poids, appuyez
et maintenez la touche MARCHE / ARRÊT /
Zéro
5
enfoncée durant 3 secondes, afin
d'éteindre la balance de cuisine
2
.
Posez la balance de cuisine
2
sur une surface
de table dure et plane. Posez le récipient de
pesée
1
sur la plateforme de pesée
6
.
Appuyez sur la touche MARCHE / ARRÊT / Zéro
5
po
ur mettre en marche la balance de cuisine
et activer le mode de pesée normal.
Attendez que tous les segments de l'écran à
cristaux liquides
4
soient allumés, et que la
balance de cuisine
2
soit stabilisée sur 0 g
16
,
0:0,0 once
19
.
Remplissez le récipient de pesée
1
de l'aliment
à peser, afin de démarrer la pesée. Le poids
de l'aliment pesé s'affiche sur l'écran à cristaux
liquides
4
dans l'unité de pesée sélectionnée
(voir ill. D).
Q
Peser et ajout d'aliments
La balance de cuisine
2
permet de réaliser des
pesées successives, sans devoir enlever l'aliment à
peser du récipient de pesée
1
.
Posez le récipient de pesée
1
sur la plateforme
de pesée
6
.
Appuyez sur la touche MARCHE / ARRÊT / Zéro
5
pour mettre en marche la balance de cui-
sine
2
.
Attendez que que l'écran à cristaux liquides
4
s'arrête, et se stabilise sur 0 g
16
, 0:0,0 once
19
ou 0 ml
17
ou 0,0 fl'oz
18
, selon le mode sur
lequel se trouvait la balance de cuisine
2
, avant
qu'elle soit éteinte.
Appuyez sur l'interrupteur du mode
3
, afin de
régler la balance de cuisine
2
sur le mode de
poids
22
(préréglage soit g soit lb:oz).
Remplissez le récipient de pesée
1
, afin de
démarrer la pesée. Le poids du premier aliment
placé dans le récipient de pesée
1
s'affiche
sur l'écran à cristaux liquides
4
.
Appuyez sur la touche MARCHE / ARRÊT /
Zéro
5
, la balance de cuisine
2
affiche dé-
sormais «T» (TARE)
25
.
31 FR/BE
Vous pouvez peser un autre aliment de la même
manière, le poids de l'aliment ajouté s'affiche
sur l'écran à cristaux
4
.
Appuyez sur la touche MARCHE / ARRÊT /
Zéro
5
, après chaque nouvel aliment ajouté.
Répétez cette procédure autant de fois que né-
cessaire, jusqu'à ce que la charge maximale de
la balance de cuisine
2
soit atteinte, ou que
le récipient de pesée
1
soit plein.
Q
Enlever partiellement
les aliments
Posez le récipient de pesée
1
sur la plateforme
de pesée
6
.
Appuyez sur la touche MARCHE / ARRÊT / Zéro
5
pour mettre en marche la balance de cui-
sine
2
.
Attendez que que l'écran à cristaux liquides
4
s'arrête, et se stabilise sur 0 g
16
, 0:0,0 once
19
ou 0 ml
17
ou 0,0 fl'oz
18
, selon le mode sur
lequel se trouvait la balance de cuisine
2
, av
ant
qu'elle soit éteinte.
Appuyez sur l'interrupteur du mode
3
, afin de
régler le mode du poids
22
(préréglage soit g
soit lb:oz).
Remplissez le récipient de pesée
1
, afin de
démarrer la pesée. Le poids du premier aliment
placé dans le récipient de pesée
1
s'affiche
sur l'écran à cristaux liquides
4
.
Appuyez sur la touche MARCHE / ARRÊT / Zéro
5
, afin de réinitialiser l'écran à cristaux li-
quides
4
sur zéro ; «T» (TARE)
25
s'affiche.
Enlevez maintenant la quantité d'aliment souhai-
tée du récipient de pesée
1
. L'écran à cristaux
liquides
4
indique le poids de l'aliment enlevé
du récipient de pesée
1
avec une valeur
négative.
A
ppuyez sur la touche MARCHE / ARRÊT / Zéro
5
, afi
n de réinitialiser l'écran à cristaux li-
quides
4
sur zéro ; «T» (TARE)
25
s'affiche.
Vous pouvez ajouter ou retirer maintenant un
autre aliment dans la balance de cuisine
2
.
Q
Arrêt automatique ou manuel
La balance de cuisine s'éteint automatiquement,
lorsqu'elle n'est pas utilisée durant plus de 2
minutes.
Appuyez plus de 3 secondes sur la touche
ON /
OFF / Zéro
5
, pour éteindre la balance de
cuisine.
Q
Affichage des unités de volume
Posez la balance de cuisine
2
sur une surface
plane et stable.
Appuyez sur la touche MARCHE / ARRÊT / Zéro
5
p
our mettre en marche la balance de
cuisine
2
.
Attendez que que l'écran à cristaux liquides
4
s'arrête, et se stabilise sur 0 g
16
, 0:0,0 once
19
ou 0 ml
17
ou 0,0 fl'oz
18
, selon le mode sur
lequel se trouvait la balance de cuisine
2
, av
ant
qu'elle soit éteinte.
Appuyez sur l'interrupteur du mode
3
jusqu'à
ce que le lait
21
ou l'eau
20
soit affiché comme
mode de volume en ml ou fl'oz.
Posez un contenant pour liquides ou le récipient
de pesée
1
sur la plateforme de pesée
6
.
Appuyez sur la touche MARCHE / ARRÊT / Zéro
5
, afin de réinitialiser l'écran à cristaux li-
quides
4
sur zéro (soit 0 ml soit 0,0 fl'oz). Rem-
plissez le conte
nant de lait ou d'eau (après l'avoir
présélectionné).
L'écran à cristaux liquides
4
indique désormais
automatiquement le volume du liquide se trouva
nt
dans le contenant, selon le préréglage en ml
ou fl'oz.
Appuyez ensuite sur l'interrupteur du mode
3
,
afin de replacer la balance de cuisine
2
sur
le mode de pesée, et de lire le poids de liquides
correspondants (voir ill. E).
Remarque : Si la balance de cuisine
2
est en
surcharge, l'affichage erreur
15
indique «Err», et
s'éteint après 6 secondes. Retirez l'aliment de la
balance de cuisine, puis appuyez sur la touche
MARCHE / ARRÊT / Zéro
5
, afin de rallumer la
balance de cuisine.
32 FR/BE
Q
Solutions aux problèmes
Dysfonctionnement
Cause Solution
L'affichage erreur
15
indique «Err» et reste
ainsi.
L
a charge maximale de
5 kg / 11 lb de la balance
de cuisine
2
est dépassée.
Retirez l'aliment à peser de la balance de
cuisine
2
.
Éteignez la balance de cuisine
2
, avant de la
rallumer.
Réduisez la quantité d’aliments et pesez-la en
plusieurs étapes.
L'affichage erreur
15
indique «Lo».
La pile est usagée.
Remplacez la pile, conformément au chapitre
«Remplacement de la pile».
Impossible d'allumer la
balance de cuisine
2
.
La pile peut être usagée.
Remplacez la pile, conformément au chapitre
«Remplacement de la pile».
S'il n'est toujours pas possible d'allumer la
balance
2
, contactez un technicien.
Q
Nettoyage
Nettoyez le produit et le récipient de pesée
1
avec un chiffon non pelucheux et légèrement
humide. Si la balance est très sale, vous pouvez
aussi imbiber le chiffon d'eau savonneuse.
Pour le nettoyage, n'utilisez pas de détergents
chimiques, de produits abrasifs ou d'objets tran-
chants. Dans le cas contraire, le produit pourrait
être endommagé.
Ne plongez jamais le produit dans l'eau ni dans
d'autres liquides. Dans le cas contraire, le pro-
duit pourrait être endommagé.
Q
Traitement des déchets
L’emballage se compose de matières
recyclables pouvant être mises au rebut
dans les déchetteries locales. Le «point
vert» n‘est pas valable en Allemagne.
b
a
Veuillez respecter l‘identification des ma-
tériaux d‘emballage pour le tri sélectif,
ils sont identifiés avec des abbréviations
(a) et des chiffres (b) ayant la significa-
tion suivante : 1–7 : plastiques / 20–22 :
papiers et cartons / 80–98 : matériaux
composite.
Le produit et les matériaux d’emballage
sont recyclables, mettez-les au rebut sé-
parément pour un meilleur traitement des
déchets. Le logo Triman n’est valable
qu’en France.
Votre mairie ou votre municipalité vous
renseigneront sur les possibilités de mise
au rebut des produits usagés.
Afin de contribuer à la protection de
l’environnement, veuillez ne pas jeter
votre produit usagé dans les ordures
ménagères, mais éliminez-le de manière
appropriée. Pour obtenir des renseigne-
ments concernant les points de collecte
et leurs horaires d’ouverture, vous pouvez
contacter votre municipalité.
Les piles défectueuses ou usagées doivent être recy-
clées conformément à la directive 2006 / 66 / CE et
ses modifications. Les piles et / ou le produit doivent
être retournés dans les centres de collecte proposés.
Pollution de l’environnement
par mise au rebut incorrecte
des piles !
33 FR/BE
Les piles ne doivent pas être mises au rebut dans
les ordures ménagères. Elles peuvent contenir des
métaux lourds toxiques et doivent être considérés
comme des déchets spéciaux. Les symboles
chimiques des métaux lourds sont les suivants :
Cd = cadmium, Hg= mercure, Pb = plomb. Pour
cette raison, veuillez toujours déposer les piles
usées dans les conteneurs de recyclage communaux.
Garantie
Le produit a été fabriqué selon des critères de qua-
lité stricts et contrôlé consciencieusement avant sa
livraison. En cas de défaillance, vous êtes en droit
de retourner ce produit au vendeur. La présente ga-
rantie ne constitue pas une restriction de vos droits
légaux.
Ce produit bénéficie d‘une garantie de 3 ans à
compter de sa date d’achat. La durée de garantie
débute à la date d’achat. Veuillez conserver le tic-
ket de caisse original. Il fera office de preuve d’achat.
Si un problème matériel ou de fabrication devait
survenir dans 3 ans suivant la date d‘achat de ce
produit, nous assurons à notre discrétion la répara-
tion ou le remplacement du produit sans frais sup-
plémentaires. La garantie prend fin si le produit est
endommagé suite à une utilisation inappropriée ou
à un entretien défaillant.
La garantie couvre les vices matériels et de fabrica-
tion. Cette garantie ne s’étend ni aux pièces du pro-
duit soumises à une usure normale (p. ex. des piles)
et qui, par conséquent, peuvent être considérées
comme des pièces d’usure, ni aux dommages sur
des composants fragiles, comme des interrupteurs,
des batteries ou des éléments fabriqués en verre.
34 NL/BE
Inleiding ....................................................................................................................................... Pagina 35
Doelmatig gebruik........................................................................................................................... Pagina 35
Beschrijving van de onderdelen ..................................................................................................... Pagina 35
Technische gegevens ...................................................................................................................... Pagina 36
Functies ............................................................................................................................................ Pagina 36
Inhoud van de levering ................................................................................................................... Pagina 36
Veiligheidsinstructies ........................................................................................................ Pagina 36
Algemene veiligheidsinstructies ...................................................................................................... Pagina 36
Veiligheidsinstructies voor batterijen / accu‘s ................................................................................ Pagina 38
Ingebruikname ...................................................................................................................... Pagina 39
Batterij vervangen ........................................................................................................................... Pagina 39
Omrekenschakelaar ........................................................................................................................ Pagina 39
Wegen ............................................................................................................................................. Pagina 39
Wegen en toevoegen ..................................................................................................................... Pagina 40
Te wegen goed gedeeltelijk verwijderen ...................................................................................... Pagina 40
Automatisch of manueel uitschakelen ............................................................................................ Pagina 41
Weergave van de volume-eenheden ............................................................................................ Pagina 41
Storingen verhelpen .......................................................................................................... Pagina 42
Reiniging ...................................................................................................................................... Pagina 42
Verwijdering ............................................................................................................................ Pagina 42
Garantie ....................................................................................................................................... Pagina 43
35 NL/BE
In deze gebruiksaanwijzing worden de volgende pictogrammen / symbolen gebruikt:
Waarschuwings- en
veiligheidsinstructies in acht nemen!
5 kg
Belast het product met niet meer
dan 5 kg.
Explosiegevaar!
Geschikt voor levensmiddelen! Smaak-
en geureigenschappen worden door
dit product niet beïnvloed.
Gelijkstroom
(stroom- en spanningssoort)
De weegschaal is niet geschikt voor
de vaatwasser.
Draag veiligheidshandschoenen.
De weegschaal is gemaakt van polysty-
reen (PS 6). Niet via het huishoudelijk
afval afvoeren. Voer de weegschaal,
als deze niet meer nodig is, volgens de
plaatselijk geldende voorschriften af.
Laat kinderen nooit zonder toezicht
hanteren met verpakkingsmateriaal
en het product.
Het product is niet geschikt voor
magnetrons.
Keukenweegschaal
Inleiding
Hartelijk gefeliciteerd met de aankoop van uw nieuwe
product. U hebt voor een hoogwaardig product ge-
kozen. Maak u voor de eerste ingebruikname ver-
trouwd met het product. Lees hiervoor aandachtig de
volgende gebruiksaanwijzing en de veiligheidsvoor-
schriften. Gebruik het product alleen zoals beschre-
ven en voor de aangegeven toepassingsgebieden.
Bewaar deze handleiding goed. Geef, wanneer u
het product doorgeeft aan derden, ook alle docu-
menten mee.
Q
Doelmatig gebruik
Dit product is geschikt voor het wegen en doorweg
en
van huishoudelijke hoeveelheden van levensmidde-
len in privé-huishoudens. Het product is bedoeld voor
het bepalen van het gewicht van niet-agressieve,
niet-bijtende en niet-schurende vloeistoffen of vaste
stoffen. Het is niet geschikt voor het wegen van
medicijnen of niet-geoorloofde materialen. Het pro-
duct is niet bestemd voor commercieel gebruik.
Q
Beschrijving van de
onderdelen
1
Weegschaal
2
Keukenweegschaal
3
Modus-schakelaar gewicht / melk / water
(weight ▸ milk ▸ water)
4
LCD-display
5
AAN- / UIT- / nul-knop, nulinstelling (tara)
(ON / OFF / ZERO)
6
Weegplateau
7
Klem aan het batterijvakdeksel
8
Batterijvakdeksel
9
g / lb:oz omrekenschakelaar
10
Metaalcontact van de batterij - met springveer-
effect
11
Extern omhulsel batterij
12
Zwarte sluiting-schakelaar voor batterij
13
Batterijvak
14
Isolatiestrook batterij
36 NL/BE
LCD-weergave:
15
Storingsweergave
16
„g“ = weergave gewichtseenheid (gram)
17
„ml“ = weergave volume-eenheid (milliliter)
18
“fl’oz” = weergave volume-eenheid (vloeistof:
ounce)
19
„lb:oz“= weergave gewichtseenheid (pond:
ounce)
20
“ = teken boven water = maateenheid voor
volumemodus (ml of fl’oz water)
21
“ = teken boven melk = maateenheid voor
volumemodus (ml of fl’oz melk)
22
“ = teken boven gewicht = weegmodus
(gram of pond: ounce)
23
„0“ symbool = nul gewicht (linker onderste
hoek van het LCD-display)
24
„–“ = negatieve waarde (linker kant van het
LCD-display)
25
T“ = gewicht tara (linker bovenste hoek van
het LCD-display)
Q
Technische gegevens
Weegbereik: 0,1 oz–11 lb (pond) / 1 g–5 kg
(kilogram)
Indeling: 0,1 oz / 1 g
Batterij: 1 x 3 V
lithium batterij
(CR2032 lithium-knoopcelbatte-
rijen / bij de levering inbegrepen)
Q
Functies
Weergave van de volume-eenheden voor water
en melk.
Twee verschillende systemen voor gewichtseen-
heden - gram (g) of pond (lb:oz), verander-
baar.
Waarschuwing voor een bijna lege batterij /
overbelasting door een speciale LCD-symbool-
weergave.
Gebruik van bijzonder nauwkeurige rekmeter-
sensoren.
Nulstelling of tara-functie mogelijk.
Automatische uitschakeling voor het besparen
van energie, als het product gedurende langer
dan twee minuten niet wordt gebruikt.
Manueel uitschakelen – druk op de AAN- /
UIT- / nul-knop
5
en houd deze gedurende
drie seconden ingedrukt (zie afb. A).
Q
Inhoud van de levering
Controleer de levering direct na het uitpakken op
volledigheid en optimale staat van het product.
1 keukenweegschaal
1 weegschaal
1 lithium-batterij (reeds geïnstalleerd in het batterijvak)
1 gebruiksaanwijzing
Q
Veiligheidsinstructies
Algemene
veiligheidsinstructies
LEVENSGEVAAR EN KANS
OP ONGELUKKEN VOOR
PEUTERS EN KINDEREN!
Laat kinderen nooit zonder toe-
zicht bij het verpakkingsmateriaal
en het product. Anders bestaat
levensgevaar door verstikking.
Houdt kinderen altijd buiten het
bereik van het product.
Dit product kan door kinderen
vanaf 8 alsmede door personen
met verminderde fysieke,
37 NL/BE
sensorische of mentale vaardig-
heden of een gebrek aan erva-
ring en kennis worden gebruikt,
als zij onder toezicht staan of
geïnstrueerd werden met betrek-
king tot
het veilige gebruik van het
product en zij de hieruit voort-
vloeiende gevaren begrijpen. Kin-
deren mogen niet met het product
spelen. Reiniging en onderhoud
mag niet door kinderen zonder
toezicht worden uitgevoerd.
5 kg
VOORZICHTIG! KAN
S
OP LETSEL! Belast het
product niet boven 5 kg. Het pro-
duct kan anders beschadigd raken.
Stel het product niet bloot aan
- extreme temperaturen,
- sterke vibraties,
- sterke mechanische belastingen,
- direct zonlicht,
- een magnetische omgeving,
- vocht.
Anders kan het product bescha-
digd worden.
Bescherm het product tegen
elektrostatische lading / ontlading.
Dit kan een belemmering voor
de interne data-uitwisseling
veroorzaken, wat fouten in het
LC-display genereert.
Controleer het product voor in-
gebruikname op beschadigingen.
Gebruik nooit een beschadigd
product.
Open
nooit de behuizing van het pro-
duct. Letsel en beschadigingen
aan het product kunnen het ge-
volg zijn. Laat reparaties alleen
door de vakman uitvoeren.
Laat geen onervaren personen
het product gebruiken. Verzeker
U ervan dat iedereen die het
product gebruikt, de handleiding
gelezen heeft en in staat is het
product veilig te bedienen.
Plaats het product op een stevige,
horizontale en vlakke ondergrond.
Het product bevat kwetsbare
elektronische componenten.
Daarom is het mogelijk dat het
door radiografische apparaten
in de directe omgeving wordt
verstoord. Dit kunnen bijv. mo-
biele telefoons, walkietalkies,
CB-zenders, radiografische be-
sturingen / andere afstandsbe-
dieningen en magnetrons zijn.
Als onjuiste weergaven op het
display verschijnen, dient u der-
gelijke apparaten uit de buurt
van dit product te verwijderen.
Elektromagnetische storingen /
hoogfrequente storingsemissies
kunnen leiden tot functionele sto-
ringen. Verwijder in geval van
38 NL/BE
dergelijke functionele storingen
even de batterij en plaats deze
opnieuw. Ga hierbij te werk zo-
als beschreven in het hoofdstuk
"Batterij vervangen".
GESCHIKT VOOR
LEVENSMIDDELEN!
Smaak- en geureigenschappen
worden door dit product niet be-
invloed.
De weegschaal is niet ge-
schikt voor de vaatwasser.
Veiligheidsinstructies
voor batterijen / accu‘s
LEVENSGEVAAR! Houd bat-
terijen / accu‘s buiten het bereik
van kinderen. Raadpleeg bij in-
slikken onmiddellijk een arts!
EXPLOSIEGEVAAR!
Laad niet oplaadbare
batterijen nooit op. Sluit de bat-
terijen / accu‘s niet kort en/of
open deze niet. Daardoor kan
de batterij oververhit raken, in
brand vliegen of exploderen.
Gooi batterijen / accu‘s nooit in
het vuur of water.
Stel batterijen / accu‘s nooit bloot
aan mechanische belastingen.
Risico dat de batterijen /
accu‘s lekken
Vermijd extreme omstandigheden
en temperaturen die invloed op
de batterijen / accu‘s zouden
kunnen hebben bijv. radiatoren /
direct zonlicht.
Vermijd contact met huid, ogen
en slijmvliezen! Spoel in geval
van contact met batterijzuur de
desbetreffende plekken direct af
met voldoende schoon water en
raadpleeg onmiddellijk een arts!
DRAAG VEILIGHEIDS-
HANDSCHOENEN!
Lekkende of beschadigde batte-
rijen / accu‘s kunnen in geval van
huidcontact chemische brand-
wonden veroorzaken. Draag
daarom in dit geval geschikte
veiligheidshandschoenen.
Als de batterijen lekken dient u
deze direct uit het product te ha-
len om beschadigingen te voor-
komen.
Gebruik alleen batterijen / accu‘s
van hetzelfde type. Gebruik nooit
nieuwe en oude batterijen / accu‘s
door elkaar!
Verwijder de batterijen / accu‘s,
als u het product gedurende een
langere periode niet gebruikt.
39 NL/BE
Risico op beschadiging van
het product
Gebruik uitsluitend het aangege-
ven type batterij / accu!
Let bij het plaatsen op de juiste
polariteit! Deze wordt aangege-
ven in het batterijvakje!
Reinig indien nodig de contacten
aan de batterij en in het batterij-
vak voor het plaatsen!
Verwijder verbruikte accu‘s /
batterijen direct uit het product.
Q
Ingebruikname
1. Maak de schroef, die zich aan de achterkant
van de keukenweegschaal
2
bevindt, los met
behulp van een schroevendraaier.
2. Open het batterijvak
13
aan de onderkant van
de keukenweegschaal
2
, door de klem
7
van
het batterijvakdeksel
8
in de richting van het
batterijvak te bewegen en deze naar boven te
verwijderen.
3. Verwijder de isolatiestrook
14
, die zich onder
het metalen contact voor de batterij is bevestigd.
4. Plaats het deksel van het batterijvak
8
weer
op het batterijvak
13
. Druk het deksel van het
batterijvak
8
stevig op het batterijvak
13
, tot-
dat dit hoorbaar vast klikt.
5. Draai de schroef met behulp van een schroeven-
draaier vast (zie afb. B).
Q
Batterij vervangen
1. Schakel de keukenweegschaal
2
uit. Druk
op de AAN- / UIT- / nul-knop
5
en houd deze
3 seconden lang ingedrukt.
2. Maak de schroef, die zich aan de achterkant
van de keukenweegschaal
2
bevindt, los met
behulp van een schroevendraaier. Open het
batterijvak
13
zoals voorheen beschreven.
3. Verwijder de lege batterij uit het omhulsel
11
,
door de zwarte sluiting-schakelaar
12
in te
drukken en te trekken. De batterij laat automa-
tisch los uit het omhulsel
11
. Zorg ervoor, dat u
geen al te grote druk op het metalen contact
van de batterij
10
uitoefent. Deze kan anders
beschadigd raken, omdat het optillen van de
batterij tot een vervorming leidt. Verwijder de
batterij uit het omhulsel
11
.
4. Plaats de nieuwe batterij in het externe omhul-
sel
11
. Let op de juiste polariteit. De “+“-kant
moet hierbij naar boven zijn gericht. De batterij
moet in het externe omhulsel
11
worden gedrukt.
5. Sluit het batterijvak
13
en draai de schroef met
behulp van de schroevendraaier aan.
Q
Omrekenschakelaar
Een g / lb:oz omrekenschakelaar
9
voor de
gewichtseenheden bevindt zich onder aan de
keukenweegschaal
2
. Door een druk op de
knop wisselt u de maateenheid tussen metrische
maten (g, ml) naar imperiale maten (lb:oz, fl'oz).
Opmerking:
Als de gewichtseenheid als metrische eenheid
is bepaald (g), wordt ook de volume-eenheid
automatisch in ml weergegeven.
Als de gewichtseenheid als imperiale eenheid
is bepaald (lb:oz), wordt ook de volume-eenheid
automatisch in fl'oz weergegeven.
De standaard eenheid voor gewicht is g (gram).
Q
Wegen
Opmerking: Of u met of zonder weegschaal
1
begint, de keukenweegschaal
2
start altijd op 0
g / 0:0.0 lb:oz
16
/
19
, als de AAN- / UIT- / nul-knop
5
wordt gedrukt.
Als de weegschaal
1
echter eerst na het inschake-
len op de keukenweegschaal
2
wordt geplaatst,
toont deze het gewicht van de weegschaal
1
. Druk
1 x op de AAN- / UIT- / nul-knop
5
, om de
40 NL/BE
weergave weer te resetten op 0 g / 0:0.0 lb:oz
16
/
19
; “T“ (TARE)
25
verschijnt op het LCD-dis-
play
4
.
Plaats de keukenweegschaal op een stevig en
vlak oppervlak.
Druk op de AAN- / UIT- / nul-knop
5
, om de keu-
kenweegschaal
2
in te schakelen (zie afb. C).
Wacht, totdat het LCD-display
4
stopt en zich
op 0 g
16
, 0:0,0 ounce
19
of 0 ml
17
of 0,0
fl'oz
18
pendelt, afhankelijk van welke modus
de keukenweegschaal zich bevond, voordat
deze werd uitgeschakeld.
Druk op de modusschakelaar
3
, om de keuken-
weegschaal op de normale weegmodus in te
stellen
22
.
Indien nodig, kiest u de gewichtseenheid vooraf,
door op de g / lb:oz omrekenschakelaar
9
aan
de onderkant van de keukenweegschaal te druk-
ken, voordat u begint met wegen.
Voor het nieuw instellen van de keukenweeg-
schaal
2
, als u de gewichtseenheid heeft ge-
selecteerd, drukt u de AAN- / UIT-nul-knop
5
3
seconden lang, om de keukenweegschaal
2
uit te schakelen.
Stel de keukenweegschaal
2
op een harde,
vlakke tafel. Plaats de weegschaal
1
op het
weegplateau
6
.
Druk de AAN- / UIT- / nul-knop
5
, om de keu-
kenweegschaal in te schakelen en in de normale
weegmodus te bevestigen.
Wacht, totdat alle segmenten van het LCD-dis-
play
4
branden en de keukenweegschaal
2
zich op 0 g
16
, 0:0,0 ounce
19
pendelt.
Vul het te wegen goed in de weegschaal
1
om
het weegproces te starten. Het LCD-display
4
toont het gewicht van het te wegen goed in de
geselecteerde gewichtseenheid (zie afb. D).
Q
Wegen en toevoegen
De keukenweegschaal
2
staat een na elkaar wege
n
toe, zonder het te wegen goed uit de weegschaal
1
te verwijderen.
Plaats de weegschaal
1
op het weegplateau
6
.
Druk op de AAN- / UIT- / nul-knop
5
, om de
keukenweegschaal
2
in te schakelen.
Wacht, totdat het LCD-display
4
stopt en zich
op 0 g
16
, 0:0,0 ounce
19
of 0 ml
17
of 0,0
fl'oz
18
pendelt, afhankelijk van welke modus
de keukenweegschaal
2
zich bevond, voordat
deze werd uitgeschakeld.
Druk op de modusschakelaar
3
, om de keuken-
weegschaal
2
in de gewichtsmodus
22
te bren-
gen (voorafgaande instelling of g of lb:oz).
Vul de weegschaal
1
, om het weegproces te
starten. Het LCD-display
4
toont het gewicht
van het eerste, in de weegschaal
1
geplaatste
te wegen goed.
Druk op de AAN- / UIT- / nul-knop
5
, waarna
de keukenweegschaal
2
nu “T“ (TARE)
25
toont.
U kunt extra te wegen goed op dezelfde manier
wegen. Het LCD-display
4
toont het gewicht
van het nieuw toegevoegde te wegen goed.
Druk op de AAN- / UIT- / nul-knop
5
na ieder
nieuw toegevoegd te wegen goed.
Voer deze procedure maximaal zo lang uit, tot-
dat de maximale belasting van de keukenweeg-
schaal
2
is bereikt, of de weegschaal
1
vol
beladen is.
Q
Te wegen goed gedeeltelijk
verwijderen
Plaats de weegschaal
1
op het weegplateau
6
.
Druk op de AAN- / UIT- / nul-knop
5
, om de
keukenweegschaal
2
in te schakelen.
Wacht, totdat het LCD-display
4
stopt en zich
op 0 g
16
, 0:0,0 ounce
19
of 0 ml
17
of 0,0
fl'oz
18
pendelt, afhankelijk van welke modus
de keukenweegschaal
2
zich bevond, voordat
deze werd uitgeschakeld.
Druk op de modusschakelaar
3
, om de ge-
wichtsmodus
22
in te stellen (voorafgaande
instelling of g of lb:oz).
Vul de weegschaal
1
, om het weegproces te
starten. Het LCD-display
4
toont het gewicht
van het eerste, in de weegschaal
1
geplaatste
te wegen goed.
41 NL/BE
Druk de AAN- / UIT- / nul-knop
5
, om het LCD-
display
4
op nul te resetten; “T“ (TARE)
25
wordt
weergegeven.
Verwijder vervolgens de gewenste hoeveelheid
aan te wegen goed uit de weegschaal
1
. Het
LCD-display
4
toont het gewicht van het uit
de weegschaal
1
verwijderde te wegen goed
als negatieve waarde.
Druk de AAN- / UIT- / nul-knop
5
, om het LCD-
display
4
op nul te resetten; “T“ (TARE)
25
wordt
weergegeven.
U kunt nu verder te wegen goed toevoegen resp.
verwijderen van de keukenweegschaal
2
.
Q
Automatisch of manueel
uitschakelen
De keukenweegschaal gaat automatisch uit, als
deze langer dan 2 minuten niet wordt gebruikt.
Druk op de AAN- / UIT- / nul-knop
5
gedurende
3 seconden, om de keukenweegschaal uit te
schakelen.
Q
Weergave van de
volume-eenheden
Plaats de keukenweegschaal
2
op een stevig
en vlak oppervlak.
Druk op de AAN- / UIT- / nul-knop
5
, om de
keukenweegschaal
2
in te schakelen.
Wacht, totdat het LCD-display
4
stopt en zich
op 0 g
16
, 0:0,0 ounce
19
of 0 ml
17
of 0,0
fl'oz
18
pendelt, afhankelijk van welke modus
de keukenweegschaal
2
zich bevond, voordat
deze werd uitgeschakeld.
Druk op de modusschakelaar
3
, totdat melk
21
of water
20
als volumemodus in ml of fl'oz
wordt weergegeven.
Plaats het reservoir voor vloeistoffen of de weeg-
schaal
1
op het weegplateau
6
.
Druk de AAN- / UIT- / nul-knop
5
, om het
LCD-display
4
te resetten (of 0 ml of 0,0 fl'oz).
Vul melk of water (wat u zojuist heeft geselec-
teerd) in het reservoir.
Het LCD-display
4
toont nu automatisch het
volume van de in het reservoir gevulde vloeistof,
afhankelijk van de vooraf gemaakte instelling
of in ml of in fl'oz.
Vervolgens drukt u op de modusschakelaar
3
,
om de keukenweegschaal
2
weer terug te
zetten in de weegmodus en het dienovereen-
komstige gewicht van de vloeistof af te lezen
(zie afb. E).
Opmerking: als de keukenweegschaal
2
is
overbelast, toont de storingsmelding
15
“Err“ en
gaat hij na 6 seconden uit. Verwijder het te wegen
goed van de keukenweegschaal, druk vervolgens
op de AAN- / UIT- / nul-knop
5
om de keukenweeg-
schaal weer in te schakelen.
42 NL/BE
Q
Storingen verhelpen
Storing Oorzaak Oplossing
De storingsmelding
15
toont “Err“ en
blijft zo staan.
De maximale belasting
van 5 kg / 11 lb van de
keukenweegschaal
2
is
overschreden.
Verwijder het te wegen product van de keuken-
weegschaal
2
.
Schakel de keukenweegschaal
2
uit en
vervolgens weer aan.
Reduceer het te wegen goed en weeg het in
meerdere stappen.
De storingsmelding
15
toont “Lo“.
De batterij is leeg.
Vervang de batterij in overeenstemming met het
hoofdstuk “Batterij vervangen“.
De keukenweegschaal
2
kan niet worden
ingeschakeld.
De batterij is eventueel
leeg.
Vervang de batterij in overeenstemming met het
hoofdstuk “Batterij vervangen“.
Als de keukenweegschaal
2
nog steeds niet in-
geschakeld kan worden, dient u contact met een
specialist op te nemen.
Q
Reiniging
Reinig het product en de weegschaal
1
met
een iets vochtige, pluisvrije doek. Bij hardnek-
kige verontreinigingen kunt u de doek ook met
een lichte zeepsop vochtig maken.
Gebruik voor de reiniging geen chemische
reinigingsmiddelen, schuurmiddelen of scherpe
voorwerpen. Anders kan het product bescha-
digd raken.
Dompel het product nooit onder in water of in
andere vloeistoffen. Anders kan het product
beschadigd raken.
Q
Verwijdering
De verpakking bestaat uit milieuvriende-
lijke grondstoffen die u via de plaatselijke
recyclingcontainers kunt afvoeren. De
Grüne Punkt geldt niet voor Duitsland.
b
a
Neem de aanduiding van de verpakkings-
materialen voor de afvalscheiding in acht.
Deze zijn gemarkeerd met de afkortingen
(a) en een cijfers (b) met de volgende
betekenis: 1–7: kunststoffen / 20–22:
papier en vezelplaten / 80–98: compo-
sietmaterialen.
Het product en de verpakkingsmaterialen
zijn recyclebaar; verwijder deze afzon-
derlijk voor een betere afvalbehandeling.
Het Triman-logo geldt alleen voor Frankrijk.
Informatie over de mogelijkheden om
het uitgediende product na gebruik te
verwijderen, verstrekt uw gemeentelijke
overheid.
Gooi het afgedankte product omwille van
het milieu niet weg via het huisvuil, maar
geef het af bij het daarvoor bestemde
depot of het gemeentelijke milieupark.
Over afgifteplaatsen en hun openingstij-
den kunt u zich bij uw aangewezen in-
stantie informeren.
43 NL/BE
Defecte of verbruikte batterijen moeten volgens de
richtlijn 2006 / 66 / EG en diens veranderingen
worden gerecycled. Geef batterijen en / of het pro-
duct af bij de daarvoor bestemde verzamelstations.
Milieuschade door verkeerde
afvoer van batterijen!
Batterijen mogen niet via het huisafval worden
afgevoerd. Ze kunnen giftig zwaar metaal bevatten
en moeten worden behandeld als gevaarlijk afval.
De chemische symbolen van de zware metalen
zijn als volgt: Cd = cadmium, Hg = kwikzilver,
Pb = lood. Geef verbruikte batterijen daarom af
bij een gemeentelijk inzamelpunt.
Garantie
Het product wordt volgens strenge kwaliteitsrichtlijn
en
zorgvuldig geproduceerd en voor levering grondig
getest. In geval van schade aan het product kunt u
rechtmatig beroep doen op de verkoper van het
product. Deze wettelijke rechten worden door onze
hierna vermelde garantie niet beperkt.
Op dit product verlenen wij 3 jaar garantie vanaf
aankoopdatum. De garantieperiode start op de
dag van aankoop. Bewaar de originele kassabon
alstublieft. Dit document is nodig als bewijs voor
aankoop.
Wanneer binnen 3 jaar na de aankoopdatum van
dit product een materiaal- of productiefout optreedt,
dan wordt het product door ons – naar onze keuze
– gratis voor u gerepareerd of vervangen. Deze
garantie komt te vervallen als het product beschadigd
wordt, niet correct gebruikt of onderhouden wordt.
De garantie geldt voor materiaal- en productiefouten.
Deze garantie is niet van toepassing op producton-
derdelen, die onderhevig zijn aan normale slijtage
en hierdoor als aan slijtage onderhevige onderdelen
gelden (bijv. batterijen) of voor beschadigingen aan
breekbare onderdelen, zoals bijv. schakelaars, accu’s
of dergelijke onderdelen, die gemaakt zijn van glas.
44 CZ
Úvod .................................................................................................................................................Strana 45
Použití ke stanovenému účelu..........................................................................................................Strana 45
Popis součástí ................................................................................................................................... Strana 45
Technické údaje ...............................................................................................................................Strana 46
Funkce ...............................................................................................................................................Strana 46
Obsah dodávky ............................................................................................................................... Strana 46
Bezpečnostní pokyny ........................................................................................................Strana 46
Všeobecné bezpečnostní pokyny ...................................................................................................Strana 46
Bezpečnostní pokyny pro baterie a akumulátory .......................................................................... Strana 48
Uvedení do provozu ...........................................................................................................Strana 49
Výměna baterie ................................................................................................................................Strana 49
Volič jednotek ...................................................................................................................................Strana 49
Vážení ...............................................................................................................................................Strana 49
Vážení a přidávání ..........................................................................................................................Strana 50
Částečné ubrání vážené suroviny ...................................................................................................Strana 50
Automatické nebo manuální vypnutí ...............................................................................................Strana 50
Zobrazení v objemových jednotkách .............................................................................................Strana 50
Odstranění chyb .....................................................................................................................Strana 51
Čistění .............................................................................................................................................. Strana 51
Likvidace do odpadu .........................................................................................................Strana 51
Záruka ............................................................................................................................................Strana 52
45 CZ
V tomto návodu k obsluze se používají následující piktogramy / symboly:
Dodržujte bezpečnostní pokyny a
řiďte se upozorněními!
5 kg
Nezatěžujte
výrobek
váhou nad 5 kg.
Nebezpečí výbuchu!
Vhodné pro potraviny! Výrobek neo-
vlivňuje chuťové a aromatické vlastnosti
potravin.
Stejnosměrný proud
(druh proudu a napětí)
Vážící mísa není vhodná na mytí v
myčce na nádobí.
Noste ochranné rukavice.
Vážící mísa je zhotovená z polysty-
renu (PS 6). Neodstraňujte jí do do-
mácího odpadu. Nepotřebnou vážící
mísu odstraňujte do odpadu podle
místních, platných předpisů.
Nikdy nenechávejte děti bez dozoru
sobalovým materiálem.
Výrobek není vhodný pro mikrovlnnou
troubu.
Kuchyňská váha
Úvod
Blahopřejeme Vám ke koupi nového výrobku. Roz-
hodli jste se pro kvalitní výrobek. Před prvním uve-
dením do provozu se seznamte s výrobkem. K tomu
si pozorně přečtěte následující návod k obsluze a
bezpečnostní pokyny. Používejte výrobek jen po-
psaným způsobem a pouze pro uvedené oblasti
použití. Uschovejte si, prosím, tento návod. Všechny
podklady vydejte při předání výrobku i třetí osobě.
Q
Použití ke stanovenému účelu
Tento výrobek je určen k vážení a dovažování běž-
ných množství potravin v domácnosti. Výrobek slouží
k vážení neagresivních, neleptajících a nebrousících
tekutin nebo pevných látek. Není určen na vážení
léků nebo nepovolených materiálů. Není určen ke
komerčnímu využívání.
Q
Popis součástí
1
Vážící mísa
2
Kuchyňská váha
3
Volič režimu hmotnost / mléko / voda
(Weight ▸ Milk ▸ Water)
4
LC-displej
5
Tlačítko ZAP / VYP / NULA, nulování (Tara)
(ON / OFF / ZERO)
6
Vážící deska
7
Spona na víčku přihrádky na baterie
8
Víko schránky na baterie
9
Volič jednotek g / lb:oz
10
Kovový kontakt pro baterii - s odpružením
11
Pouzdro pro baterii
12
Černý uzávěr pro baterii
13
Přihrádka na baterie
14
Izolační pásek
LCD-ukazatel:
15
Zobrazení chyb
16
„g“ = zobrazení jednotky hmotnosti (gram)
17
„ml“ = zobrazení jednotky objemu (mililitr)
46 CZ
18
“fl’oz” = zobrazení jednotky objemu (tekutina:
unce)
19
„lb:oz“= jednotky hmotnosti (libra: unce)
20
“ = značka nad vodou = jednotka míry pro
režim objemu (ml nebo tekutá unce vody)
21
“ = značka nad mlékem = jednotka míry pro
režim objemu (ml nebo tekutá unce mléka)
22
“ = značka nad hmotností = režim vážení
(gram nebo libra: unce)
23
„0“ piktogram = nula hmotnosti (levý dolní roh
des LC-displeje)
24
„–“ = negativní hodnota (levá strana LC-displeje)
25
T“ = hmotnost Tara (levý horní roh LC-displeje)
Q
Technické údaje
Rozsah vážení: 0,1 oz–11 lb (libra) / 1 g–5 kg
(kilogram)
Stupnice: po 0,1 oz / 1 g
Baterie: 1 x 3 V
lithium baterie
(CR2032 lithium knoflíko
baterie/ v obsahu dodávky)
Q
Funkce
Zobrazení jednotek objemu pro vodu a mléko.
Dva různé systémy pro jednotky hmotnosti –
gram (g) nebo libra (lb:oz), konvertibilní.
Varování před nízkém napětím baterie nebo
přetížením speciálním zobrazením LCD pikto-
gramu.
Použití vysoce přesných senzorů měřících
roztažení.
Vynulování nebo funkce Tara možné.
Automatické vypínání pro úsporu energie, jest-
liže se výrobek déle než dvě minuty nepoužívá.
Manuální vypnutí – Stiskněte na tři vteřiny
tlačítko ZAP / VYP / nula
5
(viz obr. A).
Q
Obsah dodávky
Bezprostředně po vybalení vždy zkontrolujte
úplnost obsahu dodávky a stav výrobku.
1 kuchyňská váha
1 vážící mísa
1 lithium baterie (již vložená do přihrádky na baterie)
1 návod kobsluze
Q
Bezpečnostní pokyny
Všeobecné
bezpečnostní pokyny
HROZÍ NEBEZPEČÍ
OHROŽENÍ ŽIVOTA A
ÚRAZU PRO MALÉ I VELKÉ
DĚTI! Nenechávejte děti nikdy
samotné s obalovým materiálem
a s výrobkem. V opačném případě
hrozí nebezpečí ohrožení života
udušením. Držte děti mimo dosah
výrobku.
Tento výrobek mohou používat
děti od 8 let, osoby se sníženými
fyzickými, smyslovými nebo dušev-
ními schopnosti nebo s nedosta-
tečnými zkušenostmi a znalostmi,
j
estliže budou pod dohledem nebo
byly poučeny o bezpečném po-
užívání výrobku a chápou ne-
bezpečí, která z jeho používání
vyplývají. S výrobkem si děti ne-
smí hrát. Děti nesmí bez dohledu
provádět čištění ani uživatelskou
údržbu.
47 CZ
5 kg
POZOR! NEBEZPEČÍ
ZRANĚNÍ! Nezatěžujte
výrobek nad 5 kg. Výrobek by
mohl být poškozen.
Nevystavujte ístroj
- extrémním teplotám,
- silným vibracím,
- výraznému mechanickému
namáhání,
- přímému slunečnímu záření
- vlivům magnetických polí,
- a vlhkosti.
V opačném případě hrozí nebez-
pečí poškození výrobku.
Chraňte výrobek před nabitím /
výbojem elektrostatické elektřiny.
Tato může rušit interní výměnu dat
a vést k chybné funkci LC displeje.
Před uvedením do provozu zkont-
rolujte výrobek, jestli není poško-
zený. Neuvádějte v žádném
případě poškozený výrobek do
provozu.
Neotevírejte
nikdy těleso výrobku. Následkem
může být zranění nebo poškození
výrobku. Opravy nechávejte pro-
vádět jen elektrikářem.
Nenechávejte používat výrobek
nezkušené osoby. Zajistěte, aby
si každý, kdo používá výrobek,
přečetl návod k obsluze a aby
byl schopen ho i bezpečně
obsluhovat.
Umístěte výrobek na pevném,
vodorovném a plochém podkladě.
Výrobek obsahuje citlivé elektro-
nické díly. Proto může být rušen i
jinými výrobky pracujícími s rádi-
ovými signály. To mohou být např.
mobilní telefony, radiotelefony,
radiová zařízení CB, dálková
řízení radiovým signálem / další
dálkové ovladače a mikrovlnná
zařízení. Jestliže se objeví na
displeji váhy chybná zobrazení,
odstraňte rušící zařízení z její
blízkosti.
Elektromagnetické poruchy / vy-
sokofrekvenční rušící vysílání mo-
hou vést také k poruchám funkcí.
Při těchto funkčních poruchách
krátce vyjměte a znovu nasaďte
baterii. V tomto případě postu-
pujte podle kapitoly „Výměna
baterie “.
VHODNÉ PRO PO-
TRAVINY! Výrobek
neovlivňuje chuťové a aromatické
vlastnosti potravin.
Vážící mísa není vhodná
k mytí v myčce na nádobí.
48 CZ
Bezpečnostní pokyny
pro baterie a akumu-
látory
NEBEZPEČÍ
OHROŽENÍ ŽIVOTA! Ucho-
vávejte baterie a akumulátory
mimo dosah dětí. V případě
spolknutí okamžitě vyhledejte
lékařskou pomoc!
NEBEZPEČÍ VÝBU-
CHU! Nenabíjecí baterie
nikdy znovu nenabíjejte. Akumu-
látory nebo baterie nezkratujte
ani je neotevírejte. Hrozí přehřátí,
nebezpečí požáru nebo jejich
prasknutí.
Nikdy neházejte baterie nebo
akumulátory do ohně ani do
vody.
Nevystavujte baterie nebo aku-
mulátory mechanickému zatížení.
Nebezpečí vytečení baterií /
akumulátorů
Zabraňte extrémním podmínkám
a teplotám, např. na topení anebo
na slunci, které mohou negativně
ovlivnit funkci baterií nebo aku-
mulátorů.
Vyhýbejte se kontaktu s pokožkou,
očima a sliznicemi! Po kontaktu
s kyselinou baterií ihned omyjte
postižená místa dostatečným
množstvím čisté vody a okamžitě
vyhledejte lékařskou pomoc!
NOSTE OCHRANNÉ
RUKAVICE! Vyteklé i
poškozené baterie nebo akumu-
látory mohou při kontaktu s po-
kožkou způsobit její poleptání.
Noste proto vhodné rukavice.
V případě vytečení ihned baterie
odstraňte z výrobku, abyste za-
bránili jeho poškození.
Používejte jen baterie nebo
akumulátory stejného typu. Ne-
kombinujte staré baterie nebo
akumulátory s novými!
Odstraňte baterie nebo akumu-
látory při delším nepoužívání z
výrobku.
Nebezpečí poškození
výrobku
Používejte jen udaný typ baterie
nebo akumulátoru!
Při vložení dbejte na správnou
polaritu! Polarita je vyznačena v
přihrádce na baterie!
Jestliže je to zapotřebí očistěte
před vložením baterie její kon-
takty a kontakty v přihrádce na
baterie!
Vybité baterie nebo akumulátory
ihned vyjměte z výrobku.
49 CZ
Q
Uvedení do provozu
1. Odšroubujte šroubovákem šroub na zadní
straně výrobku
2
.
2. Otevřete přihrádku na baterie
13
pod kuchyňskou
váhou
2
, posunutím spony
7
víčka přihrádky
na baterie
8
směrem k přihrádce a vyjmutím
víčka nahoru.
3. Vytáhněte izolační pásek
14
připevněný pod
kovovým kontaktem baterie.
4. Nasaďte víčko
8
zase zpátky na přihrádku
baterií
13
. Zatlačte víčko
8
pevně na přihrádku
13
až slyšitelně zaskočí.
5. Utáhněte šroub šroubovákem (viz obr. B).
Q
Výměna baterie
1. Vypněte kuchyňskou váhu
2
. Stiskněte na
3 vteřiny tlačítko ZAP / VYP / nula
5
.
2. Odšroubujte šroubovákem šroub na zadní straně
výrobku
2
. Otevřete přihrádku na baterie
13
jak bylo již předem popsáno.
3. Vyjměte vybitou baterii z pouzdra
11
, stisknutím
a vytažením černého uzávěru
12
. Baterie se z
pouzdra
11
automaticky nadzvedne. Dávejte
pozor, abyste příliš netlačili na kovový kontakt
baterie
10
. Kontakt se může poškodit, protože
nadzvednutí baterie způsobuje jeho deformaci.
Vyjměte baterii z pouzdra
11
.
4. Vložte do pouzdra
11
novou baterii. Dbejte na
správnou polaritu. Strana s „+“ musí přitom
ukazovat nahoru. Baterie se musí do pouzdra
11
zatlačit.
5. Zavřete přihrádku na baterie
13
a šroub
utáhněte šroubovákem.
Q
Volič jednotek
Volič přepočítání g / lb:oz
9
jednotek hmotnosti
je na spodní straně váhy
2
. Jednoduchým
stisknutím tlačítka lze změnit zobrazení jedno-
tek metrické soustavy (g, ml) na jednotky an-
gloamerické měrné soustavy (lb:oz, fl’oz).
Poznámka:
Jestliže je jednotka hmotnosti určena v metrické
soustavě (g), zobrazí se i jednotka objemu
automaticky v ml.
Jestliže je jednotka hmotnosti určena v anglo-
americké soustavě (libra:unce), zobrazí se i
jednotka objemu automaticky v tekuté unci.
Standardní jednotka hmotnosti je g (gram).
Q
Vážení
Poznámka: Po stisknutí tlačítka ZAP / VYP / nula
5
začne kuchyňská váha
2
vždy ukazovat 0 g /
0:0.0 libry:unce
16
/
19
, jedno, jestli začínáte vážit
s vážící mísou
1
nebo bez ní.
Jestliže ale položíte vážící mísu
1
na kuchyňskou
váhu
2
teprve až po jejím zapnutí, ukáže váha
hmotnost vážící mísy
1
. Stiskněte 1x tlačítko
ZAP / VYP / nula
5
k vynulování zobrazení na
0 g / 0:0.0 libry:unce
16
/
19
; na LC-displeji
4
se
objeví „T“ (TARE)
25
.
Postavte kuchyňskou váhu na pevný a rovný
povrch.
Zapněte kuchyňskou váhu
2
stisknutím tlačítka
ZAP/ VYP / nula
5
(viz obr. C).
Počkejte až se LC-displej
4
uklidní a ukáže 0 g
16
, 0:0,0 unce
19
nebo 0 ml
17
anebo 0,0
tekuté unce
18
, podle toho, ve kterém režimu
se kuchyňská váha před vypnutím nacházela.
Stiskněte volič režimu
3
pro přepnutí kuchyňské
váhy do normálního režimu vážení
22
.
Jestliže je to zapotřebí zvolte jednotku hmotnosti
již předem, než začnete vážit, stisknutím voliče
jednotek g / libra:unce
9
na spodní straně
váhy.
Pro nové kalibrování kuchyňské váhy
2
, jest-
liže jste zvolili jednotku hmotnosti, stiskněte na
3 vteřiny tlačítko ZAP/ VYP / nula
5
, aby se
váha
2
vypnula.
Postavte kuchyňskou váhu
2
na pevný a rovný
povrch. Postavte vážící mísu
1
na Vážící
desku
6
.
Zapněte kuchyňskou váhu
2
stisknutím tlačítka
ZAP / VYP / nula
5
v normálním režimu.
50 CZ
Počkejte až se rozsvítí všechny segmenty na
LC-displeji
4
a až se kuchyňská váha
2
uklidní
na 0 g
16
, 0:0,0 unce
19
.
K zahájení vážení naplňte do vážící mísy
1
zboží resp. surovinu. LC displej
4
ukáže váhu
suroviny ve zvolené váhové jednotce (viz obr. D).
Q
Vážení a přidávání
Kuchyňská váha
2
umožňuje po sobě následující
odvážení bez vyprazdňování vážící mísy
1
.
Postavte vážící mísu
1
na vážící desku
6
.
Zapněte kuchyňskou váhu
2
stisknutím tlačítka
ZAP / VYP / nula
5
.
Počkejte až se LC-displej
4
uklidní a ukáže
0 g
16
, 0:0,0 unce
19
nebo 0 ml
17
anebo
0,0 tekuté unce
18
, podle toho, ve kterém
režimu se kuchyňská váha
2
před vypnutím
nacházela.
Stiskněte volič režimu
3
pro přestavení kuch-
ské váhy
2
do režimu vážení
22
(přednasta-
vení buď g nebo libra:unce).
Naplňte vážící mísu
1
pro start vážení. LC-dis-
plej
4
ukáže hmotnost první suroviny naplněné
do mísy
1
.
Stiskněte tlačítko ZAP / VYP / nula
5
, nyní ukáže
váha
2
T“ (TARE)
25
.
Nyní můžete stejným způsobem zvážit další
surovinu, LC-displej
4
ukáže hmotnost nově
přidané suroviny.
Po každé další přidané surovině stiskněte tlačítko
ZAP / VYP / nula
5
.
Tento postup můžete provádět tak dlouho dokud
nedosáhnete maximální nosnosti kuchyňské
váhy
2
, nebo dokud není vážící mísa
1
plná.
Q
Částečné ubrání vážené
suroviny
Postavte vážící mísu
1
na vážící desku
6
.
Zapněte kuchyňskou váhu
2
stisknutím tlačítka
ZAP / VYP / nula
5
.
Počkejte až se LC-displej
4
uklidní a ukáže
0 g
16
, 0:0,0 unce
19
nebo 0 ml
17
anebo
0,0 tekuté unce
18
, podle toho, ve kterém
režimu se kuchyňská váha
2
před vypnutím
nacházela.
Stiskněte volič režimu
3
pro přestavení kuchyňské
váhy
2
do režimu vážení
22
(přednastavení
buď g nebo libra:unce).
Naplňte vážící mísu
1
pro start vážení. LC-dis-
plej
4
ukáže hmotnost první suroviny naplněné
do mísy
1
.
Stiskněte tlačítko ZAP / VYP / nula
5
k vynulo-
vání; na LC-displeji
4
se objeví „T“ (TARE)
25
.
Odeberte požadované množství suroviny z vá-
žící mísy
1
. Na LC-displeji
4
se zobrazí jako
negativní hodnota hmotnost suroviny odebrané
z vážící mísy
1
.
Stiskněte tlačítko ZAP / VYP / nula
5
k vynulo-
vání; na LC-displeji
4
se objeví „T“ (TARE)
25
.
Nyní můžete na kuchyňskou váhu
2
přidat
nebo z ní odebrat další surovinu.
Q
Automatické nebo
manuální vypnutí
Jestliže není váha déle než 2 minuty používána,
automaticky se vypne.
K vypnutí váhy stiskněte na více než 3 vteřiny
tlačítko ZAP / VYP / nula
5
.
Q
Zobrazení v objemových
jednotkách
Postavte kuchyňskou váhu
2
na pevný a rovný
povrch.
Zapněte kuchyňskou váhu
2
stisknutím tlačítka
ZAP / VYP / nula
5
.
Počkejte až se LC-displej
4
uklidní a ukáže
0 g
16
, 0:0,0 unce
19
nebo 0 ml
17
anebo
0,0 tekuté unce
18
, podle toho, ve kterém
režimu se kuchyňská váha
2
před vypnutím
nacházela.
Stiskněte volič režimu
3
tak dlouho až se
ukáže mléko
21
nebo voda
20
jako režim ob-
jemových jednotek v ml nebo tekutých uncích.
Postavte nádobu s tekutinou nebo vážící mísu
1
na vážící desku
6
.
51 CZ
Stiskněte tlačítko ZAP / VYP / nula
5
k vynulo-
vání LC-displeje
4
(buď 0 ml nebo 0,0 tekuté
unce). Naplňte mléko nebo vodu (co jste předem
zvolili) do nádoby.
LC-displej
4
nyní automaticky ukáže objem
tekutiny naplněné do nádoby, podle předna-
stavení v ml nebi tekutých uncích.
Nakonec stiskněte volič režimu
3
k přestavení
kuchyňské váhy
2
zase do režimu vážení a
odečtení hmotnosti tekutiny (viz obr. E).
Upozornění: Při přetížení kuchyňské váhy
2
se
zobrazí „Err“ chyba
15
a váha se po 6 vteřinách
vypne. Sejměte surovinu z kuchyňské váhy a potom
stiskněte pro její nové zapnutí tlačítko
ZAP/ VYP / nula
5
.
Q
Odstranění chyb
Porucha Příčina Řešení
Zobrazení chyby
„Err“
15
zůstane stát.
Maximální přípustné
zatížení kuchyňské váhy
2
ve výši 5 kg / 11 lb je
překročené.
Odeberte surovinu z kuchyňské váhy
2
.
Nakonec zase kuchyňskou váhu
2
zapněte.
Redukujte váženou surovinu a važte jí po dílech.
Zobrazí se chyba
15
„Lo“.
Baterie je vybitá.
V tomto případě vyměňte baterii, postupujte
podle kapitoly „Výměna baterie “.
Kuchyňskou váhu
2
není možné zapnout.
Baterie může být vybitá.
V tomto případě vyměňte baterii, postupujte
podle kapitoly „Výměna baterie “.
Jestliže se přesto nedá kuchyňská váha
2
zapnout, obraťte se na odborníka.
Q
Čistění
Čistěte výrobek a vážící mísu
1
mírně navlh-
čeným hadrem, který nepouští vlákna. Na sil-
ného znečištění můžete použít hadr navlhčený
mýdlovou vodou.
Nepoužívejte na čištění chemické ani abrazivní
čisticí prostředky nebo ostré předměty. V opač-
ném případě může dojít k poškození.
Neponořujte výrobek v žádném případě do
vody nebo do jiných tekutin. V opačném pří-
padě může dojít k poškození.
Q
Likvidace do odpadu
Obal se skládá zekologických materiálů,
které můžete zlikvidovat prostřednictvím
místních sběren recyklovatelných materi-
álů. Zelený bod neplatí pro Německo.
b
a
Při třídění odpadu se řiďte podle ozna-
čení obalových materiálů zkratkami (a)
a čísly (b), s následujícím významem:
1–7: umělé hmoty / 20–22: papír a
lepenka / 80–98: složené látky.
Výrobek a obalové materiály jsou recy-
klovatelné, zlikvidujte je odděleně pro
lepší odstranění odpadu. Logo Triman
platí jen pro Francii.
O možnostech likvidace vysloužilých
zařízení se informujte u správy vaší obce
nebo města.
Vzájmu ochrany životního prostředí vy-
sloužilý výrobek nevyhazujte do domov-
ního odpadu, ale předejte k odborné
likvidaci. O sběrnách a jejich otevíracích
52 CZ
hodinách se můžete informovat u příslušn
é
správy města nebo obce.
Vadné nebo vybité baterie se musí, podle směrnice
2006 / 66 / ES a jejích příslušných změn, recyklovat.
Odevzdejte baterie a / nebo výrobek nabízejícím
sběrnám zpět.
Ekologické škody v důsledku
chybného zlikvidování
akumulátorových článků!
Akumulátorové články se nesmí zlikvidovat vdomá-
cím odpadu. Mohou obsahovat jedovaté těžké kovy
a podléhají zpracování zvláštního odpadu. Chemické
symboly těžkých kovů : Cd = kadmium, Hg = rtuť,
Pb = olovo. Proto odevzdejte opotřebované akumu-
látorové články u komunální sběrny.
Záruka
Výrobek byl vyroben s nejvyšší pečlivostí podle
přísných kvalitativních směrnic a před odesláním
prošel výstupní kontrolou. V případě závad máte
možnost uplatnění zákonných práv vůči prodejci.
Vaše práva ze zákona nejsou omezena naší níže
uvedenou zárukou.
Na tento artikl platí 3 záruka od data zakoupení.
Záruční lhůta začíná od data zakoupení. Uschovejte
si dobře originál pokladní stvrzenky. Tuto stvrzenku
budete potřebovat jako doklad o zakoupení.
Pokud se do 3 let od data zakoupení tohoto výrobku
vyskytne vada materiálu nebo výrobní vada, výrobek
Vám – dle našeho rozhodnutí – bezplatně opravíme
nebo vyměníme. Tato záruka zaniká, jestliže se vý-
robek poškodí, neodborně použil nebo neobdržel
pravidelnou údržbu.
Záruka platí na vady materiálu a výrobní vady. Tato
záruka se nevztahuje na díly výrobku podléhající
opotřebení (např. na baterie), dále na poškození
křehkých, choulostivých dílů, např. vypínačů, aku-
mulátorů nebo dílů zhotovených ze skla.
53 ES
Introducción .............................................................................................................................. Página 54
Uso adecuado ................................................................................................................................ Página 54
Descripción de los componentes ................................................................................................... Página 54
Datos técnicos ................................................................................................................................. Página 55
Funciones ......................................................................................................................................... Página 55
Contenido ........................................................................................................................................ Página 55
Advertencias de seguridad .......................................................................................... Página 55
Indicaciones generales de seguridad ............................................................................................ Página 55
Indicaciones de seguridad sobre las pilas / baterías ................................................................... Página 57
Puesta en funcionamiento ............................................................................................ Página 58
Cambiar la pila ............................................................................................................................... Página 58
Interruptor de conversión ................................................................................................................ Página 58
Pesar ................................................................................................................................................ Página 58
Pesar y añadir ................................................................................................................................. Página 59
Retirar parte del producto de medición ........................................................................................ Página 59
Apagado automático o manual ..................................................................................................... Página 60
Indicador de unidades de volumen ............................................................................................... Página 60
Solución de fallos ................................................................................................................. Página 60
Limpieza ....................................................................................................................................... Página 61
Eliminación ................................................................................................................................. Página 61
Garantía ....................................................................................................................................... Página 61
54 ES
En estas instrucciones de uso / en el aparato se utilizan los siguientes pictogramas:
¡Siga las indicaciones de prevención
y seguridad!
5 kg
No someta el
producto
a una carga
superior a los 5 kg.
¡Peligro de explosión!
¡Apto para alimentos! Este producto
no modifica el sabor ni el olor de los
alimentos.
Corriente continua
(Tipo de corriente y de tensión)
El platillo de pesaje no es apto para
el lavavajillas.
Utilice guantes de protección.
El platillo de pesaje está fabricado
en poliestireno (PS 6). No lo deseche
junto con la basura doméstica.
Cuando ya no lo necesite, deseche
el platillo de acuerdo a las directivas
locales vigentes.
Nunca deje a los niños sin vigilancia
con el material de embalaje o el
producto.
El producto no es apto para
microondas.
Báscula de cocina
Introducción
Enhorabuena por la adquisición de su nuevo produ
cto.
Ha elegido un producto de alta calidad. Familiarí-
cese con el producto antes de la primera puesta
en funcionamiento. Lea detenidamente el siguiente
manual de instrucciones y las indicaciones de segu-
ridad. Utilice el producto únicamente como se describe
a continuación y para las aplicaciones indicadas.
Conserve estas instrucciones adecuadamente. En
caso de transferir el producto a terceros, entregue
también todos los documentos correspondientes.
Q
Uso adecuado
El producto está diseñado para pesar alimentos en
pequeñas cantidades, ya que está pensado para
un uso doméstico. El producto sirve para determi-
nar el peso de líquidos y sólidos no agresivos, no
corrosivos ni afilados. El producto no ha sido con-
cebido para pesar medicamentos o materiales no
autorizados. El producto no ha sido diseñado para
un uso comercial.
Q
Descripción de los
componentes
1
Platillo de pesaje
2
Balanza de cocina
3
Interruptor de modo peso / leche / agua
(Weight ▸ Milk ▸ Water)
4
Pantalla LCD
5
Botón de ENCENDIDO / APAGADO / CERO,
ajuste cero (Tara) (ON / OFF / ZERO)
6
Base de pesaje
7
Pestaña del compartimento para pilas
8
Tapa del compartimento para pilas
9
Interruptor de conversión g / lb:oz
10
Contacto metálico de la pila, con efecto resorte
11
Integración externa de la pila
12
Botón de cierre negro para pilas
13
Compartimento para pilas
14
Tiras aislantes de la pila
55 ES
Indicador LCD:
15
Indicador de error
16
"g" = Indicador unidad de peso (gramos)
17
"ml" = Indicador de unidad de volumen
(mililitros)
18
"fl’oz" = Indicador de unidad de volumen
(líquido: onza)
19
"lb:oz" = Indicador de unidad de peso (libras:
onzas)
20
“ = Símbolo sobre agua = Unidad de medida
para modo de volumen (ml o fl’oz de agua)
21
“ = Símbolo sobre leche = Unidad de me-
dida para modo de volumen (ml o fl’oz de leche)
22
“ = Símbolo sobre peso = Modo de pesaje
(gramos o libras: onzas)
23
Pictograma "0" = Peso cero (esquina inferior
izquierda de la pantalla LCD)
24
"–" = Valor negativo (lado izquierdo de la
pantalla LCD)
25
"T" = Peso Tara (esquina superior izquierda de
la pantalla LCD)
Q
Datos técnicos
Rango de pesado: 0,1 oz–11 lb (libras) /
1 g–5 kg (kilogramos)
Escala: 0,1 oz / 1 g
Pila: 1 x pila de litio 3 V
(pila
de botón de litio CR2032/
incluida en el suministro)
Q
Funciones
Indicador de unidades de volumen para agua
y leche.
Dos sistemas distintos para las unidades de
peso: gramos (g) o libras (lb:oz), convertibles.
Advertencia en caso de funcionamiento bajo /
sobrecarga mediante indicador LCD de picto-
gramas.
Utilización de extensómetros de alta precisión.
Opción de posición cero o función Tara.
Función de desconexión automática para el
ahorro de energía cuando no se utilice el pro-
ducto durante más de dos minutos.
Desconexión manual: Pulse el botón de
ENCENDIDO / APAGADO / CERO
5
y
manténgalo pulsado durante tres segundos
(ver fig. A).
Q
Contenido
Compruebe siempre, inmediatamente después de
desembalar el producto, la integridad del contenido
y el perfecto estado del aparato.
1 balanza de cocina
1 platillo de pesaje
1 pila de litio (incorporada en el compartimento
para pilas)
1 manual de instrucciones
Q
Advertencias de seguridad
Indicaciones generales
de seguridad
¡PELIGRO
DE MUERTE
Y ACCIDENTES PARA BEBÉS
Y NIÑOS! Nunca deje a los
niños sin vigilancia con el material
de embalaje ni con el producto.
De lo contrario, existe peligro de
asfixia. Mantenga siempre a los
niños alejados del producto.
Este producto puede ser utilizado
por niños mayores de 8 años, así
como por personas con capaci-
dades físicas, sensoriales o men-
tales reducidas o que cuenten con
poca experiencia y / o falta de
56 ES
conocimientos, siempre y cuando
se les haya enseñado cómo utili-
zar el producto de forma segura
y hayan comprendido los peligr
os
que pueden resultar de un mal
uso del mismo. No permita que
los niños jueguen con el producto.
La limpieza y el mantenimiento
nunca deben llevarse a cabo por
niños sin la vigilancia de un adulto.
5 kg
¡PRECAUCIÓN! ¡PE-
LIGRO DE LESIONES!
No someta el producto a una
carga superior a los 5 kg. El
producto podría dañarse.
No exponga el producto
- a temperaturas extremas,
- a fuertes vibraciones,
- a fuertes esfuerzos mecánicos,
- a la radiación solar directa,
- a un campo magnético,
- a la humedad.
De lo contrario hay peligro de
daño del producto.
Proteja el producto de carga /
descarga electrostática. Esto
podría causar el impedimento
de intercambio de datos, que
produce fallos en la pantalla LCD.
Revise el producto por daños
antes de la puesta en marcha.
De ninguna manera ponga en
funcionamiento un producto
averiado.
Bajo nin-
guna circunstancia debe abrir la
caja del producto. Se pueden pro-
ducir lesiones y / o daños en el
producto. Deje que un electricista
lleve a cabo las reparaciones.
No permita que personas inex-
pertas utilicen el producto. Ase-
gúrese de haber comprendido
totalmente las instrucciones de uso
y que está en condiciones de ope-
rar el producto con seguridad.
Coloque el producto sobre una su-
perficie plana, firme y horizontal.
El producto contiene componen-
tes electrónicos sensibles. Por
ello podría sufrir interferencias
por otros equipos de radiotrans-
misión que se encuentren en las
proximidades. Estos pueden ser
p. ej., teléfonos móviles, apara-
tos de radio, radios para banda
ciudadana, radiocontroles / otros
controles remotos y aparatos de
microondas. Si aparecen indica-
ciones de error en la pantalla,
retire los aparatos de este tipo
del entorno del producto.
Las perturbaciones electromag-
néticas / la emisión de interferen-
cias de alta frecuencia pueden
causar averías en el funciona-
miento. Si se producen tales fallos,
retire la pila brevemente y
57 ES
colóquela de nuevo. Para ello
siga las instrucciones del apar-
tado "Cambiar la pila".
¡APTO PARA ALI-
MENTOS! Este producto
no modifica el sabor ni el olor
de los alimentos.
El platillo de pesaje no es
apto para el lavavajillas.
Indicaciones de
seguridad sobre las
pilas / baterías
¡PELI-
GRO DE MUERTE! Mantenga
las pilas / baterías fuera del al-
cance de los niños. ¡En caso de
ingestión, acuda inmediatamente
a un médico!
¡PELIGRO DE EXPLO-
SIÓN! No recargue
nunca pilas no recargables. No
ponga las pilas / baterías en cor-
tocircuito ni tampoco las abra.
Estas podrían recalentarse, ex-
plotar o provocar un incendio.
Nunca arroje pilas / baterías al
fuego o al agua.
No aplique cargas mecánicas
sobre las pilas / baterías.
Riesgo de sulfatación de las
pilas / baterías
Evite condiciones y temperaturas
extremas que puedan influir en
el funcionamiento de las pilas /
baterías, por ejemplo, acercarlas
a un radiador o exponerlas di-
rectamente a la luz solar.
¡Evite el contacto con la piel, ojos
y mucosas! En caso de que se
produzca un contacto con el
ácido de las pilas, ¡lave las zo-
nas afectadas y póngase inme-
diatamente en contacto con un
médico!
¡UTILICE GUANTES
DE SEGURIDAD! Las
pilas / baterías sulfatadas o da-
ñadas pueden provocar abra-
siones al entrar en contacto con
la piel. Por tanto, es imprescindi-
ble el uso de guantes de protec-
ción en estos casos.
En caso de que las pilas se sul-
faten, retírelas inmediatamente
del producto para evitar daños.
Utilice únicamente pilas / baterías
del mismo tipo. ¡No mezcle
pilas / baterías usadas con
nuevas!
Retire las pilas / baterías del pro-
ducto si no va a utilizarlo durante
un período de tiempo prolon-
gado.
58 ES
Riesgo de daño del producto
¡Utilice exclusivamente el tipo de
pila / batería indicado!
¡Cuando las coloque, observe
que la polaridad sea correcta!
¡Esta se indica en el comparti-
mento de las pilas!
¡Si fuese necesario, limpie los
contactos de la pila y del com-
partimento para pilas antes de
colocarla!
Retire inmediatamente las pilas /
baterías agotadas del producto.
Q
Puesta en funcionamiento
1. Afloje los tornillos que se encuentran en la
parte trasera de la báscula
2
con ayuda de
un destornillador.
2. Abra el compartimento de las pilas
13
de la
parte inferior de la báscula
2
apretando la
pestaña
7
de la tapa del compartimento en
8
dirección a este y sáquela hacia arriba.
3. Retire las cintas aislantes
14
situadas bajo el
contacto metálico para la pila.
4. Vuelva a colocar la tapa del compartimento
para pilas
8
en el compartimento de las pilas
13
. Empuje la tapa del compartimento de las
pilas
8
en el compartimento
13
hasta que
escuche cómo encaja.
5. Fije el tornillo mediante un destornillador (ver
fig. B).
Q
Cambiar la pila
1. Apague la balanza
2
. Presione el botón de
ENCENDIDO / APAGADO / CERO
5
durante
3 segundos.
2. Afloje los tornillos que se encuentran en la
parte trasera de la báscula
2
con ayuda de
un destornillador. Abra el compartimento de
las pilas
13
como se ha indicado anteriormente.
3. Retire la pila gastada de la integración externa
11
pulsando y tirando del botón de cierre
negro
12
. La pila saldrá automáticamente del
dispositivo de integración
11
. Asegúrese de no
ejercer demasiada presión sobre el contacto
metálico de la pila
10
. De lo contrario, este
podría resultar dañado al deformarse con la
presión de la pila. Retire la pila del dispositivo
de integración externo
11
.
4. Coloque una pila nueva en el dispositivo de
integración externo
11
. Preste atención a la
polaridad correcta. La parte con la señal "+"
debe apuntar hacia arriba. La pila debe inser-
tarse en el dispositivo de integración externo
11
.
5. Cierre el compartimento de las pilas
13
y
vuelva a apretar los tornillos utilizando un
destornillador.
Q
Interruptor de conversión
En la parte inferior de la balanza
2
se en-
cuentra un interruptor de conversión g / lb:oz
9
para las unidades de peso. Sencillamente
pulsando el botón es posible cambiar la unidad
de medida entre el sistema métrico (g, ml) y el
imperial (lb:oz, fl’oz).
Nota:
Cuando la unidad de peso está determinada
según el sistema métrico (g), la unidad de
volumen también se muestra automáticamente
como ml.
Cuando la unidad de peso está determinada
según el sistema imperial (lb:oz), la unidad de
volumen también se muestra automáticamente
como fl’oz.
La unidad estándar de peso es g (gramo).
Q
Pesar
Nota: Tanto si empieza a pesar con o sin platillo
de pesaje
1
, la balanza
2
siempre se iniciará
en 0 g / 0:0.0 lb:oz
16
/
19
al pulsar el botón de
ENCENDIDO / APAGADO / CERO
5
.
59 ES
Por contra, si coloca el platillo de pesaje
1
tras
haber encendido la balanza
2
, se mostrará el
peso del platillo
1
. Pulse x1 el botón de ENCEN-
DIDO / APAGADO / CERO
5
para restablecer el
indicador en 0 g / 0:0.0 lb:oz
16
/
19
; "T" (TARA)
25
se mostrará en la pantalla LCD
4
.
Coloque la balanza sobre una superficie firme
y plana.
Pulse la tecla de ENCENDIDO / APAGADO /
CERO
5
para encender la balanza
2
(ver
fig. C).
Espere hasta que la pantalla LCD
4
se detenga
y estabilice en 0 g
16
, 0:0,0 onzas
19
o 0 ml
17
o 0,0 fl’oz
18
, según el modo en que se
encontrara la balanza antes de apagarse.
Pulse el interruptor de modo
3
para establecer
la balanza en el modo normal de pesaje
22
.
En caso necesario, seleccione la unidad de peso
con antelación pulsando el interruptor de con-
versión g / lb:oz
9
del inferior de la balanza
antes de comenzar a pesar.
Para volver a calibrar la balanza
2
una vez
que haya seleccionado la unidad de peso,
mantenga pulsado el botón de ENCENDIDO /
APAGADO / CERO
5
durante 3 segundos
para apagar la balanza
2
.
Coloque la balanza
2
sobre una superficie
fuerte y plana. Coloque el platillo de pesaje
1
sobre la base de pesaje
6
.
Pulse la tecla de ENCENDIDO / APAGADO /
CERO
5
para encender la balanza y utilizar
el modo de pesaje normal.
Espere hasta que todos los segmentos de la
pantalla LCD
4
se iluminen y la balanza
2
se estabilice en 0 g
16
, 0:0,0 onzas
19
.
Coloque el producto que desea pesar en el
platillo de pesaje
1
para empezar el proceso.
La pantalla LCD
4
muestra el peso de los ali-
mentos en la unidad de peso seleccionada
(ver fig. D).
Q
Pesar y añadir
La balanza
2
permite pesar de forma consecutiva
sin retirar el alimento del platillo de pesaje
1
.
Coloque el platillo de pesaje
1
sobre la base
de pesaje
6
.
Pulse la tecla de ENCENDIDO / APAGADO /
CERO
5
para encender la balanza
2
.
Espere hasta que la pantalla LCD
4
se detenga
y estabilice en 0 g
16
, 0:0,0 onzas
19
o 0 ml
17
o 0,0 fl’oz
18
, según el modo en que se
encontrara la balanza
2
antes de apagarse.
Pulse el interruptor de modo
3
para establecer
la balanza
2
en modo de pesaje
22
(ajuste
previo g o lb:oz).
Llene el platillo de pesaje
1
para empezar a
pesar. La pantalla LCD
4
muestra el peso del
primer producto colocado en el platillo de pes-
aje
1
.
Pulse la tecla de ENCENDIDO / APAGADO /
CERO
5
, la balanza
2
muestra la indicación
"T" (TARA)
25
.
Podrá pesar otros productos del mismo modo,
la pantalla LCD
4
muestra el peso del nuevo
producto.
Pulse el botón de ENCENDIDO / APAGADO /
CERO
5
después de añadir cada nuevo pro-
ducto.
Realice este procedimiento hasta que alcance
la carga máxima permitida de la balanza
2
,
o bien hasta que el platillo de pesaje
1
esté
totalmente lleno.
Q
Retirar parte del producto
de medición
Coloque el platillo de pesaje
1
sobre la base
de pesaje
6
.
Pulse la tecla de ENCENDIDO / APAGADO /
CERO
5
para encender la balanza
2
.
Espere hasta que la pantalla LCD
4
se detenga
y estabilice en 0 g
16
, 0:0,0 onzas
19
o 0 ml
17
o 0,0 fl’oz
18
, según el modo en que se
encontrara la balanza
2
antes de apagarse.
Pulse el interruptor de modo
3
para estable-
cer el modo de pesaje
22
(ajuste previo g o
lb:oz).
Llene el platillo de pesaje
1
para empezar a
pesar. La pantalla LCD
4
muestra el peso del
60 ES
primer producto colocado en el platillo de
pesaje
1
.
Pulse el botón de ENCENDIDO / APAGADO /
CERO
5
para restablecer la pantalla LCD
4
en cero; se muestra la indicación "T" (TARA)
25
.
A continuación retire la cantidad deseada del
producto del platillo de pesaje
1
. La pantalla
LCD
4
muestra el peso producto retirado del
platillo
1
mediante un valor negativo.
Pulse el botón de ENCENDIDO / APAGADO /
CERO
5
para restablecer la pantalla LCD
4
en cero; se muestra la indicación "T" (TARA)
25
.
A continuación podrá añadir más productos a
la balanza
2
o seguir retirándolos.
Q
Apagado automático o manual
La balanza se apaga automáticamente si no
se utiliza durante más de 2 minutos.
Pulse el botón de ENCENDIDO / APAGADO /
CERO
5
durante más de 3 segundos para
apagar la balanza.
Q
Indicador de unidades de
volumen
Coloque la balanza
2
sobre una superficie
firme y plana.
Pulse la tecla de ENCENDIDO / APAGADO /
CERO
5
para encender la balanza
2
.
Espere hasta que la pantalla LCD
4
se de-
tenga y estabilice en 0 g
16
, 0:0,0 onzas
19
o 0 ml
17
o 0,0 fl’oz
18
, según el modo en que
se encontrara la balanza
2
antes de apagarse.
Pulse el interruptor de modo
3
hasta que se
muestre leche
21
o agua
20
como modo de
volumen en ml o fl’oz.
Coloque un recipiente para líquidos o el plati-
llo de pesaje
1
sobre la base de pesaje
6
.
Pulse el botón de ENCENDIDO / APAGADO /
CERO
5
para restablecer la pantalla LCD
4
en cero (0 ml o 0,0 fl’oz). Rellene el recipiente
con leche o agua (según lo que haya seleccio-
nado anteriormente).
La pantalla LCD
4
muestra automáticamente
el volumen del líquido incorporado al recipiente,
en ml o fl’oz según la configuración establecida.
A continuación pulse el interruptor de modo
3
para volver a establecer la balanza
2
en
el modo de pesaje y obtener el peso corres-
pondiente del líquido (ver fig. E).
Nota: Cuando la báscula
2
se sobrecarga, se
muestra la indicación de error "Err"
15
y se apaga
tras 6 segundos. Retire el producto de la báscula y
luego pulse el botón de ENCENDIDO / APAGADO /
CERO
5
para volver a encenderla.
Q
Solución de fallos
Problema Causa Solución
El indicador de error
15
muestra "Err" y se
mantiene así.
Se ha superado la carga
máxima de 5 kg / 11 lb de
la balanza
2
.
Retire los productos de la balanza
2
.
Apague la balanza
2
y vuelva a encenderla.
Reduzca la cantidad del producto y péselo en
varias tandas.
El indicador de error
15
muestra "Lo".
La pila está agotada.
Cambie la pila siguiendo el apartado "Cambiar
la pila".
La balanza
2
no se
enciende.
En este caso la pila está
agotada.
Cambie la pila siguiendo el apartado "Cambiar
la pila".
Si la balanza de cocina
2
aún no se enciende,
póngase en contacto con un profesional.
61 ES
Q
Limpieza
Limpie el producto y el platillo de pesaje
1
con
un paño suave libre de pelusas, ligeramente
humedecido. En caso de suciedad intensa,
puede humedecer el paño también con un
jabón suave.
No utilice detergentes químicos, agentes abra-
sivos u objetos cortantes para la limpieza. De
lo contrario el producto podría resultar dañado.
Nunca sumerja el producto en agua u otros
líquidos. De lo contrario el producto podría
resultar dañado.
Q
Eliminación
El embalaje está compuesto por materia-
les no contaminantes que pueden ser des-
echados en el centro de reciclaje local.
El punto verde no se aplica en Alemania.
b
a
Tenga en cuenta el distintivo del emba-
laje para la separación de residuos. Está
compuesto por abreviaturas (a) y núme-
ros (b) que significan lo siguiente: 1–7:
plásticos / 20–22: papel y cartón /
80–98: materiales compuestos.
El producto y el material de embalaje son
reciclables. Separe los materiales para un
mejor tratamiento de los residuos. El logo-
tipo Triman se aplica solo para Francia.
Para obtener información sobre las
posibilidades de desecho del producto
al final de su vida útil, acuda a la admi-
nistración de su comunidad o ciudad.
Para proteger el medio ambiente no tire
el producto junto con la basura domés-
tica cuando ya no le sea útil. Deséchelo
en un contenedor de reciclaje. Diríjase a
la administración competente para obte-
ner información sobre los puntos de re-
cogida de residuos y sus horarios.
Las pilas defectuosas o usadas deben ser recicladas
según lo indicado en la directiva 2006 / 66 / CE y
en sus modificaciones. Recicle las pilas y / o el pro-
ducto en los puntos de recogida adecuados.
¡Daño medioambiental
debido a un reciclaje
incorrecto de las pilas!
Las pilas no deben eliminarse junto a los residuos
domésticos. Las pilas pueden contener metales
pesados tóxicos que debe tratarse conforme a la
normativa aplicable a los residuos especiales. Los
símbolo químicos de los metales pesados son:
Cd = Cadmio, Hg = Mercurio, Pb = Plomo. Las
pilas deben reciclarse en el punto de recolección
específico para ello.
Garantía
El producto ha sido fabricado cuidadosamente
siguiendo exigentes normas de calidad y ha sido
probado antes de su entrega. En caso de defecto
del producto, usted tiene derechos legales frente
al vendedor del mismo. Nuestra garantía (abajo
indicada) no supone una restricción de dichos
derechos legales.
Este producto dispone de una garantía de 3 años
desde la fecha de compra. El plazo de garantía
comienza a partir de la fecha de compra. Por favor,
conserve adecuadamente el justificante de compra
original. Este documento se requerirá como prueba
de que se realizó la compra.
Si en el plazo de 3 años a partir de la fecha de com-
pra se produce un fallo de material o fabricación en
este producto, repararemos el producto o lo sustitui-
remos gratuitamente por un producto nuevo (según
nuestra elección). La garantía quedará anulada si
el producto resulta dañado o es utilizado o mante-
nido de forma inadecuada.
La garantía cubre defectos de materiales o de fabri-
cación. Esta garantía no cubre aquellos componen-
tes del producto sometidos a un desgaste normal y
62 ES
que, por ello, puedan considerarse piezas de des-
gaste (por ej. las pilas). Tampoco cubre daños de
componentes frágiles como, por ejemplo, los inter-
ruptores, baterías y piezas de cristal.
63 PT
Introdução .................................................................................................................................. Página 64
Utilização de acordo com as disposições .................................................................................... Página 64
Descrição das peças ...................................................................................................................... Página 64
Dados técnicos ................................................................................................................................ Página 65
Funções ............................................................................................................................................ Página 65
Material fornecido .......................................................................................................................... Página 65
Indicações de segurança ................................................................................................ Página 65
Indicações gerais de segurança .................................................................................................... Página 65
Indicações de segurança relativas às pilhas / baterias ................................................................ Página 67
Colocação em funcionamento ................................................................................... Página 68
Substituir a pilha .............................................................................................................................. Página 68
Interruptor de conversão ................................................................................................................ Página 68
Pesagem .......................................................................................................................................... Página 69
Pesar e adicionar ............................................................................................................................ Página 69
Remover parcialmente o material a pesar .................................................................................... Página 69
Desactivação automática ou manual ............................................................................................ Página 70
Indicação de unidades de volume ................................................................................................ Página 70
Resolução de erros ............................................................................................................. Página 71
Limpeza ........................................................................................................................................ Página 71
Eliminação .................................................................................................................................. Página 71
Garantia ....................................................................................................................................... Página 72
64 PT
Neste manual de instruções são utilizados os seguintes símbolos / gficos:
Considerar as indicações de aviso e
de segurança!
5 kg
Não sobrecarregue o produto com
mais de 5 kg.
Perigo de explosão!
Adequado para alimentos! O sabor e
o odor natural dos alimentos não são
afetados por este
produto
.
Corriente continua
(Tipo de corriente y de tensión)
A taça da balança não é apropriada
para a máquina de lavar.
Utilize luvas de protecção.
A taça da balança é fabricada de
poliestireno (PS 6). Não colocar no
lixo doméstico. Elimine a taça da ba-
lança quando não mais necessitar de
acordo com os regulamentos locais
em vigor.
Nunca deixe crianças sem vigilância
com o material da embalagem e o
produto.
O produto não é apropriado para
microondas.
Balança de cozinha
Introdução
Damos-lhe os parabéns pela aquisição do seu novo
produto. Acabou de adquirir um produto de grande
qualidade. Familiarize-se com o produto antes da
primeira colocação em funcionamento. Para tal, leia
atentamente este manual de instruções e as indica-
ções de segurança. Utilize o produto apenas como
descrito e para as áreas de aplicação indicadas.
Guarde este manual. Se entregar este produto a
terceiros, entregue também todos os documentos.
Q
Utilização de acordo
com as disposições
Este produto destina-se à pesagem e pesagem adi-
cional de alimentos, em uso doméstico. O produto
é destinado para a avaliação do peso de líquidos
e materiais não agressivos ou abrasivos ou que
riscam. Não está prevista uma utilização para a
pesagem de medicamentos ou materiais ilícitos.
O produto não é adequado para a utilização
comercial.
Q
Descrição das peças
1
Taça da balança
2
Balança de cozinha
3
Interruptor de modo Peso/ leite/ água
(Weight ▸ Milk ▸ Water)
4
Visor LC
5
Interruptor para LIGAR / DESLIGAR / tecla zero
hora, repor a zero (tara) (ON / OFF / ZERO)
6
Plataforma de pesagem
7
Patilha da tampa do compartimento da pilha
8
Tampa do compartimento das pilhas
9
Interruptor de conversão g / lb:oz
10
Contacto metálico da pilha com efeito de mola
11
Suporte externo da pilha
12
Interruptor de bloqueio preto para a pilha
13
Compartimento das pilhas
14
Fita de isolamento da pilha
65 PT
Visor LCD:
15
Indicação de avaria
16
„g“ = indicação da unidade de peso (gramas)
17
„ml“ = indicação da unidade de volume
(mililitros)
18
“fl’oz” = indicação da unidade de volume
(líquido: onças)
19
„lb:oz“= indicação da unidade de peso
(libras: onças)
20
“ = símbolo relativo à água = unidade de
medida para o modo de volume (ml ou fl’oz
de água)
21
“ = símbolo relativo ao leite = unidade de
medida para o modo de volume (ml ou fl’oz
de leite)
22
“ = símbolo relativo ao peso = modo de
pesagem (grama ou libra: onça)
23
Símbolo gráfico "0" = peso nulo (canto inferior
esquerdo do visor LC)
24
„–“ = valor negativo (lado esquerdo do visor LC)
25
„T“ = tara (canto superior esquerdo do visor LC)
Q
Dados técnicos
Capacidade: 0,1 oz–11 lb (libras) /
1 g–5 kg (quilogramas)
Divisão: 0,1 oz / 1 g
Pilha: 1 x 3 V
Pilha de Lítio
(CR2032 pilha tipo botão
de lítio / incluída no material
fornecido)
Q
Funções
Indicação das unidades de volume relativas à
água e ao leite.
Dois sistemas diferentes para as unidades de
peso – gramas (g) ou libras (lb:oz), convertíveis.
Aviso em caso de nível operacional baixo /
sobrecarregamento através de um símbolo
gráfico especial no LCD.
Utilização de extensómetros de elevada
precisão.
Possibilidade de reposição a zero ou função
de tara.
Função de desactivação automática para
economizar energia, caso o produto não seja
utilizado durante um período superior a dois
minutos.
Desactivação manual – mantenha premido a
tecla para LIGAR / DESLIGAR / repor a zero
5
durante três segundos (veja Fig. A).
Q
Material fornecido
Depois de desembalar o aparelho, verifique sempre
o material fornecido quanto à sua integridade e se
o produto se encontra em perfeitas condições.
1 balança de cozinha
1 taça da balança
1 pilha de lítio (pré-instalada no compartimento de
pilhas)
1 manual de instruções
Q
Indicações de segurança
Indicações gerais
de segurança
PERIGO
DE VIDA E DE ACI-
DENTE PARA BEBÉS E
CRIANÇAS! Nunca deixe as
crianças sozinhas com o material
da embalagem e o produto. Ca
so
contrário, existe um perigo de
asfixia através do material da
embalagem. Mantenha sempre
as crianças afastadas do produto.
66 PT
Esse produto pode ser utilizado
por crianças a partir dos 8 anos,
assim como por pessoas com
capacidades físicas, sensoriais
ou mentais reduzidas ou defi-
ciências na experiência e conhe-
cimento, se forem vigiadas ou
instruídas em relação ao uso se-
guro do produto e se compreen-
derem os perigos que daí possam
resultar. As crianças não devem
brincar com o produto. A lim-
peza e a manutenção pelo utili-
zador não devem ser realizadas
por crianças sem vigilância.
5 kg
CUIDADO! PERIGO
DE FERIMENTOS! Não
sobrecarregue o produto com
mais de 5 kg. O produto poderá
ficar danificado.
Nunca submeta o produto a:
- temperaturas extremas,
- vibrações fortes,
- esforços mecânicos excessivos,
- acção directa dos raios do sol,
- zonas com campos magnéticos,
- humidade.
Caso contrário a balança poderá
avariar-se.
Proteja a balança contra cargas /
descargas electroestáticas. Elas
podem provocar um impedimento
na troca de dados interna, dando
origem a uma mensagem de
erro no monitor LCD.
Antes de o colocar em funciona-
mento, verifique o produto em
relação a danos ou avarias.
Nunca coloque uma balança
danificada em funcionamento.
Nunca abra a estru-
tu
ra do produto. Em consequência
disso, podem ocorrer ferimentos
e danos materiais. As reparações
deverão ser efectuadas apenas
por electricistas especializados.
Não permite que pessoas inex-
perientes utilizem a balança.
Certifique-se de que as pessoas
que utilizarem a balança leram
o manual de instruções e estão
capacitadas a utilizá-la de forma
segura.
Coloque a balança sobre
uma superfície firme, plana e
horizontal.
O produto contém componentes
eletrónicos sensíveis. Por isso, é
possível que aparelhos com ra-
diotransmissão na proximidade
imediata deste interfiram com o
seu funcionamento. Este pode ser
por ex. um telemóvel, walkie-talkie,
rádio sem fios CB, telecomando
por rádio / outros telecomandos
e microondas. Caso surjam indi-
cações de erro no visor, afaste
67 PT
tais aparelhos da proximidade
do produto.
Avarias electromagnéticas/
emissões de interferências alta-
mente frequentes podem provocar
interferências no funcionamento.
No caso deste tipo de interfe-
rências, remova brevemente as
pilhas e volte a colocá-las. Siga
para tal as instruções segundo o
capítulo "Mudar as pilhas".
ADEQUADO PARA
PRODUTOS ALIMEN-
TARES! O sabor e o odor natural
dos alimentos não são afetados
por este produto.
A taça da balança não
é apropriada para a
máquina de lavar.
Indicações de
segurança relativas
às pilhas / baterias
PERIGO DE
MORTE! Mantenha as pilhas e
baterias fora do alcance das
crianças. Se a pilha for ingerida,
contacte imediatamente um
médico!
PERIGO DE EXPLO-
O! Nunca carregue
pilhas não recarregáveis. Não
faça ligação direta de pilhas ou
baterias e / ou abra elas. As
consequências poderão ser o
sobreaquecimento, perigo de
incêndio ou a explosão.
Nunca atire as pilhas ou baterias
para chamas ou água.
Não exponha as pilhas ou
baterias a uma carga mecânica
demasiada elevada.
Risco de derrame das pilhas /
baterias
Evite condições e temperaturas
extremas que possam ter efeito
sobre as pilhas ou baterias, por
ex. elementos de batterie / gli
solar direta.
Evite o contacto com a pele,
olhos e mucosas! Em caso de
contacto com o ácido das pilhas,
lave imediatamente as zonas
afetadas com água limpa e
consulte um médico logo que
possível!
UTILIZAR LUVAS DE
PROTECÇÃO! As pilhas
ou baterias gastas ou danifica-
das podem provocar queimadu-
ras ao entrarem em contacto com
a pele. Por isso, nestes casos use
sempre luvas adequadas.
Caso as pilhas derramem, retire-
-as imediatamente do produto
para evitar danos.
68 PT
Utilize apenas pilhas ou baterias
do mesmo tipo. Não misture pilhas
novas com pilhas ou baterias
antigas.
Remova as pilhas ou baterias,
se o produto não foi utilizado
durante um longo período.
Perigo de dano ao produto
Utilize apenas o tipo de pilha ou
bateria indicado!
Ao colocar as pilhas, tenha em
atenção a polaridade correta!
Esta é indicada no comparti-
mento das pilhas!
Limpe os contactos na bateria e
no compartimento de baterias
antes de colocar as baterias,
caso necessário!
Retire de imediato as pilhas ou
baterias gastas do produto.
Q
Colocação em funcionamento
1. Solte o parafuso que se encontra no lado de
trás da balança
2
através de uma chave de
fenda.
2. Abra o compartimento da pilha
13
na parte
de baixo da taça da balança
2
, deslocando
a patilha
7
da tampa
8
na direcção do
compartimento e retirando-a para cima.
3. Remova a fita de isolamento
14
que se encon-
tra fixa sob o contacto metálico da pilha.
4. Coloque a tampa
8
novamente no comparti-
mento da pilha
13
. Pressione a tampa
8
sobre
o compartimento para as pilhas
13
até esta
encaixar de forma audível.
5. Aperte o parafuso através da chave de fenda
(veja Fig. B).
Q
Substituir a pilha
1. Desligue a balança de cozinha
2
. Prima e
mantenha a tecla de LIGAR / DESLIGAR /
ZERO
5
por 3 segundos.
2. Solte o parafuso que se encontra no lado de
trás da balança
2
através de uma chave de
fenda. Abra o compartimento da pilha
13
tal
como descrito anteriormente.
3. Remova a bateria usada do suporte
11
primando
e puxando o interruptor preto de fechamento
12
. A bateria se solta automaticamente do su-
porte
11
. Certifique-se de que não é exercida
demasiada pressão sobre o contacto de metal
da bateria
10
. Caso contrário, este pode ser
danificado, pois pode ser provocada uma de-
formação ao levantar a pilha. Retire a pilha do
suporte externo
11
.
4. Insira a nova pilha no suporte externo
11
. Te-
nha em atenção a polaridade correta. O lado
"+" deve estar voltado para cima. A pilha pre-
cisa ser primada no suporte exterior
11
.
5. Feche o compartimento de pilhas
13
e aperte
os parafusos com uma chave de fenda.
Q
Interruptor de conversão
Um interruptor de conversão
9
g / lb:oz para
as unidades de peso encontra-se na parte infe-
rior da balança para cozinha
2
. Ao premir
um simples botão, a unidade de medida é
alterada de medidas métricas (g, ml) para
medidas imperiais (lb:oz, fl:oz).
Aviso:
Se a unidade de peso estiver definida como
medida métrica (g), a medida volumétrica tam-
bém é indicada automaticamente como ml.
Se a unidade de peso estiver definida como
medida imperial (lb:oz), a medida volumétrica
também é indicada automaticamente como
fl:oz.
A unidade de peso padrão é g (grama).
69 PT
Q
Pesagem
Aviso: Seja com ou sem a taça da balança
1
que começas, a balança de cozinha
2
sempre
começa em 0 g / 0:0.0 lb:oz
16
/
19
, quando a
tecla de LIGAR / DESLIGAR / ZERO
5
for primada.
Se colocar a taça da balança
1
sobre a balança
de cozinha
2
depois de a ligar, o peso da taça
da balança
1
é indicado. Prima 1 x a tecla LIGAR /
DESLIGAR / ZERO
5
, para voltar o indicador
para 0 g / 0:0.0 lb:oz
16
/
19
; „T“ (TARE)
25
é
mostrado no visor LC
4
.
Coloque a balança de cozinha sobre uma
superfície estável e plana.
Prima a tecla de LIGAR / DESLIGAR / ZERO
5
para ligar a balança de cozinha
2
(veja Fig. C).
Aguarde até que o visor LC
4
estabilize em
0 g
16
, 0:0,0 onças
19
ou 0 ml
17
ou 0,0 fl:oz
18
, consoante o modo ajustado antes de a
balança de cozinha ter sido desligada.
Pressione o interruptor de modo
3
, a fim de
ajustar a balança de cozinha para o modo de
pesagem normal
22
.
Se necessário, seleccione previamente a unidade
de peso, premindo o interruptor de conversão
g / fl:oz
9
no fundo da balança de cozinha,
antes de iniciar a pesagem.
Para uma nova calibração da balança de
cozinha
2
, quando tiver selecionado a uni-
dade de peso, prima e mantenha a tecla LIGAR /
DESLIGAR / ZERO
5
por 3 segundos para
desligar a balança de cozinha
2
.
Coloque a balança de cozinha
2
sobre uma
superfície rígida e plana. Coloque a taça da
balança
1
sobre a plataforma de pesagem
6
.
Prima a tecla de LIGAR / DESLIGAR / ZERO
5
para ligar a balança de cozinha e accionar o
modo de pesagem normal.
Aguarde até que todos os segmentos do visor
LC
4
acendam e que a balança de cozinha
2
estabilize em 0 g
16
, 0:0,0 onças
19
.
Insira o material a pesar na taça da balança
1
para iniciar a pesagem. O visor LC
4
mostra
o peso do material na unidade de pesagem
escolhida (veja Fig. D).
Q
Pesar e adicionar
A balança de cozinha
2
permite efectuar uma pesa-
gem adicional, sem remover o material da taça
1
.
Coloque a taça da balança
1
sobre a plata-
forma de pesagem
6
.
Prima o botão LIGAR / DESLIGAR / ZERO
5
para ligar a balança de cozinha
2
.
Aguarde até que o visor LC
4
estabilize em
0 g
16
, 0:0,0 onças
19
ou 0 ml
17
ou 0,0 fl:oz
18
, consoante o modo ajustado antes de a
balança de cozinha
2
ter sido desligada.
Prima o interruptor de modo
3
para regressar
a balança de cozinha
2
ao modo de pesa-
gem
22
(predefinição: g ou lb:oz).
Insira o material na taça da balança
1
para
iniciar a pesagem. O visor LC
4
indica o peso
do material colocado na taçada balança
1
em primeiro lugar.
Prima o botão LIGAR / DESLIGAR / ZERO
5
e
a balança de cozinha
2
mostra „T“ (TARE)
25
.
Podes colocar um peso adicional da mesma
maneira e pesar-lo, o visor LC
4
indica o peso
do novo objeto que foi adicionado.
Prima a tecla LIGAR / DESLIGAR / ZERO
5
após cada novo peso adicionado.
Repita este procedimento até atingir a capaci-
dade máxima da balança de cozinha
2
ou
até a taça de balança
1
estar cheia.
Q
Remover parcialmente o
material a pesar
Coloque a taça da balança
1
sobre a
plataforma de pesagem
6
.
Prima o botão LIGAR / DESLIGAR / ZERO
5
para ligar a balança de cozinha
2
.
Aguarde até que o visor LC
4
estabilize em
0 g
16
, 0:0,0 onças
19
ou 0 ml
17
ou 0,0 fl:oz
18
, consoante o modo ajustado antes de a
balança de cozinha
2
ter sido desligada.
Prima o interruptor de modo
3
, a fim de ajus-
tar o modo de pesagem
22
(predefinição: g
ou lb:oz).
70 PT
Insira o material na taça da balança
1
para
iniciar a pesagem. O visor LC
4
indica o
peso do material colocado na taçada balança
1
em primeiro lugar.
Prima a tecla LIGAR / DESLIGAR / ZERO
5
,
para voltar o visor LC
4
ao zero; „T“ (TARE)
25
é mostrado.
Retire a quantidade pretendida de material a
pesar da taça da balança
1
. O visor LC
4
mostra o peso removido da taça da balança
1
como valor negativo.
Prima a tecla LIGAR / DESLIGAR / ZERO
5
,
para voltar o visor LC
4
ao zero; „T“ (TARE)
25
é mostrado.
Agora, podes adicionar ou remover peso na
balança de cozinha
2
.
Q
Desactivação automática
ou manual
A balança de cozinha é desactivada automati-
camente se não for utilizada durante um período
superior a 2 minutos.
Prima a tecla de LIGAR / DESLIGAR / ZERO
5
por mais de 3 segundos para desligar a ba-
lança de cozinha.
Q
Indicação de unidades
de volume
Coloque a balança de cozinha
2
sobre uma
superfície estável e plana.
Prima o botão LIGAR / DESLIGAR / ZERO
5
para ligar a balança de cozinha
2
.
Aguarde até que o visor LC
4
estabilize em
0 g
16
, 0:0,0 onças
19
ou 0 ml
17
ou 0,0 fl:oz
18
, consoante o modo ajustado antes de a
balança de cozinha
2
ter sido desligada.
Prima o interruptor de modo
3
, até surgir a
indicação leite
21
ou água
20
como modo de
volume em ml ou fl:oz.
Coloque um recipiente para líquidos ou a taça
da balança
1
sobre a plataforma de pesa-
gem
6
.
Prima a tecla LIGAR / DESLIGAR / ZERO
5
para retornar o visor LC
4
para zero (0 ml
ou 0,0 fl’oz). Encha o recipiente com leite ou
água (o que tiver seleccionado anteriormente).
O visor LC
4
indica agora automaticamente
o volume do líquido existente no recipiente, em
ml ou em fl:oz, consoante o ajuste efectuado.
De seguida, prima o interruptor de modo
3
da balança de cozinha
2
para regressar ao
modo de pesagem e determinar o peso corres-
pondente ao líquido (veja Fig. E).
Aviso: Caso a balança
2
esteja sobrecarregada,
o indicador de erro mostra
15
„Err“ e se desliga
depois de 6 segundos. Remova o peso da balança
de cozinha e então prima o botão LIGAR / DESLIGAR /
ZERO
5
para ligar a balança de cozinha nova-
mente.
71 PT
Q
Resolução de erros
Erro Causa Solução
O indicador de erro
15
mostra „Err“ e
permanece dessa
maneira.
A carga máxima de
5 kg / 11lb da balança de
cozinha
2
foi ultrapas-
sada.
Retire o ingrediente a pesar da balança de
cozinha
2
.
Desligue a balança de cozinha
2
e volte a
ligar de seguida.
Divida o artigo a pesar e pese-o em vários
passos.
O indicador de erro
15
mostra „Lo“.
A pilha está gasta.
Substitua a pilha de acordo com o capítulo
„Substituir a pilha“.
A balança da co-
zinha
2
não liga.
A pilha está, eventual-
mente, gasta.
Substitua a pilha de acordo com o capítulo
„Substituir a pilha“.
Se a balança de cozinha
2
ainda não liga,
entre em contacto com o técnico.
Q
Limpeza
Limpe um produto e a balança de cozinha
1
com um pano ligeiramente humedecido e livre
de fios. Em caso de maior sujidade, também
pode humedecer o pano com um pouco de
água morna e sabão.
Não utilize quaisquer produtos químicos ou
abrasivos para a limpeza, nem objetos afiados.
Caso contrário, o artigo poderá ficar danifi-
cado.
Nunca mergulhe o produto em água ou outros
líquidos. Caso contrário, o artigo poderá ficar
danificado.
Q
Eliminação
A embalagem é feita de materiais não
poluentes que podem ser eliminados
nos contentores de reciclagem locais. O
ponto verde não vale para a Alemanha.
b
a
Esteja atento à especificação dos mate-
riais da embalagem para a separação
de
lixo. Estas são identificadas com abre-
viações (a) e números (b) com o seguinte
significado: 1–7: Plásticos / 20–22:
Papel e papelão / 80–98: Materiais
compostos.
O produto e materiais de embalagem
são recicláveis, elimine-os separadamente
para uma melhor reciclagem. O logotipo
Triman somente vale para a França.
As possibilidades de reciclagem dos ar-
tigos utilizados poderão ser averiguadas
no seu Município ou Câmara Municipal.
Não deposite o produto utilizado no
lixo doméstico, a favor da proteção do
ambiente. Elimine-o de forma responsá-
vel. Pode informar-se no seu município
sobre os locais de recolha adequados
e o seu período de funcionamento.
As pilhas avariadas ou gastas têm de ser recicladas
de acordo com a diretiva 2006 / 66 / CE e as suas
alterações. Devolva as pilhas e / ou o produto nos
locais específicos destinados à sua recolha.
Danos ambientais devido à
eliminação incorrecta das pilhas!
As pilhas não podem ser eliminadas no lixo domés-
tico. Podem conter metais pesados tóxicos e são
72 PT
consideradas resíduos perigosos. Os símbolos
químicos dos metais pesados são os seguintes:
Cd = cádmio, Hg = mercúrio, Pb = chumbo. Como
tal, deposite as pilhas utilizadas num ponto de
recolha adequado do seu município.
Garantia
O producto foi cuidadosamente fabricado segundo
rigorosas directivas de qualidade e meticulosamente
testado antes da sua distribuição. Em caso de falhas
deste producto, possui direitos legais relativamente
ao vendedor do producto. Os seus direitos legais
não estão limitados pela garantia representada de
seguida.
Este produto tem 3 anos de garantia a partir da
data de compra. A validade da garantia inicia-se
com a data de compra. Guarde o talão da caixa
como comprovativo da compra. Esse documento é
necessário para comprovar a compra.
Caso num espaço de tempo de 3 anos a partir da
data da compra deste producto surja um erro de
material ou de fabrico, o producto será reparado ou
substituído por nós – segundo a nossa escolha – e
sem qualquer custo. Esta garantia expira se o producto
estiver danificado, se não for devidamente utilizado
ou se não for efectuada a devida manutenção.
A garantia é válida em caso de defeitos de material
ou de fabrico. Esta garantia não é extensível a com-
ponentes do produto que se desgastam com o uso e
que, por isso, podem ser consideradas peças de des-
gaste (por ex.º pilhas) ou a danos em peças frágeis,
por ex.º interruptores, baterias ou peças de vidro.
Com a troca do aparelho, de acordo com
DL 67/2003, o tempo de garantia se inicia
novamente.
OWIM GmbH & Co. KG
Stiftsbergstraße 1
DE-74167 Neckarsulm
GERMANY
Model-No.: HG00496A / HG00496C
Version: 01 / 2017
Stand der Informationen · Last Information Update · Version
des informations · Stand van de informatie · Stav informací
Estado de las informaciones · Estado das informações:
01 / 2017 · Ident.-No.: HG00496A / C012017-8
IAN 282289
35


Need help? Post your question in this forum.

Forumrules


Report abuse

Libble takes abuse of its services very seriously. We're committed to dealing with such abuse according to the laws in your country of residence. When you submit a report, we'll investigate it and take the appropriate action. We'll get back to you only if we require additional details or have more information to share.

Product:

For example, Anti-Semitic content, racist content, or material that could result in a violent physical act.

For example, a credit card number, a personal identification number, or an unlisted home address. Note that email addresses and full names are not considered private information.

Forumrules

To achieve meaningful questions, we apply the following rules:

Register

Register getting emails for Silvercrest HG00496 - IAN 282289 at:


You will receive an email to register for one or both of the options.


Get your user manual by e-mail

Enter your email address to receive the manual of Silvercrest HG00496 - IAN 282289 in the language / languages: English, German, Dutch, French, Portuguese, Spanish as an attachment in your email.

The manual is 2,54 mb in size.


You will receive the manual in your email within minutes. If you have not received an email, then probably have entered the wrong email address or your mailbox is too full. In addition, it may be that your ISP may have a maximum size for emails to receive.

The manual is sent by email. Check your email

If you have not received an email with the manual within fifteen minutes, it may be that you have a entered a wrong email address or that your ISP has set a maximum size to receive email that is smaller than the size of the manual.

The email address you have provided is not correct.

Please check the email address and correct it.

Your question is posted on this page

Would you like to receive an email when new answers and questions are posted? Please enter your email address.


Info