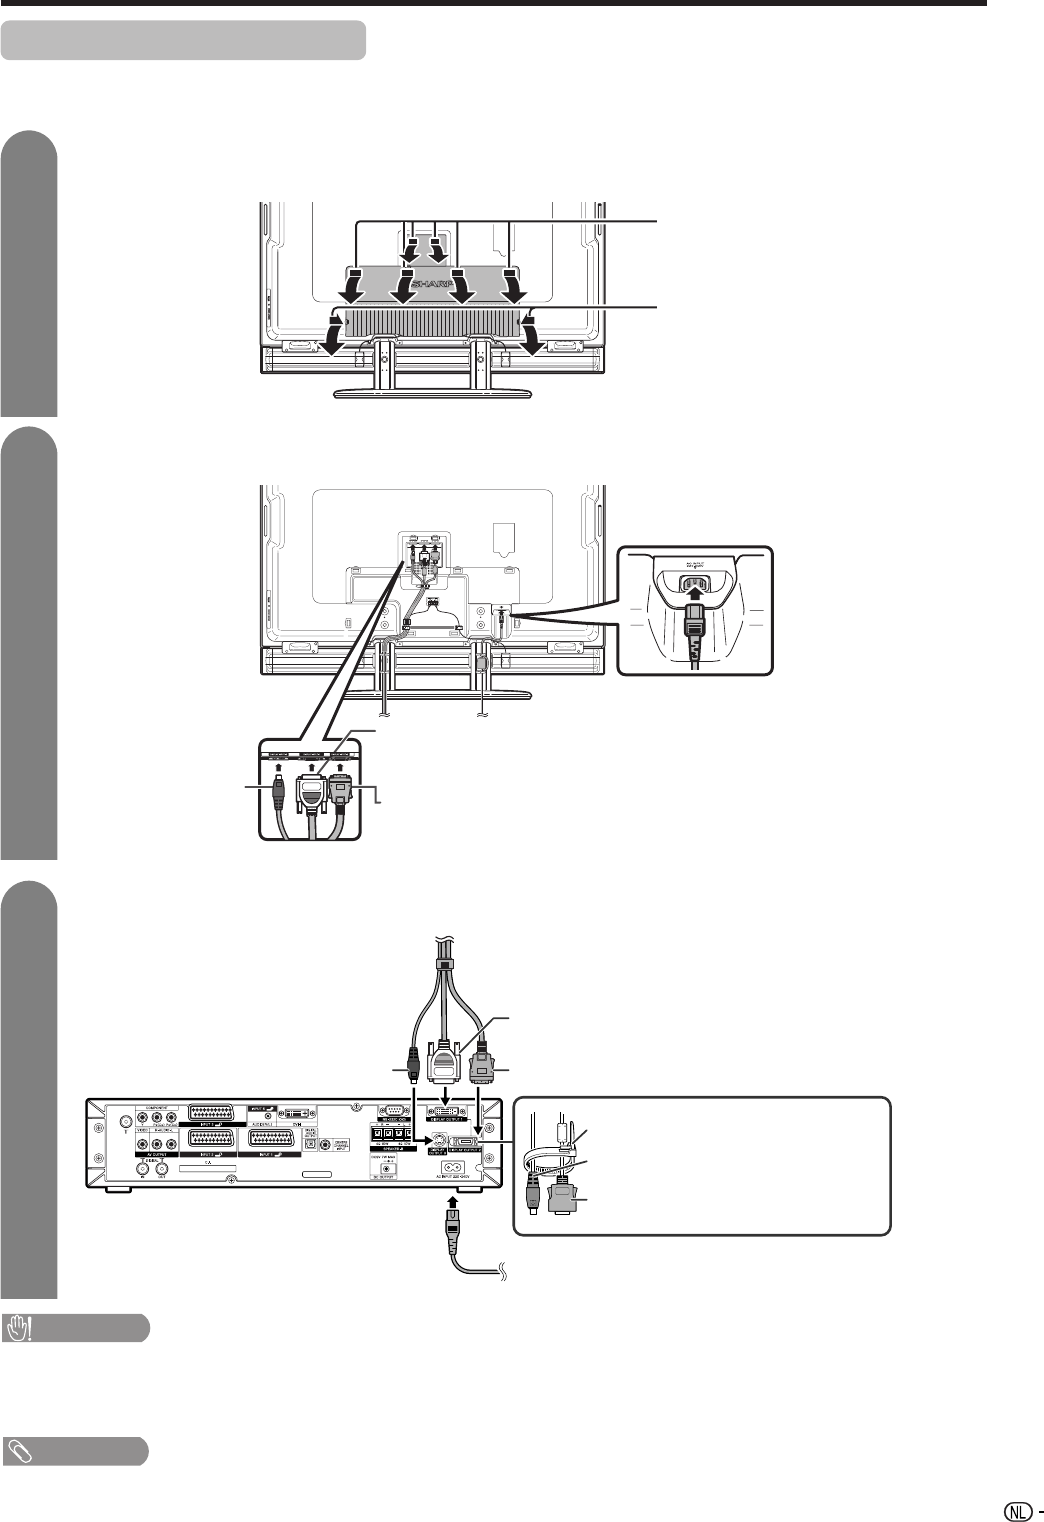
Nadat u het beeldscherm en het AVC-systeem op hun plaats hebt gezet, kunt u de systeemkabels en de
netsnoeren aansluiten. Gebruik de kabelklem om de kabels bij elkaar te houden.
Netsnoer
Systeemkabel
(GRIJS)**
Steek de stekker stevig naar binnen totdat de lipjes aan
beide zijkanten vastklikken.
(WIT)*
Steek de stekker in de aansluiting en maak de stekker
vast door de handschroeven vast te draaien.
Sluit de systeemkabel en het netsnoer op het beeldscherm aan.
2
(ZWART)
Systeemkabel
Netsnoer
3
Sluit de systeemkabel en het netsnoer op het AVC-systeem aan.
(GRIJS)
(WIT)
(ZWART)
VOORZICHTIG
•OM EEN ELEKTRISCHE SCHOK TE VOORKOMEN, MAG U GEEN NIET-GEÏSOLEERDE ONDERDELEN OF KABELS
AANRAKEN WANNEER HET NETSNOER OP EEN STOPCONTACT IS AANGESLOTEN.
•
Om te voldoen aan de vereisten van de CE richtlijnen, dient u vooral het aansluitingen-dekseltje aan de achterkant van de
beeldschermeenheid aan te brengen nadat u alle systeemkabels hebt aangesloten, voordat u dit toestel in gebruik neemt.
OPMERKING
*Wanneer u de WITTE systeemkabel losmaakt, dient u vooral beide schroeven helemaal los te draaien voordat u de kabel uit de aansluitbus trekt.
**
Wanneer u de GRIJZE systeemkabel losmaakt, drukt u de klemmen aan weerszijden van de stekker naar binnen en dan kunt u de kabel voorzichtig los trekken.
Libble takes abuse of its services very seriously. We're committed to dealing with such abuse according to the laws in your country of residence. When you submit a report, we'll investigate it and take the appropriate action. We'll get back to you only if we require additional details or have more information to share.
Product:
Forumrules
To achieve meaningful questions, we apply the following rules:
First, read the manual;
Check if your question has been asked previously;
Try to ask your question as clearly as possible;
Did you already try to solve the problem? Please mention this;
Is your problem solved by a visitor then let him/her know in this forum;
To give a response to a question or answer, do not use this form but click on the button 'reply to this question';
Your question will be posted here and emailed to our subscribers. Therefore, avoid filling in personal details.
Register
Register getting emails for Sharp TU-65GD1E at:
new questions and answers
new manuals
You will receive an email to register for one or both of the options.
Get your user manual by e-mail
Enter your email address to receive the manual of Sharp TU-65GD1E in the language / languages: Dutch as an attachment in your email.
The manual is 3,62 mb in size.
You will receive the manual in your email within minutes. If you have not received an email, then probably have entered the wrong email address or your mailbox is too full. In addition, it may be that your ISP may have a maximum size for emails to receive.
The manual is sent by email. Check your email
If you have not received an email with the manual within fifteen minutes, it may be that you have a entered a wrong email address or that your ISP has set a maximum size to receive email that is smaller than the size of the manual.
The email address you have provided is not correct.
Please check the email address and correct it.
Your question is posted on this page
Would you like to receive an email when new answers and questions are posted? Please enter your email address.