753105
91
Zoom out
Zoom in
Previous page
1/100
Next page
5 Upevnění ovládací jednotky
Dbejte zvýšené opatrnosti - Poškození přístroje: k upevnění ovládací jednotky nepoužívejte akumulátorový
šroubovák.
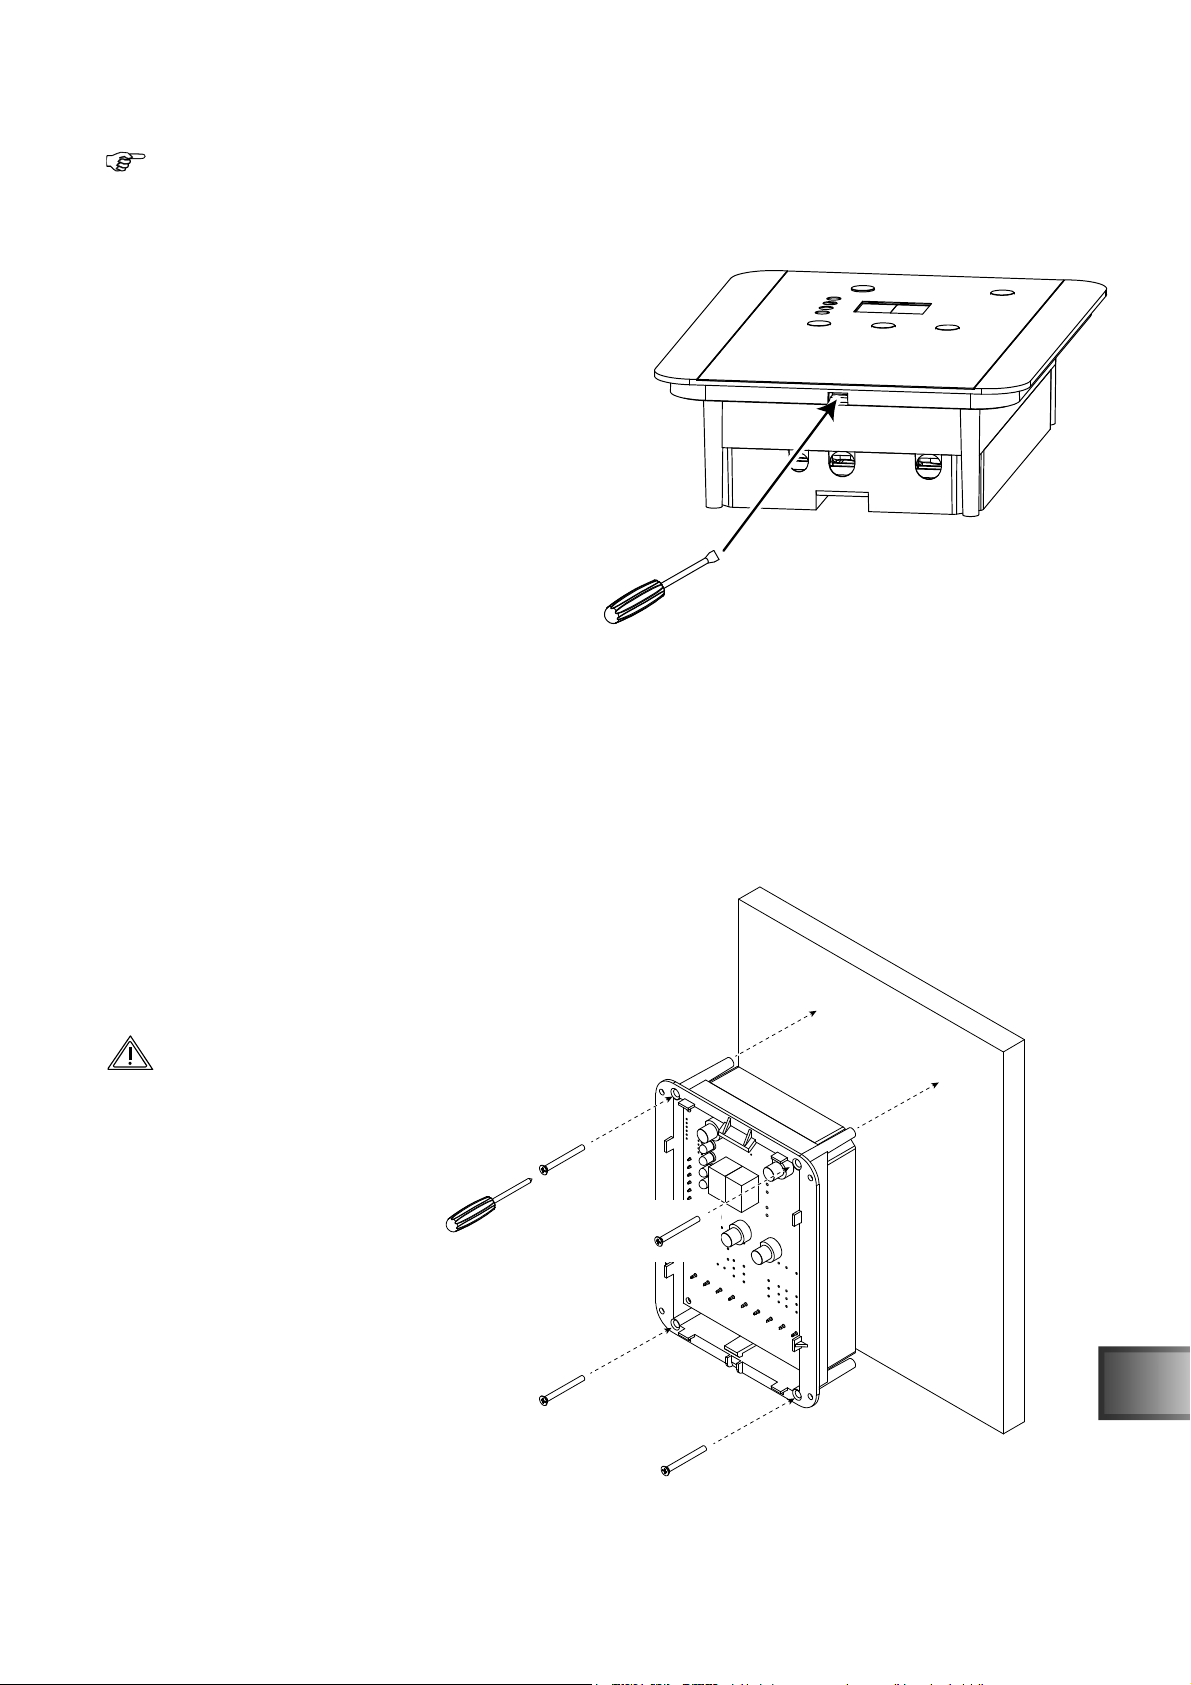
5.1 Odstranění předního krytu
Za účelem upevnění ovládací jednotky na stěnu je
nutné sundat přední kryt ovládací jednotky.
Použijte plochý šroubovák o šířce cca 3 mm.
Vsuňte šroubovák do určeného otvoru na spodní
hraně ovládací jednotky. Kryt je přidržován karabinkou.
Opatrně ji stiskněte směrem dovnitř tak, aby se kryt
uvolnil.
Nyní sundejte kryt z ovládací jednotky.
Jakmile bude ovládací jednotka připevněna na stěnu,
je nutné kryt znovu připevnit.
Kryt nejdříve zavěste za jeho horní hranu do skříňky ovládací jednotky.
Nyní zatlačte spodní stranu proti skříňce ovládací jednotky tak, aby kryt zacvakl.
Obr. 6 Odstranění krytu
Obr. 7 Upevnění na omítku
5.2 Montáž na stěnu
Pro upevnění ovládací jednotky použijte dlouhé
šrouby, které jsou součástí dodávky. V žádném případě nepoužívejte
šrouby s větším průměrem. Mohlo by dojít k nevratnému poškození
skříňky ovládací jednotky.
Při zašroubovávání šroubů dejte pozor na to,
abyste nepoškodili žádné kabely uložené ve stěně.
Mohlo by dojít k vážnému zranění osob
a vzniku škod.
WE DO IT FIRST.WE DO IT FIRST.
Návod k montáži a používání pouze pro kvalifi kované pracovníky s. 7/14
CS
91


Need help? Post your question in this forum.

Forumrules


Report abuse

Libble takes abuse of its services very seriously. We're committed to dealing with such abuse according to the laws in your country of residence. When you submit a report, we'll investigate it and take the appropriate action. We'll get back to you only if we require additional details or have more information to share.

Product:

For example, Anti-Semitic content, racist content, or material that could result in a violent physical act.

For example, a credit card number, a personal identification number, or an unlisted home address. Note that email addresses and full names are not considered private information.

Forumrules

To achieve meaningful questions, we apply the following rules:

Register

Register getting emails for Sentiotec IS2 at:


You will receive an email to register for one or both of the options.


Get your user manual by e-mail

Enter your email address to receive the manual of Sentiotec IS2 in the language / languages: English, German, Dutch, French, Italian, Swedish as an attachment in your email.

The manual is 4,21 mb in size.


You will receive the manual in your email within minutes. If you have not received an email, then probably have entered the wrong email address or your mailbox is too full. In addition, it may be that your ISP may have a maximum size for emails to receive.

The manual is sent by email. Check your email

If you have not received an email with the manual within fifteen minutes, it may be that you have a entered a wrong email address or that your ISP has set a maximum size to receive email that is smaller than the size of the manual.

The email address you have provided is not correct.

Please check the email address and correct it.

Your question is posted on this page

Would you like to receive an email when new answers and questions are posted? Please enter your email address.


Info