19
Michigan 81cm LED BLU-TV
IT
Per impostare più satelliti e LNB (possibile solo con
sistemi a LNB, parabole e switch multipli)
Utilizzare i pulsanti per selezionare il satellite su cui
è allineata la parabola. Premere OK. Vicino al satellite
scelto apparirà una freccia.
Premere per spostarsi nella sezione LNB del menu.
Selezionare il tipo e le impostazioni di LNB.
Premere il pulsante Exit e quello per selezionare il
secondo satellite.
Utilizzare i pulsanti per selezionare il secondo satel-
lite e per selezionare il satellite su cui è allineata la
parabola. Premere OK. Vicino al satellite scelto apparirà
una freccia.
Premere per spostarsi nella sezione LNB del menu.
Selezionare il tipo e le impostazioni del secondo LNB e le
impostazioni dello switch.
Premere i pulsanti Exit e .
Premere due volte il tasto blu per cercare i canali satelli-
tari.
Segue una descrizione accurata della congurazione
avanzata della parabola per utilizzare più satelliti
con switch e regolatore di posizione DiSEqC. Questa
operazione deve essere effettuata solo da utenti esperti.
La pagina principale del menu Congurazione parabola
mostra l’interfaccia principale. Tale interfaccia è forma-
ta da Elenco satelliti, Elenco transponder ed Elenco dei
parametri di parabola/LNB
Elenco satelliti
Mostra i nomi dei satelliti.
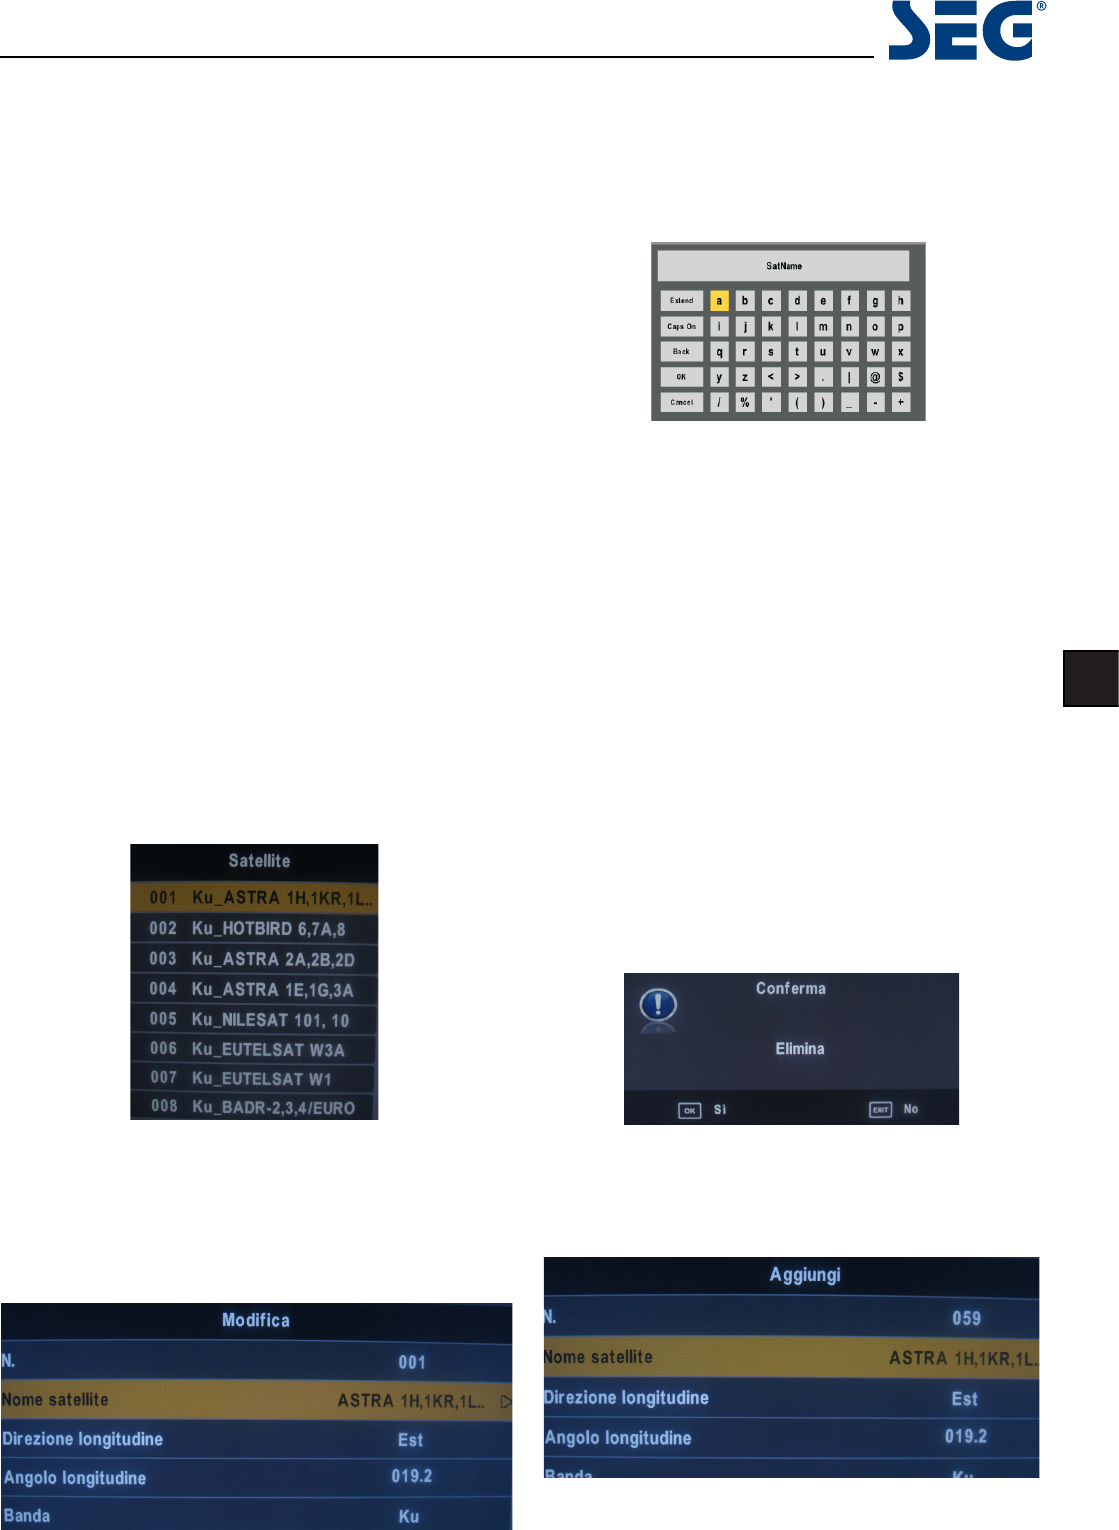
Per apportare modiche tramite la tastiera a video, pre-
mere .
Nel campo di immissione, utilizzare i tasti e il
pulsante OK per selezionare le lettere.
Campo di immissione (tastiera a video)
Espandi: ingrandisce i caratteri
Maiuscole: permette l’uso delle maiuscole. Premere OK
per effettuare la selezione.
Indietro: cancella le lettere, premere OK per confermare.
OK: conferma l’impostazione del nome del satellite e
torna al menu Modica.
Annulla: torna direttamente al menu Modica.
Direzione longitudine: serve per determinare la posizione
del satellite. Utilizzare il tasto per selezionare Ovest/
Est.
Angolo longitudine:
immettere la longitudine utilizzan-
do i tasti .
Banda: selezione della banda. Premere per selezio-
nare.
Menu Elimina satellite
Premere il pulsante GIALLO e apparirà il menu di confer-
ma. Premere OK per eliminare.
Modica satellite
No. - L’attuale numero in elenco del satellite selezionato.
Tale numero non può essere modicato.
Nome satellite: Premere il pulsante verde per aprire il
menu Modica illustrato di seguito.
Aggiungi satellite
Premere il pulsante ROSSO per visualizzare il menu
Aggiungi.