Grundbedienung
Menüs und Funktionen
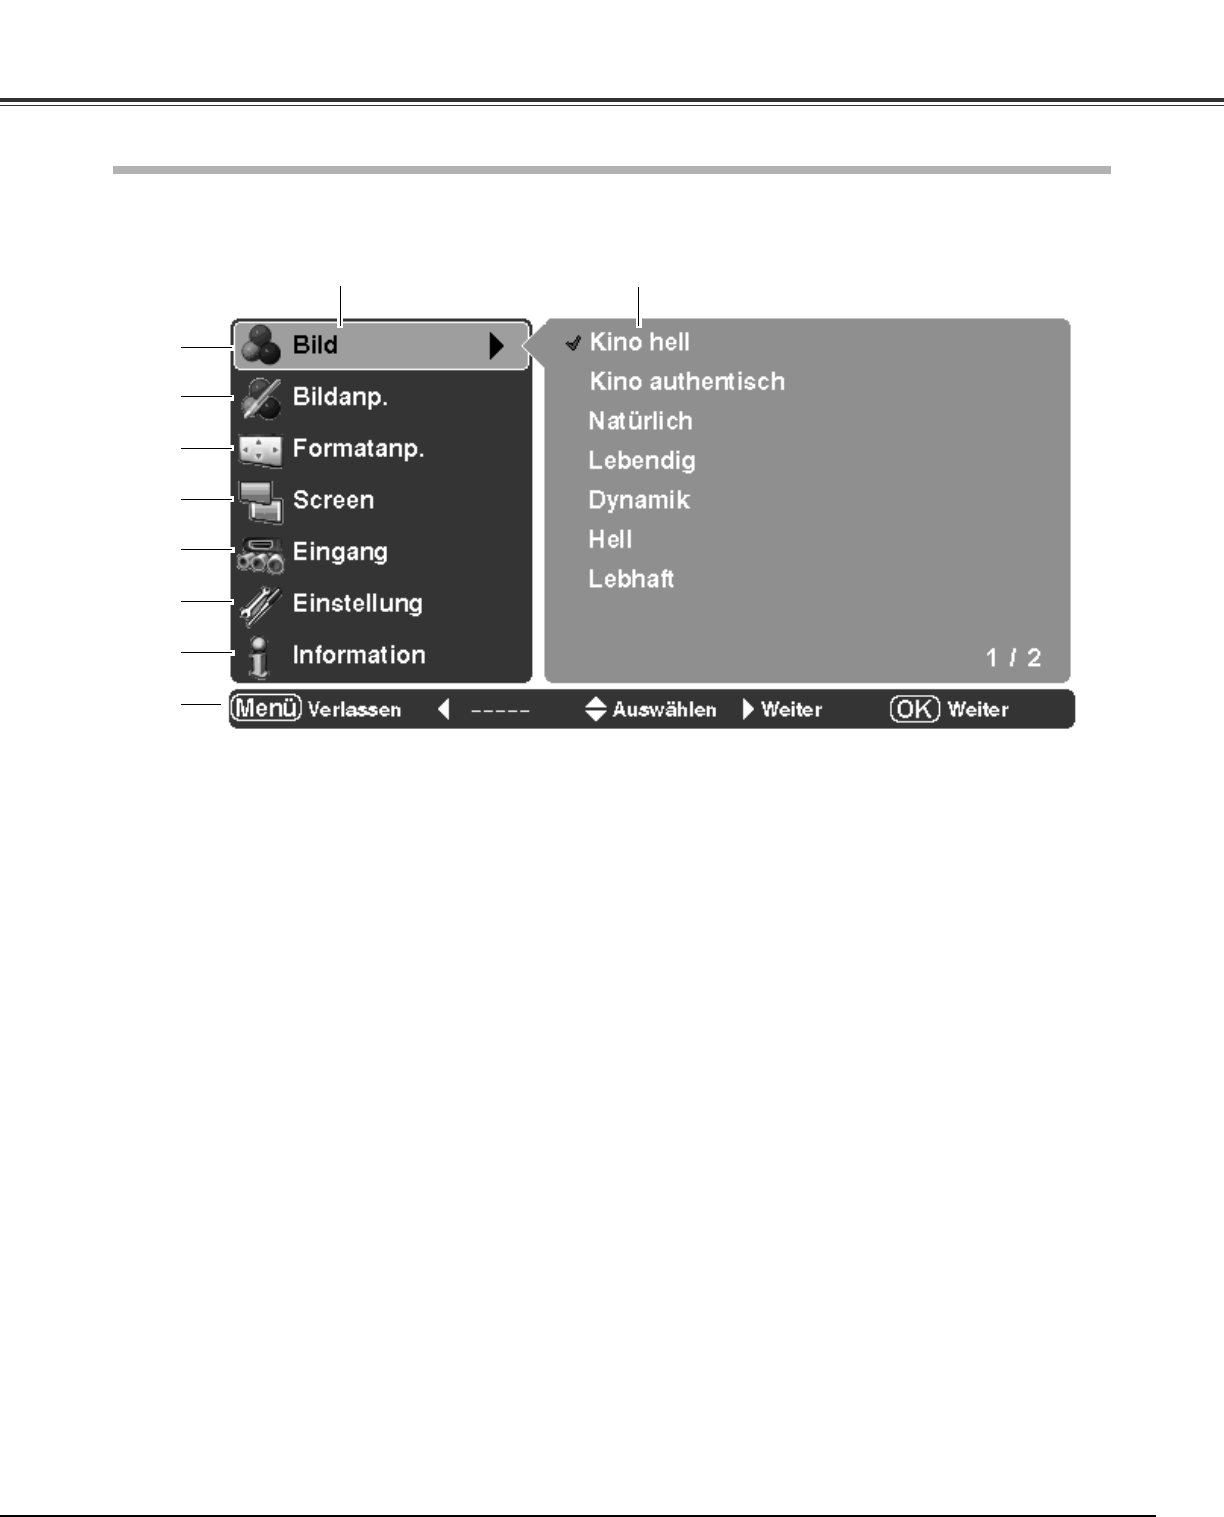
q
w
e
r
t
y
u
i
q Bild
Wählen Sie einen Bildpegel unter “Kino hell”, “Kino authentisch”, “Natürlich”, “Lebendig”, “Dynamik”,
“Hell”, “Lebhaft” und “Benutzereinstellung 1 - 4” (Seite 27).
w Bildanp.
Stellen Sie die Helligkeit, den Kontrast, die Farbsättigung, den Farbton, die Ferbtemperatur den
Weißabgleich (R/G/B), die Schärfe, die Lampenkontrolle, Gamma, Progressiv, Iris (Objektiv), erweitertes
Menü, Reset und Speichern ein (Seiten 28 - 31).
e Formatanp.
Stellen Sie Overscan, Horizontal, Vertikal, Autom. Bildanpassung, Fine sync. und Tracking ein, um die
Parameter auf die das Eingangssignalformat abzustimmen (Seite 32).
r Screen
Stellen Sie für das Bildschirmformat Vollbild, Full true, Zoom, Caption in, Normal true, Natural wide 1
oder Natural wide 2 ein (Seiten 33 und 34).
t Eingang
Stellen Sie die Eingangsquelle auf Video, S-Video, Component 1, Component 2, HDMI oder Computer
ein. Stellen Sie das Videosystem für Video und S-Video auf AUTO, PAL, SECAM, NTSC, NTSC4.43, PAL-
M oder PAL-N ein (Seiten 24 - 26).
y Einstellung
Nehmen Sie verschiedene Einstellungen wie, Sprache, Erweitertes Menü, Menü Position,
Trapezkorrektur, Installationsart, Rückproj., HDMI, Hintergrund blau, Display, Logo, Power off
Bestätigung, Screen Shot Logo, Automatische Lampenabschaltung, Fernbedienung, Shutter demo,
Reinigen Paneljustierung, Lampenwechsel, Fabrikeinstellungen vor (Seiten 35 - 39).
u Information
Displaysignal, H-sync freq., V-sync freq. des projizierten Bildes und Lampenlaufzeit (Seite 40).
i Führung
Die Tastenbedienung wird angezeigt.
Hauptmenü
Untermenü
Für Einzelheiten über die Menüs wird auf Menüstruktur auf den Seiten 50 und 51 verwiesen.
21