Bezeichnung und Funktion der Teile
Der Projektor besitzt acht verschiedene Fernbedienungscodes (Code 1 – Code 8), Code 1 ist bei der Auslieferung
eingestellt, außerdem sind weitere sieben Codes, Code 2 bis 8 vorhanden. Mit dieser Umschaltfunktion kann bei
Verwendung von mehreren Projektoren oder Videogeräten eine gegenseitige Beeinflussung der Fernbedienungen
ausgeschlossen werden. (Ändern Sie zuerst den Fernbedienungscode des Projektors bevor der Code für die Fernbedienung
geändert wird. Siehe “Fernbedienung” auf Seite 40.)
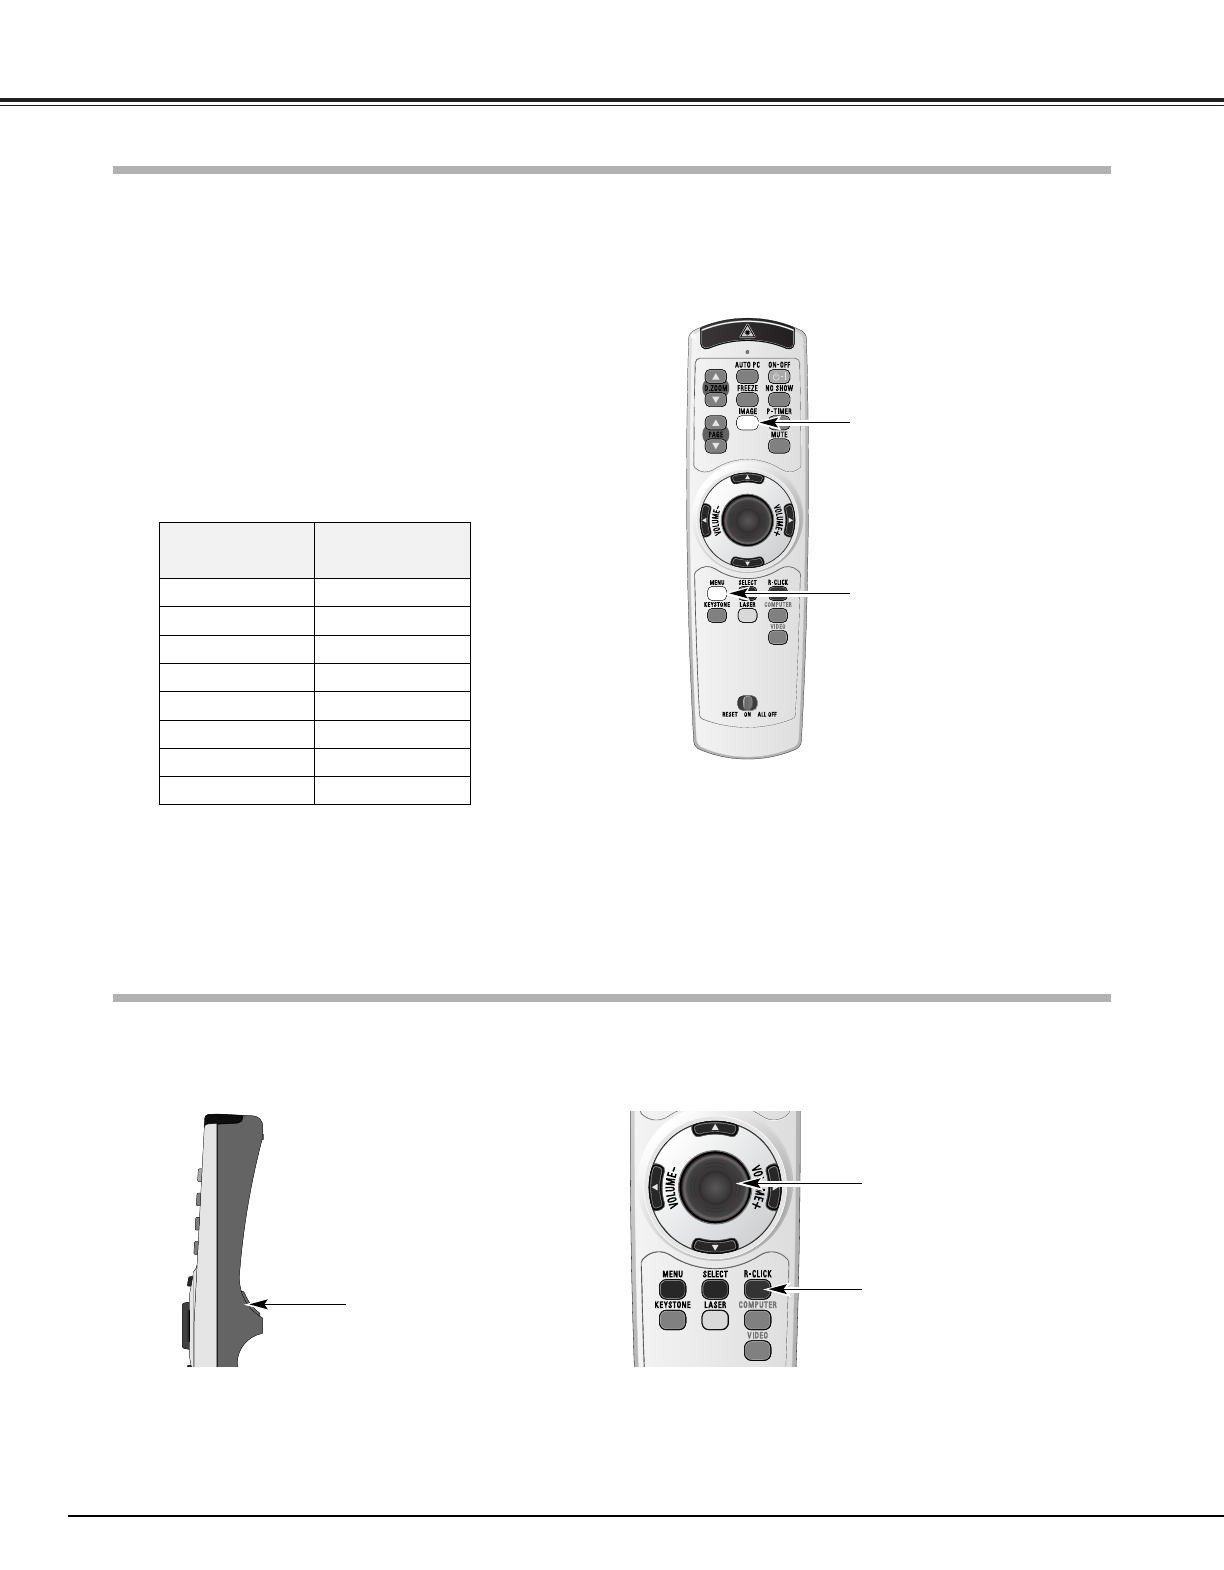
Halten Sie die MENU-Taste gedrückt und drücken Sie die
IMAGE-Taste so viele Male wie der einzustellende
Fernbedienungscode der Fernbedienung. Bei jedem Drücken
der IMAGE-Taste wird der nächste Code eingestellt. (Siehe
nachstehende Liste.)
1
Schieben Sie zum Initialisieren des Fernbedienungscodes der
Fernbedienung den RESET/ON/ALL-OFF-Schalter auf “RESET”
und danach auf “ON”. Der voreingestellte Code ist 1.
2
Fernbedienungscode
Halten Sie die MENU-Taste gedrückt
und drücken Sie die IMAGE-Taste so
viele Male wie der einzustellende
Fernbedienungscode des Projektors.
Fernbedienungscode
Anzahl IMAGE-
Tastenbetätigungen
Code 1 1
Code 2 2
Code 3 3
Code 4 4
Code 5 5
Code 6 6
Code 7 7
Code 8 8
MENU-Taste
IMAGE-Taste
Die Fernbedienung kann als kabellose Maus für Ihren Computer verwendet werden. Schließen vor der Bedienung der
kabellosen Maus den Computer mit dem mitgelieferten USB-Kabel am Projektor an. (Für den Anschluss siehe Seite 17.) Bei
Verwendung der Zeigerfunktion lässt sich die kabellose Mausfunktion nicht verwenden.
Kabellose Mausbedienung
Den Pfeil mit dieser Taste auf
dem Bildschirm einstellen.
PRESENTATION POINTER-Taste
R-CLICK-Taste
L-CLICK-Taste
Funktion als Rechtsklick, wenn der
Computer mit einem USB-Kabel
am Projektor angeschlossen ist.
Funktion als Linksklick, wenn der
Computer mit einem USB-Kabel
am Projektor angeschlossen ist.
14