39
APÉNDICE
CAMBIO DE LA LÁMPARA
Cuando la vida útil de la lámpara de este proyector llega a su fin, el indicador LAMP REPLACE se ilumina de amarillo.
Cuando la imagen se vuelve oscura o el color de la imagen pierde naturalidad, es necesario cambiar la lámpara.
Apague el proyector y desconecte el enchufe de CA. Deje que el
proyector se enfríe al menos 45 minutos.
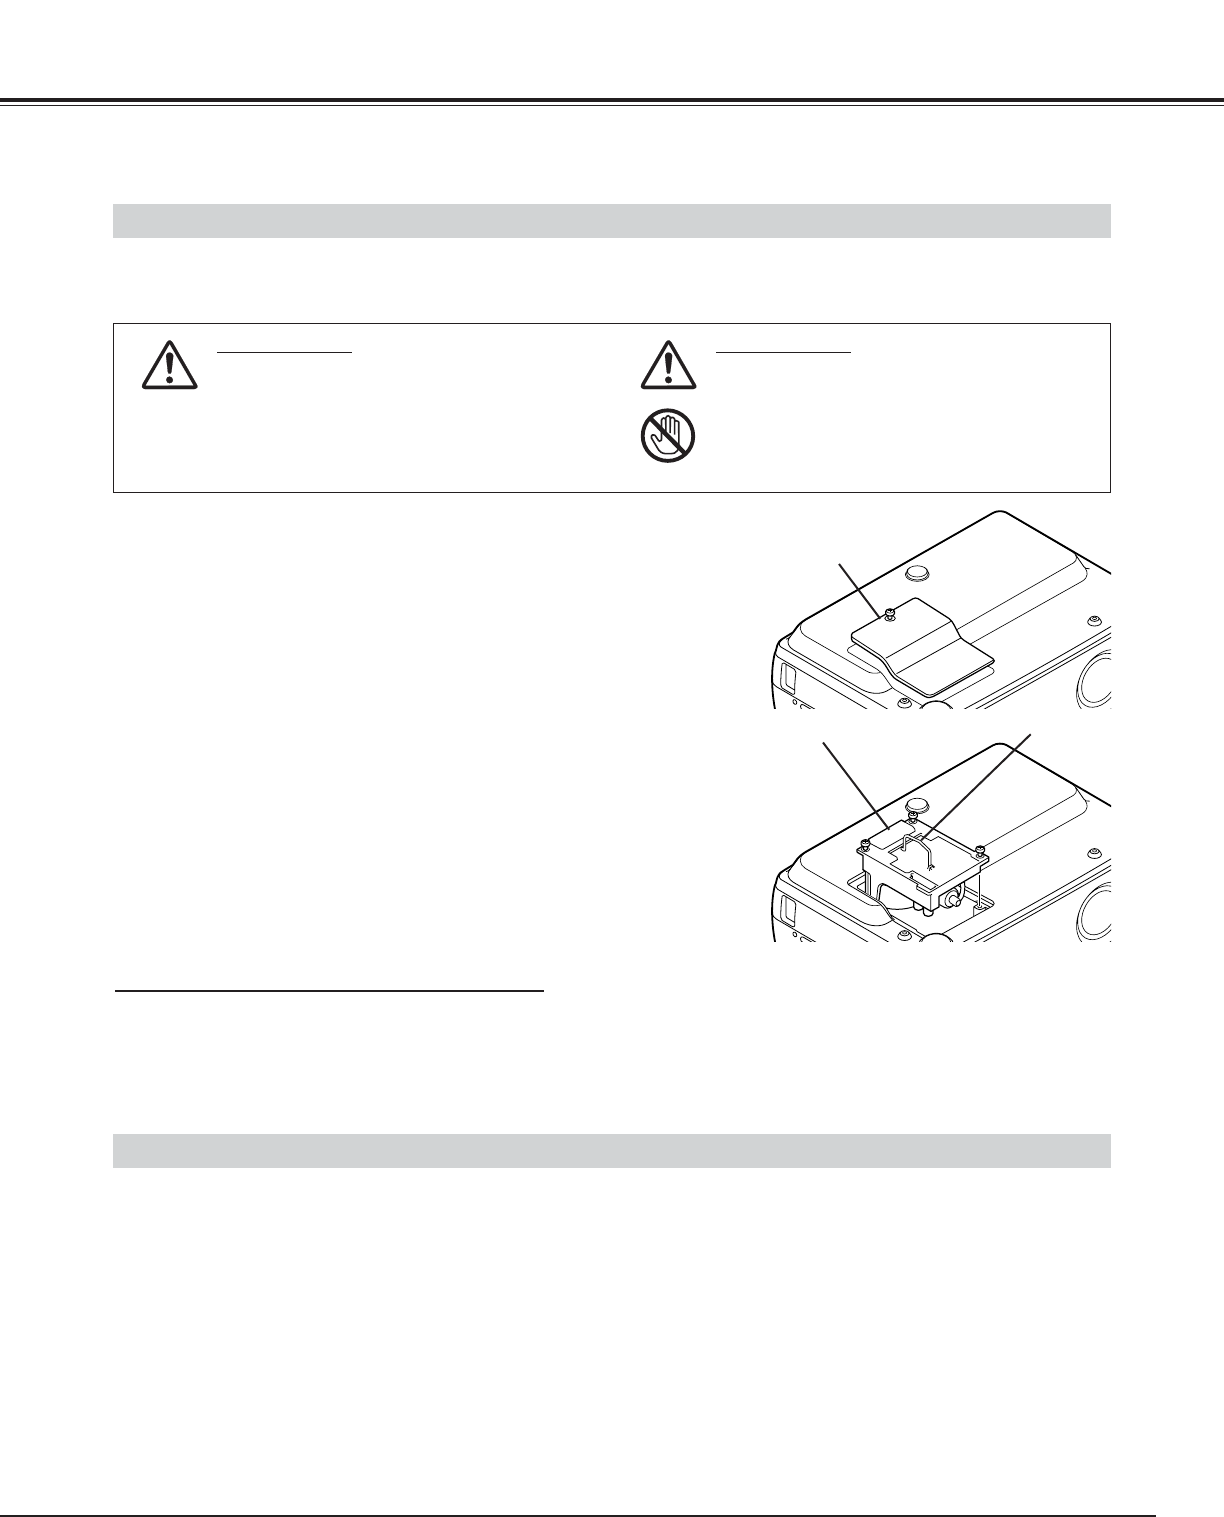
Quite tres tornillos con un destornillador y tire del conjunto de la
lámpara sujetando la manija.
1
3
Vuelva a colocar el conjunto de la lámpara y apriete los tres
tornillos. Asegúrese que el conjunto de la lámpara está ajustado
correctamente. Además vuelva a colocar la cubierta de la
lámpara y asegure un tornillo.
4
Quite un tornillo con un destornillador y desmonte la cubierta de
la lámpara.
2
Conecte el cable de alimentación de CA al proyector y encienda
el proyector.
6
Siga estos pasos para cambiar el conjunto de la lámpara.
Reponga el contador de recambio de lámpara (consulte la
sección “Contador de recambio de lámpara” a continuación).
5
CONJUNTO
DE LA
LÁMPARA
MANGO
CUBIERTA DE
LA LÁMPARA
NOTA: No reponga el contador de recambio de lámpara
cuando la lámpara de proyección no ha sido cambiada.
ORDEN DE LÁMPARA DE REPUESTO
La lámpara de repuesto puede ser encargada a través de su concesionario. Al ordenar la lámpara, déle la
siguiente información al concesionario.
● No. de modelo del proyector: PLC-SE10
● No. de tipo de lámpara de repuesto: POA-LMP50
(No. de partes de servicio 610 301 0144)
CONTADOR DE RECAMBIO DE LÁMPARA
Asegúrese de reponer el contador de recambio de lámpara cuando se cambie el conjunto de la lámpara. Cuando se repone
el contador de recambio de lámpara, el indicador LAMP REPLACE dejará de destellar.
Encienda el proyector, y presione el botón MENU y aparecerá el menú en la pantalla. Presione el(los) botón(es) de
apuntar hacia la izquierda/derecha para mover el puntero rojo al ícono de menú de ajuste (consulte las páginas 35, 36).
1
Presione el botón de apuntar hacia abajo para mover el puntero rojo a “Recambio lámp” y luego presione el botón de
selección (SELECT). Se exhibirá el mensaje “Contador de sustitución de lámpara ¿Reset?”. Mueva el puntero a [Si] y
luego presione el botón de selección (SELECT).
2
No reponga el contador de recambio de lámpara excepto después de cambiar la lámpara de proyección.
Aparecerá otro cuadro de diálogo de confirmación y seleccione [Si] para reponer el contador de recambio de lámpara.
3
PRECAUCIÓN
¡No deje caer el conjunto de la lámpara ni
toque el bulbo de vidrio! El vidrio puede
romperse y puede causar lesiones.
PRECAUCIÓN
Por seguridad, reemplace con un montaje de
lámpara del mismo tipo.
Deje que el proyector se enfríe al menos 45
minutos antes de abrir la cubierta de la lámpara.
El interior del proyector puede estar muy caliente.

