681529
309
Zoom out
Zoom in
Previous page
1/316
Next page
User Guide
C406x Series
This guide provides information concerning the installation, operation and
troubleshooting on Windows.
2
Introduction
Features by model 6
Useful to know 7
About this user guide 8
Safety information 9
Machine overview 15
Control panel overview 18
Display screen and useful menu 20
Understanding the pop-up keyboard 30
Turning on the machine 31
Understanding the LEDs 32
Installing the software 35
Media and Tray
Preparing originals 39
Loading originals 40
Selecting print media 43
Loading paper in the tray 44
Printing on special media 49
Tray Settings 53
Printing
Basic printing 56
Opening printing preferences 58
Using special print features 65
Using Direct Printing Utility 75
Changing the default print settings 77
Setting your machine as a default machine 78
Copying
Understanding the copy screen 80
Basic copying 89
ID card copying 90
Scan & Send
(Scanning)
Understanding the Scan & Send screen 94
Basic scaning 102
Scanning with TWAIN-enabled software 103
Using Samsung Easy Document Creator 104
Faxing
Preparing to fax 107
Using a fax in your computer 108
Understanding the fax screen 109
3
Sending a fax 111
Receiving a fax 114
Setting up an Address
book
Understanding the address screen 121
Using the control panel 123
Using SyncThru™ Web Service 128
Using a
Network-Connected
Machine
Network environment 137
Accessing network setup 138
Network settings (configuring TCP/IP) 139
Printing a network configuration report 142
Set Protocols 143
Network filtering settings 144
Wireless network setup (Optional) 145
Using the Machine via
Mobile Device
Using the BLE/NFC feature (Optional) 155
Supported Mobile Apps 166
Mopria™ 167
AirPrint 169
Google Cloud Print™ 171
Advanced Features for
Settings Menu
Log-in 175
Language and Input 176
Machine 177
Admin Settings 182
Management 190
Network Settings 192
System 195
Useful Tools
Accessing management tools 197
SyncThru™ Web Service 198
Easy Eco Driver 204
Using Samsung Printer Center 205
Using Samsung Easy Printer Manager 208
Using Samsung Printer Status 211
Using Samsung Printer Experience 213
Using Box 219
Using a USB Drive device 222
4
Maintenance
Ordering supplies and accessories 227
Available supplies 228
Available accessories 229
Available maintenance parts 230
Storing the toner cartridge 231
Redistributing toner 233
Replacing the toner cartridge 235
Replacing the waste toner container 237
Installing accessories 238
Monitoring the supplies life 241
Cleaning the machine 242
Tips for moving & storing the machine 246
Troubleshooting
Tips for avoiding paper jams 248
Clearing paper jams 249
Understanding display messages 256
Paper feeding problems 263
Power and cable connecting problems 264
Printing problems 265
Printing quality problems 268
Copying problems 274
Scanning problems 275
Faxing problems 276
Operating system problems 278
Wireless network problems 279
Appendix
Specifications 281
Regulatory information 287
Copyright 300
Introduction
These are the main components of your machine:
• Features by model 6
• Useful to know 7
• About this user guide 8
• Safety information 9
• Machine overview 15
• Control panel overview 18
• Display screen and useful menu 20
• Understanding the pop-up keyboard 30
• Turning on the machine 31
• Understanding the LEDs 32
• Installing the software 35
Features by model | 6
Features by model
Some features and optional goods may not be available depending on model or country.
(: supported, : optional, Blank: Not supported)
Features C406x series
Hi-Speed USB 2.0
Network Interface Ethernet 10/100/1000 Base TX wired LAN
Wi-Fi/NFC Kit Network Interface 802.11b/g/n support over 2.4 GHz
wireless LAN
a
a.Depending on your country, wireless LAN card may not be available. Contact your local Samsung dealer
or the retailer where you bought your machine.
Wi-Fi/NFC/BLE
Kit
Network Interface 802.11b/g/n/ac support over 2.4
GHz/ 5 GHz wireless LAN
a
NFC (Near Field Communication)
XOA applications
b
b.To use this feature, XOA applications should be installed. For more information, contact your local
Samsung dealer or the retailer where you purchased your machine.
Google Cloud Print
Mopria
Eco printing
Duplex (2-sided) printing
USB memory interface
Memory
Optional tray (Tray2, Tray3, Tray4)
Stand
Dual Scan Document Feeder (DSDF)
Useful to know | 7
Useful to know
The machine does not print.
• Open the print queue list and remove the document from the list (see "Canceling a
print job" on page 57).
• Remove the driver and install it again (see "Installing the software" on page 35).
• Select your machine as your default machine in your Windows (see "Setting your
machine as a default machine" on page 78).
Where can I purchase accessories or supplies?
• Inquire at a Samsung distributor or your retailer.
• Visit www.samsung.com/supplies. Select your country/region to view product
service information.
The status LED flashes or remains constantly on.
• Turn the product off and on again.
• Check the meanings of LED indications in this manual and troubleshoot accordingly
(see "Understanding the LEDs" on page 32).
A paper jam has occurred.
• Open and close the cover (see "Front view" on page 16).
• Check the instructions on removing jammed paper in this manual and troubleshoot
accordingly (see "Clearing paper jams" on page 249).
Printouts are blurry.
• The toner level might be low or uneven. Shake the toner cartridge (see
"Redistributing toner" on page 233).
• Try a different print resolution setting (see "Opening printing preferences" on page
58).
• Replace the toner cartridge (see "Replacing the toner cartridge" on page 235).
Where can I download the machine’s driver?
• You can get help, support application, machine drivers, manuals, and order
information from the Samsung website, www.samsung.com > find your product >
Support or Downloads.
About this user guide | 8
About this user guide
This user guide provides information for your basic understanding of the machine as well as
detailed steps to explain machine usage.
• Do not discard this manual, and keep it for future reference.
• Read the safety information before using the machine.
• If you have a problem using the machine, refer to the troubleshooting chapter.
• Terms used in this user guide are explained in the glossary chapter.
• All illustrations in this user guide may differ from your machine depending on its options or
model you purchased.
• The screenshots in this user guide may differ from your machine depending on the machine’s
firmware/driver version.
• The procedures in this user guide are mainly based on Windows 7.
• If you are a Mac, Linux or UNIX operating systems user, refer to the User Guidefrom the
Samsung website, http://www.samsung.com > find your product > Support or Downloads or
http://www.samsung.com/printersetup.
• If you have Internet access, you can get help, support application, machine drivers, manuals,
and order information from the Samsung website, www.samsung.com > find your product >
Support or Downloads.
Conventions
Some terms in this guide are used interchangeably, as below:
• Document is synonymous with original.
• Paper is synonymous with media, or print media.
• Machine refers to printer or MFP.
General icons
Icon Text Description
Warning Used to alert users to the possibility of personal injury.
Caution
Gives users information to protect the machine from possible
mechanical damage or malfunction.
Note
Provides additional information or detailed specification of the
machine function and feature.
Safety information | 9
Safety information
These warnings and precautions are included to prevent injury to you and others, and to prevent
any potential damage to your machine. Be sure to read and understand all of these instructions
before using the machine. After reading this section, keep it in a safe place for future reference.
Important safety symbols
Explanation of all icons and signs used in this chapter
Operating environment
Warning
Warning
Hazards or unsafe practices that may result in severe personal injury
or death.
Caution
Hazards or unsafe practices that may result in minor personal injury
or property damage.
Do not attempt.
Do not use if the power cord is damaged or if the electrical outlet is not grounded.
This could result in electric shock or fire.
Do not place anything on top of the machine (water, small metal or heavy objects,
candles, lit cigarettes, etc.).
This could result in electric shock or fire.
• If the machine gets overheated, it releases smoke, makes strange noises, or
generates an odd odor, immediately turn off the power switch or unplug the
machine.
• The user should be able to access the power outlet in case of emergencies that
might require the user to pull the plug out.
This could result in electric shock or fire.
Do not bend, or place heavy objects on the power cord.
Stepping on or allowing the power cord to be crushed by a heavy object could
result in electric shock or fire.
Safety information | 10
Caution
Operating method
Caution
Do not remove the plug by pulling on the cord; do not handle the plug with wet
hands.
This could result in electric shock or fire.
During an electrical storm or for a period of non-operation, remove the power plug
from the electrical outlet.
This could result in electric shock or fire.
Be careful, the paper output area is hot.
Burns could occur.
If the machine has been dropped, or if the cabinet appears damaged, unplug the
machine from all interface connections and request assistance from qualified
service personnel.
Otherwise, this could result in electric shock or fire.
If the machine does not operate properly after these instructions have been
followed, unplug the machine from all interface connections and request
assistance from qualified service personnel.
Otherwise, this could result in electric shock or fire.
If the plug does not easily enter the electrical outlet, do not attempt to force it in.
Call an electrician to change the electrical outlet, or this could result in electric
shock.
Do not allow pets to chew on the AC power, telephone or PC interface cords.
This could result in electric shock or fire and/or injury to your pet.
Do not forcefully pull the paper out during printing.
It can cause damage to the machine.
Safety information | 11
Installation / Moving
Warning
Be careful not to put your hand between the machine and paper tray.
You may get injured.
Be careful when replacing paper or removing jammed paper.
New paper has sharp edges and can cause painful cuts.
When printing large quantities, the bottom part of the paper output area may get
hot. Do not allow children to touch.
Burns can occur.
When removing jammed paper, do not use tweezers or sharp metal objects.
It can damage the machine.
Do not allow too many papers to stack up in the paper output tray.
It can damage the machine.
Do not block or push objects into the ventilation opening.
This could result in elevated component temperatures which can cause damage or
fire.
Use of controls or adjustments or performance of procedures other than those
specified herein may result in hazardous radiation exposure.
This machine's power reception device is the power cord.
To switch off the power supply, remove the power cord from the electrical outlet.
Do not place the machine in an area with dust, humidity, or water leaks.
This could result in electric shock or fire.
Safety information | 12
Caution
Place the machine in the environment where it meets the operating temperature
and humidity specification.
Do not use the machine when it is below freezing temperature or has recently
been moved from a location below freezing temperature. Doing so may damage
the machine. Only operate the machine when the internal temperature of the
machine is within the operating temperature and humidity specifications.
Otherwise, quality problems can occur and cause damage to the machine.
See "General specifications" on page 281.
Before moving the machine, turn the power off and disconnect all cords. The
information below are only suggestions based on the units weight.If you have a
medical condition that prevents you from lifting, do not lift the machine. Ask for
help, and always use the appropriate amount of people to lift the device safety.
Then lift the machine:
• If the machine weighs under 20 kg (44.09 lbs), lift with 1 person.
• If the machine weighs 20 kg (44.09 lbs) - 40 kg (88.18 lbs), lift with 2 people.
• If the machine weighs more than 40 kg (88.18 lbs), lift with 4 or more people.
The machine could fall, causing injury or machine damage.
Choose a flat surface with enough space for ventilation to place the machine. Also
consider the space required to open the cover and trays.
The place should be well-ventilated and be far from direct light, heat, and
humidity.
When using the machine for a long period of time or printing a large number of
pages in a non-ventilated space, it could pollute the air and be harmful to your
health. Place the machine in a well-ventilated space or open a window to circulate
the air periodically.
Do not place the machine on an unstable surface.
The machine could fall, causing injury or machine damage.
Use only No.26 AWG
a
or larger, telephone line cord, if necessary.
Otherwise, it can cause damage to the machine.
Make sure you plug the power cord into a grounded electrical outlet.
Otherwise, this could result in electric shock or fire.
Use the power cord supplied with your machine for safe operation. If you are using
a cord which is longer than 2 meters (6 feet) with a 110V machine, then the gauge
should be 16 AWG or larger.
Otherwise, it can cause damage to the machine, and could result in electric shock
or fire.
Safety information | 13
Maintenance / Checking
Caution
Do not put a cover over the machine or place it in an airtight location, such as a
closet.
If the machine is not well-ventilated, this could result in fire.
Do not overload wall outlets and extension cords.
This can diminish performance, and could result in electric shock or fire.
The machine should be connected tothe power level which is specified on the
label.
If you are unsure and want to check the power level you are using, contact the
electrical utility company.
a.AWG: American Wire Gauge
Unplug this product from the wall outlet before cleaning the inside of the machine.
Do not clean the machine with benzene, paint thinner or alcohol; do not spray
water directly into the machine.
This could result in electric shock or fire.
When you are working inside the machine replacing supplies or cleaning the
inside, do not operate the machine.
You could get injured.
Keep cleaning supplies away from children.
Children could get hurt.
Do not disassemble, repair or rebuild the machine by yourself.
It can damage the machine. Call a certified technician when the machine needs
repairing.
To clean and operate the machine, strictly follow the user's guide provided with
the machine.
Otherwise, you could damage the machine.
Keep the power cable and the contact surface of the plug clean from dust or water.
Otherwise, this could result in electric shock or fire.
Safety information | 14
Supply usage
Caution
• Do not remove any covers or guards that are fastened with screws.
• Fuser units should only be repaired by a certified service technician. Repair by
non-certified technicians could result in fire or electric shock.
• The machine should only be repaired by a Samsung service technician.
Do not disassemble the toner cartridge.
Toner dust can be dangerous if inhaled or ingested.
Do not burn any of the supplies such as toner cartridge or fuser unit.
This could cause an explosion or uncontrollable fire.
When storing supplies such as toner cartridges, keep them away from children.
Toner dust can be dangerous if inhaled or ingested.
Using recycled supplies, such as toner, can cause damage to the machine.
In case of damage due to the use of recycled supplies, a service fee will be
charged.
For supplies that contain toner dust (toner cartridge, waste toner bottle, imaging
unit, etc.) follow the instructions below.
When disposing of the supplies, follow the instructions for disposal. Refer to the
reseller for disposal instructions.
• Do not wash the supplies.
• For a waste toner bottle, do not reuse it after emptying the bottle.
If you do not follow the instructions above, it may cause machine malfunction and
environmental pollution. The warranty does not cover damages caused by a
user's carelessness.
When toner gets on your clothing, do not use hot water to wash it.
Hot water sets toner into fabric. Use cold water.
When changing the toner cartridge or removing jammed paper, be careful not to
let toner dust touch your body or clothes.
Toner dust can be dangerous if inhaled or ingested.
Machine overview | 15
Machine overview
Components
The actual component may differ from the illustration below. Some components may change
depending on the configuration.
Machine
a
a.This illustration may differ from your machine depending on your model. There are various types of
machine.
Quick installation guide
Software CD
b
b.The software CD contains the print drivers, user’s guide, and software applications.
Power cord
Misc. accessories
c
c.Miscellaneous accessories included with your machine may vary by country of purchase and specific
model.
Machine overview | 16
Front view
• This illustration may differ from your machine depending on your model. There are
various types of machine.
Some features and optional goods may not be available depending on model or country
(see "Features by model" on page 6).
1 Dual Scan Document Feeder (DSDF) cover 13 Push-release of multi-purpose tray
2
Dual Scan Document Feeder (DSDF) width
guide
14 Front cover release button
3
Dual Scan Document Feeder (DSDF) input
tray
15 Output tray
4
Dual Scan Document Feeder (DSDF)
output tray
16 Multi-purpose support tray
5 Control panel 17
Paper width guides on a
multi-purpose tray
6 USB memory port 18 Intermediate Transfer Belt (ITB)
7 Control board cover 19 Toner cartridge handle
8 Front cover 20 Toner cartridges
9
Optional tray
a
a.Install the optional tray if it is necessary.
21 Output support tray
10
Stand
b
b.Optional device.
22 Scanner glass
11 Tray 1 23 Dual Scan Document Feeder (DSDF)
12 Multi-purpose tray
Machine overview | 17
Rear view
• This illustration may differ from your machine depending on your model. There are
various types of machine.
Some features and optional goods may not be available depending on model or country
(see "Features by model" on page 6).
1 Rear cover handle
2 Rear cover
3 Waster toner container
4 Power receptacle
5 USB memory port
6 USB port
7 Network port
8 Telephone line socket (LINE)
9 Extension telephone socket (EXT.)
1
2
7
6
5
4
LINE EXT.
98
3
Control panel overview | 18
Control panel overview
Control Panel
When you use the display screen, use your finger only. The screen may be damaged with
a sharp pen or anything else.
• The screen may not operate or may not recognize touch inputs properly :
- If you attach an unauthorized protective film or accessory on the screen.
- If the screen is covered with dust or any foreign substance.
- If there is any foreign substance between the display screen and frame or if your other
finger is touching the edge of the screen.
- If there is frost or moisture on the edge of the screen or if you touch the screen with a
wet finger.
• When the display screen is scratched or damaged, contact a service representative.
• When you use non-genuine Samsung toner cartridges such as refilled or
remanufactured have been used, the background image of display screen may be
changed.
1 Display screen
Shows the current machine status and prompts during an
operation. You can set menus easily using the display screen.
2Power LED Shows the power status of your machine.
3
(Power/Wakeup)
button
Turn the power on or off. When the blue LED is on, the machine
is powered on and you can use it. If you turn the machine off,
press this button for more than two seconds. Then,
confirmation window appears.
4 Status LED
Shows the status of your machine (see "Understanding the
LEDs" on page 32).
1
2
4
3
Control panel overview | 19
Adjusting angle of the control panel
You can adjust the angle of the control panel for your convenience. Refer to the illustration below.
• Tilt the control panel backwards before you remove printed documents from the
machine. Removing documents while the control panel is upright may tear or wrinkle
the paper.
• When printing on large paper, such as legal size paper, you can avoid paper jams by
adjusting the angle of the control panel so that it lays flat against the machine.
Display screen and useful menu | 20
Display screen and useful menu
Display Screen
The Display Screen serves as the user interface of the machine. It shows the current status of
processes, notifies you of any prompts or messages, and provides quick access to various
features.
Touch gesture terms
The Display Screen is a touchscreen interface. You can interact with it in the same way as a
smartphone or tablet computer.
Tap
Lightly touch the screen and release your finger.
For example:
• Tap the on-screen keyboard to enter characters or other text.
• Tap a menu item to select it.
• Tap an application’s icon to launch the application.
Touch and hold
Press your finger on an item on the screen and hold it in place.
For example:
• Touch and hold a widget on the home screen to move it.
• Touch and hold on a field to display a pop-up menu of options.
Swipe
Lightly slide your finger vertically or horizontally across the screen.
For example:
• Swipe to scroll through menus or the pages on the Home screen.
Drag
Touch and hold an icon, and then move it to where you want it.
For example:
• Drag icons to a different page in the app drawer.
• Drag icons and widgets to a different page on the home screen.
Command Keys
(Back): Return to the previous screen, option or step.
(Home): Go to the main home screen
Display screen and useful menu | 21
(Recent): Show recently used apps.
• Quick launch: A customizable key. See the next section for options.
Adjust Brightness
1 Tap Settings > Display > Screen > Brightness from the home screen or Apps.
2 Drag to adjust to the screen brightness.
Add quick launch
1 Tap Settings > Display > More Settings > Quick Launch from the home screen or Apps.
2 Select the desired quick launch function.
None: The icon is not shown.
Screen Capture: Capture the current screen to an image file.
Applications: Open a Screen showing all apps.
Search: Open the search screen.
Job Status: Open the Job status screen.
Login/Logout: Open the Login or Logout screen.
3 Tap (Back) to return to the settings menu.
Home screen overview
The main home screen is the starting point for many applications and functions. You can
customize it with application icons, shortcuts, and widgets to give you instant access to
information and applications. You can open the default page at any time by tapping the
icon. The screen images in this user guide may differ from your machine depending on its options
or model.
Depending on authentication settings, a machine’s users may need to enter an ID and
password. If this is enabled, the machine can only be used by a user with an authorized ID
and password on the machine. Contact the machine’s administrator.
Navigating the home screens
The machine initially has three home screens. You can place application icons on any page.
From the main home screen, swipe left or right. The main home screen is located in the
center and three additional pages are located on each side.
Display screen and useful menu | 22
Navigating the application menus
By default, this machine has several application menus available in the main home screen. If you
want to access all application menus and widgets, tap the icon and swipe the screen left or
right.
From the main home screen, swipe left or right. The main home screen is located in the
center.
Accessing recently-used apps
You can easily find any app that you used recently.
1 Tap the icon from anywhere to open the recently-used applications window.
2 Tap an application’s icon in this window to open it.
Customizing your home screen
You can customize your home screen to suit your needs.
Creating shortcuts
Shortcuts are different from widgets. While widgets can only launch applications, shortcuts can
do this and activate features and actions.
Adding a shortcut from the home screen
1 Tap the icon to go to the main home screen.
2 Touch and hold the home screen to view a list of available shortcuts to select from.
Set wallpaper
- Home Screen : Set the wallpaper for the Home Screen.
- Login Screen : Set the wallpaper for the Login Screen. To use this feature, you may need
to log-in as an administrator (see "Log-in" on page 175).
- Home and Login Screens : Set the wallpaper for both screens. To use this feature, you
may need to log-in as an administrator (see "Log-in" on page 175).
Apps, XOA Apps, Widgets and Programs : Place apps, XOA apps, widgets, and program
icons on home screen.
Folder : Create a folder on the home screen.
Page : Add another page to the home screen.
Display screen and useful menu | 23
Adding a shortcut from the Apps menu
1 Tap the icon to go to the main home screen.
2 Tap the icon to view your current applications.
3 Scroll through the list and locate the desired application.
4 Touch and hold the application icon. This creates a shortcut to the application and shows the
main home screen.
5 Drag the shortcut to a desired position on the screen and release it. To move to a different
page, drag the shortcut to the edge of the screen until the screen scrolls to the desired page.
Deleting a shortcut
1 Touch and hold a shortcut until it becomes movable.
2 You can drag shortcut and place a shortcut in the trash, both items turn red.
This action does not uninstall a program, it only removes the shortcut from the home
screen.
Adding and removing widgets
Widgets are self-contained applications that reside on your widgets tab and on any page of the
home screen. Unlike shortcuts, a widget appears as an on-screen application.
Adding a widget
1 Tap the icon to go to the main home screen.
2 Tap the icon and tap the Widget tap at the top of the screen.
3 Scroll through the list and locate your desired widget.
4 Touch and hold the widget icon. This creates a copy of the widget and opens the main home
screen.
Display screen and useful menu | 24
5 Drag the widget to the desired position on the screen and release it. To move the widget to
a different page, drag it to the edge of the screen until the screen scrolls to the desired page.
Removing a widget
1 Touch and hold a widget until it becomes movable.
2 You can drag shortcut and place a shortcut in the trash, both items turn red.
This action does not uninstall a widget, it only removes the copy from the home screen.
Moving icons in the Apps menu
1 Tap the icon to go to the main home screen.
2 Tap the icon to view your current applications.
3 Tap the Apps tab at the top of the screen if it is not already selected.
4 Drag the icon to a desired position on the screen and release it. To move to a different page,
drag the icon to the edge of the screen until the screen scrolls to the desired page.
Changing the Wallpaper
You can customize the Wallpaper (background) of your home screens.
1 From any home screen, touch and hold on an empty area of the screen, and then select Set
wallpaper option.
2 Tap one of the following options in the window that appears.
Home Screen : Set the wallpaper for the Home Screen.
Login Screen : Set the wallpaper for the Login Screen. To use this feature, you may need
to log-in as an administrator (see "Log-in" on page 175).
Home and Login Screens : Set the wallpaper for both screens. To use this feature, you may
need to log-in as an administrator (see "Log-in" on page 175).
3 Tap one of the following options in the next window that appears.
Gallery: Select a wallpaper from photographs and images in the machine’s gallery.
You can select any images in a USB device or the 'BOX > Download' folder.
Display screen and useful menu | 25
Live wallpapers: Select an animated image.
Wallpapers: Select from several built-in stationary images.
4 Select a wallpaper and tap Set wallpaper, or Cancel.
Notification Bar
The notification bar includes a pull-down list to show information about currently running
processes, toner status, screen brightness and recent notifications.
On the home screen, touch and hold the notification bar until the pull-down appears, and
then drag down to expand it.
Display screen and useful menu | 26
Job Status
When you tap Job Status from the home screen or Apps, the screen lists Current Job, Completed
Job, Secure Print, Secure Fax,Active Notice.
Current Job
Displays a list of jobs in progress and pending.
Completed Job
Displays a list of the completed jobs, including information about jobs in which an error has
occurred.
Secure Print / Fax
Displays a list of secured jobs. For secured print, you need to enter the ID and Password set in the
printer driver (see "Print Mode" on page 63). For secured fax, you need to enter the Password.
Active Notice
Displays any error messages and codes that have occurred.
Counter
You can check how many pages/jobs were printed, copied, scanned, and faxed-out. You can check
the counter by device or users.
Tap Counter from the home screen or Apps.
You can also use this feature from the SyncThru™ Web Service. Open the Web browser
from your networked computer and type the IP address of your machine. When
SyncThru™ Web Service opens, click Information tab > Usage Counters (see "Counter" on
page 26).
Display screen and useful menu | 27
Command keys
Understanding the Counter menu
Total Usage: Each category shows the usage count by job types ( Print, Copy, Fax Print, Total ).
- All : Tap and select the period.
Send Usage: Shows the count of Send (Fax, Scan) jobs.
User Usage (Login user only): Each category shows the printing usage by user.
To use User Usage, you may need to select to Application Authentication and Stanard
Accounting Only from Settings > Admin Settings > Security > Mode or Method on the
home screen or Apps.
USB
To use this USB feature, tap Box > USB from the home screen or Apps (see "Using a USB Drive
device" on page 222).
You need to insert a USB Drive device into the USB port on your machine.
Help
Help provides online information to help with your machine questions.
The Help app provides information about the menus and functions available in the machine. Use
the pane on the left side of the screen to navigate (Help) app. You can also select the
headings below each section to browse the help topics.
Button Name Description
Quick Menu Open the quick menu.
Search Search for a desired menu or app.
Print You can print a usage counter report.
My Program Open a list of the apps you added.
All Period Select the period of checking counter.
From, To Set the period of checking counter.
Display screen and useful menu | 28
1 Tap (Help) from the home screen or Apps.
2 Select a topic and follow the built-in navigation.
Tap (Help) from the home screen or (quick menu), and then select on any
option you want to know about.
My Page
The My Page app allows you to easily change your profile information and settings. Your My Page
profile stores your contact information as well as your personal settings. You can use these
settings to personalize the machine to suit your usage habits and accessibility needs.
To use this feature, tap My Page from the home screen or Apps.
Command keys
Button Name Description
Quick Menu Open the quick menu.
Search Search for a desired menu or app.
My Program Open a list of the apps you added.
Sub menu (Action
overflow)
Open the sub menu.
Display screen and useful menu | 29
Understanding the My Page menu
Allows you to modify various settings to make your experience using the machine more
enjoyable.
Personalization
- Usage: The Frequency of Usage graph shows how many print, copy, fax, send, or other jobs
you have performed, while the quota information indicates how close you are to your usage
quotas.
Apps Settings
- +Me Setting: The +Me Setting setting specifies whether or not the machine sends
information about your usage to the Box or another destination. You can also specify where
your usage information is sent.
- Send Feedback: The Send Feedback setting specifies whether or not the machine sends
information about your usage to the manufacturer. Sending feedback helps the
manufacturer improve the machine through updates or patches.
Change Password Allows you to change the password.
Profile Image Allows you to choose an image for your profile.
Button Name Description
Understanding the pop-up keyboard | 30
Understanding the pop-up keyboard
You can enter letters, numbers, or special symbols using the pop-up keyboard on the display
screen. This keyboard uses the standard QWERTY layout for ease of use.
When you touch an input area, the keyboard pops up on the screen. The keyboard initially shows
lowercase letters.
• Shift key( ): Tap this key to enter one upper-case letter. Tap this key twice to toggle
caps-lock.
• Symbol/Numeric Mode( ): Tap this key to enter numbers, symbols, and emoticons.
• ABC Mode( ): Tap this key to return the keyboard layout to the default letter keys. Use
the Shift key ( ) to toggle between lower-case and upper-case letters.
• Space bar( ): Tap this key to enter a space.
Turning on the machine | 31
Turning on the machine
Illustrations on this user guide may differ from your machine depending on its options or
models. Check your machine type (see "Front view" on page 16).
Keep in mind that you should use the power cord supplied with the machine. Otherwise,
it can cause damage or fire to the machine.
• Some parts inside of the machine may be hot when power is on, or after printing. Be
careful not to burn yourself when working inside the machine.
• Do not disassemble the machine when it is turned on or plugged in. Doing so may give
you an electric shock.
1 Connect the machine to the electricity supply first.
2 Power is turned on automatically.
You can also turn the machine on pressing the (Power/Wakeup) button.
Understanding the LEDs | 32
Understanding the LEDs
The color of the status LED indicates the machine's current status.
• Some LEDs may not be available depending on model or country (see "Control panel
overview" on page 18).
• To resolve the error, look at the error message and its instructions from the
troubleshooting part (see "Troubleshooting" on page 247).
You also can resolve the error with the guideline from the computers’ Samsung Printer
Status program window (see "Using Samsung Printer Status" on page 211).
• If the problem persists, call a service representative.
Status LED
The color of the status LED indicates the machine's current status.
Status Description
Off
• The machine is off-line.
• The machine is in power saver mode. When data is received, or any
button is pressed, it switches to on-line automatically.
Blue
On The machine is on-line and can be used.
Blinking
Fax The machine is sending or receiving faxes.
Copy The machine is copying documents.
Scan The machine is scanning documents.
Print
• When the status LED slowly blinks, the machine is receiving
data from the computer.
• When the status LED blinks rapidly, the machine is printing
data.
Understanding the LEDs | 33
Check the message on the display screen. Follow the instructions in the message or refer
to the troubleshooting chapter (see "Understanding display messages" on page 256). If the
problem persists, call for service.
Orange
On
• The cover is open. Close the cover.
• There is no paper in the tray. Load paper in the tray (see "Loading
paper in the tray" on page 44).
• The machine has stopped due to a major error. Check the display
message (see "Understanding display messages" on page 256).
• A paper jam has occurred (see "Clearing paper jams" on page 249).
The waste toner container is not installed in the machine, or the waste
toner container is full (see "Replacing the waste toner container" on
page 237).
A toner cartridge has almost reached its estimated cartridge life
a
. It is
recommended to replace the toner cartridge (see "Replacing the toner
cartridge" on page 235).
Blinking
A minor error has occurred and the machine is waiting for the error to be
cleared. Check the display message. When the problem is cleared, the
machine resumes.
a.Estimated cartridge life means the expected or estimated toner cartridge life, which indicates the
average capacity of print-outs and is designed pursuant to ISO/IEC 19798. The number of pages may be
affected by operating environment, printing interval, media type, and media size. Some amount of toner
may remain in the cartridge even when the orange LED is on and the printer stops printing.
Status Description
Understanding the LEDs | 34
Power LED
The color of the status LED indicates the machine's current status.
Check the message on the display screen. Follow the instructions in the message or refer
to the troubleshooting chapter (see "Understanding display messages" on page 256). If the
problem persists, call for service.
Status Description
Off The machine is off-line.
Blue
On
• The machine is on-line and can be used.
• When data is received, or any screen is pressed, it switches to on-line
automatically.
Blinking When the status LED slowly blinks, the machine is in power save mode.
Installing the software | 35
Installing the software
After you have set up your machine and connected it to your computer, you must install the
printer software. If you are a Windows user, install the software from the supplied CD and if you
are a Mac, Linux, or UNIX OS user, download the software from the Samsung website and install
(http://www.samsung.com > find your product > Support or Downloads or
http://www.samsung.com/printersetup). Before installing, check whether your computer’s OS
support the software.
If you are a Mac, Linux or UNIX operating systems user, refer to the User Guidefrom the
Samsung website.
• The installation window in this User Guide may differ depending on the machine and
interface in use.
• Only use a USB cable no longer than 3 meters (118 inches).
Supplied software
Printer software are occasionally updated due to release of new operating system and etc. If
needed, download the latest version from the Samsung website.
Software Windows Mac
a
Linux
a
UNIX
a
PCL printer driver ●●
PS printer driver
a
●●
XPS printer driver
a
Direct Printing Utility
a
Samsung Printer Center
Samsung Easy Printer Manager ●●
Samsung Printer Status
Samsung Easy Document Creator
Easy Capture Manager
Samsung Eco Driver Pack
b
Samsung Stylish Driver Pack
c
SyncThru™ Web Service ●●
Fax Samsung Network PC Fax
Scan Scan driver
Installing the software | 36
Installing for Windows
1 Make sure that the machine is connected to your computer and powered on.
2 Insert the supplied software CD into your CD-ROM drive.
If the installation window does not appear, click Start > All programs > Accessories > Run.
X:\Setup.exe replacing “X” with the letter, which represents your CD-ROM drive and click
OK.
• For Windows 8
If the installation window does not appear, from Charms, select Search > Appsand search
for Run. Type in X:\Setup.exe, replacing “X” with the letter that represents your CD-ROM
drive and click OK.
If “Tap to choose what happens with this disc.” pop-up window appears, click the window
and select Run Setup.exe.
• For Windows 10 / Windows Server 2016
If the installation window does not appear, from task bar, type in X:\Setup.exe in Search
input area, replacing “X” with the letter that represents your CD-ROM drive and press the
Enter key.
3 Review and accept the installation agreements in the installation window, and then click
Next.
4 Select you want type on the Printer Setup Type screen, and then click Next.
5 Select you want type on the Printer Connection Type screen, and then click Next.
6 Follow the instructions in the installation window.
a.Download the software from the Samsung website and install it: (http://www.samsung.com > find your
product > Support or Downloads). Before installing, check whether your computer’s OS support the
software.
b.To use the Easy Eco Driver features, the Eco Driver Packmust be installed.
c.The printer driver includes a user interface that is optimized for touchscreens. To use this UI, click
Samsung Printer Center > Device Options and then select Stylish User Interface (see "Using Samsung
Printer Center" on page 205).
Installing the software | 37
From the Windows 8 Start Screen
The V4 driver is automatically downloaded from the Windows Update if your computer
is connected to the Internet. Or, you can manually download the V4 driver from
Samsung website, www.samsung.com > find your product > Support or downloads.
You can download Samsung Printer Experience app from the Windows Store. You need
have a Microsoft account to use the WindowsStore.
1. From Charms, select Search.
2. Click Store.
3. Search and click Samsung Printer Experience.
4. Click Install.
• If you install the driver using the supplied software CD, V4 driver is not installed. If you
want to use the V4 driver in the Desktop screen, you can download from the Samsung
website, www.samsung.com > find your product > Support or downloads.
• If you want to install Samsung’s printer management tools, you need to install them
using the supplied software CD.
1 Make sure that your computer is connected to the Internet and powered on.
2 Make sure that the machine is powered on.
3 Connect the computer and the machine with a USB cable.
The driver is automatically installed from the Windows Update.
If the printer driver does not work properly, follow the steps below to reinstall the driver.
From the Start menu, select Programs or All Programs > Samsung Printers > Uninstall
Samsung Printer Software.
• For Windows 8,
1. From Charms, select Search > Apps.
2. Search and click Control Panel.
3. Click Programs and Features.
4. Right-click the driver you want to uninstall and select Uninstall.
• For Windows 10 / Windows Server 2016
1. From task bar, type in Programs and Features in Search input area. Press the Enter
key.
OR
From the Start () icon, select All apps > Search > type in Programs and Features.
2. Right-click the driver you want to uninstall and select Uninstall.
Media and Tray
This chapter provides information on how to load originals and print media into your machine.
• Preparing originals 39
• Loading originals 40
• Selecting print media 43
• Loading paper in the tray 44
• Printing on special media 49
• Tray Settings 53
Preparing originals | 39
Preparing originals
• Do not load paper smaller or larger than custom size.
- Scan glass: X: 0 - 216 mm (8.5 inches), Y: 0 - 297 mm (11.7 inches)
- Document feeder: X: 105- 216 mm ( 4.14 x 8.5 inches), Y: 148 - 356 mm (5.83 x 14.02 inches)
• To prevent paper jams, low print quality and machine failure, do not load the following :
- Carbon-paper or carbon-backed paper
- Coated paper
- Onion skin or thin paper
- Wrinkled or creased paper
- Curled or rolled paper
- Torn paper
X : 216 mm ( 8.50 inches), Y: 297 mm (11.69 inches)
• Remove all staples and paper clips before loading.
• Make sure any glue, ink, or correction fluid on the paper is completely dry before loading.
• Do not load originals that include different sizes or weights of paper.
• Do not load booklets, pamphlets, or documents with other unusual characteristics.
Loading originals | 40
Loading originals
You can use the scanner glass or the document feeder to load an original for copying, scanning,
and sending a fax.
Illustrations on this user guide may differ from your machine depending on its options or
models. Check your machine type (see "Front view" on page 16).
On the scanner glass
Using the scanner glass, you can copy or scan originals. You can get the best scan quality,
especially for colored or gray-scaled images. Make sure that no originals are in the document
feeder. If an original is detected in the document feeder, the machine gives it priority over the
original on the scanner glass.
1 Lift and open the Dual Scan Document Feeder (DSDF).
2 Place the original face down on the scanner glass. Align it with the registration guide at the
top left corner of the glass.
Loading originals | 41
3 Close the Dual Scan Document Feeder (DSDF).
• Leaving the Dual Scan Document Feeder (DSDF) open while copying may affect copy
quality and toner consumption.
• Dust on the scanner glass may cause black spots on the printout. Always keep it clean
(see "Cleaning the machine" on page 242).
If you are copying a page from a book or magazine, lift the Dual Scan Document Feeder
(DSDF) until its hinges are caught by the stopper and then close the lid. If the book or
magazine is thicker than 30 mm, start copying with the scanner lid open.
• Be careful not to break the scanner glass. You may get hurt.
Do not put hands while closing the scanner lid. The Dual Scan Document Feeder (DSDF)
may fall on your hands and get hurt.
• Do not look into the light from inside of the scanner while copying or scanning. It is
harmful to eyes.
Loading originals | 42
In the document feeder
Using the Dual Scan Document Feeder (DSDF), you can load up to 50 sheets of paper (60 to
90 g/m
2
, 16 to 24 lbs bond) for one job.
1 Flex or fan the edge of the paper stack to separate the pages before loading originals.
2 Load the original face up into the document feeder input tray. Make sure that the bottom of
the original stack matches the paper size marked on the document input tray.
3 Adjust the document feeder width guides to the paper size.
Dust on the document feeder glass may cause black lines on the printout. Always keep the
glass clean (see "Cleaning the machine" on page 242).
Selecting print media | 43
Selecting print media
You can print on a variety of print media, such as plain paper, envelopes and labels. Always use
print media that meet the guidelines for use with your machine.
Guidelines for select the print media
Print media that does not meet the guidelines outlined in this user guide may cause the following
problems:
• Poor print quality
• Increased paper jams
• Premature wear on the machine.
Properties, such as weight, composition, grain, and moisture content, are important factors that
affect the machine’s performance and the output quality. When you choose print materials,
consider the following:
• The type, size, and weight of the print media for your machine are described in print media
specifications (see "Print media specifications" on page 282).
• Desired outcome: The print media you choose should be appropriate for your project.
• Brightness: Some print media are whiter than others and produce sharper, more vibrant
images.
Surface smoothness: The smoothness of the print media affects how crisp the printing looks on
the paper.
Some print media may meet all of the guidelines in this user guide and still not produce
satisfactory results. This may be the result of the sheets characteristics, improper
handling, unacceptable temperature and humidity levels, or other variables over which
cannot be controlled.
• Before purchasing large quantities of print media, ensure that it meets the
requirements specified in this user guide.
• Using print media that does not meet these specifications may cause problems or
require repairs. Such repairs are not covered by Samsung’s warranty or service
agreements.
• The amount of paper put into the tray may differ according to media type used (see
"Print media specifications" on page 282).
• Make sure not to use the inkjet photo paper with this machine. It could cause damage
to the machine.
• Using flammable print media can cause a fire.
• Use designated print media (see "Print media specifications" on page 282).
The use of flammable media or foreign materials left in the printer may lead to over-
heating of the unit and, in rare cases may cause a fire.
Loading paper in the tray | 44
Loading paper in the tray
Tray overview
1. Tray extend lever
2. Paper length guide
3. Paper width guide
4. Paper limit mark
If you do not adjust the guide, it may cause paper registration, image skew, or jamming of
the paper.
Changing the tray size
To change the size, you need to adjust the paper guides.
To change the size to A4 or Letter
The tray is preset to Letter or A4 size, depending on your country. You must adjust the lever and
paper width guide properly.
1 Pull the tray out of the machine. Remove paper from the tray if necessary.
2 If you want to change the size to Letter, hold the lever at the back of the tray, and rotate the
lever clockwise.
Loading paper in the tray | 45
3 Squeeze the paper width guide and slide it to the edge of the lever.
If you want to change the size to A4, first move the paper width guide to left and rotate
the lever counterclockwise. If you force the lever, it could damage the tray.
To change the size to Legal (LGL)
Push button as shown and pull out the tray.
LT
R
A4
Loading paper in the tray | 46
Loading paper in the tray
Illustrations on this user guide may differ from your machine depending on its options or
models. Check your machine type (see "Front view" on page 16).
Tray 1 / optional tray
• The procedure is same for all optional trays.
• Do not push the paper width guide too far causing the media to warp.
• If you do not adjust the paper width guide, it may cause paper jams.
• Do not use a paper with a leading-edge curl, it may cause a paper jam or the paper can
be wrinkled.
Loading paper in the tray | 47
When you print a document, set the paper type and size for the tray (see "Tray Settings" on page
53).
Multi-purpose tray
The multi-purpose tray can hold special sizes and types of print material, such as postcards, note
cards, and envelopes (see "Print media specifications" on page 282).
Tips on using the multi-purpose tray
• Load only one type, size and weight of print media at a time in the multi-purpose tray.
• To prevent paper jams, do not add paper while printing when there is still paper in the
multi-purpose tray. This also applies to other types of print media.
• To prevent paper jams, do not pull out the paper tray while printing is in progress from the
multi-purpose tray or the printing will stop. Make sure that the paper tray is inserted.
Always load the specified print media only to avoid paper jams and print quality problems (see
"Print media specifications" on page 282).
• Flatten any curl on postcards, envelopes, and labels before loading them into the
multi-purpose tray.
• When printing the special media, you must follow the loading guideline (see "Printing
on special media" on page 49).
• When papers overlap when printing using multi-purpose tray, open tray 1 and remove
overlapping papers then try printing again.
Loading paper in the tray | 48
When you print a document, set the paper type and size for the multi-purpose tray.
For information about setting the paper type and size on the control panel (see "Tray Settings" on
page 53).
Printing on special media | 49
Printing on special media
The table below shows the available special media for each tray.
The paper setting in the machine and driver should match to print without a paper mismatch
error.
To change the paper setting set in the machine, from SyncThru™ Web Service click Information
> Current Settings > Machine information > System > Input Trays (see "Settings tab" on page 201).
Or, you can set it from the control panel.
Then, set the paper type from the Printing preferences window > Paper tab > Paper Type (see
"Opening printing preferences" on page 58).
For example, if you want to print on labels, select Labels for Paper Type.
When using special media, we recommend you feed a piece of paper at a time. Check the
maximum input number of media for each tray (see "Print media specifications" on page
282).
Types Tray 1 Optional tray Multi-purpose tray
Plain ●●
Thick ●●
Heavy weight ●●
Extra Heavy weight ●●
Thin ●●
Cotton ●●
Color ●●
Preprinted ●●
Recycled ●●
Envelope ●●
Thick Envelope ●●
Labels ●●
CardStock ●●
Bond ●●
Archive ●●
LetterHead ●●
Punched ●●
Printing on special media | 50
(: Supported, Blank: Not supported)
The media types are shown in the Printing Preferences. This paper type option allows you
to set the type of paper to be loaded in the tray. This setting appears in the list so that you
can select it. This will let you get the best quality printout. If not, the desired print quality
may not be achieved.
Envelope
Printing successfully on envelopes depends upon the quality of the envelopes.
To print an envelope, place it as shown in the following figure.
• When selecting envelopes, consider the following factors:
- Weight: should not exceed 90 g/m
2
otherwise, jams may occur.
- Construction: should lie flat with less than 6 mm curl and should not contain air.
- Condition: should not be wrinkled, nicked, nor damaged.
- Temperature: should resist the heat and pressure of the machine during operation.
• Use only well-constructed envelopes with sharp and well-creased folds.
• Do not use stamped envelopes.
• Do not use envelopes with clasps, snaps, windows, coated lining, self-adhesive seals, or other
synthetic materials.
• Do not use damaged or poorly made envelopes.
• Be sure the seam at both ends of the envelope extends all the way to the corner of the
envelope.
1. Acceptable
2. Unacceptable
Glossy Photo ●●
Types Tray 1 Optional tray Multi-purpose tray
Printing on special media | 51
Envelopes with a peel-off adhesive strip or with more than one flap that folds over to seal must
use adhesives compatible with the machine’s fusing temperature for 0.1 second about 170 °C
(338 °F). The extra flaps and strips might cause wrinkling, creasing, or jams, and may even
damage the fuser.
• For the best print quality, position margins no closer than 15 mm from the edges of the
envelope.
• Avoid printing over the area where the envelope’s seams meet.
Labels
To avoid damaging the machine, use only labels designed for use in laser printers.
• When selecting labels, consider the following factors:
- Adhesives: Should be stable at your machine’s fusing temperature about 170 °C (338 °F).
- Arrangement: Only use labels with no exposed backing between them. Labels can peel off
sheets that have spaces between the labels, causing serious jams.
- Curl: Must lie flat with no more than 13 mm of curl in any direction.
- Condition: Do not use labels with wrinkles, bubbles, or other indications of separation.
Make sure that there is no exposed adhesive material between labels. Exposed areas can cause
labels to peel off during printing, which can cause paper jams. Exposed adhesive can also cause
damage to machine components.
• Do not run a sheet of labels through the machine more than once. The adhesive backing is
designed for only a single pass through the machine.
• Do not use labels that are separating from the backing sheet or are wrinkled, bubbled, or
otherwise damaged.
CLP-68xND Series/ CLP-68xDW Series
Printing on special media | 52
Card stock/ Custom-sized paper
• In the software application, set the margins to at least 6.4 mm (0.25 inches) away from the
edges of the material.
Preprinted paper
When loading preprinted paper, the printed side should be facing up with an uncurled edge at the
front. If you experience problems with paper feeding, turn the paper around. Note that print
quality is not guaranteed.
• Must be printed with heat-resistant ink that will not melt, vaporize, or release hazardous
emissions when subjected to the machine’s fusing temperature for 0.1 second (about 170 °C
(338 °F)).
• Preprinted paper ink must be non-flammable and should not adversely affect machine rollers.
• Before you load preprinted paper, verify that the ink on the paper is dry. During the fusing
process, wet ink can come off preprinted paper, reducing print quality.
Tray Settings | 53
Tray Settings
To change detailed tray settings, tap Settings> Tray Settings and select the tray and options you
want on the display screen.
Tray 1, MP Tray: You can set the Paper Size and Paper Type.
Tray 2, Tray 3, Tray 4: You can see when you install the optional tray. And then, You can set the
Paper Size and Paper Type.
Paper Size: Allows you to change the paper size.
- You can change the paper list on the display screen. The paper lists are divided into the
available A/B type and letter type paper in this machine.
- If there is no required size paper or you need to use custom sized paper, press the cardinal
point arrows to set the paper size. You can also set and save the custom size using Custom
Size. You can select the custom size whenever you need it.
Paper Type: Allows you to change the paper type.
Options
Scroll through the options by swiping up and down.
Auto Tray Switch: Determine whether or not the machine continues printing when it detects
the paper does not match. For example, if both tray 1 and tray 2 are filled with the same size
paper, the machine automatically prints from tray 2 after the tray 1 runs out of paper.
Auto Continue: This option allows you to continue printing when the paper size you have set is
mismatched with the paper in the tray. When this option is activated, the machine continues
printing using similar or large size paper. If this option is inactivated, the machine waits until
the required size paper is loaded in the tray.
Paper Substitution: When the requested paper for a print job is not available in the tray, this
feature allows you to substitute similar paper size, For example, if the requested letter sized
paper is not available in the tray, this machine substitutes A4 for the requested paper.
Tray Settings | 54
When the paper is substituted, some image loss may occur.
Tray Confirmation Message: When you load paper into a tray, you can set the confirmation
message to appear automatically. This machine can detect some paper sizes and types
automatically. If you want to set the paper size and type, or the machine cannot detect them,
you can set the size and type directly in the confirmation window.
Tray Protection: If you set tray 1 to On, for example, then tray 1 is excluded during tray
switching.
This setting works for copy or print jobs: It doesn't affect fax jobs.
Tray Priority Settings: You can set the tray priority. If first setting is tray 1, the machine
automatically prints from tray 1 after the second setting tray runs out of paper.
Printing
This chapter explains common printing tasks.
• Basic printing 56
• Opening printing preferences 58
• Using special print features 65
• Using Direct Printing Utility 75
• Changing the default print settings 77
• Setting your machine as a default machine
78
Basic printing | 56
Basic printing
• The procedures in this chapter are mainly based on Windows 7.
• Check the operating systems that are compatible with your machine (see "System
requirements" on page 286).
If you are a Mac, Linux or UNIX operating systems user, refer to the User Guidefrom the
Samsung website, http://www.samsung.com > find your product > Support or
Downloads or http://www.samsung.com/printersetup.
Printing
The following Printing Preferences window is for Notepad in Windows 7.
1 Open the document you want to print.
2 Select Print from the File menu.
3 Select your machine from the Select Printer list.
4 The basic print settings including the number of copies and print range are selected within
the Print window.
Basic printing | 57
To take advantage of the advanced printing features, click Properties or Preferences
from the Print window (see "Opening printing preferences" on page 58).
5 To start the print job, click OK or Print in the Print window.
Canceling a print job
If the print job is waiting in the print queue or print spooler, cancel the job as follows:
You can access this window by simply double-clicking the machine icon ( ) in the Windows
task bar.
Opening printing preferences | 58
Opening printing preferences
When you select an option in Printing Preferences, you may see a warning mark, , or
. An exclamation mark ( ) means you can select that certain option but it is not
recommended, and ( ) mark means you cannot select that option due to the machine’s
setting or environment.
1 Open the document to print.
2 Select Print from the File menu.
3 Select your printer driver from the Select Printer list.
4 Click Properties or Preferences.
The screenshot may differ depending on model.
Opening printing preferences | 59
• You can apply Eco features to save paper and toner before printing (see "Easy Eco
Driver" on page 204).
You can check the machine’s current status pressing the Printer Status button (see
"Using Samsung Printer Status" on page 211).
The printer driver includes a user interface that is optimized for touchscreens. To use
this UI, click Samsung Printer Center > Device Options and then select Stylish User
Interface (see "Using Samsung Printer Center" on page 205).
Favorites tab
Listed items help you choose pre-defined settings.
The screenshot may differ depending on model.
Basic tab
Basictab to set various printing options.
Orientation
This option allows you to select the direction in which information is printed on a page.
Layout Options
This option allows you to select various ways to layout your document.
Single Page Per Side: This option is a basic layout option. This option allows you to print a page
on one side of a paper.
Multiple Pages Per Side: See "Printing multiple pages on one sheet of paper" on page 65.
Opening printing preferences | 60
Poster Printing: See "Printing posters" on page 66.
Booklet Printing: See "Printing booklets" on page 66.
Pre-Formatted Booklet Printing: This option allows you to print your document to make a
booklet by pre-formatted.
Page Border: This option allows you to print your document with a border line around it. This
option is not available for Poster Printing and Booklet Printing.
Double-Sided Printing
This option allows you to print on both sides of paper (see "Printing on both sides of the paper"
on page 67).
Paper tab
Use the Paper tab options to set the basic paper handling specifications.
Copies
This option allows you to choose the number of copies to be printed. You can select 1 to 9999
copies.
Paper Options
Original Size: This option allows you to set the actual paper size of the originals.
Output Size: This option allows you to scale your print job to any selected paper size regardless
of the originals size (see "Fitting your document to a selected paper size" on page 69).
- Percentage: This option allows you to change the size of a page’s contents to appear larger
or smaller on the printed page by typing in a percentage you want (see "Change the size by
percentage of your document" on page 68).
Source: Make sure that Source is set to the corresponding paper tray. Use MP Tray when
printing on special materials, such as envelopes and transparencies.
Type: This option allows you to set the type of paper to be loaded in the tray. This will let you
get the best quality printout. If not, the desired print quality may not be achieved.
Advanced Paper Options: This option is allows you to set additional features about paper.
special pages such as covers.
- Page: The First Page selection specifies where the paper source for the first page of the print
job.
- Cover: This property provides you to print a cover page using a specific paper option from a
specific paper source which you selected. If you configure the options to make printing on
two-sided, the first 2 pages or the last 2 pages of document will be used as a front or back
cover.
Opening printing preferences | 61
Graphics tab
Use the Graphic tab options to adjust the print quality for your specific printing needs.
Quality
The higher the setting, the sharper the clarity of printed characters and graphics. The higher
setting also may increase the time it takes to print a document.
Font/Text
Select Clear Textto print text darker than on a normal document.
Check All Text Black to print in solid black, regardless of the color it appears on the screen.
Graphic Controller
It allows user to emphasize edges of texts and fine lines for improving readability and align each
color channel registration in color printing mode.
Toner Save
The Toner Save setting allows the user to save printing toner when printing a draft version of a
document. Select Off to print in normal mode and select On to print with less toner applied to the
page.
Advanced tab
Use the Advanced tab to set various printing options.
Watermark
See "Using watermarks" on page 70.
Overlay
See "Using overlay" on page 72.
Output options
Print Order: This options allows you to set the sequence in which the pages will print. Print Odd
Pages and Print Even Pages are available only when you use the PCL printer driver.
Skip Blank Pages: This option allows you to specify not to print blank pages in the original data.
Manual Margin: This option allows you to specify binding margin. Binding margin adjusts
binding position. This option is not available when you use the PS printer driver.
If you click Reset, settings in the Advanced option returns to the default setting.
Opening printing preferences | 62
Security
Encrypts printing data first, and transmits it to the machine. This feature protects the printing
information to prevent your data from being comprised on your network. Job Encryption feature
is enabled only when the hard drive is installed. The hard drive is used to decrypt the printing
data.
Job Accounting
This option allows you to print with the given permission.
User permission: If you check this option, only users with user permission can start a print job.
Group permission: If you check this option, only groups with group permission can start a print
job.
• Click the question mark( ) from the upper-right corner of the window and click on
any option you want to know about.
• Administrators can enable job accounting and configure permissions in the control
panel or SyncThru™ Web Service. For the detailed information about them (see
"SyncThru™ Web Service" on page 198).
Eco tab
The Eco tab allows you to save print resources and lead you to eco-friendly printing. When you
select Eco Printing, you can see the eco image ( ) on some options. Also, some options are not
available to use in the eco mode.
Eco Options
Printer Default: If you select this option, this feature is determined by the setting you’ve made
on the control panel of the machine.
None: Disables this option.
Eco Printing: Eco mode gets activated. Select Double-Sided Printing, TonerSave, Skip Blank
Pages, Layout, and ColorMode you want to use in eco mode. As long as you do not change the
options from the other tabs, the document will be print out as set in the eco mode.
Passcode: If the administrator sets On-Forced in Default Eco Mode for this machine, the eco
mode is always set by this machine’s eco setting, while the Eco Options in the printer driver is
disabled. If you need to change the print settings, click Password and enter the password or
contact your administrator.
Opening printing preferences | 63
Result Simulator
Result Simulator shows the result of reduced emission of carbon dioxide, used electricity, and the
amount of saved paper in accordance with the settings you selected.
• The results are calculated on the basis that the total number of printed paper is one
hundred without a blank page when the eco mode is disabled.
• Referred to the calculation coefficient about CO2, energy and paper from
IEA(International Energy Agency), the index of Ministry of Internal Affairs and
Communication of Japan and www.remanufacturing.org.uk. Each model has a different
index.
• The power consumption in printing mode refers to the average printing power
consumption in this machine.
• The actual saved or reduced amount may differ depending on the operating system
used, computing performance, application software, connection method, media type,
media size, job complexity, etc.
Samsung tab
Use the Samsung tab to display the copyright and the version number of the driver. If your
computer is connected to the Internet, you can have access to services.
Print Mode
This option allows you to choose how to print or save the printing file by using the HDD in your
machine. The default Print Mode is Normal which is for printing without storing the printing file
on the HDD. You can also use this option in other tabs.
Normal: This mode prints without storing your document.
Proof: This mode is useful when you print more than one copy. You can print one copy first to
check, then print the rest of the copies later.
Confidential: This mode is used for printing confidential documents. You need to enter a
password to print it (see "Job Status" on page 26).
Store: This mode is used only for storing documents on the HDD. If necessary, you can load and
print the stored documents. You can find the stored file in the Box (see "Using Box" on page
219). First, choose a document box in Save Location and then set Options.
Store and Print: This mode is used when printing and storing documents at the same time. If
necessary, you can load and print the stored documents. You can find the stored file in the Box
(see "Using Box" on page 219). First, choose a document box in Save Location and then set
Options.
Job Name: This option is used when you need to find a stored file using the control
panel.
User ID: This option is used when you need to find a stored file using the control panel.
The user name automatically appears as the user name that you use to log on Windows.
Opening printing preferences | 64
Enter Password: If the Property of the stored documents you selected is Secured, you
have to enter the password for the stored document. This option is used for loading a
stored file using the control panel.
Confirm Password: Re-enter the password to confirm it.
Using a favorite setting
The Favorites option, which is visible on each preferences tab except for the Favorites tab and
Samsung tab, allows you to save the current preferences for future use.
To save a Favorites item, follow these steps:
1 Change the settings as needed on each tab.
2 Enter a name for the item in the Favorites input box.
3 Click Save.
4 Enter name and description, and then select the desired icon.
5 Click OK. When you save Favorites, all current driver settings are saved.
To use a saved setting, select it in the Favorites tab. The machine is now set to print
according to the settings you have selected. To delete saved settings, select it in the
Favorites tab and click Delete.
Using help
Click the option you want to know on the Printing Preferences window and press F1 on your
keyboard.
Using special print features | 65
Using special print features
Special print features include:
• "Printing multiple pages on one sheet of paper" on page 65.
• "Printing posters" on page 66.
• "Printing booklets" on page 66.
• "Printing on both sides of the paper" on page 67.
• "Change the size by percentage of your document" on page 68.
• "Fitting your document to a selected paper size" on page 69.
• "Using watermarks" on page 70.
• "Using overlay" on page 72.
Printing multiple pages on one sheet of paper
You can select the number of pages to print on a single sheet of paper. To print more than one
page per sheet, the pages will be reduced in size and arranged in the order you specify. You can
print up to 16 pages on one sheet.
1 To change the print settings from your software application, access Printing Preferences
(see "Opening printing preferences" on page 58).
2 Click the Basic tab, select Multiple Pages per Side in the Type drop-down list.
3 Select Page Border to print a border around each page on the sheet.
4 Select the number of pages you want to print per sheet (2, 4, 6, 9, or 16) in the Pages per Side
drop-down list.
5 Select the page order from the Page Order drop-down list, if necessary.
6 Click the Paper tab, select the Original size, Source, and Type.
7 Click OK or Print until you exit the Print window.
Using special print features | 66
Printing posters
This feature allows you to print a single-page document onto 4, 9, or 16 sheets of paper, for the
purpose of pasting the sheets together to form one poster-size document.
1 To change the print settings from your software application, access Printing Preferences
(see "Opening printing preferences" on page 58).
2 Click the Basic tab, select Poster Printing in the Type drop-down list.
3 Select the page layout you want.
Specification of the page layout:
4 Select the Poster Overlap value. Specify Poster Overlap in millimeters or inches by selecting
the radio button on the upper right of Basic tab to make it easier to paste the sheets
together.
5 Click the Paper tab, select the Original size, Source, and Type.
6 Click OK or Print until you exit the Print window.
7 You can complete the poster by pasting the sheets together.
Printing booklets
This feature prints your document on both sides of a paper and arranges the pages so that the
paper can be folded in half after printing to produce a booklet.
Using special print features | 67
If you want to make a booklet, you need to print on Letter, Legal, A4, JIS B5, Statement,
Executive, A5, Ledger, or JIS B4 sized print media.
1 To change the print settings from your software application, access Printing Preferences
(see "Opening printing preferences" on page 58).
2 Click the Basic tab, select Booklet Printing from the Type drop-down list.
3 Click the Advanced button. Then select the option you want.
4 Click the Paper tab, select the Original size, Source, and Type.
The Booklet Printing option is not available for all paper sizes. In order to find out the
available paper size for this feature, select the available paper size in the Original size
option on the Paper tab.
If you select an unavailable paper size, this option can be automatically canceled.
Select only available paper. (paper without or mark).
5 Click OK or Print until you exit the Print window.
Printing on both sides of the paper
You can print on both sides of a paper; duplex. Before printing, decide how you want your
document oriented. You can only use this feature with Letter, Legal, Oficio, US Folio, A4,
Statement, Executive, 8K, 16K, Ledger or JIS B4 sized paper.
• By default, the duplex feature is enabled and the binding option is set to Long Edge.
Do not print on both sides of the special media, such as labels, envelopes, or thick paper
to print on both sides of paper. It may cause a paper jam or damage the machine.
1 To change the print settings from your software application, access Printing Preferences
(see "Opening printing preferences" on page 58).
2 Click the Basic tab.
3 From the Double-Sided Printing section, select the binding option you want. The default
setting is Long Edge.
Using special print features | 68
Printer Default: If you select this option, this feature is determined by the setting you’ve
made on the control panel of the machine. This option is available only when you use the
PCL printer driver.
None: Disables this feature.
Long Edge: This option is the conventional layout used in bookbinding.
Short Edge: This option is the conventional layout used in calendars.
Reverse Double-Sided Printing: Check this option to reverse the print order when duplex
printing.
4 Click the Paper tab, select the Original size, Source, and Type.
5 Click OK or Print until you exit the Print window.
Change the size by percentage of your document
You can change the size of a document to appear larger or smaller on the printed page by typing
in a percentage you want.
1 To change the print settings from your software application, access Printing Preferences
(see "Opening printing preferences" on page 58).
2 Click the Paper tab.
3 Select actual paper size of the originals from the Original Size.
4 Enter the scaling rate in the Percentage input box.
You can also click the up/down arrows to select the scaling rate.
Using special print features | 69
You cannot use this feature when you select a size of paper from the Output Size.
5 Select the Source and Type.
6 Click OK or Print until you exit the Print window.
Fitting your document to a selected paper size
This printer feature allows you to scale your print job to any selected paper size regardless of the
document size. This option can be useful when you want to check fine details on a small
document.
1 To change the print settings from your software application, access Printing Preferences
(see "Opening printing preferences" on page 58).
2 Click the Paper tab.
3 Select actual paper size of the originals from the Original Size.
4 Select the size of paper to be printed in the tray from the Output Size.
5 Select the Source and Type.
6 Click OK or Print until you exit the Print window.
Using special print features | 70
Using watermarks
The watermark option allows you to print text or image over an existing document. For example,
you use it when you want to have large gray letters reading “DRAFT” or “CONFIDENTIAL” printed
diagonally across the first page or all pages of a document.
There are several predefined watermarks that come with the machine. They can be modified, or
you can add new ones to the list.
Header: You can add the selected text to the Top left, Top center, or Top right.
Footer: You can add the selected text to the Bottom left, Bottom center, or Bottom right.
Using an existing watermark
1 To change the print settings from your software application, access Printing Preferences
(see "Opening printing preferences" on page 58).
2 Click the Advanced tab, and select the desired watermark from the Watermark drop-down
list. You will see the selected watermark in the Triple Cassette Feeder image.
3 Click OK or Print until you exit the Print window.
Watermark Message: Allows users to enter the watermark which is the user want
to print.
Image file: Allows users to load the watermark image which is the user want to
print.
Watermark name: Allows users to enter the watermark name for adding to
watermark drop-down list.
First Page Only: Prints watermark only on the first page. Not checked by default.
Creating a watermark
1 To change the print settings from your software application, access Printing Preferences
(see "Opening printing preferences" on page 58).
2 From the Advanced tab, select Edit... from the Watermark drop-down list.
CONFIDENTIAL
Using special print features | 71
3 Enter a text message in the Watermark Message box. You can enter up to 256 characters.
When the First Page Only box is checked, the watermark prints on the first page only.
4 Select watermark options.
You can select the font name, style, size, and shade from the Font Attributes section, as well
as set the angle of the watermark from the Watermark Alignment and Angle section.
5 Click Add to add a new watermark to the Current Watermarks list.
6 When you finish editing, click OK or Print until you exit the Print window.
To stop printing the watermark, select None from the Watermark drop-down list.
Editing a watermark
1 To change the print settings from your software application, access Printing Preferences
(see "Opening printing preferences" on page 58).
2 Click the Advanced tab, select Edit... from the Watermark drop-down list.
3 Select the watermark you want to edit from the Current Watermarks list and change the
watermark message and options.
4 Click Update to save the changes.
5 Click OK or Print until you exit the Print window.
Deleting a watermark
1 To change the print settings from your software application, access Printing Preferences
(see "Opening printing preferences" on page 58).
2 Click the Advanced tab, select Edit... from the Watermark drop-down list.
3 Select the watermark you want to delete from the Current Watermarks list and click Delete.
4 Click OK or Print until you exit the Print window.
Using special print features | 72
Using overlay
This option is available only when you use the PCL printer driver.
What is an overlay?
An overlay is text and/or images stored on the computer hard drive (HDD) as a special file format
that can be printed on any document. Overlays are often used to take the place of letterhead
paper. Rather than using preprinted letterhead, you can create an overlay containing exactly the
same information that is currently on your letterhead. To print a letter with your company’s
letterhead, you do not need to load preprinted letterhead paper in the machine just print the
letterhead overlay on your document.
Creating a new page overlay
To use a page overlay, you must create a new page overlay containing your logo or image.
1 Create or open a document containing text or an image for use in a new page overlay.
Position the items exactly as you wish them to appear when printed as an overlay.
2 To save the document as an overlay, access Printing Preferences (see "Opening printing
preferences" on page 58).
3 Click the Advanced tab, and select Create from the Overlay drop-down list.
4 In the Save As window, type a name up to eight characters in the File name box. Select the
destination path, if necessary (The default is C:\Formover).
5 Click Save.
6 Click OK or Print until you exit the Print window.
When a confirming message window appears, click Yes.
7 The file is not printed. Instead, it is stored on your computer hard disk drive.
The overlay document size must be the same as the document you print with the overlay.
Do not create an overlay with a watermark.
Using special print features | 73
Using a page overlay
After an overlay has been created, it is ready to be printed with your document. To print an
overlay with a document:
1 Create or open the document to print.
2 To change the print settings from your software application, access Printing Preferences
(see "Opening printing preferences" on page 58).
3 Click the Advanced tab.
4 Select the Print Overlay from the Overlay drop-down list.
5 If the overlay file you want does not appear in the Overlay File 1 or Overlay File 2 drop-down
list, select Load from the Overlay List. Select the overlay file you want to use.
If you have stored the overlay file you want to use in an external source, you can also load
the file when you access the Load window.
After you select the file, click Open. The file appears in the Overlay List box and is available
for printing. Select the overlay from the Overlay List box.
6 If necessary, check Confirm Page Overlay When Printing box. If this box is checked, a
message window appears each time you submit a document for printing, asking you to
confirm your wish to print an overlay on your document.
If this box is not checked and an overlay has been selected, the overlay automatically prints
with your document.
7 Click OK or Print until you exit the Print window.
The selected overlay prints on your document.
The resolution of the overlay document must be the same as that of the document you will
print with the overlay.
Deleting a page overlay
You can delete page overlays that you no longer use.
1 In the Printing Preferences window, click the Advanced tab.
2 Select Print Overlay from the Overlay drop down list.
Using special print features | 74
3 Select the overlay you want to delete from the Overlay List box.
If the overlay file you want does not appear in the Overlay List, select Load from the Overlay
List. Select the overlay file you want to delete.
4 Click Delete.
5 When a confirming message window appears, click Yes.
6 Click OK or Print until you exit the Print window.
Using Direct Printing Utility | 75
Using Direct Printing Utility
This chapter explains how to use Direct Printing Utility to print PDF files without open the files.
• HDD should be installed on your machine, to print PDF files using this program.
You cannot print PDF files that are restricted to print. Deactivate the printing restriction
feature, and retry printing.
• You cannot print PDF files that are restricted by a password. Deactivate the password
feature, and retry printing.
• Whether or not a PDF file can be printed using the Direct Printing Utility program
depends on how the PDF file was created.
The Direct Printing Utility program supports the PDF version 1.7 and below. For a higher
version, you must open the file to print it.
What isDirect Printing Utility?
Direct Printing Utilityis a program that sends a PDF file directly to your machine to print without
having to open the file. It sends data through the Windows spooler using the port of the printer
driver. It only supports PDF format.
To install this program:
Download the software from the Samsung website then unpack and install it:
(http://www.samsung.com > find your product > Support or Downloads).
Printing
There are several ways you can print using the Direct Printing Utility.
From the Direct Printing Utility window
1 From the Start menu select Programs or All Programs > Samsung Printers.
• For Windows 8, from Charms, select Search > Apps.
• For Windows 10 / Windows Server 2016
From task bar, type in Samsung Printers in Search input area. Press the Enter key.
OR
From the Start () icon, select All apps > Samsung Printers.
2 Press Direct Printing Utility.
3 Select your machine from the Select Printer drop-down list and click Browse.
Using Direct Printing Utility | 76
4 Select the PDF file you wish to print and click Open.
The PDF file is added in the Select Files section.
5 Customize the machine settings for your needs.
6 Click Print. The selected PDF file is sent to the machine.
Using the right-click menu
1 Right-click on the PDF file you wish to print and select Direct Printing.
The Direct Printing Utility window appears with the PDF file is added.
2 Select the machine you wish to use.
3 Customize the machine settings for your needs.
4 Click Print. The selected PDF file is sent to the machine.
Changing the default print settings | 77
Changing the default print settings
Most Windows applications will override settings you specify in the printer driver. Change
all print settings available in the software application first, and change any remaining
settings using the printer driver.
1 For Windows XP Service Pack 3/Server 2003, from the Start menu, select Printer and Faxes.
• For Windows Server 2008/Vista, from the Start menu, select Control Panel > Hardware
and Sound > Printers.
• For Windows 7, from the Start menu, select Control Panel > Devices and Printers.
For Windows 8, from the Charms, select Search > Settings > Control Panel > Devices and
Printers.
• For Windows Server 2008 R2, select Control Panel > Hardware > Devices and Printers.
• For Windows 10 / Windows Server 2016
From task bar, type in Devices and Printers in Search input area. Press the Enter key.
OR
From the Start () icon, select Settings > Devices > Printers & scanners >Devices and
Printers.
Right-click the Start ( ) icon, you can select Control Panel > Devices and
Printers.
2 Right-click on your machine.
3 For Windows XP Service Pack 3/Server 2003/Server 2008/Vista, select Printing
Preferences.
For Windows 7/8 , Windows Server 2008 R2, Windows 10, or Windows Sever 2016 from
context menus, select Printing preferences.
If Printing preferences has a , you can select other printer drivers connected to the
selected printer.
4 Change the settings on each tab.
5 Click OK.
If you want to change the settings for each print job, change it in Printing Preferences.
Setting your machine as a default machine | 78
Setting your machine as a default machine
1 For Windows XP Service Pack 3/Server 2003, from the Start menu, select Printer and Faxes.
• For Windows Server 2008/Vista, from the Start menu, select Control Panel > Hardware
and Sound > Printers.
• For Windows 7, from the Start menu, select Control Panel > Devices and Printers.
For Windows 8, from the Charms, select Search > Settings > Control Panel > Devices and
Printers.
• For Windows Server 2008 R2, select Control Panel > Hardware > Devices and Printers.
• For Windows 10 / Windows Server 2016
From task bar, type in Devices and Printers in Search input area. Press the Enter key.
OR
From the Start () icon, select Settings > Devices > Printers & scanners >Devices and
Printers.
Right-click the Start ( ) icon, you can select Control Panel > Devices and
Printers.
2 Select your machine.
3 Right-click your machine and select Set as Default Printer.
For Windows 7 or Windows Server 2008 R2, if Set as default printer has a , you can
select other printer drivers connected to the selected printer.
Copying
This chapter gives you step-by-step instructions for copying documents.
• Understanding the copy screen 80
• Basic copying 89
• ID card copying 90
Understanding the copy screen | 80
Understanding the copy screen
When you tap Copy from the home screen or Apps , the Copy screen appears. This screen has
several tabs and many copying options. All the options are grouped by feature so you can
configure your selections easily. If you want to go home, tap button.
Click (Help) from the home screen or (quick menu) and then click on any option
you want to know about.
Basic screen for the Copy
Preview
Display the originals type.
Button Name Description
Numeric
keypad
Opens the keypad to enter the number of copies to
create.
Preview for
status
Shows the job preview.
Preview for
play
Scans for job.
Start Starts a job.
Understanding the copy screen | 81
Command keys
Virtual Hard Key
• The positon of virtual hard keys is fixed on the right side of screen.
• When an app is launched, the virtual hard keys are shown.
• If the screen is touched, the virtual hard keys always appear.
• If the , touched, the virtual hard keys are hidden and shown.
Sub menu (Action overflow)
Eco: When Eco mode is enabled, you can select only economical printing settings. Tap the Eco
option in the Action Overflow menu to turn Eco mode on or off.
Add to My Program: Add an app to my program list.
,
Set the number of copies printed.
Button Name Description
Quick Menu Open the quick menus.
Search Search for a desired menu or app.
My Program Add an app to my program list.
Sub menu (Action
overflow)
Open the sub menu.
Button Name Description
Reset Reset the current machine’s configuration.
Interrupt Suspend the current job, allowing for urgent copying.
Stop
Stop a job at any time. A popup window appears to show the
jobs that you can stop.
Start Start a job.
Button Name Description
Understanding the copy screen | 82
Build Job: This option can be turned on or off. When this option is on:After the scanning is
finished, the Scan More window appears to ask if you want to scan another page. If you select
Yes, then you can scan another page in the current job. If you select No, then the scanning
process is completed and the remainder of the job is performed.
Proof Copy: Allows you to print a test copy to check the quality and alignment of the printout.
Tap this option in the Action Overflow menu to print a proof copy. After ensuring that the copy
is perfect, tap the Start button to print the rest of the copies.
ID Copy: Allows you to copy both sides of a two-sided original onto one sheet of paper. This
feature is helpful for copying originals with important information on both sides, such as
driver's licenses.
Save to Box: Allows you to save scanned originals to the hard disk drive in the machine. You
can then print these saved documents at a later date or store them as printable files. Tap this
option in the Action Overflow menu to save a document to the hard disk drive in the machine.
Save as Default: Allows you to save the current copy options as the default copy settings. After
you save the default copy settings, all future copy tasks use these settings. Tap this option in
the Action Overflow menu to save the current settings as the default settings.
Restore Default: Allows you to restore the copy settings to the default settings of the machine.
This option changes the current copy settings to the original copy settings configured at the
factory. Tap the Restore Default option in this menu to restore the default settings.
Copy Settings: The Another Page Confirmation option specifies whether the machine requires
you to confirm that the scanning is complete after each page. Select this option to efficiently
copy multiple pages in a single copy job.
- Another Page Confirmation: This option specifies whether the machine requires you
to confirm that the scanning is complete after each page. Select this option to
efficiently copy multiple pages in a single copy job.
UI Configuration: Allows you to select the options that appear in the Copy menu. Tap the + or
- symbol on the menu icons to add or remove menus. You can also tap and hold a menu icon to
move it to a different position or tap Clear All to remove all the menus.
Job progress
This menu appears whenever the machine is processing a job.
Detail: Tap this button to see the status, type, and time of the job.
Preview Area: Allows you to see a preview of the document being copied. The image in the
preview area indicates the current send settings, such as the orientation and size of the
printout.
Send Feedback: Allows you to send feedback about the current send job. If you want to receive
sending job by email, you can set from My page app (see "Understanding the My Page menu"
on page 29).
To use this feature, you may need to log-in as an administrator (see "Log-in" on page 175).
Understanding the copy screen | 83
Copy tab
You can basic setting on th the Copy tab. The Copy tab provides sections as below.
• You can customize the UI of each tab using UI configuration option (Copy > Sub
menu(action overflow) > UI Configuration).
• Some menus are disabled. If so, it is not available to your machine.
(Help) app explains the normal and usual procedure for copying originals. Tap
(Help) from the home screen or (quick menu) and then select on any option
you want to know about.
Paper Source
The paper source option sets the tray for this print job. The machine prints the scanned image on
the paper in the selected tray. You can see icons that represent paper sizes and the amount of
paper remaining in each tray.
Duplex
You can set the machine to print copies on both sides of paper.
You can select the Original and Output binding type, either type is Book or Calendar.
1 Sided: For originals or output binding type that are printed on one side only.
2 Sided, Book: For originals or output binding type that are printed on both sides.
2 Sided, Calendar: For originals or output binding type that are printed on both sides, but the
back is rotated 180 degrees.
Reduce/Enlarge
The reduce/enlarge feature allows you print an image larger or smaller than the original. Tap the
icons on the screen to reduce a copy by 25 % to 99 %, or enlarge a copy by 101 % to 400 %.
• 100% (Original): Prints the copy at the same size as the original.
Auto: Reduces or enlarges the copy based on the size of the output paper.
Custom: You can set custom percentage(between 25 to 400%).
XY Custom: You can set XY custom values(between 25 to 400%).
Other preset values: Reduces or enlarges the copy to a preset value. The icons on the right side
of the column indicate the presets to use when copying to a different paper size.
Finishing
You can set the print output options.
Sets the machine to sort the copy job. For example, if you make 2 copies of a 3 page original, one
complete 3 page document will print followed by a second complete document.
Skip Blank Pages: Specifies whether the machine copys blank pages in the original.
Collated: Prints output in sets to match the sequence of originals.
Understanding the copy screen | 84
Uncollated: Prints output sorted into stacks of individual pages.
Original Size
Use this option to set the actual paper size of the originals.
Mixed Size: If the original uses a combination of both Letter and Legal-size paper, the machine
can use the proper-sized paper for each sheet from multiple trays. For example, if the original
is 3 pages, two Letter and one Legal, the machine prints in order on the correct paper size for
each page.
Custom size: If you need to set a custom value for a special size of paper, use the arrows to set
the required size.
Original Orientation
Use this option to set the orientation of the original.
Upright Images: Use this setting for an original document loaded with the top toward the back
of the machine.
Sideways Images: Use this setting for an original document loaded into the Dual Scan
Document Feeder (DSDF) with the top of the document toward the left side of the machine, or
an original document placed on the scanner glass with the top of the document toward the
right side of the machine.
Original type
Use this setting to improve copy quality by selecting the appropriate document type for the
current job.
Text: Use if the original is mostly text and very few or no images.
Text/Photo: Use if the original is a mix of text and images.
Printed Photo: Use if the original is mostly or exclusively images.
Magazine: Use if the original is glossy documents that contain both text and images, such as
magazines.
Color Mode
Use this setting to select the color mode used to copy the original.
Auto: Automatically detects whether the original is black and white or color and prints the copy
accordingly.
Full Color: Prints the copy in the same color as the original.
Understanding the copy screen | 85
Mono: Prints the copy in black and white, regardless of whether the original is color or black
and white.
Color Replacement: Replaces certain colors in the original with different colors in the copy. The
machine uses an elaborate hue conversion technique to ensure that the replacement colors
blend naturally with the surrounding area.
Background Color: Adds a background color to the blank areas in the copy.
More tab
You can advanced setting on th the More tab. The More tab provides sections as below.
• You can customize the UI of each tab using UI configuration option (Copy > Sub
menu(action overflow) > UI Configuration).
• Some menus are disabled. If so, it is not available to your machine.
(Help) app explains the normal and usual procedure for copying originals. Tap
(Help) from the home screen or (quick menu) and then select on any option
you want to know about.
MPN-up
Reduces the size of the original images and prints 2 -16 pages onto one sheet of paper.
When you use the N-Up feature, the ID Copy, Image Repeat, Booklet, Book Copy, Image
Shift, and Poster Copy menus are disabled.
Off: Disable this feature.
N-Up: Copies the specified number of pages from the original onto one sheet of paper.
Orientation: You can select the direction in which information is copied on a page.
Paper Source: Selects the paper source.
Border: Prints a border around the pages on the printout.
You cannot adjust the copy size using Reduce/Enlarge for the N-Up feature.
Booklet
The machine automatically prints on one or both sides of the paper, which are then folded to
produce a booklet with all pages in the correct sequence. The machine will also reduce and
correctly adjust the position of each image to fit on the selected paper.
Off: Disables this feature.
1 Sided Originals: Copy one side of the original to one sheet of a booklet.
2 Sided Originals, Book: Copy each side of an original to one sheet of a booklet.
2 Sided Originals, Calendar: Copy each side of an original to one page of a booklet. The second
side of each original is rotated 180 degrees so the text will be upright in the booklet.
Understanding the copy screen | 86
Binding: Selects the direction of page order.
- Left: The booklet will open to the left.
- Right: The booklet will open to the right.
Paper Source: Selects the paper tray to use.
Book Copy
Use this feature to copy a book. If the book is too thick, lift the Dual Scan Document Feeder (DSDF)
until its hinges are engaged by the stopper, then close the Dual Scan Document Feeder (DSDF).
If the book or magazine is thicker than 30 mm (1.18 inches), start copying with the Dual Scan
Document Feeder (DSDF) open.
This copy feature is available only when you place originals on the scanner glass.
Off: Disables this feature.
Left Page: Prints only the left page of the book.
Right Page: Prints only the right page of the book.
Both Pages(From Left): Prints both facing pages from the left page.
Both Pages(From Right): Prints both facing pages from a right page.
Book Center & Edge Erase: Erases shadows caused by bindings or book edges from the center
and side edges of copies.
Duplex: Erases shadows caused by bindings or book edges from the center nd side edges of
copies.
Poster Copy
This feature allows you to print a single-page document onto 4, 9, or 16 sheets of paper, for the
purpose of pasting the sheets together to form one poster-size document.
This copy feature is available only when you place originals on the scanner glass.
Image Repeat
This option prints several copies of the original image on the same side of a single page. If you
have other original in the Dual Scan Document Feeder (DSDF) , all other original images get
printed the same way.
Off: Disables this feature.
Auto Repeat: The number of images is automatically determined by the original image and
paper size. The number of repeating images is automatically selected based on size of the
original, the size of output page, and the reduce/enlarge percentage by up to 100 %.
Manual Repeat: Manually select the number of images from 2, 4, 6, 8, 9 or 16.
Understanding the copy screen | 87
Watermark
The watermark option allows you to print text over an existing document. For example, you use
it when you want to have large gray letters reading “Draft” or “Confidential” printed diagonally
across the first page or all pages of a document.
Stamp
You cannot apply stamps to booklets or posters.
Prints the IP Address, ID, Device Information, Comment, Page Number or Date & Timeon
printouts. You can set the Text Size, Opacity or Position of the stamp.
Overlay
An overlay is text and/or images stored on a computer hard drive (HDD) in a special file format
that can be printed on any document. Overlays can take the place of traditional letterhead paper.
Rather than using preprinted letterhead, you can create an overlay matching the layout of the
letterhead. To print a letter on your company’s letterhead, you do not need to load preprinted
letterhead in the machine, just enable the letterhead overlay on your document.
Off: Disables this feature.
+ New: Create a new page overlay containing your logo or image.
Overlap: Select an overlap location.
Erase Edge
You can copy the original without any edges or margins.
Off: Disables this feature.
Border Erase: Erase an equal amount of edges from all copies.
Hole Punch Erase: Erase hole-punch marks from the left edge of copies.
Image Shift
To prevent images from overlapping with punch holes, staples, and other marks, you can move
an image’s position.
Off: Disables this feature.
Auto Center: Automatically position at the center of the paper.
Custom Shift: Adjust the margins of the paper as needed.
Covers
The machine automatically adds covers to your copied set using stock taken from a different tray.
Covers must be the same size and orientation as the main body of the job.
Off: Disables this feature.
Front: Print the document with a front cover.
Back: Print the document with a back cover.
Front & Back: Prints the document with a front and back cover.
Cover Sheet: Sets the option for double-sided copying.
Paper Source: Selects the default paper tray to use.
Understanding the copy screen | 88
Image Adjustment
This option allows you to manually adjust the image Darkness, Sharpness, Contrast, , Color
Balance, Color Shift, Negative Image, Saturation, UCR, Under Color Removal, Fine Density
Background Adjustment
This option allows you to compensate for originals that contain color in the background, such as
newspapers or catalogs. You can use the options in this menu to make the copies easier to read.
Background Density: Allows you to adjust the density of the background in the scanned image.
This feature is useful when scanning originals that have turned yellow from age or originals
with a dark background.
Backside Image: Allows you to erase any text or images that show through from the other side
of the original. You can use this feature to ensure that your scanned output is clearly legible.
Mirror Image
This option allows you to reverse the original document like a mirror.
Copy to Edge
This option allows you to use copy the document all the way to the edge of the paper.
Basic copying | 89
Basic copying
This is the usual procedure to copy your original documents.
1 Tap Copy from the home screen or Apps.
2 Place the originals face up in the Dual Scan Document Feeder (DSDF) or place a single
original face down on the scanner glass and close the Dual Scan Document Feeder (DSDF)
(see "Loading originals" on page 40).
3 Adjust the settings on the Copy tab and More tab.
4 Enter the number of copies desired on the numeric keypad (or +, - button) on the control
panel, if necessary.
5 Tap , (Start) from the control panel to begin copying.
To cancel the current copy job, tap (Stop)> tap Job Status on the control panel. Then
delete the job you want (see "Job Status" on page 26).
ID card copying | 90
ID card copying
The ID Copy app allows you to copy both sides of a two-sided original onto one sheet of paper.
This app is helpful for copying originals with important information on both sides, such as driver's
licenses.
During ID copying, the machine prints one side of the original on the upper half of the paper and
the other side on the lower half of the paper. Both copied images are the same size as the original,
unless otherwise specified.
Basic screen for the ID Copy
Command keys
Button Name Description
Preview for status Shows the job preview.
Start Starts a job.
,
Set the number of copies printed.
Quick Menu Open the quick menus.
Search Search for a desired menu or app.
ID card copying | 91
Sub menu (Action overflow)
Eco: When Eco mode is enabled, you can select only economical printing settings. Tap the Eco
option in the Action Overflow menu to turn Eco mode on or off.
Add to My Program: Add an app to my program list.
Print Now: Allows you to print scanned originals immediately.
Save to Box: Allows you to save scanned originals to the hard disk drive in the machine. You
can then print these saved documents at a later date or store them as printable files. Tap this
option in the Action Overflow menu to save a document to the hard disk drive in the machine.
Save as Default: Allows you to save the current copy options as the default copy settings. After
you save the default copy settings, all future copy tasks use these settings. Tap this option in
the Action Overflow menu to save the current settings as the default settings.
Restore Default: Allows you to restore the copy settings to the default settings of the machine.
This option changes the current copy settings to the original copy settings configured at the
factory. Tap the Restore Default option in this menu to restore the default settings.
ID Copy Settings: Allows you to select the default ID copy mode. You can select ID copy or
Manual ID Copy. Refer to the Manual tab for Manual ID Copy Setup(See "Manual tab" on page
92).
ID Copy tab
Your machine can print 2-sided originals on one sheet.
The machine prints one side of the original on the upper half of the paper and the other side on
the lower half without reducing the size of the original. This feature is helpful for copying a
small-sized item such as business card.
The original must be placed on the scanner glass to use this feature.
1 Tap ID Copy from the home screen or Apps.
2 If necessary, adjust the settings for each copy such as Print Layout, Original Size, Paper
Source, Adjust to Paper Size, and Align.
Follow the instructions on the control panel.
My Program Add an app to my program list.
Sub menu (Action
overflow)
Open the sub menu.
Button Name Description
ID card copying | 92
3 Place the front side of an original facing down on the scanner glass where arrows indicate
as shown. Then, close the Dual Scan Document Feeder (DSDF).
4 Tap .
Your machine begins scanning the front side.
5 Turn the original over and place it on the scanner glass where arrows indicate as shown.
Then, close the Dual Scan Document Feeder (DSDF).
6 Tap .
Your machine begins scanning the back side.
• If you do not press the button, only the front side will be copied.
• If the original is larger than the printable area, some portions may not be printed.
Manual tab
This tab allows you to use ID copy with manually making template, if you frequently copy ID
documents of a specific size.
If there is no template configured or you want to create new template, go to Action Overflow
() > ID Copy Settings > Manual ID Copy Setup > New.
Manual ID Copy Setup
This menu allows you to create a new template or delete an existing ID copy template. You can
setting the following :
Template Name: Specifies the name of the template.
Number of Images: Specifies how many images will appear on the printout.
Scan Position: Specifies where the originals will be placed on the scanner.
Image Position: Specifies where the copied images will appear of the printout.
Scan & Send
(Scanning)
Scanning with your machine lets you turn pictures and text into digital files that can be stored on
your computer.
• Understanding the Scan & Send screen 94
• Basic scaning 102
• Scanning with TWAIN-enabled software103
• Using Samsung Easy Document Creator104
Understanding the Scan & Send screen | 94
Understanding the Scan & Send screen
This section describes all scanning and fax functions. When you tap Scan & Send from the home
screen or Apps, the Scan & Send screen appears. This screen has 2 tabs and many options. All
options are grouped by feature so that you can configure the job easily. If you want to go home,
tap button.
Tap (Help) from the home screen or (quick menu) and then select on any option
you want to know about.
Basic screen for the Scan & Send
Command keys
Button Name Description
Quick Menu Open the quick menu.
Fax Send a fax.
My Program Add an app to my program list.
Understanding the Scan & Send screen | 95
Virtual Hard Key
• The positon of virtual hard keys is fixed on the right side of screen.
• When an app is launched, the virtual hard keys are shown.
• If the screen is touched, the virtual hard keys always appear.
• If the , touched, the virtual hard keys are hidden and shown.
Sub menu (Action
overflow)
Open the sub menu.
Preview for play
Scans for job. Preview displays the original scanned
image.
Start Starts a job.
+ Me
When users are logged in, the destination
configured in their My Page profile appears.You can
set the destination in the Send to Destination menu
of the My Page app (see "Understanding the My
Page menu" on page 29). Administrators can also
set the default destination in the sub menu (Action
overflow) > Send Settings> +Me Setting.
You must log in to use your + Me destina-
tion. If you do not log in, then the machine
sends the copy to the + Me destination spec-
ified by the administrator.
Address book Open your saved destinations in address book.
Email
This option allows you to send scanned document
via Email.
Fax
This option allows you to send scanned document
via Fax.
SMB
This option allows you to send scanned document
via SMB.
Additional menu Open additional menus such as FTP, BOX, PC, I-FAX.
Button Name Description
Reset Reset to app default configuration.
Button Name Description
Understanding the Scan & Send screen | 96
Sub menu (Action overflow)
Add to My Program: Add an app to my program list. With this feature, user can set default
settings, destinations required for each program. Also can set default options as Auto Launch,
add shortcut to Home.
Search: Search for a desired options.
Build Job: This option can be turned on or off. When this option is on:After the scanning is
finished, the Scan More window appears to ask if you want to scan another page. If you select
Yes, then you can scan another page in the current job. If you select No, then the scanning
process is completed and the remainder of the job is performed.
ID Send: Allows you to quickly scan IDs and send the image to an SMB, FTP, or Email address
or save it to the Box or a USB storage device.
Attach File Only: Allows you to attach a file to your message. You can use this option to quickly
send one or more files from the hard disk drive (BOX) of the machine to an SMB, FTP, Email,
Box, USB.
Scan & Attach File: Allows you to scan and attach images to your message. You can use this
option to quickly send a scanned image or a file on the hard disk drive (Box) of the machine to
an SMB, FTP, or Email, address or save it to the Box or a USB storage device.
Internet Fax Rx: Allows you to print it immediately after checking whether any faxes over the
internet are received.
Save as Default: Allows you to save the current Scan & Send settings as the default Scan &
Send settings. After you save the default Scan & Send settings, all future send tasks use these
settings. Tap this option in the Action Overflow menu to save the current settings as the default
Scan & Send settings.
Restore Default: Allows you to restore the Scan & Send settings to the default Scan & Send
settings of the machine. This option changes the current Scan & Send settings to the original
settings configured at the factory. Tap this option in the Action Overflow menu to restore the
default Scan & Send settings.
Send Settings: Allows you to quickly scan a document and send it to a destination. The scanned
document is sent as an image file. Tap this option in the sub menu (action overflow menu) to
scan and attach a file to the current message.
- Filing Policy: The Filing Policysetting specifies how the machine handles name conflicts
when saving files.
- Print Confirmation Report: You can use this feature to get confirmation on executed Scan &
Send destination's successfully or not.
On Hook
When you press this button, you can hear a dial tone. Then
enter a fax number. It is similar to making a call using
speaker phone.
Stop
Stop a job at any time. A popup window appears to show
the jobs that you can stop.
Start Start a job.
Button Name Description
Understanding the Scan & Send screen | 97
If the report contains characters or fonts that the machine does not support, then
Unknown may appear in the report instead of the characters/fonts.
- +Me Setting: Allows you to select the default destination for the send job. When logged in,
you can select your any Send destination as the default send destination. Same will appear in
Scan & Send widgets too.
- Send to PC: Scans and sends scanned output to a computer.
Address Book Settings: This address book contains contacts that are available to all users. You
can use the address book to make contacts available to anyone who uses the machine.
- Google Address Book: This address book contains the contacts registered in your Google
contacts list. You must log into your Google account to access your Google Address Book.
UI Configuration: Allows you to select the options that appear in the Scan & Send menu. Tap
the + or - symbol on the menu icons to add or remove menus. You can also tap and hold a menu
icon to move it to a different position or tap Clear All to remove all the menus.
Job progress
This menu appears whenever the machine is processing a job.
Detail: Tap this button to see the status, destination, sender, and time of the job.
Preview Area: Allows you to see a preview of the document being sent. The image in the
preview area indicates the current send settings, such as the orientation and size of the file.
Send Feedback: Allows you to send feedback about the current send job. If you want to receive
sending job by email, you can set from My page app (see "Understanding the My Page menu"
on page 29).
To use this feature, you may need to log-in as an administrator (see "Log-in" on page 175).
Send tab
You can basic setting on th the Send tab. The Send tab provides sections as below.
• You can customize the UI of each tab using UI configuration option (Send > Sub
menu(action overflow) > UI Configuration).
• Some menus are disabled. If so, it is not available to your machine.
• Some menus may not appear on the display depending on options or models. If so, it is
not applicable to your machine.
• Tap (Help) from the home screen or (quick menu) and then select on any
option you want to know about.
Understanding the Scan & Send screen | 98
Add Destination
Tap to add a recipient’s email address or a fax number. If you want to send to SMB, FTP, Box,
PC, or USB click on respective buttons.
Original
This setting is used to improve the scan quality by selecting the document type for the current
scan job.
Duplex
- 1 Sided: For originals that are printed on one side only.
- 2 Sided, Book: For originals that are printed on both sides.
- 2 Sided, Calendar: For originals that are printed on both sides, but the back is rotated 180
degrees.
Skip Blank Pages: Specifies whether the machine scans blank pages in the original.
To use 2 Sided, Book and 2 Sided, Calendar, load the originals on the Dual Scan Document
Feeder (DSDF). If the machine cannot detect the original on the Dual Scan Document
Feeder (DSDF), it automatically changes to 1 Sided.
Scan Options
Set file options of the scanned output.
File Name: Enter a file name to store the scan file name at destination.
File Format: Select a file format for the scanned output.
PDF Options: Set PDF file options for the scanned out.
Resolution: Adjust the document resolution. The higher this value, the clearer the result, but
scan time may take longer.
Quality: Use this option to produce a high quality document. The higher quality you select, the
larger file size.
OCR Language: When producing scanned output for OCR software, select the appropriate
language.
Fax Options (fax user only)
If you send originals that are of poor quality, or contain photographs, you can adjust the
resolution to produce a higher quality fax.
Resolution
- Standard: Usually recommended for originals with text. This option will reduce the
transmission time.
- Fine: Recommended for the originals containing small characters, thin lines, or text from a
dot-matrix printer.
- Super Fine: Recommended for originals containing fine details. This option is only available
if the receiving machine also supports Super Fine resolution.
- Ultra Fine: Recommended for originals containing extremely fine details. This option is only
available if the receiving machine also supports Ultra Fine resolution.
Understanding the Scan & Send screen | 99
More tab
You can detail options setting on th the More tab. The More tab provides sections as below.
• You can customize the UI of each tab using UI configuration option (Send > Sub
menu(action overflow) > UI Configuration).
• Some menus are disabled. If so, it is not available to your machine.
• Some menus may not appear on the display depending on options or models. If so, it is
not applicable to your machine.
• Tap (Help) from the home screen or (quick menu) and then select on any
option you want to know about.
Book Scan
Use this feature to scan a book. If the book is too thick, lift the Dual Scan Document Feeder (DSDF)
until its hinges are engaged by the stopper, then close the Dual Scan Document Feeder (DSDF).
If the book or magazine is thicker than 30 mm (1.18 inches), start copying with the Dual Scan
Document Feeder (DSDF) open.
Off: Disable this feature.
Left Page: Scans only the left page of the book.
Right Page: Scans only the right page of the book.
Both Pages(From Left): Scans both facing pages from the left page.
Both Pages(From Right): Scans both facing pages from the right page.
Book Center & Edge Erase: You can set shaded areas to erase shadows caused by bindings or
book edges from the center and side edges of copies.
Advanced Fax (fax user only)
Set the sending options for fax, such as Quick Start Fax and Delay Send.
Off: Disables this feature.
Quick Start Fax: The machine will begin to transmit the fax right after the first page has been
scanned. Originals with many pages can be sent this way without overflowing the machine’s
memory.
Delay Send: Set your machine to send a fax at scheduled time. Define the Job Nameand Start
Time.
You can delay a fax by any length of time starting 1 minute and 24 hours after the scan.
Email Settings
Set email information, such as From, Subject and Message.
Color Mode
Use this option to set the default color mode used for scan jobs.
Mono: Scans an image in black and white.
Understanding the Scan & Send screen | 100
Gray: Scans an image in grayscale.
Color: Scans an image in color.
Auto: Automatically detects whether or not the original contains color. If the original contains
color, then the machine prints the document in color. If the original does not contain color, then
the machine prints the document in black and white(Color/Mono) or grayscale(Color/Gray).
• The file format JPEG cannot be selected in the File Format option, if Mono has been
selected for Color Mode.
• You cannot use to Gray, Color, Auto Mode in Fax transmmision.
Original Type
Use this setting to improve copy quality by selecting the appropriate document type for the
current job.
Text: Use if the original is mostly text and very few or no images.
Text/Photo: Use if the original is a mix of text and images.
Photo: Use if the original is mostly or exclusively images.
Original Size
Use this option to set the actual paper size of the originals.
Mixed Size: Automatically detect the size of original if the original uses a combination of
different paper types.
Custom size: If you need to set a custom value for a special size of paper, use the arrows to set
the required size.
Original Orientation
Use this option to set the orientation of the original.
Upright Images: The original is in landscape orientation. The images or text in the original are
parallel to the long edge of the page.
Sideways Images: The original is in portrait orientation. The images or text in the original are
perpendicular to the long edge of the page.
Understanding the Scan & Send screen | 101
Erase Edge
This option allows you to eliminate unwanted marks or shadows from the margins of the printout.
You can use this feature to remove hole punches and damage near the edge of the page or
remove the shadows that appear when scanning bound media.
Scan To Edge
This options allows you to scan the full size of a document without omitting any edges or margins.
Use this option to scan the document all the way to the edge of the paper. Enable this setting to
scan an entire document, including all edges and margins.
Image Adjustment
This option allows you to manually adjust the image.
Darkness: Allows you to adjust the darkness of the scanned output file. This feature is useful
when scanning faded originals or originals with little contrast.
Sharpness: Allows you to adjust the edges of text so that it is easier to read. You can also use
this feature to enhance the details of images.
Contrast: Allows you to adjust the contrast to make the scanned output crisper or smoother.
You can use this feature to improve the quality of an image or increase the readability of text.
Background Adjustment
This option allows you to compensate for originals that contain color in the background, such as
newspapers or catalogs. You can use the options in this menu to make the copies easier to read.
Background Density: Allows you to adjust the density of the background in the scanned image.
This feature is useful when scanning originals that have turned yellow from age or originals
with a dark background.
Backside Image: Allows you to erase any text or images that show through from the other side
of the original. You can use this feature to ensure that your scanned output is clearly legible.
Basic scaning | 102
Basic scaning
This is the usual procedure to scan your original documents.
1 Tap Scan & Send from the home screen or Apps.
2 Place the originals face up in the Dual Scan Document Feeder (DSDF) or place a single
original face down on the scanner glass and close the Dual Scan Document Feeder (DSDF)
(see "Loading originals" on page 40).
3 Adjust the settings in the Send tab and More tab.
4 Select a destination using (Add Destination), + Me, (Address book), Email , SMB,
FTP, Box, or USB).
You can send scanned documents to Email, Fax, FTP, or SMB addresses through the
(Address book). The Email, Fax, FTP, or SMB icons appear next to the contact's
name in the Address book. When you select a name, the first icon is selected by
default. To send documents to multiple destinations, select the icons for each of the
destinations.
5 Tap , (Start) from the control panel to begin scan.
To cancel the current send job, tap (Stop), then tap Job Status on the control panel,
and then delete the job you want (see "Job Status" on page 26).
Scanning with TWAIN-enabled software | 103
Scanning with TWAIN-enabled software
If you want to scan documents using other software, you need to use TWAIN-compliant software,
such as Adobe Photoshop.
Follow the steps below to scan with TWAIN-compliant software:
1 Make sure that the machine is connected to your computer and powered on.
2 Place the originals face up in the Dual Scan Document Feeder (DSDF) or place a single
original face down on the scanner glass and close the Dual Scan Document Feeder (DSDF)
(see "Loading originals" on page 40).
3 Open an application, such as Adobe Photoshop.
4 Open the TWAIN window and set the scan options.
5 Scan and save your scanned images.
Using Samsung Easy Document Creator | 104
Using Samsung Easy Document Creator
Samsung Easy Document Creator is an application to help users scan, compile, and save
documents in multiple formats (including .epub). These documents can be shared over social
networking sites or fax. Whether you’re a student organizing research from a library or a
stay-at-home parent sharing scanned pictures from last year’s birthday party, Easy Document
Creator will provide you with the necessary tools.
• Available for Windows and Mac OS users only.
Windows XP Service Pack 3 or higher and Internet Explorer 6.0 or higher is the minimum
requirement for Samsung Easy Document Creator.
• Samsung Easy Document Creator is installed automatically when you install the
machine software.
The Samsung Easy Document Creator provides the following features:
Scan: Use for scanning pictures or documents.
Text Converting Scan(Windows only): Use for scanning documents that need to be saved in an
editable text format.
Document Conversion: Provides the ability to convert existing files into multiple formats.
Fax: Provides the ability to directly fax a document from Easy Document Creator if the
Samsung Network PC fax driver is installed.
Click the Help ( ) button from the window, and then click on any option you want to
know about.
Scanning with Samsung Easy Document Creator
1 Place a single document face down on the document glass, or load the documents face up
into the document feeder (see "Loading originals" on page 40).
2 From the Start menu select Programs or All Programs > Samsung Printers.
For Mac, open the Applications folder > Samsung folder > Samsung Easy Document Creator.
3 Click Samsung Easy Document Creator.
4 Click Scan from the home screen.
5 Select the type of scanning or a favorites and then make adjustments to the image.
Using Samsung Easy Document Creator | 105
6 Click Scan to scan a final image or Prescan to get another preview image.
7 Press Send to save the scanned image.
8 Select the option you want.
9 Press OK.
Click the Help ( ) button from the window, and then click on any option you want to
know about.
Faxing
This guide gives you information about using your machine as a fax machine.
• Preparing to fax 107
• Using a fax in your computer 108
• Understanding the fax screen 109
• Sending a fax 111
• Receiving a fax 114
Preparing to fax | 107
Preparing to fax
You cannot use this machine as a fax through the internet phone. For more information,
ask your internet service provider.
• We recommend you use traditional analog phone services like PSTN (public switched
telephone network) when using a phone line as a fax line. If you use internet services
(DSL, ISDN, VolP), you can improve the connection quality by using a micro-filter. A
micro-filter reduces noise and improves connection quality. Since a DSL micro-filter is
not provided with the machine, contact your internet service provider.
1. Line port
2. Micro filter
3. DSL modem / Telephone line
Before you send or receive a fax, you must connect the supplied cord to the wall jack. Refer to
“Quick installation guide”. The method of connecting a telephone line varies by country.
Using a fax in your computer | 108
Using a fax in your computer
You can send a fax directly from your computer. Make sure that your machine and the computer
are connected to the same network.
Sending a fax (Windows)
To send a fax from your computer, the Samsung Network PC Fax program must be installed. You
can install the Samsung Network PC Fax driver from the software CD. You can select the
Samsung Network PC Fax driver in the Select Software window.
1 Open the document you want to send.
2 Select Print from the File menu.
The Print window will be displayed. It may look slightly different depending on your
application.
3 Select Samsung Network PC Fax from the Print window
4 Click Print or OK.
5 Enter the recipient’s fax number and set any options if necessary.
For more information about Samsung Network PC Fax, click Help.
6 Click Send.
Checking a sent fax list (Windows)
You can check a sent fax list on your computer.
From the Start menu, click Programs or All Programs > Samsung Printers > Network PC Fax > Fax
Transmission History. Then, the Fax Journal appears with the fax list you have sent.
For more information about Fax Transmission History, click Help.
Understanding the fax screen | 109
Understanding the fax screen
To open the Fax screen, tap Scan & Send from the home screen or Apps, then tap icon(or Fax
on the screen). If you see a different screen, tap the icon to go to the home screen.
Command keys
Button Name Description
keypad Open the keypad.
Favorites Open a list of frequently-used addresses.
Recent View any recently-used addresses.
Groups Open a list of group addresses.
Contacts Open a list of your contacts.
Pause Pause the current job.
Add Contacts Add a new contact to your addresses.
Add To Add to the destination list.
Understanding the fax screen | 110
To Open the destination list.
On Hook
Enable On Hook dialing. When you hear the dial tone,
enter a fax number using the numeric keypad on the
screen.
Send Send the fax.
Button Name Description
Sending a fax | 111
Sending a fax
This section explains how to send a fax and the special methods of transmission.
You can place the originals use either the Dual Scan Document Feeder (DSDF) or the
scanner glass. If the originals are placed on both the Dual Scan Document Feeder (DSDF)
and the scanner glass, the machine will read the originals on the Dual Scan Document
Feeder (DSDF) first, because it has higher scan priority.
Setting the fax header
In some countries, you are required by law to specify your fax number on any fax you send.
1 Tap Settings > Fax Settings > Machine ID & Fax No from the home screen or Apps.
2 Tap the ID Name input box. The pop-up keyboard appears.
3 Enter your name or the company name (see "Understanding the pop-up keyboard" on page
30).
4 Tap Done.
5 Tap the Fax Number input box.
6 Enter your fax number using the numeric keypad on the control panel.
7 Tap Done.
8 Tap or select other settings.
Sending a fax
1 Place the originals face up in the Dual Scan Document Feeder (DSDF) or place a single
original face down on the scanner glass and close the Dual Scan Document Feeder (DSDF)
(see "Loading originals" on page 40).
2 Tap Scan & Send from the home screen or Apps.
Sending a fax | 112
3 Adjust the document settings in the Send tab or More tab.
4 Tap and enter a fax number directly using on the screen, then tap or using
Favorites, Recent, Groups, Contacts tap from the display screen.
• You can send a fax up to 10 destinations at once.
• You can view and delete a destination from Destination List ().
• To insert a pause, tap while entering the fax number. A dash (-) appears on
the display when a pause is inserted.
• If you want to use On Hook dial, tap and enter a fax number using the numeric
keypad on the screen while you hear the dial tone.
5 Tap to start the process.
• You can send a fax directly from your computer (see "Using a fax in your computer" on
page 108).
• When you want to cancel a fax job, tap (Stop) from virtual hard key before the
machine starts transmission. Or tap Job Status from the home screen or Apps, select
the job you want to delete (see "Job Status" on page 26).
• You cannot send emails with the machine while it is sending a fax.
Sending a fax using speed dial numbers
When you are prompted to enter a destination number for your fax, you can use a speed dial
number previously set by you.
• 1-500 can be assigned for the speed dial numbers
• For one-digit speed dial numbers, press and hold the corresponding number on the
numeric keypad on the control panel.
• For two or more digit speed dial numbers, press the first digit button and hold the last
number on the numeric keypad on the control panel.
Sending a fax | 113
Sending a fax manually using an extension telephone
This method is sending a fax using an extension telephone. Make sure that extension telephone
is connected to the EXT. socket of the fax kit on the machine.
1 Place the originals face up in the Dual Scan Document Feeder (DSDF) or place a single
original face down on the scanner glass and close the Dual Scan Document Feeder (DSDF)
(see "Loading originals" on page 40).
2 Tap Scan & Send from the home screen or Apps.
3 Adjust the document settings in the Send tab or More tab.
4 Pick up the receiver of the extension telephone.
5 When you hear the dial tone, dial a fax number using the extension telephone.
6 Tap on the control panel. The manual fax pop-up appears.
7 Tap Sendbutton on the manual fax pop-up when you hear a high-pitched fax signal from the
extension telephone.
Resending automatically
If the line is busy or there is no answer when you send a fax, the machine automatically redials
the number.
To change the time interval between redials and/or the number of redial attempts, follow the
steps below:
Tap Settings > Fax Settings > Redial from the home screen or Apps.
Delaying a fax transmission
You can set your machine to send a fax at a later time (see "General fax settings" on page 117).
To cancel a delayed fax, tap Off before it is sent.
Receiving a fax | 114
Receiving a fax
This section explains how to receive faxes, and the special options available.
Changing Receive Mode
Your machine is preset to Fax mode at the factory. When you receive a fax, the machine answers
the call after a specified number of rings and automatically receives the fax. If you want to change
to another receive mode, follow the steps below:
Tap Settings > Fax Settings > Receive Mode on the display screen.
Telephone: Receive faxes by pressing > Receive.
Fax: Receive incoming faxes normally and immediately enter the fax reception mode.
Answering Machine/Fax: Use when an answering machine is attached to your machine. Your
machine answers the incoming call, and the caller can leave a message on the answering
machine. If the fax machine senses a fax tone on the line, the machine automatically switches
to Fax mode to receive the fax.
Receive start code: When you receive a call on the extension phone and hear fax tones,
press the keys *9* on the extension phone. The machine receives the fax. Press the
buttons slowly in sequence. If you still hear the fax tone from the remote machine, try
pressing *9* once again.
Receiving manually in Telephone mode
1 Pick up the telephone on the machine when you hear a high-pitched fax signal from the
telephone.
2 Tap Scan & Send or Apps from the home screen.
3 Tap on the control panel. The pop-up manual fax appears.
4 Tap Receiveon the control panel.
The machine begins receiving a fax.
Receiving a fax | 115
Receiving automatically in Answering Machine/Fax mode
To use this mode, you must attach an answering machine to the EXT socket on the back of your
machine.
If the caller leaves a message, the answering machine records the message as normal. If your
machine detects a fax tone on the line, it automatically starts to receive the fax.
If you have set your machine to this mode and your answering machine is turned off, or
no answering machine is connected to the EXT. socket, your machine automatically
enters Fax mode after a predefined number of rings.
• If your answering machine has a configurable ring counter, set it to answer incoming
calls before it rings more than once.
• If you are in Telephone mode when the answering machine is connected to your
machine, you must switch off the answering machine. Otherwise, outgoing messages
from the answering machine will interrupt your phone conversations.
Receiving faxes manually using an extension telephone
This feature works best when you are using an extension telephone connected to the EXT. socket
on your machine. When you receive a call on the extension phone and hear fax tones, press the
keys *9* on the extension phone. The machine receives the fax. Press the buttons slowly in
sequence. If you still hear the fax tone from the remote machine, try pressing *9* once again. To
change the *9* to, for example, *3*, follow the steps below:
1 Tap Settings > Fax Settings > Receive Mode > Receive Start Code on the display screen.
2 Enter number 3 on the screen.
Receiving in Secure Receive mode
You may need to prevent your received faxes from being accessed by unauthorized people. You
can turn on secure receiving mode to restrict printing of incoming faxes when the machine is
unattended. In Secure Receive mode, all incoming faxes are saved to memory.
1 Tap Settings > Fax Settings > Secure Receive from the home screen or Apps.
Secure Receive mode can only be configured by a user with a registered passcode on
the machine. When the machine requests, enter your passcode.
2 Tab On to enable this feature.
Receiving a fax | 116
When the machine receives a fax in this mode, Print option becomes available. If you
want to print the secured faxes, tap Print. All secured faxes will then be printed.
3 If you want to set a passcode, tab the passcode blank and enter a passcode.
4 If you want incoming faxes to be always saved to memory, tap Whole Day. Otherwise,
proceed to the next step.
5 Tap Start Time and set the specific start time using the up/down buttons. Tap Setwhen
finished.
6 Tap End Time and set the specific end time using the up/down buttons. Tap Set when
finished.
7 Tap or select other settings.
To deactivate the Secure Receive feature, tap Off. Incoming faxes will be automatically
printed again.
Setting Received Fax Printing
Use this option to set printing options for received faxes.
Tap Settings > Fax Settings > Received Fax Printing from the home screen or Apps.
Duplex: Print received faxes on both sides of the paper.
Output Tray: Specify the tray where the fax is printed.
Auto Reduction: Set to reduce the size of incoming pages automatically. When receiving a fax
containing pages as long as or longer than the paper loaded in the paper tray, the machine can
reduce the size of the original to fit the size of the paper loaded in the machine. If you do not
enable this option, the machine cannot reduce the original to fit onto one page. The original will
be divided and printed in actual size on two or more pages.
Stamp Received Name: Print the received fax information on printouts.
Paper Source: Select a tray as the paper source.
Receiving a fax | 117
Forwarding faxes
You can set your machine to forward sent or received faxes to email, SMB, FTP, and so on. If you
are out of the office but need to receive faxes, this feature may be useful.
General fax settings
You can set the default fax options. Set the most frequently-used fax settings.
Tap Settings > Fax Settings from the home screen or Apps.
• Some menus may not appear on the display depending on options or models. If so, it is
not applicable to your machine.
• Tap (Help) from the home screen or (quick menu) and then select on any
option you want to know about.
• You can also use this feature from the SyncThru™ Web Service. Open a web browser
from a networked computer and type the IP address of your machine. When SyncThru
Web Service opens, click Settings tab > Machine Settings > Fax (see "Settings tab" on
page 201).
Option Description
Machine ID & Fax No
You can set the machine ID and fax number to be printed
at the top of each page.
Redial
Set the machine to re-dial the fax number if the recipient’s
fax line is busy or not answered. Set the number of re-dial
attempts and the interval between attempts.
Redial Term: Select terms for re-dialing using the
up/down arrows.
Redial Times: Select a re-dial time using the up/down
arrows. Select 0 to disable redialing.
Prefix Dial
Set the number to be dialed before the destination
number. Users may use this to access a PABX (e.g. 9) or an
area code (e.g. 02). Once this number is set, it
automatically appears on the screen when entering a
phone/fax number.
ECM Mode
Set the machine to correct errors. This helps overcome
poor line quality and ensures any faxes you send are
properly transmitted to any other error
correction-equipped fax machine. Sending a fax in this
mode may take more time.
Modem Speed Set the modem speed.
Receiving a fax | 118
Receive Mode
Select the fax receiving mode.
Telephone: Receive faxes by pressing > Receive.
Fax: Receive incoming faxes normally and immediately
enter the fax reception mode.
Answering Machine/Fax: Use when an answering
machine is attached to your machine. Your machine
answers the incoming call, and the caller can leave a
message on the answering machine. If the fax machine
senses a fax tone on the line, the machine automatically
switches to Fax mode to receive the fax.
Ring to Answer
Set the number of times the machine rings before
answering an incoming call.
Receive Start Code
Initiates fax reception from an extension phone plugged
into the EXT.socket on the back of the machine. If you pick
up the extension phone and hear fax tones, enter the code.
It is preset to *9* at the factory (see "Receiving faxes
manually using an extension telephone" on page 115).
Toll Save
Set the machine to send faxes in the toll save time to
reduce phone bill costs.
DRPD Mode
Enable a user to answer several different phone numbers
on the same telephone line. Set the machine to recognize
different ring patterns for each number. This setting may
not be available in your country.
Junk Fax Setup
Use this feature to reject faxes sent from numbers stored
in memory as junk fax numbers. This feature is useful to
block any unwanted faxes. When you turn this feature on,
you can access additional options to set junk fax numbers.
This option may not be available in your country.
Secure Receive
a
Set the machine to save the received faxes in memory so
that unauthorized people cannot access them when you
are absent. This option restricts printing of received faxes
when the machine is unattended.
You need to log-in as an administrator.
Received Fax Printing Set options to print received faxes.
Fax Country Setting
Select a country as default. Before changing this, connect
a telephone line to the machine. When you change the
country, a ping test is performed.
Option Description
Receiving a fax | 119
Smart Fax Diagnostics
The Smart Fax feature optimizes the settings for your fax
line.
Auto Configuration: When sending and receiving faxes,
the machine regularly checks for errors and
automatically configures the fax settings to ensure a
stable connection.
Start: Allows you to automatically detect or manually
specify the environment when sending or receiving
faxes. Select Auto Detection to automatically detect the
environment, or manually specify the faxing
environment as Normal, VoIP(Office), Noise(Home), or
Big Noise.
Initialize Diagnostics Settings: Resets all the settings.
a.May only be available for the administrator depending on the authentication settings selected (see
"Authentication" on page 183).
Option Description
Setting up an Address
book
This guide gives you guidelines for the address book.
• Understanding the address screen 121
• Using the control panel 123
• Using SyncThru™ Web Service 128
Understanding the address screen | 121
Understanding the address screen
The Address book app allows you to access and save frequently used addresses in the machine.
You can save fax numbers and email addresses as well as addresses for SMB, FTP, and and so on.
Tap Address book from the home screen or Apps. If you see a different screen, tap to go
to the home display screen.
Tap (Help) from home screen or (quick menu) and then select on any option
you want to know about.
Address screen
You can save frequently used fax numbers, e-mail addresses, SMB server addresses, FTP server
addresses in your machine.
To use some features, you may need to log-in.(see "Log-in" on page 175).
Contacts: Displays the name and contact information of contacts saved in the address book
(see "Storing individual addresses" on page 123).
Favorites: Displays the name and contact information of contacts marked as favorites in the
address book.
Understanding the address screen | 122
Tab icon for addresses you use often and want to find easily.
Groups: Lists the groups registered in the address book and the users registered to those
groups (see "Storing address groups" on page 125).
You cannot add a group as a member of another group.
Command keys
To use some features, you may need to log-in as an administrator (see "Log-in" on page
175).
Sub menu (Action overflow)
To use some features, you may need to log-in as an administrator (see "Log-in" on page
175).
Search: Searches the names and contact information in the Contacts list.
Delete Contacts: Delete the contacts you set.
Import: You can import the address book saved from another MFP or same MFP.
Export: You can export the address book saved from another MFP or same MFP.
Button Name Description
Quick Menu Show the quick menu.
Search Search for a desired address.
Add Add a contact, favorites, or group.
Edit Select the address you want to edit and tap this button.
My Program Shows list of added programs.
Sub menu (Action
overflow)
Open the sub menu.
Using the control panel | 123
Using the control panel
Storing individual addresses
1 Tap Address book > Tap from the home screen or Apps .
2 Tap the Name field, and then enter the name of the recipient. To make the address available
to everyone, tap (private) to change it to (public).
• Admin (Grants authorities to users.)
- Administrators can add, delete, and edit public addresses but cannot add or edit
private addresses.
- Administrators may only read and delete private addresses added by users.
• User (Assigned an authority by the administrator.)
- Users can add and edit public and private addresses depending on the authorities
assigned to them by the administrator.
- If a user adds a private address, then only the user and administrator can access
that address.
• General User (Unassigned an authority by the administrator.)
- General User can add, delete, and edit public addresses but cannot add or edit
private addresses.
3 Speed No. is automatically assigned with the first number of unused numbers.
Use the Speed No. on the numeric keypad to select an address quickly.
4 Tap the Email input boxes to enter that information of the recipient.
5 Tap the Fax input box and enter the fax number using the numeric keypad on the control
panel. You can enter only numbers, area code first if necessary.
Inserting a pause: On some telephone systems, you must dial an access code (like 9)
and listen for a second dial tone before dialing the number. In such cases, you can
insert a pause in the telephone number.
6 Tap the Internet Fax input boxes to enter that information of the recipient.
Using the control panel | 124
7 Tap the SMB, and/or FTP input boxes to enter that information of the recipient.
• Select the login method in Login Type:
- Auto Login : Automatically logs in using the ID and password you provide.
- Anonymous : Logs in as an anonymous user if the server allows it.
- Login Prompt : Asks you to enter your ID and password every time that you
connect.
- Single Sign On : Logs in using the ID and passwords you used to log in to the
machine. Use this if you use the same ID and password on both the server and the
machine.
If the SMB server you entered is not registered to any domain, leave it blank or enter
the computer name of the SMB server.
User Login Name: Select this option to create a sub-folder in the file folder you
selected. The sub-folder is named according to the user name entered in step 5. If
the file folder already has a sub-folder of the same name, the machine does not
create a sub-folder.
Folder Creation Cycle: Set the cycle of sub-folder creation. The machine creates
sub-folders according to this option. If the file folder already has a sub-folder of the
same name, the machine does not create a sub-folder.
- Every Day: A sub-folder is created every day using the name format
“YYYY-MM-DD” (for example, “2016-01-01”).
- Every Month: A sub-folder is created every month using the name format
“YYYY-MM” (for example, “2016-01”).
- Every Year: A sub-folder is created every year using the name format “YYYY” (for
example, “2016”).
Create Group For Multiple Files: If you select this option and scan multiple files, the
machine creates a sub-folder in the file folder you selected to store all sent files.
If all folder creation options are enabled at the same time, sent files are stored as
below.
- When a single scanned file is sent:
\\folder\user name\2016-01-01\DOC.jpg
- When multiple scanned files are sent:
\\folder\user name\2016-01-01\DOCJPEG\DOC000.jpg
\\folder\user name\2016-01-01\DOCJPEG\DOC001.jpg
\\folder\user name\2016-01-01\DOCJPEG\DOC002.jpg
8 Tap Done to save the information.
Using the control panel | 125
Editing Individual address
When editing a contact, tap a field to change or delete the information, or add additional fields to
the contact’s information.
1 Tap Address book > Contacts from the home screen or Apps.
2 Tap the name of individual you want to edit. Tap .
If you want to delete an individual address, check the box of that address and tap
Sub menu (Action overflow) > Delete Contacts.
3 Tap the input field for the information you want to change. The pop-up keyboard appears,
allowing you to type in the field.
4 Tap Done to save the information.
Storing address groups
1 Tap Address book > Groups > from the home screen or Apps.
2 Tap the Name input field and enter a name for the group.
3 Tap +Add Contact and check the boxes for any addresses you want include in the group. Tap
Done when you are finished.
To search for a contact, tap the search field in the +Add Contact screen. Enter the first
few letters of a contact’s name or tap icon to show all contacts. In the list that
appears, check the boxes for the contacts you want to add and tap Done.
4 Tap Done to save the information.
Editing address groups
1 Tap Address book > Groups from the home screen or Apps.
2 Tap the name of group you want to edit and tap .
Using the control panel | 126
If you want to delete an address group, check the box for the group you want to delete
and tap .
3 Tap the group name input field to change the name of the group.
4 Tap +Add contact and check the boxes for any addresses you want include in the group. Tap
Done when you are finished.
To search for a contact, tap the search field in the +Add contact screen. Enter the first
few letters of a contact’s name or tap the icon to show all contacts. In the list that
appears, check the boxes for the contacts you want to add and tap Done.
5 To remove an individual address from the group, check the box for that address and tap .
6 Tap Done to save the information.
Searching for address book entries
You can search the addresses that are currently stored in the address book.
1 Tap Address book > Contacts or Groupsfrom the home screen or Apps.
2 Tap input field and enter a name or part of a name to search for.
3 The machine then displays the search results.
Deleting address book entries
You can delete addresses currently stored in the address book.
To use this feature, you may need to log-in as an administrator (see "Log-in" on page 175).
1 Tap Address book > Contacts or Groupson the home screen or Apps.
2 Check the boxes of the addresses you want to delete and tap tap Sub menu (Action
overflow) > Delete Contacts.
Using the control panel | 127
3 Tap OK in the confirmation window and the selected addresses are deleted from the address
book.
Viewing the address book
You can browse for individual addresses and groups.
1 Tap Address book from the home screen or Apps.
2 Tap an address to see more information about it.
You can tap when viewing an address to edit its information directly, or when
viewing an address group to see a list of that group’s members.
Using SyncThru™ Web Service | 128
Using SyncThru™ Web Service
You can store addresses conveniently from the networked computer using SyncThru™ Web
Service. Only for users registered on the machine can store addresses through login SyncThru™
Web Service.
Storing on your local machine
This method allows you to store addresses on your machine’s memory. You can add addresses
and group them into categories.
Adding individual addresses to the address book
1 Access the SyncThru™ Web Service (see "Logging into SyncThru™ Web Service" on page
199).
2 Select Address Book tab > Add.
3 Enter a name to add and select a speed dial number in the General field.
• A Speed Dial Number allows you to enter that number on the numeric keypad to dial
that number quickly.
• Check Favorites for addresses you use often. You can easily find them in search
results.
4 Enter an email address in the Email field.
5 Enter a fax number in the Fax field.
6 Check the enable SMB box in SMB and enter the SMB information.
7 Enter a server IP address or a host name in SMB Server Address.
8 Enter a server port number in SMB Server Port.
9 Select the login method in Login Type.
Auto Login : Automatically logs in using the ID and password you provide.
Anonymous : Logs in as an anonymous user if the server allows it. If you select this login
method, go to the step 18
Using SyncThru™ Web Service | 129
Login Prompt : Asks you to enter your ID and password every time that you connect. If you
select this login method, go to step 18.
Single Sign On : Logs in using the ID and passwords you used to log in to the machine. Use
this if you use the same ID and password on both the server and the machine. If you select
this login method, go to step 18.
10Enter a login name in the Login ID field.
11 Enter a password in Password and re-enter the same password in Confirm Password.
12 Enter a domain name in Domain.
If the SMB server you entered is not registered to a domain, leave this field blank or
enter the computer name of the SMB server.
13 Enter the scan file folder to store scanned images in Path.
Example: /shared_Folder/
14 Select Scan folder creating policy options:
Create new folder using login name: If you select this option, the machine creates a
sub-folder in the file folder you selected. The sub-folder is named using the user name
from step 15.
If the file folder already has a sub-folder of the same name, the machine does not
create a sub-folder.
Create new folder every: You can set the cycle of sub-folder creation. The machine create
a sub-folder according to these options:
If the file folder already has a sub-folder of the same name, the machine does not
create a sub-folder.
- Every Day: A sub-folder is created every day using the name format “YYYY-MM-DD” (for
example, “2016-01-01”).
- Every Month: A sub-folder is created every month using the name format “YYYY-MM”
(for example, “2016-01”).
- Every Year: A sub-folder is created every year using the name format “YYYY” (for
example, “2016”).
Create new folder only if scan output consist of several files: If you select this option and
multiple files are scanned, the machine creates sub-folders in the file folder you selected
and the sent files are stored in the sub-folder.
Using SyncThru™ Web Service | 130
If all folder creation options are enabled at the same time, sent files are stored as
below.
• When a single scanned file is sent:
\\folder\user name\2016-01-01\DOC.jpg
• When multiple scanned files are sent:
\\folder\user name\2016-01-01\DOCJPEG\DOC000.jpg
\\folder\user name\2016-01-01\DOCJPEG\DOC001.jpg
\\folder\user name\2016-01-01\DOCJPEG\DOC002.jpg
15 Select the policy for generating file names in Filing Policy. If the server already contains a
file of the same name, the file is processed based on the following options.
Change Name: The sent file is automatically saved as a pre-defined file name.
Cancel: Do not save the sent file.
Overwrite: Overwrite the existing file with the newly sent file.
16 Enter the file name in File Name to store on the server.
17 To verify that the process is working with your settings, click Test.
18Enter FTP server information as you did for SMB.
19 Select Apply.
Select Undo to delete the information you entered. If you click Cancel, the Add window
is closed.
Editing individual addresses in Address Book
1 Access the SyncThru™ Web Service (see "Logging into SyncThru™ Web Service" on page
199).
2 Select Address Book tab.
3 Check the box for the address you want to edit and click Edit.
4 Change the address information.
5 Select Apply.
Using SyncThru™ Web Service | 131
Select Undo to reverse any changes you entered. Click Cancel to close the window
without saving any changes.
Deleting individual addresses in Address Book
1 Access the SyncThru™ Web Service (see "Logging into SyncThru™ Web Service" on page
199).
2 Select Address Book tab.
3 Check the boxes of the addresses you want to delete and click Delete.
Check the box at the top of the column to select all addresses.
Click OK in the confirmation window to delete the addresses.
Searching for individual addresses in the address book
1 Access the SyncThru™ Web Service (see "Logging into SyncThru™ Web Service" on page
199).
2 Select Address Book tab.
You can sort the address book by clicking each column header. For example, click
Speed No. to sort the addresses by speed dial number. Click a column a second time
to reverse the sort order.
3 Enter a name or part of a name to search for in the search field.
You can search for addresses in a specific category such as Fax Number, Email, SMB,
and so on.
For example, if you want to find a fax number, click the drop down list next to and
select Fax Number.
4 Select and the search results appear.
You can see the addresses in a specific category such as Fax Number, Email, SMB, etc.
For example, if you want to see the addresses which are included fax number, click
drop down list below LDAP and select Fax Number.
Using SyncThru™ Web Service | 132
Exporting Address Book
To use this feature, you may need to log-in as an administrator (see "Log-in" on page 175).
You can import the address book saved in the machine to the computer in CSV file format using
SyncThru™ Web Service.
1 Access the SyncThru™ Web Service (see "Logging into SyncThru™ Web Service" on page
199).
2 Select Address Book tab > Individual.
3 Select Export from the Task drop down list.
4 Select the option you want and click the Export button.
Then the address book file stored in your computer.
Encryption
- Encrypt only credential data : Encrypts only passwords.
- Encrypt whole data : Encrypts all the data.
Key, Confirm Key: Requires you to enter a key when importing the address book. If you
enter the wrong key when importing the address book, then the import process stops.
Importing Address Book
You can edit the exported address book in CSV file format and send it back to the machine by
exporting to the machine from your computer.
Followings are the conditions for editing the imported CSV file.
• Password-protected or security enhanced CSV file cannot be edited.
• The CSV file needs to be saved in Notepad program in UTF-8.
• Do not change the first row (model name, version, title field).
• Use comma(,) as a separator.
• When importing the address book data from a computer to the machine, the existing
address book data is deleted.
• Make sure to enter valid data. If you enter invalid data, unexpected errors can occur.
Refer to the below rules for entering valid data.
- Speed dial: A number is required for each address. You cannot use duplicate numbers.
Only numbers are allowed.
- User Name: This field is not mandatory. You can enter up to 64 byte in UTF-8. <, “, >, \,
/ in not allowed.
- Fax: This field is not mandatory. You can enter up to 40 byte using numbers (0-9) and
special characters (#,*,-).
Using SyncThru™ Web Service | 133
- Email: This field is not mandatory. You can enter up to 128 byte in email address
format (ex: printer@domain.com)
1 Access the SyncThru™ Web Service (see "Logging into SyncThru™ Web Service" on page
199).
2 Select Address Book tab > Individual.
3 Select Browse, and select the stored file.
4 Select Overwrite or Append in Options.
5 Enter the key you set when you exported the address book.
6 Select Browse, and select the stored file.
7 Select Import > OK.
Grouping addresses in address book
1 Access the SyncThru™ Web Service (see "Logging into SyncThru™ Web Service" on page
199).
2 Select Address Book tab > Groups > Add Group.
3 Enter the group name to be added in Group Name.
4 Select Add individual(s) after this group is created > Apply.
If you do not want to add individual addresses to the group address you made, skip this
step. You can add individual addresses next time pressing Group Details.
5 Check the addresses you want to add to Group Address Book in Individual Address Book.
6 Select the arrow in the middle. The selected addresses are added in Group Address Book.
7 Select Apply.
Using SyncThru™ Web Service | 134
Editing address groups in Address Book
1 Access the SyncThru™ Web Service (see "Logging into SyncThru™ Web Service" on page
199).
2 Select Address Book tab > Groups.
3 Check the group address you want to edit and press Edit Group.
4 Change the group address information.
5 Select Apply.
Press Undo to delete the information you entered. If you press Cancel, the Edit window
closes.
Deleting address groups from Address Book
1 Access the SyncThru™ Web Service (see "Logging into SyncThru™ Web Service" on page
199).
2 Select Address Book tab > Groups.
3 Check the box for the groups you want to delete.
4 Select Delete Group.
Select OK when the confirmation window appears.
Checking address groups
You can see information about address groups and add or delete individual addresses from the
group in the Group Details window.
1 Access the SyncThru™ Web Service (see "Logging into SyncThru™ Web Service" on page
199).
2 Select Address Book tab > Groups.
3 Select the group address you want to see and click Group Details.
Using SyncThru™ Web Service | 135
• You can add individual addresses directly. Check the addresses you want to add to
Group Address Book in Individual Address Book.
• You can delete individual addresses directly. Check the addresses you want to
delete and press Delete in Group Address Book.
Using a
Network-Connected
Machine
This chapter gives you step-by-step instructions for setting up the network environment before
using the machine. You need to be familiar with the terms used for setting up the network
environment. Refer to the glossary for terms you do not understand ("Glossary" on page 301).
• Network environment 137
• Accessing network setup 138
• Network settings (configuring TCP/IP) 139
• Printing a network configuration report142
• Set Protocols 143
• Network filtering settings 144
• Wireless network setup (Optional) 145
Network environment | 137
Network environment
You can use network after connecting network cable to a corresponding port on your machine.
You need to set up the network protocols on the machine to use it as your network machine. You
can set up the basic network settings through the machine's control panel.
The following table shows the network environments supported by the machine:
Item Specification
Network interface
• Ethernet 10/100/1000 Base-TX Wired Lan
• Network Interface 802.11b/g/n support over 2.4 GHz wireless LAN
and NFC (Near Field Communication)
a
• Network Interface 802.11b/g/n/ac support over 2.4 GHz/5 GHz
wireless LAN and NFC (Near Field Communication) and BLE
(Bluetooth Low Energy)
a
a.Optional device. See "Available accessories" on page 229.
Network operating
system
• Windows® XP Service Pack 3, Windows Server® 2003, Windows
Vista®, Windows® 7, Windows 8, Windows Server® 2008 R2,
Windows 10, Windows Server® 2016
• Novell NetWare 5.x ~ 6.x
Network protocols
• TCP/IPv4
• TCP/IPv6 (DHCP, DNS, RAW, LPR, SNMPv 1/2/3, HTTP, IPSec)
• DHCP, BOOTP
• DNS, DDNS, WINS, Bonjour, SLP, UPnP(SSDP)
• Standard TCP/IP Printing (RAW), LPR, IPP, FTP Printing, ThinPrint
• FTP(S), SMB, SMTP(S), WSD, I-Fax
• LDAP(S), Kerberos, 802.1x
• SNMPv 1/2/3, HTTP(S), IPSec
Accessing network setup | 138
Accessing network setup
1 Make sure that the Ethernet cable is connected to your machine.
2 Tap Settings > Network Settings > Ethernetfrom the home screen or Apps.
3 Log-in as an administrator (see "Log-in" on page 175).
Network settings (configuring TCP/IP) | 139
Network settings (configuring TCP/IP)
When you connect your machine to a network, you must first configure the TCP/IP settings for
the machine. The settings shown below are the basic settings required for using your machine as
a network machine. You can set TCP/IP, DNS server, TCP/IPv6, Ethernet, and IP address allocation
methods.
Ethernet
You can set Ethernet settings.
Tap Settings> Network Settings> Ethernet from the home screen or Apps.
You can also use this feature from the SyncThru™ Web Service. Open the Web browser
from your networked computer and type the IP address of your machine (see "Settings
tab" on page 201).
Ethernet Port: You can enable/disable Ethernet port.
Ethernet Speed: Choose the speed rate of Ethernet.
MAC Address: Shows the Mac address of the machine.
TCP/IP Protocol
You can set IPv4 settings.
Tap Settings > Network Settings > Ethernet > TCP/IPv4 from the home screen or Apps.
You can also use this feature from the SyncThru™ Web Service. Open the Web browser
from your networked computer and type the IP address of your machine (see "Settings
tab" on page 201).
IP Setting
You can choose the method for allocating IP addresses.
Static: Select to enter IP address/Subnet Mask/ Gateway Address manually.
BOOTP: IP address/Subnet Mask/ Gateway Address are automatically allocated by the BOOTP
Server.
DHCP: IP address/Subnet Mask/ Gateway Address are automatically allocated by the DHCP
Server.
DNS Configuration
You can configure the DNS server.
Host Name: Enter the host name. You can enter up to 63 characters. Default name is “SEC[MAC
address]”.
Domain Name: Enter the domain name. You can enter up to 128 characters.
Network settings (configuring TCP/IP) | 140
Primary DNS Server: Enter the address of the DNS server you want to use primarily.
Secondary DNS Server: Enter the address of the DNS server you want to use as an alternative.
Dynamic DNS Registration: If you want to use, check the checkbox(es) of dynamic DNS
registration. If this option is checked, the machine registers its host name and domain name to
configured DNS servers dynamically. Also, if this option is checked and DHCP is selected, DHCP
FQDN options are automatically disabled.
WINS (Windows Internet Name Service)
You can configure the WINS server. WINS is used in the Windows operating system. Select this
option.
Display IP address / Host Name
You can set the machine to display the IP address or host name on the Notification Bar. If you
select this option the IP address or host name will show on the Notification Bar.
TCP/IPv6
You can set the IPv6 settings.
Tap Settings > Network Settings > Ethernet > TCP/IPv6 from the home screen or Apps.
You can also use this feature from the SyncThru™ Web Service. Open the Web browser
from your networked computer and type the IP address of your machine (see "Settings
tab" on page 201).
Protocol: Tap to use IPv6 protocol in the system. Reboot the machine to apply the change.
IPv6 Address: Shows the IPv6 address types.
- Link-local Address: This is an IPv6 address starting with a prefix value FE80. This address has
local link scope and is automatically generated.
- Stateless Address: This is an IPv6 address which is formed by router advertised prefix and
interface identifier. On a interface like Ethernet, interface identifier is usually derived from
the Mac address of the machine. The advertised prefix depends on the router configurations.
More than one address may be configured for the router advertisement, but only one will
be displayed in the display screen.
- Stateful Address: This is an IPv6 address which is acquired by a DHCPv6 server.
- Manual Address: This is an IPv6 address which an administrator can configure manually.
DHCPv6 Configuration: Select the DHCPv6 configuration you want to us.
- Use DHCP as directed by a router: DHCPv6 is enabled when a router advertises to use
DHCPv6.
- Always Enable DHCP: Regardless of router advertisement, use DHCPv6 to acquire an IPv6
address.
- Never use DHCP: Disables DHCPv6.
DHCPv6 Unique Identifier: Clients use an DHCP Unique Identifier (DUID) to obtain an IP address
from the DHCPv6 server. The server looks up the DUID in its database and delivers the
appropriate configuration data (address, lease times, DNS servers, etc.) to the client.
Network settings (configuring TCP/IP) | 141
DHCPv6 Identity Association Identifier: Each interface has an ID, called an Identity Association
Identifier (IAID), that binds the interface to one or more IP addresses. Each allocation in the
DHCPv6 server includes a DUID and an IAID pair.
802.1x
You can enable 802.1x authentication, which is a port-based authentication. If this authentication
is enabled, the machine is not allowed to access through the protected side of the network until
the machine is authorized. Use this feature to protect your network.
Tap Settings > Network Settings > Ethernet > 802.1x from the home screen or Apps.
802.1x: Check to enable this feature.
802.1x Authentication Method: Select the authentication algorithm to use.
- EAP-MD5: Offers minimal security. The MD5 hash function is vulnerable to dictionary attacks,
and does not support key generation.
- PEAP: Recommended for users who only intend to use Microsoft desktop clients and servers.
For other users, it is not recommended.
- EAP-MS-CHAPv2: MS-CHAPv2 provides two-way authentication between peers by
combining a peer Challenge message with the Response packet and an authenticator
Response message on the Success packet.
- TLS: This is used to provide secure communication over the Internet between a client and
server.
Printing a network configuration report | 142
Printing a network configuration report
You can identify the network information connected to your machine by printing a network
configuration report.
Tap Settings > Management > Report > Network Configuration from the home screen or Apps
then tap Print.
You can also use this feature from the SyncThru™ Web Service. Open the Web browser
from your networked computer and type the IP address of your machine (see "Information
tab" on page 200).
Set Protocols | 143
Set Protocols
You can enable/disable the protocols (Standard TCP/IP, LPR, IPP, FTP, POP3, ThinPrint, CIFS,
SNTP (Simple Network Time Protocol), SLP (Service Location Protocol), Telnet, SNMP V1/V2
(Simple Network Management Protocol), SNMPv3, UPnP(SSDP)Protocol, and mDNS (Multicast
Domain Name System), SetIP, IPv6, and HTTP.
Tap Settings > Network Settings> Network Protocol from the home screen or Apps.
You can also use this feature from the SyncThru™ Web Service. Open the Web browser
from your networked computer and type the IP address of your machine (see "Settings
tab" on page 201).
Network filtering settings | 144
Network filtering settings
You can set your machine to prevent unlisted IP or MAC addresses from connecting to the
machine.
You can set general network filtering settings.
Tap Settings > Network Settings > Network Security > Network Filteringfrom the home screen
or App.
You can also use this feature from the SyncThru™ Web Service. Open the Web browser
from your networked computer and type the IP address of your machine (see "Settings
tab" on page 201).
MAC Filtering: Disable MAC filtering.
IPv4 Filtering: Disable IPv4 filtering.
IPv6 Filtering: Disable IPv6 filtering.
Wireless network setup (Optional) | 145
Wireless network setup (Optional)
• Check the option lists and contact the purchasing point to order (see "Available
accessories" on page 229). After installing the Wi-Fi/NFC kit or Wi-Fi/NFC/BLE
kit(Optional), set the machine to use this feature.
• Make sure your machine supports wireless networking. Wireless networking may not
be available depending on the model (see "Features by model" on page 6).
For errors that occur during the wireless settings, refer to the troubleshooting chapter
(see "Wireless network problems" on page 279).
Wireless networks require higher security, so when an access point is first set up, a network name
(SSID), the type of security used, and a Network Password are created for the network. Ask your
network administrator about this information before proceeding with the machine installation.
Wireless network setup (Optional) | 146
Introducing wireless set up methods
You can set wireless settings either from the machine or the computer. Choose the setting
method from the below table.
Some wireless network installation types may not be available depending on the model
or country.
• It is strongly recommended that you set the password on Access Points. If you do not
set the password on Access Points, they might be exposed to illegal access from
unknown machines including PCs, smart phones and printers. Refer to the Access Point
user' guide for password settings.
Using the WPS menu
If your machine and access point (or wireless router) support Wi-Fi Protected Setup™ (WPS), then
you can easily configure the wireless network settings through the WPS menu without the need
for a computer.
• If you want to use the wireless network using the infrastructure mode, make sure that
the network cable is disconnected from the machine. Using the WPS(PBC) or entering
the PIN from the computer to connect to the access point (or wireless router) varies
depending on the access point (or wireless router) you are using. Refer to the user guide
of the access point (or wireless router) you are using.
• When using the WPS to set the wireless network, security settings may change. To
prevent this, lock the WPS option for the current wireless security settings. The option
name may differ depending on the access point (or wireless router) you are using.
Items to prepare
• Check if the access point (or wireless router) supports Wi-Fi Protected Setup™ (WPS).
• Check if your machine supports Wi-Fi Protected Setup™ (WPS).
• Networked computer (PIN mode only)
Set up method Connecting method Description & Reference
With Access
Point
From the computer See "Using a network cable" on page 150.
From the machine’s
control panel
See "Using the WPS menu" on page 146.
See "Using the Wi-Fi Networks" on page 150.
Wi-Fi Direct setup
See "Setting the Wi-Fi Direct for mobile printing" on
page 152.
Wireless network setup (Optional) | 147
Choosing your type
There are two methods available to connect your machine to a wireless network.
• The Push Button Configuration (PBC)method allows you to connect your machine to a wireless
network by pressing both the WPS Settings menu on the control panel of your machine and the
WPS (PBC) button on a Wi-Fi Protected Setup™ WPS-enabled access point (or wireless router)
respectively.
• The Personal Identification Number (PIN)method helps you connect your machine to a
wireless network by entering the supplied PIN information on a Wi-Fi Protected Setup™
WPS-enabled access point (or wireless router).
Wireless network setup (Optional) | 148
Connecting WPS
Factory default in your machine is PBCmode, which is recommended for a typical wireless
network environment.
Connecting in PBC mode
Type in the ID and Password.
Use the same login ID, Password, Domain as when logging in from the machine (see
"Log-in" on page 175). If you want to create a new user or change the password, see "Secu-
rity tab" on page 202.
1 Tap Settings > Network Settings > Wi-Fi from the home screen or Apps.
2 Tap WPS Settings > Connect via PBC.
3 Tap Start.
4 Tap the WPS (PBC) button on the access point (or wireless router).
5 Follow the instruction on the display screen.
The messages are displayed on the display screen
Connecting in PIN mode
Type in the ID and Password.
Use the same login ID, Password, Domain as when logging in from the machine (see
"Log-in" on page 175). If you want to create a new user or change the password, see "Secu-
rity tab" on page 202.
1 Tap Settings > Network Settings > Wi-Fi from the home screen or Apps.
2 Tap WPS Settings > Connect via PIN.
3 Tap Start.
4 The eight-digit PIN appears on the display.
You need to enter the eight-digit PIN within two minutes on the computer that is connected
to the access point (or wireless router).
Wireless network setup (Optional) | 149
You need to enter the PIN from the computer to connect to the access point (or wire-
less router) varies depending on the access point (or wireless router) you are using.
Refer to the user guide of the access point (or wireless router) you are using.
5 Follow the instruction on the display screen.
The messages are displayed on the display screen
Wireless network setup (Optional) | 150
Using the Wi-Fi Networks
Before starting, you will need to know the network name (SSID) of your wireless network and the
network key if it is encrypted. This information was set when the access point (or wireless router)
was installed. If you do not know about your wireless environment, please ask the person who set
up your network.
Type in the ID and Password.
Use the same login ID, Password, Domain as when logging in from the machine (see
"Log-in" on page 175). If you want to create a new user or change the password, see "Secu-
rity tab" on page 202.
1 Tap Settings > Network Settings > Wi-Fi from the home screen or Apps.
2 Tap Wi-Fi Settings.
3 The machine will display a list of available networks from which to choose. After a network
is chosen then printer will prompt for the corresponding security key.
4 Select the Wi-Fi network option you want.
Using a network cable
See your network administrator, or the person that set up your wireless network, for infor-
mation about your network configuration.
Your machine is a network compatible machine. To enable your machine to work with your
network, you will need to perform some configuration procedures.
Items to prepare
• Access point
• Network-connected computer
• A machine installed with a wireless network interface
• Network cable
Wireless network setup (Optional) | 151
IP setting using SetIP Program (Windows)
This program is used to manually set the network IP address of your machine using its MAC
address to communicate with the machine. The MAC address is the hardware serial number of
the network interface and can be found in the Network Configuration Report (see "Printing a
network configuration report" on page 142).
Configuring the machine’s wireless network
Before starting, you will need to know the network name (SSID) of your wireless network and the
network key if it is encrypted. This information was set when the access point (or wireless router)
was installed. If you do not know about your wireless environment, please ask the person who set
up your network.
To configure wireless parameters, you can use SyncThru™ Web Service.
Using SyncThru™ Web Service
Before starting wireless parameter configuration, check the cable connection status.
1 Access the SyncThru™ Web Service (see "Logging into SyncThru™ Web Service" on page
199).
2 Select Network Settings tab.
3 Select Wi-Fi > Wizard.
4 Select the one Network Name(SSID) in the list.
5 Select Next.
If the wireless security setting window appears, enter the registered password (network
password) and select Next.
6 The confirmation window appears, please check your wireless setup. If the setup is right,
click Apply.
Turning the Wi-Fi network on/off
1 Access the SyncThru™ Web Service (see "Logging into SyncThru™ Web Service" on page
199).
2 Select Network Settings tab > Wi-Fi.
3 You can turn the Wi-Fi network on/off.
Wireless network setup (Optional) | 152
Setting the Wi-Fi Direct for mobile printing
Wi-Fi Direct is a secure and easy-to-use peer-to-peer connection between a Wi-Fi Direct-enabled
printer and mobile device.
With Wi-Fi Direct, you can connect your printer to a Wi-Fi Direct network while concurrently
connecting to an access point. You can also use a wired network and a Wi-Fi Direct network
simultaneously so multiple users can access and print documents both from Wi-Fi Direct and
from a wired network.
• You cannot connect your mobile device to the internet through the printer’s Wi-Fi
Direct.
• The supported protocol list may differ from your model, Wi-Fi Direct networks do NOT
support IPv6, network filtering, IPSec, WINS, and SLP services.
Setting up Wi-Fi Direct
You can enable Wi-Fi Direct feature by one of the following methods.
From the machine
Type in the ID and Password.
Use the same login ID, Password, Domain as when logging in from the machine (see
"Log-in" on page 175). If you want to create a new user or change the password, see "Secu-
rity tab" on page 202.
1 Tap Settings > Network Settings > Wi-Fi from the home screen or Apps.
2 Tap Wi-Fi Direct.
3 Enable Wi-Fi Direct.
From the network-connected computer
If your printer is using a network cable or a wireless access point, you can enable and configure
Wi-Fi Direct from SyncThru™ Web Service.
1 Access the SyncThru™ Web Service (see "Logging into SyncThru™ Web Service" on page
199).
2 Select Settings tab > Network Settings > Wi-Fi > Wi-Fi Direct™.
3 Enable Wi-Fi Direct™ and set other options.
Wireless network setup (Optional) | 153
Setting up the mobile device
After setting up Wi-Fi Direct from the printer, refer to the user manual of the mobile device you
are using to set its Wi-Fi Direct.
• After setting up Wi-Fi Direct, you need to download the mobile printing application (For
example: Samsung Mobile printer) to print from your smartphone.
When you have found the printer you want to connect to from your mobile device, select
the printer and the printer's LED will blink. Press the WPS button on the printer and it
will be connected to your mobile device.
If your mobile device does not support Wi-Fi Direct, you need to enter the "Network Key"
of a printer instead of pushing the WPS button.
Using the Machine via
Mobile Device
This chapter gives you step-by-step instructions for setting up the mobile device before using the
machine. Check that Wi-Fi enabled features are on your mobile device and Wi-Fi feature is enabled
on your printer ("Using a Network-Connected Machine" on page 136).
• Using the BLE/NFC feature (Optional) 155
• Supported Mobile Apps 166
• Mopria™ 167
• AirPrint 169
• Google Cloud Print™ 171
Using the BLE/NFC feature (Optional) | 155
Using the BLE/NFC feature (Optional)
If you want to add BLE/NFC feature to the machine, check the option lists and contact the
purchasing point to order (see "Available accessories" on page 229). After installing the
Wi-Fi/NFC kit or Wi-Fi/NFC/BLE kit(Optional), set the machine to use this feature.
The BLE (Bluetooth Low Energy) and NFC (Near Field Communication) printer allows you to
directly print/scan/fax from your mobile device just by holding your mobile device over the NFC
tag on BLE/NFC Kit (Wireless LAN Option). It does not require installing print driver or connecting
to an access point. You just need NFC supported mobile device. In order to use this feature, mobile
apps needs to be installed on your mobile device.
• Depending on the material of the mobile device cover, NFC recognition may not work
properly.
• Depending on the mobile device you are using, the transmission speed may differ.
• This feature is available only for the model with a NFC tag (see "Machine overview" on
page 15).
• Using a cover or a battery other than the ones that came with the mobile device, or a
metal cover/sticker can block NFC.
• If NFC devices keep failing to communicate,
- Remove the case or cover from the mobile device, then try again.
- Reinstall the battery from the mobile device, then try again.
Requirements
• NFC, Bluetooth and Wi-Fi Direct enabled, supported mobile apps installed mobile device with
Android 4.0 or higher(Android 4.3 or higher for BLE)
Only Android OS 4.1 or higher will automatically enable the Wi-Fi Direct feature on your
mobile device when you enable the NFC feature. We recommend you to upgrade your
mobile device to Android OS 4.1 or higher to use the NFC feature.
Wi-Fi Direct feature enabled printer (see "Setting the Wi-Fi Direct for mobile printing" on page
152).
Using the BLE/NFC feature (Optional) | 156
Related Apps
There are some apps that can be used with the NFC feature. The apps can be downloaded from
the Google Play Store.
Samsung Mobile Print: Enables users to print, scan(Only users with the machine supports
scan), or fax(Only users with the machine supports fax) photos, documents, and web pages
directly from your smartphone or tablet (see "Using the Samsung Mobile Print App" on page
162).
Samsung Mobile Print Control: Helps users to get an authentication easily. This app provides
one way of getting a user authentication using your mobile device (see "Using the Samsung
Mobile Print Control App" on page 156).
Samsung Mobile Print Manager: Enables users to use cloning and wireless setup features
using your mobile device (see "Using the Samsung Mobile Print Manager App" on page 158).
Using the Samsung Mobile Print Control App
You can use it to get an authentication/registration from the Samsung Mobile Print Control app.
Authentication from the mobile device
1 Check that Bluetooth, NFC enabled features are on your mobile device.
2 Open Samsung Mobile Print Control app.
If you do not have Samsung Mobile Print Control installed on your cellphone, go to the
application store (Samsung Apps, Play Store, App Store) on your mobile device, and
just search for download the app and try again.
3 Select how user would like to authenticate by using NFC or BLE.
4 Select login method.
5 Type in the ID and Password.
Use the same admin ID, Password as when logging in from the machine (see "Log-in" on page
175).
If you want to create a new user or change the password, see "Security tab" on page
202.
6 Tag your mobile device (usually located on the back of the mobile device) over the NFC tag
( ) on your printer.
For BLE (Bluetooth Low Energy), approach to machine.
Using the BLE/NFC feature (Optional) | 157
Wait few seconds for the mobile device to connect to the printer.
For some mobile devices, NFC tag might not be located at the back of the mobile
device. Check the location of the NFC antenna on your mobile device before tagging.
Registration from the mobile device
1 Check that Bluetooth, NFC enabled features are on your mobile device.
2 Open Samsung Mobile Print Control app.
If you do not have Samsung Mobile Print Control installed on your cellphone, go to the
application store (Samsung Apps, Play Store, App Store) on your mobile device, and
just search for download the app and try again.
3 Press the icon on the Samsung Mobile Print Control screen.
4 Select how user would like to authenticate by using NFC or BLE.
5 Select login method.
6 Type in the ID , Password, Domain, and Passcode, then click OK.
Use the same admin ID, Password, Domain as when logging in from the machine (see
"Log-in" on page 175).
If you want to create a new user or change the password, see "Security tab" on page
202.
Using the BLE/NFC feature (Optional) | 158
7 Tag your mobile device (usually located on the back of the mobile device) over the NFC tag
( ) on your printer.
For BLE (Bluetooth Low Energy), approach to machine.
Wait few seconds for the mobile device to connect to the printer.
For some mobile devices, NFC tag might not be located at the back of the mobile
device. Check the location of the NFC antenna on your mobile device before tagging.
8 Registration complete message appears on the printer’s touch screen.
Using the Samsung Mobile Print Manager App
If you have more than one printer and need to set the same settings on each printer, you can
easily do it using the Samsung Mobile Print Manager app. Touch your cellphone on the NFC tag
on your printer to copy the settings and tap on the printer you want to set the setting.
When exporting the data, you can save more than one data. When importing the data, you
can select the data from the list and import.
Exporting(Copying the setting to your mobile device)
1 Check that NFC and Wi-Fi Direct enabled features are on your mobile device and Wi-Fi Direct
feature is enabled on your printer.
2 Open Samsung Mobile Print Manager from your mobile device.
Using the BLE/NFC feature (Optional) | 159
If you do not have Samsung Mobile Print Manager installed on your cellphone, go to
the application store (Samsung Apps, Play Store) on your mobile device, and just
search for download the app and try again.
3 Press Export.
4 Type in the ID and Password.
Use the same admin ID, Password as when logging in from the machine (see "Log-in" on page
175).
If you want to create a new user or change the password, see "Security tab" on page
202.
5 Tag your mobile device (usually located on the back of the mobile device) over the NFC tag
( ) on your printer.
Wait few seconds for the mobile device to connect to the printer.
• For some mobile devices, NFC tag might not be located at the back of the mobile
device. Check the location of the NFC antenna on your mobile device before tagging.
• While cloning, the machine is locked.
6 Select the settings you want to apply and press OK.
7 Follow the instruction on the mobile device’s screen.
Using the BLE/NFC feature (Optional) | 160
Importing (Applying the settings to the machine)
1 Check that NFC and Wi-Fi Direct enabled features are on your mobile device and Wi-Fi Direct
feature is enabled on your printer.
2 Open Samsung Mobile Print Manager from your mobile device.
If you do not have Samsung Mobile Print Manager installed on your cellphone, go to
the application store (Samsung Apps, Play Store) on your mobile device, and just
search for download the app and try again.
3 Press Import.
4 Type in the ID and Password.
Use the same admin ID, Password as when logging in from the machine (see "Log-in" on page
175).
If you want to create a new user or change the password, see "Security tab" on page
202.
5 Select the settings you want to copy.
6 Follow the instruction on the mobile device’s screen.
7 Tag your mobile device (usually located on the back of the mobile device) over the NFC tag
( ) on your printer.
Wait few seconds for the mobile device to connect to the printer.
Using the BLE/NFC feature (Optional) | 161
• For some mobile devices, NFC tag might not be located at the back of the mobile
device. Check the location of the NFC antenna on your mobile device before tagging.
• While cloning, the machine is locked.
• While importing, the machine is rebooted.
Wireless Setup
You can copy wireless setting from your phone to your printer by touching your mobile device on
the NFC tag on your printer.
1 Check that NFC and Wi-Fi Direct enabled features are on your mobile device and Wi-Fi Direct
feature is enabled on your printer.
2 Open Samsung Mobile Print Manager from your mobile device.
If you do not have Samsung Mobile Print Manager installed on your cellphone, go to
the application store (Samsung Apps, Play Store) on your mobile device, and just
search for download the app and try again.
3 When the Samsung Mobile Print Manager screen appears on your mobile device, tap Wi-Fi
Setup.
4 Type in the ID and Password.
Use the same admin ID, Password as when logging in from the machine (see "Log-in" on page
175).
If you want to create a new user or change the password, see "Security tab" on page
202.
5 If the access point (or wireless router) is connected to the connection confirmation window
appears, then click OK.If the access point (or wireless router) not connection, select the
desired access point (or wireless router) and click OK, then click OK.
6 Tag your mobile device (usually located on the back of the mobile device) over the NFC tag
( ) on your printer.
Wait few seconds for the mobile device to connect to the printer.
Using the BLE/NFC feature (Optional) | 162
For some mobile devices, NFC tag might not be located at the back of the mobile
device. Check the location of the NFC antenna on your mobile device before tagging.
7 Follow the instruction on the mobile device’s screen.
Using the Samsung Mobile Print App
Samsung Mobile Print is a free application that enables users to print, scan(Only users with
multi-functional printers), or fax(Only users with multi-functional printers) photos, documents,
and web pages directly from your smartphone or tablet.
Printing
1 Check that NFC and Wi-Fi Direct enabled features are on your mobile device and Wi-Fi Direct
feature is enabled on your printer.
2 Open Samsung Mobile Print app.
If you do not have Samsung Mobile Print installed on your cellphone, go to the appli-
cation store (Samsung Apps, Play Store) on your mobile device, and just search for
download the app and try again.
3 Select print mode.
4 Select the content you want to print.
If necessary, change the print option by pressing the icon.
Using the BLE/NFC feature (Optional) | 163
5 Tag your mobile device (usually located on the back of the mobile device) over the NFC tag
( ) on your printer.
Wait a few seconds for the mobile device to send a job to the printer.
For some mobile devices, NFC tag might not be located at the back of the mobile
device. Check the location of the NFC antenna on your mobile device before tagging.
6 The printer starts printing.
Scanning
1 Check that NFC and Wi-Fi Direct enabled features are on your mobile device and Wi-Fi Direct
feature is enabled on your printer.
2 Open Samsung Mobile Print app.
If you do not have Samsung Mobile Print installed on your cellphone, go to the appli-
cation store (Samsung Apps, Play Store) on your mobile device, and just search for
download the app and try again.
3 Select scan mode.
4 Place a single document face down on the document glass, or load the documents face up
into the document feeder (see "Loading originals" on page 40).
If necessary, change the scan option by pressing the .
Using the BLE/NFC feature (Optional) | 164
5 Tag your mobile device (usually located on the back of the mobile device) over the NFC tag
( ) on your printer.
Wait few seconds for the mobile device to send a job to the printer.
For some mobile devices, NFC tag might not be located at the back of the mobile
device. Check the location of the NFC antenna on your mobile device before tagging.
6 The printer starts scanning the content.
The scanned data is saved on your mobile device.
If you want to continue scanning, follow the instruction on the app screen.
Sending Fax
1 Check that NFC and Wi-Fi Direct enabled features are on your mobile device and Wi-Fi Direct
feature is enabled on your printer.
2 Open Samsung Mobile Print app.
If you do not have Samsung Mobile Print installed on your cellphone, go to the appli-
cation store (Samsung Apps, Play Store) on your mobile device, and just search for
download the app and try again.
3 Select fax mode.
4 Select the content you want to send fax.
Using the BLE/NFC feature (Optional) | 165
If necessary, enter the fax number and change the fax option by pressing the icon.
5 Tag your mobile device (usually located on the back of the mobile device) over the NFC tag
( ) on your printer.
Wait few seconds for the mobile device to send a job to the printer.
For some mobile devices, NFC tag might not be located at the back of the mobile
device. Check the location of the NFC antenna on your mobile device before tagging.
6 The printer starts faxing the content.
Supported Mobile Apps | 166
Supported Mobile Apps
Available Apps
Samsung Mobile Print: Samsung Mobile Print is a free application that enables users to print,
scan(Only users with the machine supports scan), or fax(Only users with the machine supports
fax) photos, documents, and web pages directly from your smartphone or tablet. Samsung
Mobile Print is not only compatible with your Android and iOS smart phones but also with your
iPod Touch and tablet PC. It connects your mobile device to a network connected Samsung
printer or to a wireless printer through a Wi-Fi access point. Installing a new driver or
configuring network settings isn’t necessary – just simply install the Samsung Mobile Print
application, and it will automatically detect compatible Samsung printers. Besides printing
photos, web pages, and PDFs, scanning is also supported. If you have a Samsung multifunction,
scan any document into a JPG, PDF, or PNG format for quick and easy viewing on your mobile
device (see "Using the Samsung Mobile Print App" on page 162).
Samsung Mobile Print Control: Helps users to get an authentication easily. This app provides
one way of getting a user authentication using your mobile device (see "Using the Samsung
Mobile Print Control App" on page 156).
Samsung Mobile Print Manager: Enables users to use cloning and wireless setup features
using your mobile device (see "Using the Samsung Mobile Print Manager App" on page 158).
Downloading Apps
To download apps, go to the application store (Play Store, App Store) on your mobile device, and
just search for “Samsung Mobile Print /Samsung Mobile Print Control/Samsung Mobile Print
Manager.” You can also visit iTunes for Apple devices on your computer.
Samsung Mobile Print/Samsung Mobile Print Control
- Android: Search for Samsung Mobile Print or Samsung Mobile Print Control from Play Store,
and then download the app.
- iOS: Search for Samsung Mobile Print or Samsung Mobile Print Control from App Store, and
then download the app.
Samsung Mobile Print Manager
- Android: Search for Samsung Mobile Print Manager from Play Store, and then download the
app.
Supported Mobile OS
Samsung Mobile Print
- Android OS 4.0 or higher
- iOS 8.0 or higher
Samsung Mobile Print Control
- NFC/Bluetooth enabled, supported mobile apps installed mobile device with Android 4.0 or
higher, iOS 8.0 or higher
Samsung Mobile Print Manager
- NFC and Wi-Fi Direct enabled, supported mobile apps installed mobile device with Android
4.0 or higher
Mopria™ | 167
Mopria
• Only Mopria-certified machines can use the Mopria feature. Check the box that your
machine came in for the Mopria-certified logo.
• Make sure that the printer and mobile device are connected to the same network and
the communication is available.
Setting up the machine for Mopria printing
Bonjour(mDNS) and IPP protocols are required on your machine to use the Mopria feature.
Perform the following steps to enable the Mopria feature.
1 Access the SyncThru™ Web Service (see "Logging into SyncThru™ Web Service" on page
199).
2 Select Settings tab > Network Settings > Standard TCP/IP, LPR, IPP > IPP. Then, select
Enable.
3 Select Settings tab > Network Settings > mDNS. Then, select Enable.
4 Select Security tab > System Security > Feature Management > Mopria. Then, select Enable.
Mopria™ Print Service is a mobile printing solution that enhances
the new print functionality on any Android phone or tablet
(Android version 4.4 or later). With this service, you can connect
and print to any Mopria-certified printer on the same network as
your mobile device without additional set-up. Many native
Android apps support printing, including Chrome, Gmail, Gallery,
Drive and Quickoffice.
Mopria™ | 168
Setting up Mopria on your mobile device
If you do not have Mopria Print Service app installed on your mobile device, open to the app store
(Play Store, App Store) on your mobile device, search for Mopria Print Service, and then download
and install the app.
1 In the Settings menu of your Android device, tap Printing.
The location of this option may differ depending on your mobile device. If you cannot
locate the Printing option, refer to the user's manual for your mobile device.
2 Under Print Services, tap Mopria Print Service.
3 Tap the On/Off slider to enable the Mopria Print Service.
Printing via Mopria
To print via Mopria on an Android device:
1 Open the email, photo, web page, or document that you want to print.
2 Tap Print on the menu in the app.
3 Select your printer, and then configure the print options.
4 Touch Print again to print the document.
To cancel a print job: Select and delete the document from the print queue in the Notifi-
cation Bar.
AirPrint | 169
AirPrint
Only AirPrint certified machines can use the AirPrint feature. Check the box your machine
came in for the AirPrint certified mark.
Setting up AirPrint
Bonjour(mDNS) and IPP protocols are required on your machine to use the AirPrint feature. You
can enable the AirPrint feature by one of the following methods.
1 Access the SyncThru™ Web Service (see "Logging into SyncThru™ Web Service" on page
199).
2 Select Settings tab > Network Settings > Standard TCP/IP, LPR, IPP > IPP. Then, select
Enable.
3 Select Settings tab > Network Settings > mDNS. Then, select Enable.
4 Select Security tab > System Security > Menu Management > AirPrint. Then, select Enable.
Printing via AirPrint
For example, the iPad manual provides these instructions:
1 Open your email, photo, web page, or document you want to print.
2 Touch the action icon( ).
3 Select your printer driver nameand option menu to set up.
4 Touch Print button. Print it out.
AirPrint allows you to print directly from Mac OS (MacBook Pro,
MacBook Air, and iMAC) and iOS (iPhone, iPad and iPod touch). Scan
and Fax are available only for Mac OS. (Only users with
multi-functional printers)
Make sure that the printer and mobile device are connected to the
same network and the communication is available.
AirPrint | 170
Cancelling print job: To cancel the printing job or view the print summary, click the print
center icon ( ) in multitasking area. You can click cancel in the print center.
Google Cloud Print™ | 171
Google Cloud Print
Google Cloud Print™ is a service that allows you to print to a printer using your smart phone,
tablet, or any other web-connected devices. Just register your Google account with the printer,
and you are ready to use the Google Cloud Print™ service. You can print your document or email
with Chrome OS, Chrome browser, or a Gmail™/ Google Docs™ application on your mobile
device, so you don’t need to install the printer driver on the mobile device. Refer to the Google
website (http://google.com/cloudprint/learn/ or http://support.google.com/cloudprint) for
more information about Google Cloud Print™.
Registering your Google account to the printer
Registering from the Chrome Browser
• Make sure the printer machine is turned on and connected to a wired or wireless
network that has access to the Internet.
• You should create your Google account in the advance.
1 Open the Chrome browser.
2 Visit www.google.com.
3 Sign in to the Google website with your Gmail™ address.
4 Enter your printer’s IP address in the address field and press the Enter key or click Go.
5 Access the SyncThru™ Web Service (see "Logging into SyncThru™ Web Service" on page
199).
If the network environment is using a proxy server, you need to configure the proxy’s
IP and port number from Settings > Network Settings > Proxy. Contact your network
service provider or network administrator for more information.
6 Select Settings tab > Network Settings > Google Cloud Print.
7 Enter your printer’s name and description.
8 Click Register.
Google Cloud Print™ | 172
The confirmation pop-up window appears.
If you set the browser to block pop-ups, the confirmation window will not appear.
Allow the site to show pop-ups.
9 Click Finish printer registration.
10Click Manage your printers.
Now your printer is registered with Google Cloud Print™ service.
Google Cloud Print™-ready devices will appear in the list.
Printing with Google Cloud Print
The printing procedure varies depending on the application or the device you are using. You can
see the application list that supports Google Cloud Print™ service.
Make sure the printer is turned on and connected to a wired or wireless network that has
access to the Internet.
Printing from an application on mobile device
The following steps are an example of using the Google Docs™ app from Android mobile phone.
1 Install the Cloud Print application on your mobile device.
If you do not have the application, download it from the application store such as
Android Market or App Store.
2 Access the Google Docs™ application from your mobile device.
3 Tap the option button of the document that you want to print.
4 Tap the send button.
5 Tap the Cloud Print button.
6 Set the printing options if you want.
7 Tap Click here to Print.
Google Cloud Print™ | 173
Printing from the Chrome browser
The following steps are an example of using the Chrome browser.
1 Run Chrome.
2 Open the document or email that you want to print.
3 Click the wrench icon in the browser’s top right corner.
4 Click Print. A new tab for printing appears.
5 Select Print with Google Cloud Print.
6 Click the Print button.
Advanced Features
for Settings Menu
This chapter explains the Settings menu provided by your machine. The Settings menu provides
various options for administrators to set in order to use the machine to its full capabilities.
• Log-in 175
• Language and Input 176
• Machine 177
• Admin Settings 182
• Management 190
• Network Settings 192
• System 195
• For some options, you need to contact your local service provider to set the
settings.
Some menus may not appear on the display screen depending on the settings or
models. If so, it is not applicable to your machine.
• Some options are only available to the administrator depending on the
authentication settings selected (see "Authentication" on page 183).
Log-in | 175
Log-in
Depending on the authentication settings you selected, you may need to log-in as an
administrator to access some options under Settings menu (see "Authentication" on page 183).
Contact your network service provider or network administrator for more information.
1 Tap Settings from the home screen or Apps.
2 Select the option you want. If the option is available for only the administrator, log-in screen
appears.
Enter the ID, Password, and Domain using the pop-up keyboard which appears when you tap
each field.
Enter the ID and password you first set when you turned on the machine(see "Initial
settings (administrator only)" on page 186).
• You can also use the Recent Users button to find the recently used ID and Domain
List button to find the domain from the list stored in the machine.
• When you log-in, you can see the ID of the logged in user on the display.
3 Tap Log in.
Language and Input | 176
Language and Input
This menu allows you to configure the language in which to display the menus. You can also set
onscreen keyboard options.
Tap Settings > Language and Input from the home screen or Apps.
Language
Allows you to select the language that appears on the display screen.
Tap Settings > Language from the home screen or Apps then select the language what you want.
Input
When there is no input for a certain period of time, the machine cancels the held job or exits the
current menu and goes in to the default settings. You can set the amount of time the machine will
wait before it cancels a held job or exits the current menu.
Keyboard & Input Methods
Allows you to specify the keyboard that the machine uses.
Default: Select the default input language and method.
Speech
Text-to-speech output: Provides audible readout of text, for example, the contents of email
messages.
Feature Description
Language Allows you to select the language.
Keyboard & Input
Methods
You can change the keyboard used by your machine.
Speech Allows you to set the speech settings for Voice input.
Machine | 177
Machine
Before using the machine, set up the general settings.
• Some menus may not appear on the display depending on options or models. If so, it is
not applicable to your machine.
• Tap (Help) from the home screen or (quick menu), and then select on any
option you want to know about.
Tap Settings > Machine from the home screen or Apps.
Feature Description
Tray Settings
Allows you to adjust the current tray settings, such as the
paper type and tray priorities (see "Tray settings" on page
178).
Sound
Allows you to set the volume for button sound, notice
alarm, and sounds occurring during fax job. You can test
the volume right after you set the level (see "Sound" on
page 178).
Display Allows you to set the brightness and quick launch.
Storage Management all application’s storage.
Adjustment
Allows you to adjust altitude, humidity, image, and
machine test functions.
Power Saver
Allows you to reduce energy consumption. If you set this
option, the machine goes into power saving mode when
not in use.
There are two power saving modes (see "Power Saver" on
page 179).
Timers
Allows you to set the time for machine to return to the
default setting or cancel the held job if there is no input for
an extended time (see "Timers (administrator only)" on
page 180).
Eco
a
a.Available for the administrator depending on the authentication settings selected (see "Authentication"
on page 183).
Allows you to set the Eco mode as a default and change
settings for Eco mode. Using Eco mode can save printing
resources (see "Eco" on page 181).
Machine | 178
Tray settings
This feature allows you to check the current tray settings and change the settings if necessary.
There are many options available for setting the tray and paper. Make the best use of the options
to fit your needs for trays and paper.
You can also use this feature from the SyncThru™ Web Service. Open the Web browser
from your networked computer and type the IP address of your machine. When
SyncThru™ Web Service opens, click Settings tab > Machine Settings > System > Input
Trays(see "Settings tab" on page 201).
If some options are grayed out, it means that the grayed-out option is not supported for
your machine or optional parts needed to use the option are not installed.
Sound
You can set the volume for button sound, notice alarm, and the sounds occurring during a fax job.
Using the slide bar select the desired volume and press the Test button to test the volume.
Key Sound: Allows you to adjust the sound volume for when pressing the button
Alarm Sound: Allows you to adjust the sound volume for when notice alarm.
Fax Sound: Allows you to adjust the sound volume occurring during a fax job. This option has
other sub-options.
Display
You can change various settings for the display.
Screen: Allows you to adjust the LCD brightness.
More Settings: You can select the register at Quick Launch (None, Screen Capture,
Applications, Search, Job Status, Login/Logout )
Storage
You can management the all application storage and shows all storage information.
If the machine’s power is cut off, you need to reset the correct time and date once the
power has been restored.
Adjustment
You can choose the altitude of the place where your machine is located. You can also adjustment
the image management and checking the machine test.
Altitude Adjustment : You can choose the altitude of the place where your machine is located.
The print quality is affected by atmospheric pressure, which is determined by the height of the
machine above sea level. Therefore, it is important to set the right altitude.
Machine | 179
- Normal : 0 ~ 1,000 m (3,280 ft)
- High 1 : 1,000 m (3,280 ft) ~ 2,000 m (6,561 ft)
- High 2 : 2,000 m (6,561 ft) ~ 3,000 m (9,842 ft)
- High 3 : 3,000 m (9,842 ft) ~ 4,000 m (13,123 ft)
- High 4 : 4,000 m (13,123 ft) ~ 5,000 m (16,404 ft)
Humidity : Optimizes print quality according to the humidity in the environment. Choose a
humidity setting based on the humidity in the work environment. The levels of humidity range
from Normal (normal humidity) to High 3 (high humidity).
Auto Color Registration
- Auto Color Registration : The machine virtually prints certain patterned image to calibrate
the color printing position. This feature enhances the colored image sharper and clearer,
which means the machine prints the colored image on the paper more like the one in the
monitor.
- Full Auto Color Registration : Set to perform full auto color registration.
Color Simulation: Allows you to choose the color. If you are not satisfied with the current
printout color, you can choose the color simulation to suit your needs.
- Default Simulation: Returns to the default color setting.
- Simulation A~ Simulation D: Choose the color setting you want. Each simulation has a
different color setting.
- Custom: If you want other color setting than the above, contact the service provider and ask
for custom setting.
Custom Color: Allows you to adjust the level of print density and copy darkness.
Tone Adjustment: Allows you to automatically adjust the color tone to produce the best
possible print quality.
- Auto Tone Adjustment Activation: Instructs the machine to automatically calibrate the tone
at certain intervals. Activate this option to perform a normal or full tone adjustment after a
certain number or pages are printed or the machine is not used for a certain period.
- Auto Tone Adjustment: Performs a normal or full tone adjustment sequence immediately.
- Normal: Automatically adjusts the color tone. This process takes more time than
Quick, but it produces better results.
- Full: Changes the color table entirely to adjust the color tone.
Machine Test: Allows you to adjust the tone level.
- Print Adjustment : Allows you to adjust the print area. When images are printed off the page
or shifted, adjust the print area.
Power Saver
When you are not using the machine for a while, use this option to save power.
The Power Save option can be wake up by pressing the display screen.
Machine | 180
Performance Optimization
When this option is On, you can wake up the machine from the power saving mode with the
following actions:
• Pressing (Power/Wakeup) on the control panel.
• Loading paper in a tray.
• Opening or closing the cover.
• Pulling a tray out or pushing a tray in.
• Place the originals in the Dual Scan Document Feeder (DSDF).
• Plug in the USB Drive device.
Low Power Save
Low Power Save option allows your machine to save power. When you are not using the machine
for a while, some parts of the machine automatically enter Low Power Save option. Low Power
Save option conserves less power than Power Save option.
Power Save
When you are not using the machine for a while, use this option to save power. The machine
conserves more power in Power Save option than in Low Power Save mode.
Auto Power Off
You can set the printer to turn power off automatically when the machine has been in power save
mode for the length of settings on the operator panel.
• Available setting range is from 5 min. to 240 min.
• To turn the machine on again, pressing (Power/Wakeup) on the control panel.
Timers (administrator only)
When there is no input for a certain period of time, the machine cancels the held job or exits the
current menu and goes in to the default settings. You can set the amount of time the machine will
wait before it cancels a held job or exits the current menu.
You can also use this feature from the SyncThru™ Web Service. Open the Web browser
from your networked computer and type the IP address of your machine. When
SyncThru™ Web Service opens, click Settings > Machine Settings > System > Setup.
System Timeout: The machine returns to the Copy menu if there is no input for the given time.
Held Job Timeout: When an error occurs while printing and there is no signal from the
computer, the machine holds a job for a specific time period before deleting it.
Machine | 181
Eco
Allows you to save print resources and enables ecofriendly printing.
Default Mode: Select whether to turn the Eco mode on or off.
On-Forced: Sets the Eco mode on. If a user wants to turn the Eco mode off, the user needs
to enter the password.
Eco Features Configuration: Setting the Eco features.
- Default Settings: The machine is set to Default Eco mode.
- Custom Settings: Change any necessary values.
Admin Settings | 182
Admin Settings
This option is only available to administrators.
• Some menus may not appear on the display depending on options or models. If so, it is
not applicable to your machine.
• Tap (Help) from the home screen or (quick menu), and then select on any
option you want to know about.
Tap Settings > Admin Settings from the home screen or Apps.
Feature Description
Security
Allows you to set up the security related settings (see
"Security" on page 183).
General Settings
Allows you to set up the general settings (Measurement,
Supplies Management, Contention Management, and
other settings) (see "General Settings" on page 185).
Initial Settings
Allows you to set the basic settings needed to be set before
using the machine (see "Initial settings (administrator
only)" on page 186).
Fax Settings
You can set the default fax options. Set the most frequently
used fax settings (see "Fax Settings" on page 187).
Print Settings
You can set print related settings. When there is no specific
input for printing options, the machine prints with the
settings you set here. Set the frequently used printing
settings. This feature can be useful if your company has a
specific printing form (see "Print Settings" on page 187).
Box Settings
Allows you to check the current box settings and change
the settings if necessary (see "Box Settings" on page 188).
Report Settings
The paper source setting specifies the default paper tray
that the machine uses to print reports.
Application Management
You can install or uninstall applications. If you add an
application, you need to activate the license of the installed
application. Some applications may not have a license (see
"Application Management" on page 188).
Admin Settings | 183
Security
Allows you to set up the security related settings.
Image Overwrite
You can set the machine to overwrite data stored in the memory. The machine overwrites the
data with different patterns eliminating the possibilities of recovery.
This feature may not be available depending on models or option kits installed.
Automatic Image Overwrite: When a job is completed, there are temporal images left in the
memory. For security reasons, you can set the machine to automatically overwrite secure
non-volatile memory. If you want to secure memory space, you can set the machine to
automatically overwrite secure non-volatile memory.
Manual Image Overwrite: When printing, copying, scanning, and faxing, the machine
temporarily uses memory space. For security reasons, you can set the machine to manually
overwrite secure non-volatile memory. If you want to secure memory space, you can manually
overwrite secure non-volatile memory. You can set the machine to repeat the manual image
overwrite after the system is rebooted.
Scheduled Image Overwrite: You can set the schedule to manually overwrite the image.
Overwrite Method: You can select the method for overwriting the secure non-volatile
memory(hard).
- German VSITR: Select to overwrite the memory 7 times. When overwriting for the 6 times,
alternate 0x00 and 0xff are used to overwrite the disk, and, in the 7th time, the disk is written
with 0xAA.
- DoD 5220.28-M: Select to overwrite the memory 3 times. When overwriting three times,
patterns 0x35, 0xCA, 0x97 are used to overwrite the disk’s content. This method of
overwriting the disk is specified by US DoD.
- Australian ACSI 33: Select to overwrite the memory 5 times. When overwriting 5 times,
character “C” and its complement alternatively are used to overwrite the disk. After the 2nd
time, there is a mandatory validation. For the 5th time, random data is used.
- DoD 5220.22M (ECE): Select to overwrite the memory 3 times. When overwriting three times,
patterns 0x35, 0xCA, 0x97 are used to overwrite the disk’s content. This method of
overwriting the disk is specified by US DoD.
- Custom Overwrite: Select to determine the number of times the memory will be overwritten.
The hard disk will be overwritten as many times as the number you select.
Authentication
This feature allows you to choose the authentication method for user authentication.
You can also use this feature from the SyncThru™ Web Service. Open the Web browser
from your networked computer and type the IP address of your machine. When
SyncThru™ Web Service opens, click the Security tab > User Access Control. (see "Security
tab" on page 202).
Mode: Select the authentication mode.
Admin Settings | 184
- Basic Authentication: Activate basic authentication. Users are asked to login when they
select options that are only available to administrators. Those options are marked with “a” or
“(administrator only)” in this guide.
- Device Authentication: Activate device authentication. Device authentication requests a user
to login before being able to use the device. Users cannot use any application without logging
in.
- Application Authentication: Activate application authentication. An administrator can
choose the application(s) to require user to login to use. Users cannot use the selected
application(s) without logging-in. Press Application Mode to enable authentication.
Method
- Local Authentication: Executes authentication process based on the user information stored
at HDD in the device.
LUI Login Screen: Provides Pre-Installed-For-LUI, by default.
SWS Login Screen: Provides Pre-Installed-For SWS, by default.
- SMB and Local Authentication: Executes authentication process based on the user
information stored at SMB server.
LUI Login Screen: Provides Pre-Installed-For-LUI, by default.
SWS Login Screen: Provides Pre-Installed-For SWS, by default.
- Kerberos and Local Authentication: Executes authentication process based on the user
information stored at kerberos server.
LUI Login Screen: Provides Pre-Installed-For-LUI, by default.
SWS Login Screen: Provides Pre-Installed-For SWS, by default.
- LDAP and Local Authentication: Executes authentication process based on the user
information stored at LDAP server.
LUI Login Screen: Provides Pre-Installed-For-LUI, by default.
SWS Login Screen: Provides Pre-Installed-For SWS, by default.
- SyncThruAaProvider: Executes authentication process based on the user information
allocated from SWS.
LUI Login Screen: Provides Pre-Installed-For-LUI , by default.
SWS Login Screen: Provides Pre-Installed-For SWS, by default.
- Standard Accounting Only: Allows users to login by entering ID and password.
ID/PW Login: You can login from ID&Password.
ID Only Login: You can login from ID only.
- Options : Select what to require for the user to login
Auto Logout: You can use auto logout.
Auto Logout Time: You can set the auto logout time.
Logout Policy: You can select the logout Identification type.
Login Restriction: You can set the Login Restriction time, attempts, or lock-out time.
Secure Print: You can login from secure print.
Admin Settings | 185
Accounting
You can set usage limits for each user to use each feature if Standard accounting method is
chosen (see "Authentication" on page 183).
You can also use this feature from the SyncThru™ Web Service. Open the Web browser
from your networked computer and type the IP address of your machine. When
SyncThru™ Web Service opens, click the Security tab > User Access Control> Accounting>
Accounting Methods. (see "Security tab" on page 202).
No Accounting: Select not to use this feature.
Standard Accounting: Select to use the installed job accounting method.
SyncThruAaProvider: Select to use the job accounting method provided by the SyncThru™Web
Admin Service (For detailed information, refer to the SyncThru™Web Admin Service guide).
General Settings
Allows you to set up the general settings.
Measurement
You can choose the measuring unit and default paper size.
Supplies Management
Allows you to set options for supplies reorder notification. If you set this option, the machine will
display a warning message when the supplies are running out. Prepare the supplies in advance.
Imaging Unit Reorder Notification: Issues a notification when the imaging unit has the
specified lifespan remaining.
Toner Cartridge Reorder Notification: Issues a notification when a toner cartridge has
the specified lifespan remaining.
Toner Save: The Toner Save setting allows the user to save printing toner when printing
a document.
Contention Management
Allows you to set Copy, Print, Send, Report priority.
More Settings
Job Progress Window: Allows you to show job progress in display.
Skip Blank Pages: This option allows you to specify not to print blank pages in the original data.
Job Deletion: The Job Deletion setting specifies whether users can delete all jobs or only the
jobs that they create.
- Allow all jobs to delete : All users allow all jobs to delete.
- Allow only own jobs to delete : Users allow only own jobs to delete.
Home Screen Lock: All users are not allow to create, move or delete icon at home screen.
Admin Settings | 186
Job Rescheduling: Processes jobs based on the order of priority set in the Contention
Management option.
Smart Duplex: Uses simplex mode when printing only one original page or a blank page
although the duplex option is enabled.
Vapor Mode: Prevents moisture in the paper from affecting the print quality.
- Off: Disables this option.
- On: Slows the printing speed by 50% and lowers the temperature of the fusing device when
printing.
- Auto: Detects the temperature and humidity in the machine and adjusts the settings
accordingly.
The machine detects the temperature and humidity again and resets the settings in the
following situations:
- When you leave the machine unattended for over four hours when the temperature is
below 15 °C or the humidity is over 80%.
- When you print 100 papers consecutively or leave the machine unattended for one
hour after printing.
Initial settings (administrator only)
You can change the initial settings when you first turn the machine on.
If you want to stop adjusting the initial settings, press Exit. The settings you have set so
far will be saved. However, the Exit button is not enabled if it’s the first time using this
option.
Language: Select the language to use on the display screen then tap Next.
Note: Read and tap Next.
Administrator Account: Input the Name, New Password, Confirm Password.The admin is
entered as a default in Name field.
Date & Time: Set the Date, Time, Time Zone, date and hour format, and Day light Saving.
Example for selecting the time zone, select your country area.
Device Attribution: Remove the existing device name and enter the device name you want to
use. Then tap Next. Keep in mind to enter the device name to be used on the network.
- If necessary, enter the location of the machine in the Location field.
- If necessary, enter the information in the Administrator field for the person to contact
when any problem occurs on the machine.
Verify Connections: Tap the Test button to verify the Ethernet Card connection. When
Connected appears after tap the Test button, press Next.
If Not connected appears, make sure that the machine is connected to the network then verify
the LAN connection again.
Admin Settings | 187
- If a network connection problem persists, contact your network administrator.
- If you installed an optional fax kit or finisher, press each Test button for verify
connection of them.
Network Settings: Enter the IP address, Subnet Mask, Gateway, Host Name, Domain Name,
Primary DNS Server and Secondary DNS Server in each field. Then tap Next.
- If a new IP address is assigned automatically by a DHCP or BOOTP, press DHCP or
BOOTP.
- If you are not sure about your network environment, contact your network
administrator.
SNMP Configuration: Enter the Community Name, Access Permission, Authentication User
Name, Authentication Password, Authentication Confirm Password, Privacy Password and
Privacy Confirm Password in each field. Then tap Done.
Fax Settings
You can set the default fax options. Set the most frequently used fax settings.
Tap Settings > Fax Settings from the home screen or Apps.
• If the optional fax is not installed, the fax icon will not appear on the display screen.
• The fax options are different from country to country depending on the International
Communications Regulatory. If some of the fax options explained in the instructions
have been grayed-out, it means that the grayed-out option is not supported in your
communication environment.
You can also use this feature from the SyncThru™ Web Service. Open the Web browser
from your networked computer and type the IP address of your machine. When
SyncThru™ Web Service opens, click Settings tab > Machine Settings > Fax (see
"Settings tab" on page 201).
Print Settings
You can set print related settings. When there is no specific input for printing options, the
machine prints with the settings you set here. Set the frequently used printing settings. This
feature can be useful if your company has a specific printing form.
Tap Settings > Print Settings from the home screen or Apps.
You can also use this feature from the SyncThru™ Web Service. Open the Web browser
from your networked computer and type the IP address of your machine. When
SyncThru™ Web Service opens, click the Settings tab > Machine Settings > Printer. (see
"Settings tab" on page 201).
Admin Settings | 188
General
General: You can set Skip Blank Page, Paper Source and Emulation.
- Skip Blank Pages: You can skip the blank pages during printing.
- Paper Source: You can select the tray as a paper source.
- Emulation: You can choose the emulation format.
Layout
Layout: Provides paper layout related options.
- Orientation: Select the paper orientation.
- Duplex: Select the paper orientation for duplex mode.
- Number of Copies: Select the number of copies you want to print.
- Margin: Adjust the margin for Common Duplex, Common Simplex and Emulation.
Box Settings
You can store documents print,download and sent from computers or scanned images in the Box.
The Box is located on your machine’s hard disk drive (HDD). It means the documents are stored
on the HDD. You can create a password for a certain Stored Document, so unauthorized users
cannot access it. Also, you can print stored documents by using a variety of printing features and
send the documents to several destination such as email, server or fax. You can set a Stored
Document and use Stored Document feature with SyncThru™ Web Service.
If important data is stored in the Box, we recommend you to backup the data regularly.
Samsung disclaims all responsibility for damage or loss of data caused by misuse or
failure of the machine.
Report Settings
The paper source setting specifies the default paper tray that the machine uses to print reports.
Application Management
You can install or uninstall applications. If you add an application, you need to activate the license
of the installed application. Some applications may not have a license.
Tap Settings > Application Management from the home screen or Apps.
You can also use this feature from the SyncThru™ Web Service. Open the Web browser
from your networked computer and type the IP address of your machine. When
SyncThru™ Web Service opens, click the Maintenance tab > Application Management.
(see "Maintenance tab" on page 203).
• Some models may not support this feature.
Admin Settings | 189
Installing an application
1 Tap Install button.
2 A pop-up window with folder tree appears. Select the application file and press OK.
3 A verification message appears. Read the agreement and check I accept terms of the
License Agreement and press OK.
Application installation begins.
Viewing an application in details
1 Tap the application name you want to view in details.
2 View the application’s information in details.
Enabling/Disabling an application
1 Select the application you want to enable/disable and press Enable/Disable.
2 The application you selected is enabled/disabled.
Uninstalling an application
1 Select the application you want to uninstall and tap Uninstall.
2 A confirmation window appears. Press Yes.
The application you selected is uninstalled.
Management | 190
Management
• Some menus may not appear on the display depending on options or models. If so, it is
not applicable to your machine.
• Tap (Help) from the home screen or (quick menu), and then select on any
option you want to know about.
You can check the supplies life and printing report.
Tap Settings > Management from the home screen or Apps.
Supplies Life
This feature allows you to check the remaining percentage of each supply.
ex) toner cartridge / imaging unit
Report
This feature allows you to print all the reports provided by your machine. You can use these
reports to help you maintain your machine.
You can also use this feature from the SyncThru™ Web Service. Open the Web browser
from your networked computer and type the IP address of your machine. When
SyncThru™ Web Service opens, click Information > Print information (see "Information
tab" on page 200).
System Report
Configuration: Print to see the machine configuration information. Product information,
version information, product setting, and paper setting are included.
Supplies Information: Print to check remaining percentage of each supply.
Usage Counter: Print to check the count of the jobs performed. Print usage, scan usage, and fax
usage information are included.
Demo Page: Print demo page to check if the machine is working properly. Also you can select
A4 or Letter size.
Error Information: Print to check what errors have occurred in the machine. Error types and
counts are included.
Network Configuration: Print to see the network configuration information. Network
configuration information such as TCP/IP, Raw TCP/IP, and LPD information are printed.
Account: Print to see the account list.
Management | 191
Send
Send Confirmation: You can set the machine to print a report whether a send was successfully
completed or not.
Fax Received: Print to check the list of faxes received.
Fax Sent: Print to check the list of faxes sent.
Fax Scheduled Jobs: Print to check the list of scheduled fax jobs.
Email Sent: Print to check the transmission state of the Scan to Email job.
Font
PCL Font List: Print to see the PCL font list.
PS Font List: Print to see the PS font list
Network Settings | 192
Network Settings
This option is setting the Network Settings functions.
• Some menus may not appear on the display depending on options or models. If so, it is
not applicable to your machine.
• Tap (Help) from the home screen or (quick menu), and then select on any
option you want to know about.
Tap Settings > Network Settings from the home screen or Apps.
Ethernet
TCP/IPv4
You can set IPv4 settings.
IP Setting: You can choose the method for allocating IP addresses.
- Static: Select to enter IP address/Subnet Mask/ Gateway Address manually.
Feature Description
Ethernet Port You can enable/disable Ethernet port.
Ethernet Speed You can select the speed rate of Ethernet.
MAC Address Shows the Mac address of the machine.
IP Setting You can set the TCP/IPv4 IP setting.
DNS Configuration You can set the DNS setting.
WINS You can configure the WINS server.
Display IP Address
You can set the machine to display the IP address on the
home screen.
Protocol You can enable/disable IPv6 protocol.
IPv6 Address You can set the IPv6 address types.
DHCPv6 Configuration You can set the DHCPv6 configuration.
DHCP Unique Identifier Show the DHCP Unique Identifier.
802.1x You can enable/disable 802.1x Security.
802.1x Authentication Method You can select the authentication algorithm to use.
DHCP Identity Association
Identifier
Show the DHCP Identity Association Identifier.
Network Settings | 193
- BOOTP: IP address/Subnet Mask/ Gateway Address are automatically allocated by the
BOOTP Server.
- DHCP: IP address/Subnet Mask/ Gateway Address are automatically allocated by the DHCP
Server.
DNS Configuration: You can configure the DNS server.
- Host Name: Enter the host name. You can enter up to 63 characters. Default name is
SEC[MAC address]”.
- Domain Name: Enter the domain name. You can enter up to 128 characters.
- Primary DNS Server: Enter the address of the DNS server you want to use primarily.
- Secondary DNS Server: Enter the address of the DNS server you want to use as an alternative.
- Dynamic DNS Registration: If you want to use, check the checkbox(es) of dynamic DNS
registration. If this option is checked, the machine registers its host name and domain name
to configured DNS servers dynamically. Also, if this option is checked and DHCP is selected,
DHCP FQDN options are automatically disabled.
WINS: You can configure the WINS server. WINS is used in the Windows operating system.
Select this option.
Display IP Address: You can set the machine to display the IP address on the Notification Bar.
If you select this option the IP address will show on the Notification Bar.
TCP/IPv6
You can set the IPv6 settings.
Protocol: Tap to use IPv6 protocol in the system. Reboot the machine to apply the change.
IPv6 Address: Shows the IPv6 address types.
- Link-local Address: This is an IPv6 address starting with a prefix value FE80. This address has
local link scope and is automatically generated.
- Stateless Address: This is an IPv6 address which is formed by router advertised prefix and
interface identifier. On a interface like Ethernet, interface identifier is usually derived from
the Mac address of the machine. The advertised prefix depends on the router configurations.
More than one address may be configured for the router advertisement, but only one will
be displayed in the display screen.
- Stateful Address: This is an IPv6 address which is acquired by a DHCPv6 server.
- Manual Address: This is an IPv6 address which an administrator can configure manually.
DHCPv6 Configuration: Select the DHCPv6 configuration you want to us.
- Use DHCP as directed by a router: DHCPv6 is enabled when a router advertises to use
DHCPv6.
- Always Enable DHCP: Regardless of router advertisement, use DHCPv6 to acquire an IPv6
address.
- Never use DHCP: Disables DHCPv6.
DHCP Unique Identifier: Show the DHCP Unique Identifier.
DHCP Identity Association Identifier: Show the DHCP Identity Association Identifier.
Network Settings | 194
802.1x
You can enable 802.1x authentication, which is a port-based authentication. If this authentication
is enabled, the machine is not allowed to access through the protected side of the network until
the machine is authorized. Use this feature to protect your network.
802.1x: Check to enable this feature.
802.1x Authentication Method: Select the authentication algorithm to use.
- EAP-MD5: Offers minimal security. The MD5 hash function is vulnerable to dictionary attacks,
and does not support key generation.
- PEAP: Recommended for users who only intend to use Microsoft desktop clients and servers.
For other users, it is not recommended.
- EAP-MS-CHAPv2: MS-CHAPv2 provides two-way authentication between peers by
combining a peer Challenge message with the Response packet and an authenticator
Response message on the Success packet.
- TLS: This is used to provide secure communication over the Internet between a client and
server.
Network Protocol
You can enable/disable what you want network protocol.
Network Security
You can enable and configure these options in SyncThru™ Web Service only(see "Security
tab" on page 202).
IPSec: You can disable IP security settings.
Network Filtering
- MAC Filtering : Disable MAC filtering.
- IPv4 Filtering: Disable IPv4 filtering.
- IPv6 Filtering: Disable IPv6 filtering.
NFC
You can turn on/off NFC function. The NFC feature is available when the optional Wi-Fi/NFC kit
or Wi-Fi/NFC/BLE kit installed (see "Using the BLE/NFC feature (Optional)" on page 155).
Feature Description
IPSec
You can disable IPSec if it is turned on in SyncThru™ Web
Service.
Network Filtering
You can disable the network filtering options if it is turned
on in SyncThru™ Web Service.
System | 195
System
• Some menus may not appear on the display depending on options or models. If so, it is
not applicable to your machine.
• Tap (Help) from the home screen or (quick menu), and then select on any
option you want to know about.
Date and Time
When you set the time and date, it will be used for sending/printing delayed fax/print jobs or will
be printed on reports. However, if they are not correct, you need to change it to the correct time.
About System
You can see the hardware configuration, system capabilities, and software version of the
machine.
Machine Details
You can check the detailed machine information. Check the status of installed hardware and
software versions to help you maintain the machine. You can download the latest software from
the Samsung website (http://www.samsung.com/printer).
H/W Configuration: Shows the status of installed hardware including optional parts .
Capabilities: Shows the capabilities of the hardware.
Software Versions: Shows the software versions of the systems installed.
Accessibility
Allows you to configure the machine to make it easier to use. In this menu, you can change
various sound, interaction, and display options so that the machine is more accessible to users.
Contact Information
This feature allows you to view the service center's information and contact point where users
can get help. If you log in as an administrator, you can change the contact information.
System Administrator: Check the contact information of the administrator.
Samsung Support: Check the information of the service center.
Useful Tools
This chapter introduces management tools provided to help you make full use of your machine.
• Accessing management tools 197
• SyncThru™ Web Service 198
• Easy Eco Driver 204
• Using Samsung Printer Center 205
• Using Samsung Easy Printer Manager 208
• Using Samsung Printer Status 211
• Using Samsung Printer Experience 213
• Using Box 219
• Using a USB Drive device 222
Accessing management tools | 197
Accessing management tools
Samsung provides a variety of management tools for Samsung printers.
1 Make sure that the machine is connected to your computer and powered on.
2 From the Start menu, select Programs or All Programs.
• For Windows 8, from Charms, select Search > Apps.
• For Windows 10 / Windows Server 2016
From task bar, type in Samsung Printers in Search input area. Press the enter key.
OR
From the Start() icon, select All apps > Search > Samsung Printers.
3 Find Samsung Printers.
4 Under Samsung Printers, you can see installed management tools.
5 Click the management tool you want to use.
• After installing the driver, for some management tools, you can access them directly
from the Start menu > Programs or All Programs.
• For Windows 8, after installing the driver, for some management tools, you can access
them directly from the Start screen by clicking on the corresponding tile.
SyncThru™ Web Service | 198
SyncThru™ Web Service
This chapter gives you step-by-step instructions for setting up the network environment through
SyncThru™ Web Service.
Some menus may not appear on the display screen depending on the settings or models.
If so, it is not applicable to your machine.
What is SyncThru™Web Service?
If you have connected your machine to a network and set up TCP/IP network parameters
correctly, you can manage the machine via SyncThru™ Web Service. Use SyncThru™ Web Service
to:
• View the machine’s device information and check its current status.
• Change TCP/IP parameters and set up other network parameters.
• Change the printer preference.
• Set the email notifications advising of the machine’s status.
• Get support for using the machine.
• Upgrade machine software.
Required web browser
You need one of the following web browsers to use SyncThru™ Web Service.
• Internet Explorer® 8.0 or higher
• Chrome 27.0.1453 (stable release at 2013-05-21) or higher
• FireFox 21.0 (stable release at 2013-05-14 ) or higher
• Safari 5.1.9 (Mac OS X 10.6 support) or higher
Connecting to SyncThru™ Web Service
IPv4 supported web browser
1 Start a web browser, such as Internet Explorer®, that supports IPv4 addressing as a URL.
Enter the machine’s IP address (http://xxx.xxx.xxx.xxx) in the address field and press the
Enter key or click Go.
You can get the machine’s IP address from the machine (see"Report" on page 190).
2 Your machine’s SyncThru™ Web Service website opens.
SyncThru™ Web Service | 199
IPv6 supported web browser
1 Start a web browser, such as Internet Explorer®, that supports IPv6 addressing as a URL.
2 Select one of the IPv6 address (Stateless Address, Stateful Address, Manual Address,
Link-Local) from Network Configuration Report.
You can get the machine’s IPv6 address from the machine report (see"Report" on page
190).
3 Enter the IPv6 addresses (eg., http://[3ffe:10:88:194:213:77ff:fe82:75b]).
The address must be enclosed in '[ ]' brackets.
4 Your machine’s SyncThru™ Web Service website opens.
Logging into SyncThru™ Web Service
Before configuring options in SyncThru™ Web Service, you need to log-in as an administrator.
You can still use SyncThru™ Web Service without logging in, but you will not have access to or
view the Settings tab and the Security tab.
1 Click Login on the upper right of the SyncThru™ Web Service website.
A log-in page appears.
2 Type in the ID and Password and select the Domain. Then click on LOGIN.
Use the same login ID, Password, Domain as when logging in from the machine (see "Log-in"
on page 175).
If you want to create a new user or change the password, see "Security tab" on page
202.
SyncThru™ Web Service | 200
Information tab
This tab gives you general information about your machine. You can check things, such as the
machine’s status, supplies’ status, count information, network information, and more. You can
also print reports, such as configuration page.
Active Alerts: You can check the current alerts in the machine. Use this information to
troubleshoot machine errors.
Supplies: You can check the supplies’ information. For toner cartridges and imaging units,
supplies’ status is displayed with a visual graph showing you the amount of each supply left.
Page counts are also available which can help you predict when to change the supplies. This
feature is also available from the machine (see "Management" on page 190).
Usage Counter: You can check the billing information and usage counter of the machine. This
feature is also available from the machine (see "Counter" on page 26).
Current Settings: Shows the current settings of the machine and network.
- Machine Information: Shows the current machine settings.
- Network Information: Shows the current network settings. Use this page as a reference and
change the necessary settings needed for using the network.
- Security Information: Shows the current security settings of the machine and network.
- Print Information: You can print all the reports provided by your machine. You can use these
reports to help you maintain your machine. This feature is also available in the machine (see
"Report" on page 190).
Address Book tab
You can manage the address book. This feature is also available from the machine (see
"Understanding the address screen" on page 121).
Individual: You can manage individual entries in the address book.
Group: You can manage group address books.
SyncThru™ Web Service | 201
Box tab
You can manage the Box. This feature is also available from the machine (see "Using Box" on page
219).
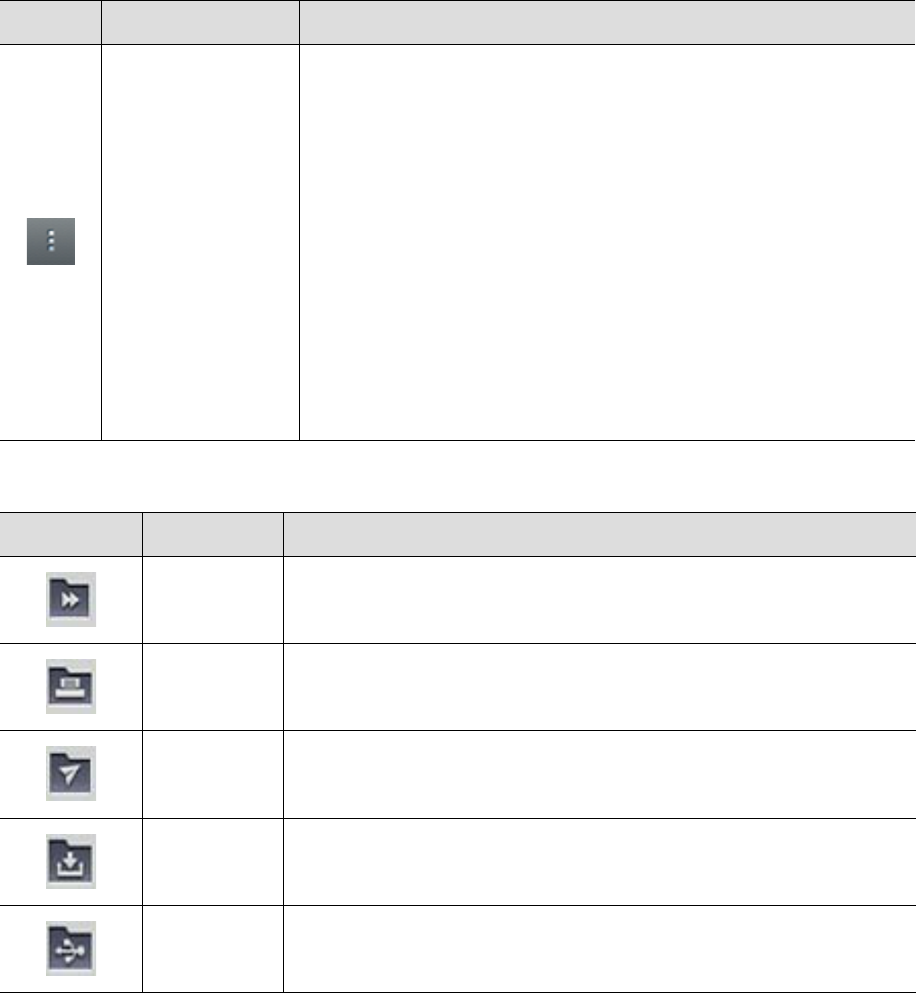
Forward/Print / Send / Download
You can manage the folder and files in Forward, Print, Send, Download.
Add: You can create Box in Print, Send, Download tab and Secured Box in Print, Send tab.
Delete: You can delete Box and file in Forward, Print, Send, Download tab.
Edit: You can edit Box and file name in Print, Send, Download tab.
Browse: If you want to browse the Box, check the Box you want then click Browse.
Task: You can copy and move the Box and files in Print, Send, Download tab.
Settings tab
Settings tab has sub menus, Machine Settings and Network Settings. You cannot view or access
this tab if you do not log-in as an administrator (see "Logging into SyncThru™ Web Service" on
page 199).
Machine Settings: You can set machine settings.
- System: You can set machine related settings.
- Printer: You can set print related settings such as darkness or adjust the background. This
feature is also available from the machine (see "Print Settings" on page 187).
- Copy: You can set copy related settings such as darkness or adjusting the background. This
feature is also available from the machine (see "Copy tab" on page 83).
- Fax: You can set fax related settings such as fax number or redial times. This feature is also
available from the machine (see "Understanding the fax screen" on page 109).
- Scan & Send: You can set scan related settings. This feature is also available from the
machine (see "Understanding the Scan & Send screen" on page 94).
- Box: You can set box related settings.This feature is also available from the machine (see
"Using Box" on page 219).
- Address Book Settings: This address book contains contacts that are available to all users.
You can use the address book to make contacts available to anyone who uses the machine.
- E-mail Notification: When an error occurs or the consumables are running out, the machine
sends a notification to the administrator via e-mail. You can set whether to use this feature
or not. You can also select which alerts to receive and when.
Network Settings: You can set up the network environment to use your machine as a network
machine. You can also set the settings from the machine. Refer to the network setup chapter
(see "Network settings (configuring TCP/IP)" on page 139).
- General: You can set general machine information to use in the network and set Ethernet
settings. This feature is also available from the machine (see "Ethernet" on page 139).
- TCP/IPv4, TCP/IPv6, Raw TCP/IP, LPR, IPP,Telnet, WSD, SLP, UPNP, mDNS, CIFS, SNMP,
SNMPv1/v2, SNMPv3: You can set protocol settings.This feature is also available from the
machine.
- Outgoing Mail Server (SMTP): You can set server settings for outgoing emails. If this setting
is not configured, you cannot use scan to email feature. Outgoing emails will be sent through
SMTP server you set here. This feature is also available from the machine (see "Network
Protocol" on page 194).
SyncThru™ Web Service | 202
- Incoming Mail Server (POP3): You can set your machine to get email from mail server when
I-FAX printing is required. This feature is also available from the machine (see "Network
Protocol" on page 194).
- HTTP: You can allow or block users from accessing the SyncThru™ Web Service. This feature
is also available from the machine (see "Network Protocol" on page 194).
- Proxy: You can set proxy settings and enable authentication to connect to license server
through http proxy server. These proxy settings are provided currently only if the
administrator wants to update an XOA application’s license online through proxy server.
Security tab
The security tab has System Security, Network Security, User Access Control and System Log.
You cannot access this tab if you do not log-in as an administrator (see "Logging into SyncThru™
Web Service" on page 199).
System Security: From the SyncThru™ Web Service, select the Security tab > System Security.
- System Administrator: Enter the system administrator’s information. The machine sends
email notification to the email address set here. This feature is also available from the
machine.
- Feature Management: Specifies the services, PC application security, physical ports, and
network protocol features to use. Select the features to use, and then click Apply.
- Information Hiding: Specifies which information to hide. Select the amount of information
that you want to hide, and then click Apply.
- Restart Device: You can reboot your machine. Click the Restart Now button to reboot.
Network Security: From the SyncThru™ Web Service, select the Security tab > Network
Security.
- Digital Certificate: You can manage digital certificates. A digital certificate is an electronic
certificate that verifies the secure association between communication nodes. You need to
add the certificate for SSL communication.
- Secure Connection: You can enable or disable secure connection to use more enhanced
secure network channel. For secure communication, using the Secure Connection feature is
recommended.
- SNMPv3: You can set SNMPv3.
- IP Security: You can set IP security settings.
- 802.1x(Ethernet): You can enable/disable 802.1x Security as well as manage filtering rules.
- IP/MAC Filtering: You can set filtering options for IP and MAC addresses. If the administrator
does not add a filtering rule for IPv4, IPv6, and MAC addresses, nothing is filtered. If the
administrator has added a filtering rule, filtering will be applied to the entered IPv4, IPv6, and
MAC addresses.
IPv4 Filtering: You can enable/disable IPv4 filtering as well as manage filtering rules.
IPv6 Filtering: You can enable/disable IPv6 filtering as well as manage filtering rules.
MAC Filtering: You can enable/disable Mac filtering as well as manage filtering rules.
- External Authentication Server: Set the servers for authentication.
User Access Control: You can restrict users from accessing the machine or application. You can
also give specific permission for user to only use certain feature of the machine. For example,
you can allow user A to only use print feature. In this case, user A will not be able to scan, copy
or fax with the machine.
- Authentication: You can choose the authentication method for user authentication. Select a
mode and click on the Options button.
SyncThru™ Web Service | 203
- Authorization (Giving rights): You can give permissions to a user to only use certain features
of the machine.
Authority Management: You can give different rights to different users. For example, you
can allow user A to use all the machine’s functions while giving user B only the right to print.
External User Authority: Set the servers for authentication.
- Accounting: You can manage accounts.
- User profile: You can store user information on the machine’s hard drive or NFC. You can use
this feature to manage the users using the machine. You can also group the users and
manage them as a group. You can make a maximum of 500 individual users and 200 user
groups. User identified by user ID and password are allowed to modify their password. They
are allowed to view all of their profile information. When it comes to the role, users are
allowed to see only the role they belong to but not its permissions.
System Log: You can keep logs of events that have happened in the machine. The administrator
can record and manage the machine usage information by keeping the system log files. The
system log files are stored on the machine’s mass storage device (hard disk), and when it is full,
it will erase old data. Export and save the important audit data separately using the exporting
feature.
- Log configuration: You can enable or disable keeping logs. You can also backup log files by
periods and transfer to a repository server.
- Log Viewer: You can view, delete, and search log files.
Maintenance tab
This tab allows you to maintain your machine by upgrading firmware, managing applications, and
setting contact information for sending emails. You can also connect to the Samsung website or
download manuals and drivers by selecting the Link menu.
Firmware Version: You can check the firmware version used in the machine. Check the version
and update it if necessary. This feature is also available from the machine (see "Machine
Details" on page 195).
Samsung MIB Version: The version number of the MIB(Management Information Base).
Application Management: You can add or delete applications/license. If you add an application,
you need to activate the license of the installed application. Some applications may not have a
license. This feature is also available from the machine (see "Application Management" on page
188)
Backup/Restore: You can backup the machine’s configurations and restore the configuration
when there is a problem with the machine. The saved (backed up) files can also be used to
configure other machines.
Wi-Fi Interface: You can enable or disable the Wi-Fi menu.
Contact Information: You can view contact information. To change the information, (see
"Contact Information" on page 195).
Link: You can view links to useful websites where you can:
- view product information and get support (samsung website).
- download manuals and drivers.
- order consumable supplies.
Easy Eco Driver | 204
Easy Eco Driver
• Available for Windows OS users only (see "Supplied software" on page 35).
• To use the Easy Eco Driver features, the Eco Driver Pack must be installed. Download
the software from the Samsung website and install it: (http://www.samsung.com > find
your product > Support or Downloads).
With the Easy Eco Driver, you can apply Eco features to save paper and toner before printing.
Easy Eco Driver also allows you simple editing such as removing images and texts, and more. You
can save frequently used settings as a preset.
How to use:
1. Open a document to print.
2. Open printing preference window (see "Opening printing preferences" on page 58).
3. From the Favorites tab, select Eco Printing Preview.
4. Click OK > Print in the window. A preview window appears.
5. Select the options you want to apply to the document.
You can see the preview of the applied features.
6. Click Print.
If you want to run Easy Eco Driver every time you print, check Start Easy Eco Driver before
printing job checkbox in the Basic tab of the printing preference window.
Using Samsung Printer Center | 205
Using Samsung Printer Center
Available for Windows users only.
The Samsung Printer Center allows you to manage all the printer drivers installed on your
computer from a single integrated application. You can use the Samsung Printer Center to add
and remove printer drivers, check the status of printers, update printer software, and configure
printer driver settings.
Understanding Samsung Printer Center
To open the program:
For Windows,
Select Start > Programs or All Programs > Samsung Printers > Samsung Printer Center.
• For Windows 8
From the Charms, select Search > Apps > Samsung Printers > Samsung Printer Center.
• For Windows 10 / Windows Server 2016
From task bar, type in Samsung Printers in Search input area. Press the enter key and then se-
lect Samsung Printer Center.
OR
From the Start() icon, select All apps > Samsung Printers > Samsung Printer Center.
Printers tab
The screenshot may differ depending on operating system you are using.
Using Samsung Printer Center | 206
Scanner & Fax Tab
• The screenshot may differ depending on operating system you are using.
• Available for multifunction products only.
1Printer list
Displays the printer drivers installed on your computer. To add a printer
driver to the list, click the button.
2Quick links
Displays links to various printer driver management functions. The quick
links in the Printers tab link to the following functions:
Settings: Allows you to configure the settings for individual printer
driver.
- Set as default printer: Sets the selected printer driver as the default
printer. If the selected printer driver is already set as the default
printer, then this option is not activated.
- Printing preferences: Allows you to configure the default print
settings.
- Device options: Allows you to configure advanced options, such as the
settings for optional devices and additional features.
The option allows you to modify the Printer Status and Stylish User
Interface settings.
- Change device: Allows you to change the device into another device.
- Properties: Allows you to configure the printer driver properties, such
as the name of the printer driver and its location, or add comments
about the printer driver .
Actions: Allows you to use the scan feature (this option is enabled only if
the selected device supports the scan feature).
Management: Allows you to manage the devices registered in the
program.
- Add a new printer / Remove printer: Adds a new device or removes an
existing device.
- Diagnose printer: Diagnoses problems in the selected device and
suggests solutions.
- Update software: Downloads and applies the applicable software
updates.
3
Printer
information
Provides general information about the selected device, such as its model,
IP address, port number, and status.
Using Samsung Printer Center | 207
1Printer list
Displays the fax and scanner driver installed on your computer. To add a
fax or scanner driver to the list, click the (Add Fax) or (Add
Scanner) button.
2Quick links
Displays links to the functions available for managing fax or scanner
drivers. The quick links in the Scanner & Fax tab offer the following
features:
To use this feature, the scanner driver and fax driver must be
installed on the computer.
Settings: Allows you to configure the settings for fax or scanner drivers.
- Address Book (fax only): Opens the Address Book.
- Fax Transmission History (fax only): Opens the fax transmission
history.
- Fax preferences (fax only): Allows you to configure the default fax
settings.
- Change device: Allows you to change the devices into another device.
- Properties: Allows you to configure the properties of a device, such as
location and add comments about the device.
Actions: Allows you to use the scan feature.
Management: Allows you to manage the devices registered in the
program.
- Remove fax or Remove scan: Removes the selected fax or scan driver.
- Update software: Downloads and applies the applicable software
updates.
3
Printer
information
Provides general information about the selected device, such as the
model, IP address, port number, and machine status.
1
2
3
Using Samsung Easy Printer Manager | 208
Using Samsung Easy Printer Manager
• Available for Windows and Mac OS users only.
For Windows, Internet Explorer 6.0 or higher is the minimum requirement for Samsung
Easy Printer Manager.
Samsung Easy Printer Manager is an application that combines Samsung machine settings into
one location. Samsung Easy Printer Manager combines device settings as well as printing
environments, settings/actions and launching. All of these features provide a gateway to
conveniently use your Samsung machine. Samsung Easy Printer Manager provides two different
user interfaces for the user to choose from: the basic user interface and the advanced user
interface. Switching between the two interfaces is easy: just click a button.
Also, Easy Capture Manager is installed automatically when you install the Samsung Easy Printer
Manager. You can also launch Easy Capture Manager manually. Capture your screen and launch
Easy Capture Manager by simply pressing the Print Screen key on the keyboard. Now you can
easily print your captured screen as captured or edited.
Understanding Samsung Easy Printer Manager
To open the program:
For Windows,
Select Start > Programs or All Programs > Samsung Printers > Samsung Easy Printer Manager.
• For Windows 8
From the Charms, select Search > Apps > Samsung Printers > Samsung Printer Manager.
• For Windows 10 / Windows Server 2016
From task bar, type in Samsung Printers in Search input area. Press the enter key and then se-
lect Samsung Printer Manager.
OR
From the Start() icon, select All apps > Samsung Printers > Samsung Printer Manager.
For Mac,
Open the Applications folder > Samsung folder > Samsung Easy Printer Manager.
The Samsung Easy Printer Manager interface is comprised of various basic sections as described
in the table that follows:
The screenshot may differ depending on operating system, model, or options.
Using Samsung Easy Printer Manager | 209
1Printer list
The Printer List displays printers installed on your computer and network
printers added by network discovery (Windows only).
2
Advanced
Setting
The advanced user interface is intended to be used by the person
responsible for managing the network and machines.
Some menus may not appear in the display depending on options or
models. If so, it is not applicable to your machine.
Device Settings: You can configure various machine settings such as
machine setup, paper, layout, emulation, network, and print information.
If you connect your machine to a network, the SyncThru™ Web
Service icon is enabled.
Scan to PC Settings: This menu includes settings to create or delete scan
to PC profiles.
- Scan Activation: Determines whether or not scanning is enabled on
the device.
- Basic tab: Contains settings related general scan and device settings.
Alert Settings (Windows only): This menu includes settings related to
error alerting.
- Printer Alert: Provides settings related to when alerts will be received.
- Email Alert: Provides options relating to receiving alerts via email.
- Alert History: Provides a history of device and toner related alerts.
3
Application
information
Includes links for changing to the refresh, preference setting, help, and
about.
Using Samsung Easy Printer Manager | 210
Click the Help ( ) button from the window, and then click on any option you want to
know about.
4
Printer
information
This area gives you general information about your machine. You can check
information, such as the machine’s model name, IP address (or Port name),
and machine status.
This button opens the Troubleshooting Guide when an error occurs.
You can directly open the troubleshooting section in the user guide.
5Quick links
Displays Quick links to machine specific functions. This section also
includes links to applications in the advanced settings.
If you connect your machine to a network, the SyncThru™ Web
Service icon is enabled.
6
Contents
area
Displays information about the selected machine, remaining toner level,
and paper. The information will vary based on the machine selected. Some
machines do not have this feature.
7
Order
supplies
Click on the Order button from the supply ordering window. You can order
replacement toner cartridge(s) from online.
Using Samsung Printer Status | 211
Using Samsung Printer Status
The Samsung Printer Status is a program that monitors and informs you of the machine status.
• The Samsung Printer Status window and its contents shown in this user guide may
differ depending on the machine or operating system in use.
• Check the operating system(s) that are compatible with your machine (see "System
requirements" on page 286).
• Available for Windows OS users only.
Samsung Printer Status overview
If an error occurs while operating, you can check the error from the Samsung Printer Status.
Samsung Printer Status is installed automatically when you install the machine software.
You can also launch Samsung Printer Status manually. Go to the Printing Preferences, click the
Printer Status button.
These icons appear on the Windows task bar:
Icon Mean Description
Normal
The machine is in ready mode and experiencing no errors or
warnings.
Warning
The machine is in a state where an error might occur in the
future. For example, it might be in toner low status, which may
lead to toner empty status.
Error The machine has at least one error.
Using Samsung Printer Status | 212
1
Device
Information
You can view the device information.
2
User’s Guide
You can view the online User Guide.
This button opens the Troubleshooting Guide when an error
occurs. You can directly open the troubleshooting section in
the user guide.
3
Supplies
Information
You can view the percentage of toner remaining in each toner
cartridge. The machine and the number of toner cartridge(s) shown
in the above window may differ depending on the machine in use.
Some machines do not have this feature.
4
Option You can set printing job alert related settings.
5
Order Supplies You can order replacement toner cartridge(s) from online.
6
Cancel Print
or
Close
Cancel Print: If print job is waiting in the print queue or printer,
cancel all user's print jobs in the print queue or the printer.
Close: Depending on the status of the machine or the supported
functions, the Close button may appear to close the status
window.
7
Toner/Paper
Information
This button areas for paper and toner info will be available based on
the device.
Using Samsung Printer Experience | 213
Using Samsung Printer Experience
Samsung Printer Experience is a Samsung application that combines Samsung machine settings
and machine management into one location. You can set device settings, order supplies, open
troubleshooting guides, visit Samsung’s website, and check connected machine information. This
application will be automatically downloaded from the Windows Store if the machine is
connected to a computer with an Internet connection.
Available for Windows 8 or higher users only.
Understanding the Samsung Printer Experience
To open the application,
From the Start screen or Start() icon, select the Samsung Printer Experience () tile.
The Samsung Printer Experience interface comprises various useful features as described in the
following table:
The screenshot may differ depending on operating system, model, or option.
1
Printer
Information
This area gives you general information about your machine. You can
check information, such as the machine’s status, location, IP address,
and remaining toner level.
1
2
6
3
4
5
Using Samsung Printer Experience | 214
Adding/Deleting Printers
If you do not have any printer added to the Samsung Printer Experience, or if you want to
add/delete a printer, follow the instructions below.
You can only add/delete network connected printers.
Adding a printer
1 Right-click the Samsung Printer Experience page and select Settings.
2 Select Add Printer
3 Select the printer you want to add.
You can see the added printer.
If you see mark, you can also click mark to add printers.
2 User Guide
You can view the online User Guide. You need to be connected to the
Internet to use this feature.
This button opens the Troubleshooting Guide when an error
occurs. You can directly open the troubleshooting section in
the user guide.
3 Order Supplies
Click on this button to order replacement toner cartridges online. You
need to be connected to the Internet to use this feature.
4 Visit Samsung
Links to Samsung printer website. You need to be connected to the
Internet to use this feature.
5 Printer Settings
You can configure various machine settings such as machine setup,
paper, layout, emulation, networking, and print information through
SyncThru™ Web Service. Your machine needs to be connected to a
network. This button will be disabled if your machine is connected via
USB cable.
6
Device List &
Latest Scanned
Image
The scan list displays devices that supports Samsung Printer
Experience. Under the device, you can see the latest scanned images.
Your machine needs to be connected to a network to scan from here.
This section is for the users with multi-functional printers.
Using Samsung Printer Experience | 215
Deleting a printer
1 Right-click the Samsung Printer Experience page, and then click Settings.
2 Select Remove Printer.
3 Select the printer you want to delete.
4 Click Yes.
You can see that the selected printer is removed from the screen.
Printing
This section explains common printing tasks from the Start screen.
The screenshot may differ depending on operating system, model, or option.
Basic printing
1 Open the document to print.
2 Select Print from the File menu.
3 Select your printer from the list.
4 Select the printer settings, such as the number of copies and orientation.
5 Click the Print button to start the print job.
Using Samsung Printer Experience | 216
Cancelling a print job
If the printing job is waiting in the print queue or print spooler, cancel the job as follows:
You can access this window by simply double-clicking the machine icon ( ) in the Windows
task bar.
• You can also cancel the current job by pressing (Stop) button on the control panel.
Opening more settings
The screen may appear somewhat different depending on the model or options.
You can set up more printing parameters.
1 Open the document you want to print.
2 Select Print from the File menu.
3 Select your printer from the list.
4 Click More settings.
Using Samsung Printer Experience | 217
Using the sharing feature
Samsung Printer Experience allows you to print from other applications installed on the
computer using the sharing feature.
This feature is only available for printing jpeg, bmp, tiff, gif, and png file formats.
1 Select the content you want to print from other application.
2 Click Share or press Window key + H.
3 Select the printer settings, such as the number of copies and orientation.
4 Click the Print button to start the print job.
Scanning
This section is for the users with multi-functional printers.
Scanning with your machine lets you turn pictures and text into digital files that can be stored on
your computer.
Scanning from Samsung Printer Experience
The most frequently used printing menus are displayed for quick scanning.
1 Place a single document face down on the document glass, or load the documents face up
into the document feeder.
2 Click the Samsung Printer Experience tile on the Start screen.
3 Click Scan ().
4 Set up the scanning parameters such as image type, document size, and resolution.
5 Click Prescan ( ) to check the image.
6 Adjust the prescanned image with scanning operation functions such as rotate and mirror.
7 Click Scan ( )and save the image.
Using Samsung Printer Experience | 218
When you place the originals in the Dual Scan Document Feeder (DSDF), Prescan ()
is not available.
• You can skip step 5, if the Prescan option is selected.
Using Box | 219
Using Box
Understanding the Box screen
Documents and images printed, scanned, downloaded and sent from computers can be stored in
the Box. The Box is located on your machine’s hard disk drive (HDD). It means the documents are
stored on the HDD. You can create a password for a certain Stored Document, so unauthorized
users cannot access it. Also, you can print stored documents by using a variety of printing
features and send the documents to several destination such as email, server or fax. You can set
a Stored Document and use the Stored Document feature with SyncThru™ Web Service.
If important data is stored in the Box, we recommend you to backup the data regularly.
Samsung disclaims all responsibility for damage or loss of data caused by misuse or
failure of the machine.
• Tap (Help) from the home screen or (quick menu) and then select on any
option you want to know about.
Command keys
When you selected files, shows below meus.
(Print) : Print files directly.
(Send) : Send files to Fax, Email, Server, Box, or USB.
(Delete) : Delete folders and files.
Button Name Description
Quick Menu Open the quick menu.
View Mode Select the view type.
Search Search for a desired menu or app.
My Program Show my program list.
Using Box | 220
Storage
Job progress
This menu appears whenever the machine is processing a job.
Detail: Tap this button to see the status, type, and time of the job.
Preview Area: Allows you to see a preview of the document being saved. The image in the
Preview area indicates the current send settings, such as the orientation and size of the file.
Using Box
To use the Boxfeature, tap Box from the home screen or Apps.
Storage allows you to store the scanned data on HDD (your machine's hard disk drive) in your
machine. The stored data can be sent to different destinations like Fax, Email, Server, Box, or
USB.
Sub menu (Action
overflow)
Open the sub menu.
Select All : Select all folders and files.
Print Options : Set options for printing.
Create folder : Create a folder.
Rename : Rename a folder or a file.
Delete : Delete folders and files.
Copy : Copy folders and files.
Move : Move folders or files to other storage.
Clear Browsing Info : Clear browsing information.
Detail : View the detail information about a folder or a file.
Filing Policy : Select a filing policy.
Format : Formatting files or data.
Button Name Description
Forward Manage the forward data.
Print Manage the stored print data.
Send Manage the stored send data.
Download Manage the stored download data.
USB Use a USB memory.
Button Name Description
Using Box | 221
Using multi check
This function is not available in Print and Send storage.
Touch and hold a folder or file, then change the multi check mode.
Create private folder
This function is not available in Download and USB storage.
Public: All users can access to the files.
Private: Set up the password to prevent unauthorized person from accessing.
1 Select the type of Storage (Print or Send) in which you want to create the folder.
2 Tap > Create folder.
3 Input the folder name and select Set as Private, and then tap OK.
4 Enter the appropriate information in the ID, Password, and Confirm Password fields, and
then tap OK.
Using a USB Drive device | 222
Using a USB Drive device
This chapter explains how to use a USB Drive device with your machine.
Understanding the USB screen
To use the USBfeature, tap Box > USB from the home screen or Apps.
Documents and images printed, scanned, downloaded and sent from USB can be stored in the
Box (see "Using Box" on page 219).
About USB Drive device
USB Drive devices are available with a variety of memory capacities to give you more room for
storing documents, presentations, music and videos, high resolution photographs, or whatever
other files you want to store or move.
You can do the following on your machine using a USB Drive device:
• Scan documents and save them on a USB Drive device.
• Print data stored on a USB Drive device.
• Format the USB Drive device.
Your machine supports USB Drive devices with FAT16/FAT32 and sector size of 512 bytes.
Check your USB Drive device’s file system from your dealer.
You must use only an authorized USB Drive device with an A plug type connector.
Use only a USB Drive device with metal-shielded connector.
Only use a USB Drive device that has obtained compatibility certification; otherwise, the machine
might not recognize it.
Insert a USB Drive device into the USB port on your machine.
A B
Using a USB Drive device | 223
Do not insert the USB Drive device to other ports except the ports which is as shown below
the image. If you insert the USB Drive device to other ports, the machine shows warning
message on the display screen.
• Do not remove the USB Drive device while it is in use. The machine warranty does not
cover damage caused by a user’s misuse.
• If your USB Drive device has certain features, such as security settings and password
settings, your machine may not automatically detect it. For details about these features,
see USB Drive device’s User Guide.
Printing from a USB Drive device
You can directly print files stored on a USB Drive device. You can print TIFF, JPEG and PRN files.
USB print option supported file types:
PRN: Only files created by provided driver with your machine are compatible. PRN files can be
created by selecting the Print to file check box when you print a document. The document will
be saved as a PRN file, rather than printed on paper. Only PRN files created in this fashion can
be printed directly from USB memory device.
TIFF: TIFF 6.0 Baseline
JPEG: JPEG Baseline
PDF: PDF 1.7 and below
XPS: XML Paper Specification 1.0
In case of 8bit CMYK JPEG files, Job could be cancelled.
To print a document from a USB Drive device:
Using a USB Drive device | 224
1 Insert a USB Drive device into the USB port on your machine.
Your machine automatically detects the device and reads data stored on it (see "About USB
Drive device" on page 222).
• The machine cannot detect the unformatted USB Drive device. Format, and then
reinsert the USB Drive device into the USB port on your machine.
• If the machine did not detect your USB Drive when the machine is in power save
mode. Wake up the device and wait until the machine returns to ready state. Then
reinsert the USB Drive back into the USB port on the front of your device.
2 Tap Box > USB from the home screen or Apps.
3 The machine shows all files in the USB Drive device.
Select the document you want to print from the list.
If the PDF file you selected is secured with a password, you have to know the password
for printing. Enter the password when the machine requires the secure password. If
you do not know the password, the print job will be cancelled.
4 Tap > Print Options.
5 Select the appropriate option.
Copies: Selects the number of copies.
Paper Source: Select from which tray the paper is used.
Auto fit: Allows you to scale your print job to the selected paper size in the tray regardless
of the document size. Select a tray, and press On.
6 Tap icon to begin printing.
7 After printing is completed, you can remove the USB Drive device from the machine.
Managing USB Drive device
You can delete image files stored on a USB Drive one-by-one or all at once by reformatting the
device.
After deleting files or reformatting a USB Drive device, files cannot be restored. Confirm
that you no longer need the data before deleting it.
Using a USB Drive device | 225
Deleting an image file
1 Insert a USB Drive device into the USB port on your machine.
2 Tap Box > USB from the home screen or Apps.
3 The machine shows all files in the USB Drive device.
Touch and hold folder or document you want to delete from the list.
If the file is in a folder, press the folder name.
4 Tap > Delete.
5 Tap Delete when the confirmation window appears.
Formatting a USB Drive device
1 Insert a USB Drive device into the USB port on your machine.
2 Tap Box > USB from the home screen or Apps.
3 The machine shows all files in the USB Drive device.
Touch and hold folder or document you want to delete from the list.
If the file is in a folder, press the folder name.
4 Tap > Format.
5 Tap Format when the confirmation window appears.
Maintenance
This chapter provides information about purchasing supplies, accessories and maintenance parts
available for your machine.
• Ordering supplies and accessories 227
• Available supplies 228
• Available accessories 229
• Available maintenance parts 230
• Storing the toner cartridge 231
• Redistributing toner 233
• Replacing the toner cartridge 235
• Replacing the waste toner container 237
• Installing accessories 238
• Monitoring the supplies life 241
• Cleaning the machine 242
• Tips for moving & storing the machine 246
Ordering supplies and accessories | 227
Ordering supplies and accessories
Available accessories may differ from country to country. Contact your sales representa-
tives to obtain the list of available supplies, and maintenance parts.
To order Samsung-authorized supplies, accessories, and maintenance parts, contact your local
Samsung dealer or the retailer where you purchased your machine. You can also visit
www.samsung.com/supplies, and then select your country/region to obtain the contact
information for service.
Available supplies | 228
Available supplies
When supplies reach the end of their life spans, you can order the followings of supplies for your
machine:
Depending on the options, percentage of image area and job mode used, the toner
cartridge’s lifespan may differ.
When purchasing new toner cartridges or other supplies, these must be purchased in the
same country as the machine you are using. Otherwise, new toner cartridges or other
supplies will be incompatible with your machine due to different configurations of toner
cartridges and other supplies according to the specific country conditions.
Samsung does not recommend using non-genuine Samsung toner cartridge such as
refilled or remanufactured toner. Samsung cannot guarantee non-genuine Samsung
toner cartridge's quality. Service or repair required as a result of using non-genuine
Samsung toner cartridges will not be covered under the machine’s warranty.
Type Average yield
a
a.Declared yield value in accordance with ISO/IEC 19798. The number of pages may be affected b y
operating environment, printing interval, graphics, media type and media size.
Part name
Toner cartridge
• Average continuous black cartridge yield:
Approx. 15,000 standard pages (Black)
• Average continuous color cartridge yield:
Approx. 10,000 standard pages
(Yellow/Magenta/Cyan)
CLT-K603L: Black
CLT-Y603L: Yellow
CLT-M603L: Magenta
CLT-C603L: Cyan
CLT-K604L
b
: Black
CLT-Y604L
b
: Yellow
CLT-M604L
b
: Magenta
CLT-C604L
b
: Cyan
b.The toner cartridge is available only for C4062 series bought in the United States and Canada.
Waste toner
container
Approx. 20,000 black pages or 5,000 color
pages
CLT-W506
Available accessories | 229
Available accessories
You can purchase and install accessories to enhance your machine’s performance and capacity.
Accessory Function Part name
Stand You can easily move the machine using the stand with
its wheels.
When using the optional Stand, you must install
the foot as shown in the Optional Stand Installa-
tion Guide. Otherwise, the machine could fall
over if on incline and cause bodily injury.
SL-DSK003S
Optional trays
(Tray2, Tray3,
Tray4)
If you are experiencing frequent paper supply problems,
you can attach an additional 550
a
sheet trays.
a.Plain paper 75 g/m
2
(20 lbs bond).
SL-SCF3001
Memory This module lets you extend your machine’s memory
capacity.
SL-MEM0020
Wi-Fi/NFC kit This kit lets you use your machine as a Wi-Fi and
NFC(Near Field Communication) machine.
SL-NWE001X
Wi-Fi/NFC/BLE kit This kit lets you use your machine as a Wi-Fi, NFC(Near
Field Communication) and BLE(Bluetooth Low Energy)
machine.
SL-NWE002X
Available maintenance parts | 230
Available maintenance parts
You need to replace the maintenance parts at specific intervals to keep the machine in the best
condition and avoid print quality and paper feeding problems resulting from the worn-out parts.
Maintenance parts are mostly rollers, belts and pads. However, the replacement period and parts
may differ depending on the model. Replacing maintenance parts can be performed only by an
authorized service provider, dealer, or the retailer where you bought the machine. To purchase
maintenance parts, contact the retailer where you bought the machine. The replacement period
for the maintenance parts is informed by the Samsung Printer Statusprogram. Or on the UI (User
Interface) if your machine supports a display screen. The replacement period varies based on the
operating system used, computing performance, application software, connecting method, paper
type, paper size, and job complexity.
Storing the toner cartridge | 231
Storing the toner cartridge
Toner cartridges contain components that are sensitive to light, temperature and humidity.
Samsung suggests users follow these recommendations to ensure optimal performance, highest
quality, and longest life from your new Samsung toner cartridge.
Store the cartridge in the same environment in which the printer will be used. This should be in
controlled temperature and humidity conditions. The toner cartridge should remain in its original
and unopened package until installation – if original packaging is not available, cover the top
opening of the cartridge with paper and store in a dark cabinet.
Opening the cartridge package prior to use dramatically shortens its useful shelf and operating
life. Do not store on the floor. If the toner cartridge is removed from the printer, follow the
instructions below to store the toner cartridge properly.
• Store the cartridge inside the protective bag from the original package.
• Store lying flat (not standing on end) with the same side facing up as if it were installed in the
machine.
• Do not store consumables in any of the following conditions:
- Temperature greater than 40 °C (104 °F).
- Humidity range less than 20 % or greater than 80 %.
- An environment with extreme changes in humidity or temperature.
- Direct sunlight or room light.
-Dusty places.
- A car for a long period of time.
- An environment where corrosive gases are present.
- An environment with salty air.
Handling instructions
• Do not touch the surface of the photoconductive drum in the cartridge.
• Do not expose the cartridge to unnecessary vibrations or shock.
• Never manually rotate the drum, especially in the reverse direction; this can cause internal
damage and toner spillage.
Toner cartridge usage
Samsung Electronics does not recommend or approve the use of non-Samsung brand toner
cartridges in your printer including generic, store brand, refilled, or remanufactured toner
cartridges.
Samsung’s printer warranty does not cover damage to the machine caused by the use of
refilled, remanufactured, or non-Samsung brand toner cartridges.
Storing the toner cartridge | 232
Estimated cartridge life
Estimated cartridge life (the life of the toner cartridge yield) depends on the amount of toner that
print jobs require. The actual print yield may vary depending on the print density of the pages you
print on, operating environment, percentage of image area, printing interval, media type and/or
media size. For example, if you print a lot of graphics, the consumption of the toner is higher and
you may need to change the cartridge more often.
Redistributing toner | 233
Redistributing toner
When the toner cartridge is near the end of its life:
• White streaks or light printing occurs and/or density varies from side to side.
• The toner-related message saying that the toner is low may appear on the display.
The computer’s Samsung Printing Status program window appears on the computer telling you
which color cartridge is low on toner (see "Using Samsung Printer Status" on page 211).
If this happens, you can temporarily improve print quality by redistributing the remaining toner
in the cartridge. In some cases, white streaks or light printing will still occur even after you have
redistributed the toner.
Illustrations on this user guide may differ from your machine depending on its options or
models. Check your machine type (see "Front view" on page 16).
• To prevent damage to the toner cartridge, do not expose it to light for more than a few
minutes. Cover it with a piece of paper, if necessary.
• Do not touch the green area of the toner cartridge. Use the handle on the cartridge to
avoid touching this area.
Do not use sharp objects such as a knife or scissors to open the toner cartridge package.
They might scratch the drum of the cartridge.
• If toner gets on your clothing, wipe it off with a dry cloth and wash clothing in cold
water. Hot water sets toner into fabric.
Redistributing toner | 234
Replacing the toner cartridge | 235
Replacing the toner cartridge
The machine uses four colors and has a different toner cartridge for each one: yellow (Y),
magenta (M), cyan (C), and black (K).
• The status LED and the toner-related message on the display indicate when each individual
toner cartridge should be replaced.
The computer’s Samsung Printing Status Program window appears on the computer telling you
which color cartridge is empty on toner (see "Using Samsung Printer Status" on page 211).
Check the type of the toner cartridge for your machine (see "Available supplies" on page 228).
• Shake the toner cartridge thoroughly, it will increase the initial print quality.
• Illustrations on this user guide may differ from your machine depending on its options
or models. Check your machine type (see "Front view" on page 16).
• To prevent damage to the toner cartridge, do not expose it to light for more than a few
minutes. Cover it with a piece of paper, if necessary.
• Do not touch the green area of the toner cartridge. Use the handle on the cartridge to
avoid touching this area.
Do not use sharp objects such as a knife or scissors to open the toner cartridge package.
They might scratch the drum of the cartridge.
• If toner gets on your clothing, wipe it off with a dry cloth and wash clothing in cold
water. Hot water sets toner into fabric.
Replacing the toner cartridge | 236
Replacing the waste toner container | 237
Replacing the waste toner container
When the life span of the waste toner container has expired, waste toner container-related
message appears on the screen display of the control panel, indicating the waste toner container
needs to be replaced. Check the waste toner container for your machine (see "Available supplies"
on page 228).
Toner particles can be released inside the machine but it does not mean the machine is
damaged. Contact a service representative when print quality problems occur.
• When you pull out the waste toner container out of the machine, move the container
carefully not to drop it from your hands.
Make sure that you lay the waste toner container on a flat surface so that the toner does
not spill.
Do not tilt or turn over the container.
Installing accessories | 238
Installing accessories
Precautions
• Disconnect the power cord
Never remove the control board cover while the power is turned on.
To avoid the possibility of an electrical shock, always disconnect the power cord when installing
or removing ANY internal or external accessories.
• Discharge static electricity
The control board and internal accessories (memory module) are sensitive to static electricity.
Before installing or removing any internal accessories, discharge static electricity from your
body by touching something metal, such as the metal back plate on any device plugged into a
grounded power source. If you walk around before finishing the installation, repeat this proce-
dure to discharge any static electricity again.
When installing accessories, the battery inside the machine is a service component. Do not
change it by yourself. There is a risk of an explosion if battery is replaced by an incorrect
type. Your service provider should remove the old battery from your device and dispose
of it in accordance with the relevant regulations in your country.
Setting Device Options
When you install the optional devices such as optional tray, memory, etc, this machine
automatically detects and sets the optional devices. If you cannot use the optional devices you
installed in this driver, you can set the optional devices in Device Options.
1 For Windows XP Service Pack 3/Server 2003, from the Start menu, select Printer and Faxes.
• For Windows Server 2008/Vista, from the Start menu, select Control Panel > Hardware
and Sound> Printers.
• For Windows 7, from the Start menu, select Control Panel > Devices and Printers.
For Windows 8, from the Charms, select Search > Settings > Control Panel > Devices and
Printers.
• For Windows Server 2008 R2, select Control Panel > Hardware> Devices and Printers.
• For Windows 10 / Windows Server 2016
From task bar, type in Devices and Printers in Search input area. Press the Enter key.
OR
From the Start () icon, select Settings > Devices> Printers & scanners>Devices and
Printers.
Right-click the Start ( ) icon, you can select Control Panel > Devices and
Printers.
Installing accessories | 239
2 Right-click your machine.
3 For Windows XP Service Pack 3/2003/2008/Vista, press Properties.
For Windows 7/Windows 8/Windows Server 2008 R2/Windows 10 / Windows Server 2016,
from context menus, select the Printer properties.
If Printer properties item has mark, you can select other printer drivers connected
with selected printer.
4 Select Device Options.
The Properties window may differ depending on the driver or operating system you
are using.
5 Select the appropriate option.
Some menus may not appear in the display depending on options or models. if so, it is
not applicable to your machine.
Tray Options: Select the optional tray you installed. You can select the tray.
Storage Options: Select the optional memory you installed. If this feature is checked, you
can select the Print Mode.
Printer Configuration: Select the printer language for the print job.
Administrator Settings: You can select the Printer Status and EMF Spooling.
Admin Job Accounting: Allows you to associate user and account identification
information with each document you print.
- User permission: If you check this option, only users with user permission can start a
print job.
- Group permission: If you check this option, only groups with group permission can start
a print job.
If you want to encrypt job accounting password, check Job Accounting Password
Encryption.
Custom Paper Size Settings: You can specify custom paper size.
6 Click OK until you exit the Properties or Printer properties window.
Installing accessories | 240
Upgrading a memory module
Your machine has a dual in-line memory module (DIMM). Use this memory module slot to install
additional memory. We recommend the use of only genuine Samsung DIMM's. You may void your
warranty if it is determined that your machine problem is being caused by third party DIMM's.
The order information is provided for optional accessories (see "Available accessories" on page
229).
After installing the optional memory, you can use the advanced printing features, such as
proofing a job and specifying of printing a secure print job in the printer properties
window. You can control the active job queue and file policy (see "Using Box" on page 219).
1 2
Monitoring the supplies life | 241
Monitoring the supplies life
You can easily check remaining life of the supplies on the Notification Bar. (see "Notification Bar"
on page 25). Check remaining life of the supplies and prepare the supplies in advance.
You can also print the supplies life report. Select Supplies Information in the Report feature (see
"Report" on page 190).
From the machine
1 Tap Settings > Management > Supplies Life from the home screen or Apps.
2 Check the supplies life.
We recommend you prepare new supplies or those that you have used over 90 % of
their average yield (see "Replacing the toner cartridge" on page 235).
From the SyncThru™ Web Service
1 From the SyncThru™ Web Service, select the Informationtab > Supplies.
2 Check the remaining percentage.
We recommend you prepare new supplies if the remaining percentage is less than 10
% (see "Replacing the toner cartridge" on page 235).
Cleaning the machine | 242
Cleaning the machine
If printing quality problems occur or if you use your machine in a dusty environment, you need to
clean your machine regularly to keep it in the best printing condition and prolong the life of your
machine.
• Cleaning the cabinet of the machine with cleaning materials containing large amounts
of alcohol, solvents, or other strong substances can discolor or distort the cabinet.
If your machine or the surrounding area is contaminated with toner, we recommend you
use a cloth or tissue dampened with water to clean it. If you use a vacuum cleaner, toner
blows in the air and might be harmful to you.
Cleaning the outside or the display screen
Clean the machine cabinet or the display screen with a soft, lint-free cloth. Dampen the cloth
slightly with water, but be careful not to let any water drip onto or into the machine.
Cleaning the machine | 243
Cleaning the inside
During the printing process, paper, toner, and dust particles can accumulate inside the machine.
This buildup can cause print quality problems, such as toner specks or smearing. Cleaning the
inside of the machine clears and reduces these problems.
• To prevent damage to the toner cartridge, do not expose it to light for more than a few
minutes. Cover it with a piece of paper, if necessary.
• Do not touch the green area of the toner cartridge. Use the handle on the cartridge to
avoid touching this area.
• Use a dry lint-free cloth when cleaning the inside of the machine, be careful not to
damage the transfer roller or any other inside parts. Do not use solvents such as
benzene or thinner. Printing quality problems can occur and cause damage to the
machine.
• Use a dry lint-free cloth to clean the machine.
• Turn the machine off and unplug the power cord. Wait for the machine to cool down. If
your machine has a power switch, turn the power switch off before cleaning the
machine.
• Illustrations on this user guide may differ from your machine depending on its options
or models. Check your machine type (see "Front view" on page 16).
Cleaning the machine | 244
Cleaning the pickup roller
• Turn the machine off and unplug the power cord. Wait for the machine to cool down. If
your machine has a power switch, turn the power switch off before cleaning the
machine.
• Illustrations on this user guide may differ from your machine depending on its options
or models. Check your machine type (see "Front view" on page 16).
1
2
Cleaning the machine | 245
Cleaning the scan unit
Keeping the scan unit clean helps ensure the best possible copies. We suggest that you clean the
scan unit at the start of each day and during the day as needed.
• Turn the machine off and unplug the power cord. Wait for the machine to cool down. If
your machine has a power switch, turn the power switch off before cleaning the
machine.
• Illustrations on this user guide may differ from your machine depending on its options
or models. Check your machine type (see "Front view" on page 16).
1 Slightly dampen a soft, lint-free cloth or paper towel with water.
2 Lift and open the Dual Scan Document Feeder (DSDF).
3 Wipe the surface of the scanner until it is clean and dry.
1. Dual Scan Document Feeder (DSDF)
2. Scanner glass
3. Document feeder glass
4. White bar and CIS(Contact Image Sensor)
4 Close the Dual Scan Document Feeder (DSDF).
1
2
4
3
Tips for moving & storing the machine | 246
Tips for moving & storing the machine
• When moving the machine, do not tilt or turn it upside down. Otherwise, the inside of the
machine may be contaminated by toner, which can cause damage to the machine or reduce
print quality.
• When moving the machine, make sure at least two people are holding the machine securely.
Troubleshooting
This chapter gives helpful information for what to do if you encounter an error. If you cannot find a
solution in the User Guide or the problem persists, call for service.
• Tips for avoiding paper jams 248
• Clearing paper jams 249
• Understanding display messages 256
• Paper feeding problems 263
• Power and cable connecting problems 264
• Printing problems 265
• Printing quality problems 268
• Copying problems 274
• Scanning problems 275
• Faxing problems 276
• Operating system problems 278
• Wireless network problems 279
Tips for avoiding paper jams | 248
Tips for avoiding paper jams
By selecting the correct medias, most paper jams can be avoided. To avoid paper jams, refer to
the following guidelines:
• Ensure that the adjustable guides are positioned correctly (see "Tray overview" on page 44).
• Do not remove paper from the tray while your machine is printing.
• Flex, fan, and straighten paper before loading.
• Do not use creased, damp, or highly curled paper.
• Do not mix paper type and size in a tray.
• Use only recommended print media (see "Print media specifications" on page 282).
Clearing paper jams | 249
Clearing paper jams
To avoid tearing the paper, pull the jammed paper out slowly and gently.
In tray1
Illustrations on this user guide may differ from your machine depending on its options or
models. Check your machine type (see "Front view" on page 16).
Clearing paper jams | 250
In optional tray
The procedure is same for all optional trays.
If you do not see the paper in this area, stop and go to next step:
Clearing paper jams | 251
In the multi-purpose tray
If you do not see the paper in this area, stop and go to next step:
1 2 3
Clearing paper jams | 252
Inside the machine
The fuser area is hot. Take care when removing paper from the machine in this area.
Illustrations on this user guide may differ from your machine depending on its options or
models. Check your machine type (see "Front view" on page 16).
In the exit area
The fuser area is hot. Take care when removing paper from the machine in this area.
If you do not see the paper in this area, stop and go to next step:
Clearing paper jams | 253
In the duplex unit area
Clearing original document jams
To prevent document jams, use the scanner glass for thick, thin or mixed paper originals.
To avoid tearing the document, remove the jammed document slowly and carefully.
Original paper jam in front of scanner
Illustrations in this user guide may differ from your machine depending on the model and
options installed. Check your machine type (see "Front view" on page 16).
Clearing paper jams | 254
Original paper jam inside of scanner
Illustrations in this user guide may differ from your machine depending on the model and
options installed. Check your machine type (see "Front view" on page 16).
If you do not see the paper in this area, stop and go to next step:
Clearing paper jams | 255
Original paper jam in exit area of scanner
• Illustrations in this user guide may differ from your machine depending on the model
and options installed. Check your machine type (see "Front view" on page 16).
• This troubleshooting may not be available depending on model or optional goods (see
"Front view" on page 16).
Understanding display messages | 256
Understanding display messages
Messages appear on the display screen to indicate the machine’s status or errors. Some error
messages are shown with graphics to help you troubleshoot problem. Refer to the tables below
to understand the messages and their meaning, and correct the problem, if necessary.
• You can resolve the error with the guideline from the computer’s Printing Status
program window (see "Using Samsung Printer Status" on page 211).
• If a message is not in the table, reboot the power and try the printing job again. If the
problem persists, call a service representative.
• When you call for service, provide the service representative with the contents of
display message.
• Some messages may not appear on the display depending on the options or models.
• [error number] indicates the error number.
• [tray number] indicates the tray number.
• [media type] indicates the media type.
• [media size] indicates the media size.
• [color] indicates the color of toner.
• [unit type] indicates the unit type.
Message Meaning Suggested solutions
Check whether the pieces
of paper remain in the
paper path
There is a problem in the
paper path.
Remove the pieces of paper
remain in the paper path. If the
problem persists, call for service.
Did not supply enough
toner. Remove seal tape
of toner cartridge or
shake it. Call for service if
the problem persists
The machine cannot detect
a toner cartridge. Or the
seal tape was not removed
from the toner cartridge.
Remove the sealing tape from the
toner cartridge. Refer to Quick
Install Guide.
When replacing
cartridges, we
recommend that you use
genuine Samsung toner
cartridge. Samsung may
decline to perform
warranty services on
products in which
non-genuine Samsung
toner cartridges such as
refilled or
remanufactured have
been used.
The indicated toner
cartridge is not suitable for
your machine.
Install the corresponding toner
cartridge with a
Samsung-genuine cartridge (see
"Replacing the toner cartridge" on
page 235).
Understanding display messages | 257
Door is open.
Close it
The front cover or rear cover
is not securely latched.
Close the cover until it locks into
place.
End of life, Replace with
new [color] toner
cartridge
The indicated toner
cartridge has reached its
estimated cartridge life
a
.
Replace the toner cartridge with a
Samsung- genuine toner
cartridge (see "Replacing the
toner cartridge" on page 235).
[Color] toner is very low
The indicated toner
cartridge has almost
reached its estimated
cartridge life
a
.
• You can choose Stop or
Continue as shown on the
control panel. If you select Stop,
the printer stops printing. If you
select Continue, the printer
keeps printing but the printing
quality cannot be guaranteed.
• Replace the toner cartridge for
the best print quality when this
message appears. Using a
cartridge beyond this stage can
result in printing quality issues
(see "Replacing the toner
cartridge" on page 235).
[Color] toner is low
Small amount of toner is left
in the indicated cartridge
a
.
Prepare a new cartridge for a
replacement. You may
temporarily increase the printing
quality by redistributing the toner
(see "Redistributing toner" on
page 233).
Engine System Failure
[error number]. Turn off
then on.
There is a problem in the
engine system.
Turn the machine off and back on
again. If the problem persists, call
for service.
Engine Failure [error
number].
Call for service if the
problem persists.
Fan Failure: [error
number].Turn off then on.
Call for service if the
problem persists.
There is a problem in the fan
system.
Turn the machine off and back on
again. If the problem persists, call
for service.
Fuser Failure [error
number]. Turn off then on.
There is a problem in the
fuser unit.
Turn the machine off and back on
again. If the problem persists, call
for service.
Fuser Unit Failure [error
number]. Turn off then on.
Message Meaning Suggested solutions
Understanding display messages | 258
HDD System Failure
[error number] : Turn off
then on. Call for service if
the problem persists
There is a problem in the
hard disk.
Turn the machine off and back on
again. If the problem persists, call
for service.
HDD System Failure
[error number] : Call for
service
HDD Error [error
number]. Check users
guide
Input System Failure
[error number]:Check
[tray number]
connection.
There is a problem in the
tray
Open and close the tray. If the
problem persists, call for service.
Input System Failure
[error number]:Pull [tray
number] out and insert it.
There is a problem in the
tray.
Open and close the tray. If the
problem persists, call for service.
Input System Failure
[error number]:Check
[tray number]
connection.
There is a problem in the
lamp.
Open the door, then close it. If the
problem persists, call for service.
Load Manual with
[Letter], [Plain] paper
Thepapersize specified in
the printer properties does
not match the paper you are
loading.
Load the correct paper in the tray.
LSU Failure: [error
number]. Turn off then
on. Call for service if the
problem persists.
There is a problem in the
LSU.
Turn the machine off and back on
again. If the problem persists, call
for service.
Motor Failure: [error
number].Turn off then on.
Call for service if the
problem persists.
There is a problem in the
motor system.
Turn the machine off and back on
again. If the problem persists, call
for service.
MSOK Failure: [error
number]. Call for service
and Change MSOK
There is a problem in the
engine system.
Turn the machine off and back on
again. If the problem persists, call
for service.
Original paper jam in
front of the scanner
The originals are jammed in
Dual scan document feeder.
Clear the jam (see "Original paper
jam in front of scanner" on page
253).
Original paper jam inside
of the scanner
The originals are jammed in
Dual scan document feeder.
Clear the jam (see "Original paper
jam inside of scanner" on page
254).
Message Meaning Suggested solutions
Understanding display messages | 259
Paper in output bin is full.
Remove printed paper
The output tray is full.
Remove printouts from the output
tray, the machine resumes
printing.
Paper is empty in all tray.
Load paper.
There is no paper in all tray. Load paper in the tray.
Paper is empty in
tray[number]. Load
paper.
There is no paper in the tray. Load paper in the tray.
Paper is empty in MP tray.
Load paper.
There is no paper in the
multi-purpose tray.
Load paper in the multi-purpose
tray.
Paper is low in
tray[number]. Load
paper.
Running out of paper in the
tray.
Load paper in the tray.
Tray[number] paper
mismatch
MP tray paper mismatch
The paper size specified in
the printer properties does
not match the paper loaded
in the tray.
Select Continue to proceed with
the print job with the incorrect
paper, or select Cancel to stop the
print job and load the correct
paper in the tray.
Paper Jam at the bottom
of duplex path
Paper has jammed during
duplex printing.
Clear the jam (see "In the duplex
unit area" on page 253).
Paper Jam inside of
duplex path
Paper Jam at the top of
duplex pat
Paper Jam in exit area.
Paper has jammed in the
exit area.
Clear the jam (see "In the exit
area" on page 252).
Paper Jam inside of
machine
Paper has jammed inside
the machine.
Clear the jam (see "Inside the
machine" on page 252).
Paper jam in Tray1
Paper has jammed in the
tray.
Clear the jam (see "In tray1" on
page 249).
Paper jam in Tray2
Paper has jammed in the
optional tray.
Clear the jam (see "In optional
tray" on page 250).
Paper jam in Tray3
Paper jam in Tray4
Paper jam in MP tray
Paper has jammed in the
feeding area of the tray.
Clear the jam (see "In the
multi-purpose tray" on page 251).
Prepare new fuser unit
The estimated life of the
fuser unit is close.
Replace the fuser unit with a new
one. Contact the service
representatives.
Message Meaning Suggested solutions
Understanding display messages | 260
Replace with new fuser
unit
The fuser unit has reached
its end of life.
Replace the fuser unit with a
Samsung-genuine fuser unit, call
for service.
Prepare new image
transfer belt unit
The estimated life of the
transfer belt is close.
Replace the transfer belt with a
new one. Contact the service
representatives.
Replace with new image
transfer belt unit
The transfer belt has
reached its end of life.
Replace the transfer belt with a
new one. Contact the service
representatives.
Install image transfer belt
unit
The transfer belt is not
installed.
Install a Samsung-genuine
transfer belt. Contact the service
representatives.
Image transfer belt unit is
not compatible. Check the
user guide.
The transfer belt of the
machine is not for your
machine.
Install the a Samsung-genuine
part designed for your machine.
Contact the service
representatives.
Replace with new
Transfer roller
The transfer roller has
reached its end of life.
Replace the transfer roller with a
Samsung-genuine transfer roller,
call for service.
Replace with new
tray[number] pickup
roller
The tray pickup roller has
reached its end of life.
Replace the tray pickup roller with
a Samsung-genuine pickup roller,
call for service.
Replace with new
tray[number] retard
roller
The tray retard roller has
reached its end of life.
Replace the tray retard roller with
a new one. Contact the service
representatives.
Replace with new DSDF
retard roller
The Dual Scan Document
Feeder (DSDF) retard roller
has reached its end of life.
Replace the Dual Scan Document
Feeder (DSDF) retard roller with a
new one. Contact the service
representatives.
Scan System Failure:
[error number]. Turn off
then on
There is a problem in the
scan system.
Turn the machine off and back on
again. If the problem persists, call
for service.
Sensor Failure: [error
number]. Turn off then on.
Call for service if the
problem persists
There is a problem in the
sensor system.
Turn the machine off and back on
again. If the problem persists, call
for service.
The room temperature is
not suitable for this set
use. Please adjust room
temperature
The machine is in a room
with improper room
temperature.
Please adjust room temperature
(see "Specifications" on page 281).
Message Meaning Suggested solutions
Understanding display messages | 261
[Color] Toner Cartridge
Failure: [error number].
Call for service
There is a problem in the
toner cartridge.
Turn the machine off and back on
again. If the problem persists, call
for service.
[Color] Toner cartridge is
not installed. Install the
cartridge
A toner cartridge is not
installed.
Reinstall the toner cartridge.
[Color] Toner cartridge is
not compatible. Check
users guide
The imaging unit you have
installed is not for your
machine.
Install a Samsung-genuine
imaging unit, designed for your
machine (see "Available supplies"
on page 228).
Top door of scanner is
open
The Dual scan document
feeder cover is not securely
latched.
Close the cover until it locks into
place.
Tray Failure: [error
number]. Check Tray
connection
The tray is not securely
connected.
Reinstall the tray. If the problem
persists, call for service.
Tray Failure [error
number]. Pull tray
[number] out and insert
it. Call for service if the
problem persists
The tray is not securely
connected.
Reinstall the tray. If the problem
persists, call for service.
Tray[number] is not
installed. Install the tray
The tray is not properly
installed.
Reinstall the tray. If the problem
persists, call for service.
Tray[number] cassette is
pulled out. Insert it
properly
The tray is not securely
latched.
Close the tray until it locks into
place.
Tray[number] door is
open. Close it
The tray door is not securely
latched.
Close the tray door until it locks
into place.
UI System Failure: [error
number].
There is a problem in the UI
system.
Turn the machine off and back on
again. If the problem persists, call
for service.
Tray Failure: [error
number]. Check Tray
connection
The tray is not securely
connected.
Reinstall the tray. If the problem
persists, call for service.
Tray Failure [error
number]. Pull tray
[number] out and insert
it. Call for service if the
problem persists
The tray is not securely
connected.
Reinstall the tray. If the problem
persists, call for service.
Message Meaning Suggested solutions
Understanding display messages | 262
TR Failure: [error
number]. Install transfer
roller again
The transfer roller is not
installed.
Install the transfer roller. If it is
already installed, try to reinstall
the transfer roller. If the problem
persists, call for service.
Waste toner container is
almost full. Replace with
new one
The life span of the waste
toner container has expired
and the printer will stop
printing until a new waste
toner container is placed
into the printer.
Replace a waste toner container
with a Samsung-genuine waste
toner container.
Waste toner tank is full.
Replace with new one
The waste toner container is
full.
Replace the waste toner
container.
Waste toner tank is not
installed. Install it
The waste toner container is
not installed.
Install the waste toner container.
If it is already installed, try to
reinstall the waste toner
container. If the problem persists,
call for service.
The IPv4 address assigned
to wireless LAN conflicts
with that of other system.
Check it
The IPv4 address is used
elsewhere(wieless LAN).
Check the IPv4 address or obtain a
new IP address.
The IPv6 address assigned
to wireless LAN conflicts
with that of other system.
Check it
The IPv6 address is used
elsewhere(wieless LAN).
Check theM IPv6 address or obtain
a new IP address.
This IP address conflicts
with that of other system.
Check it
The IP address is used
elsewhere.
Check the IP address or obtain a
new IP address.
Network cable is
disconnected. Check it
The machine is not
connected with a network
cable.
Connect the machine to the
network with a network cable.
Error: #S6-3113
Call for service
The network function does
not work due to a fault in
the wired network PHY chip.
Reboot the power and try the
printing job again. If the problem
persists, please call for service.
802.1x authentication
failed. Please Contact the
System Administrator
Fail to authenticate.
Check the network authentication
protocol. If the problem persists,
call for service.
a.Estimated cartridge life means the expected or estimated toner cartridge life, which indicates the
average capacity of print-outs and is designed pursuant to ISO/IEC 19798 (see "Available supplies" on
page 228). The number of pages may be affected by operating environment, percentage of image area,
printing interval, media, percentage of image area, and media size. Some amount of toner may remain in
the cartridge even when replace new cartridge appears and the machine stops printing.
Message Meaning Suggested solutions
Paper feeding problems | 263
Paper feeding problems
Condition Suggested solutions
Paper jams during
printing.
Clear the paper jam.
Paper sticks together.
• Check the maximum paper capacity of the tray.
• Make sure that you are using the correct type of paper.
• Remove paper from the tray and flex or fan the paper.
• Humid conditions may cause some paper to stick together.
Multiple sheets of
paper do not feed.
Different types of paper may be stacked in the tray. Load paper of
only one type, size, and weight.
Paper does not feed
into the machine.
• Remove any obstructions from inside the machine.
Paper has not been loaded correctly. Remove paper from the tray
and reload it correctly.
• There is too much paper in the tray. Remove excess paper from
the tray.
• The paper is too thick. Use only paper that meets the
specifications required by the machine.
The paper keeps
jamming.
• There is too much paper in the tray. Remove excess paper from
the tray. If you are printing on special materials, use the manual
feeding in tray.
• An incorrect type of paper is being used. Use only paper that
meets the specifications required by the machine.
There may be debris inside the machine. Open the front cover and
remove any debris.
Envelopes skew or fail
to feed correctly.
Ensure that the paper guides are against both sides of the
envelopes.
Power and cable connecting problems | 264
Power and cable connecting problems
Reboot the power. If the problem persists, please call for service.
Condition Suggested solutions
The machine is not receiving
power,
or the connection cable
between the computer and
the machine is not connected
properly.
1. Connect the machine to the electricity supply first.
2. Check the USB cable or network cable in the machine’s rear.
3. Disconnect the USB cable or network cable in the machine’s
rear and then, reconnect it.
Printing problems | 265
Printing problems
Condition Suggested solutions
The machine does not
print.
Connect the machine to the electricity supply first. If the machine
has a (Power/Wakeup) button on the control, press it.
Select your machine as your default machine in Windows.
Check the machine for the following:
• The cover is not closed. Close the cover.
• Paper is jammed. Clear the paper jam (see "Clearing paper
jams" on page 249).
No paper is loaded. Load paper (see "Loading paper in the tray"
on page 44).
• The toner cartridge is not installed. Install the toner cartridge
(see "Replacing the toner cartridge" on page 235).
• Make sure the protect cover and sheets are removed from the
toner cartridge (see "Replacing the toner cartridge" on page
235).
If a system error occurs, contact your service representative.
Disconnect the machine cable and reconnect it (see "Rear view"
on page 17).
If possible, attach the cable to another computer that is working
properly and print a job. You can also try using a different
machine cable.
Check the Windows printer settings to make sure that the print
job is sent to the correct port. If the computer has more than one
port, make sure that the machine is attached to the correct one.
Check the Printing Preferences to ensure that all of the print
settings are correct.
Uninstall and reinstall the machine’s driver.
Check the display message on the control panel to see if the
machine is indicating a system error. Contact a service
representative.
Get more hard disk space and print the document again.
Once the paper is removed from the output tray, the machine
resumes printing.
Printing problems | 266
The machine selects print
materials from the wrong
paper source.
For many software applications, the paper source selection is
found under the Paper tab within the Printing Preferences (see
"Opening printing preferences" on page 58). Select the correct
paper source. See the printer driver help screen (see "Using help"
on page 64).
A print job is extremely
slow.
Reduce the complexity of the page or try adjusting the print
quality settings.
Half the page is blank.
Change the page orientation in your application (see "Opening
printing preferences" on page 58). See the printer driver help
screen (see "Using help" on page 64).
Ensure that the paper size in the printer driver settings matches
the paper in the tray.Or, ensure that the paper size in the printer
driver settings matches the paper selection in the software
application settings you use (see "Opening printing preferences"
on page 58).
The machine prints, but
the text is wrong, garbled,
or incomplete.
Disconnect the machine cable and reconnect. Try a print job that
you have already printed successfully. If possible, attach the
cable and the machine to another computer that you know works
and try a print job. Finally, try a new machine cable.
Check the application’s printer selection menu to ensure that
your machine is selected.
Try printing a job from another application.
The operating system is malfunctioning. Exit Windows and reboot
the computer. Turn the machine off and back on again.
Pages print, but they are
blank.
Redistribute the toner, if necessary. If necessary, replace the
toner cartridge.
• See "Redistributing toner" on page 233.
• See "Replacing the toner cartridge" on page 235.
Check the file to ensure that it does not contain blank pages.
Contact a service representative.
The machine does not
print PDF files correctly.
Some parts of graphics,
text, or illustrations are
missing.
Printing the PDF file as an image may enable the file to print. Turn
on Print As Image from the Acrobat printing options.
It will take longer to print when you print a PDF file as an
image.
The print quality of
photos is not good.
Images are not clear.
Reduce the photo size. If you increase the photo size in the
software application, the resolution will be reduced.
Condition Suggested solutions
Printing problems | 267
Before printing, the
machine emits vapor near
the output tray.
Using damp/wet paper can cause vapor [white smoke] during
printing. This is not a problem, just keep printing. If you are
bothered by the smoke [vapor], then replace the paper with fresh
paper from an unopened ream.
The machine does not
print custom-sized paper,
such as billing paper.
Set the correct paper size in the Custom in Paper tab in Printing
Preferences (see "Opening printing preferences" on page 58).
The printed billing paper
is curled.
The paper type setting does not match. Change the printer option
and try again. Go to Printing Preferences, click Paper tab, and set
type to Thin (see "Opening printing preferences" on page 58).
Condition Suggested solutions
Printing quality problems | 268
Printing quality problems
If the inside of the machine is dirty or paper has been loaded improperly, there might be a
reduction in print quality. See the table below to clear the problem.
Condition Suggested solutions
Light or faded print
If a vertical white streak or faded area appears on the page, the
toner supply is low. Install a new toner cartridge (see "Replacing
the toner cartridge" on page 235).
• The paper may not meet paper specifications; for example, the
paper may be too moist or rough.
• If the entire page is light, the print resolution setting is too low
or the toner save mode is on. Adjust the print resolution and
turn the toner save mode off. See the help screen of the printer
driver.
• A combination of faded or smeared defects may indicate that
the toner cartridge needs cleaning. Clean the inside of your
machine (see "Cleaning the machine" on page 242).
• The surface of the LSU part inside the machine may be dirty.
Clean the inside of your machine (see "Cleaning the machine" on
page 242). If these steps do not correct the problem, contact a
service representative.
The top half of the paper
is printed lighter than the
rest of the paper
The toner might not adhere properly to this type of paper.
• Change the printer option and try again. Go to Printing
Preferences, click the Paper tab, and set the paper type to
Recycled (see "Opening printing preferences" on page 58).
Toner specks • The paper may not meet specifications; for example, the paper
may be too moist or rough.
• The transfer roller may be dirty. Clean the inside of your
machine (see "Cleaning the machine" on page 242).
• The paper path may need cleaning. Contact a service
representative (see "Cleaning the machine" on page 242).
Printing quality problems | 269
Dropouts
If faded areas, generally rounded, occur randomly on the page:
A single sheet of paper may be defective. Try reprinting the job.
• The moisture content of the paper is uneven or the paper has
moist spots on its surface. Try a different brand of paper.
• The paper lot is bad. The manufacturing processes can cause
some areas to reject toner. Try a different kind or brand of
paper.
• Change the printer option and try again. Go to Printing
Preferences, click the Paper tab, and set type to Thick (see
"Opening printing preferences" on page 58).
If these steps do not correct the problem, contact a service
representative.
White Spots
If white spots appear on the page:
• The paper is too rough and a lot of dirt from paper falls to the
inner components within the machine, so the transfer roller
may be dirty. Clean the inside of your machine (see "Cleaning
the machine" on page 242).
• The paper path may need cleaning. Clean the inside of your
machine (see "Cleaning the machine" on page 242).
If these steps do not correct the problem, contact a service
representative.
Vertical lines
If black vertical streaks appear on the page:
• The surface (drum part) of the toner cartridge inside the
machine has probably been scratched. Remove the toner
cartridge and install a new one (see "Replacing the toner
cartridge" on page 235).
If white vertical streaks appear on the page:
• The surface of the LSU part inside the machine may be dirty.
Clean the inside of your machine (see "Cleaning the machine" on
page 242). If these steps do not correct the problem, contact a
service representative.
Black or color
background
If the amount of background shading becomes unacceptable:
• Change to a lighter weight paper.
• Check the environmental conditions: very dry conditions or a
high level of humidity (higher than 80% RH) can increase the
amount of background shading.
• Remove the old toner cartridge and install a new one (see
"Replacing the toner cartridge" on page 235).
Thoroughly redistribute the toner (see "Redistributing toner" on
page 233).
Condition Suggested solutions
Printing quality problems | 270
Toner smear Clean the inside of the machine (see "Cleaning the machine" on
page 242).
• Check the paper type and quality.
• Remove the toner cartridge and install a new one (see
"Replacing the toner cartridge" on page 235).
Vertical repetitive
defects
If marks repeatedly appear on the printed side of the page at even
intervals:
The toner cartridge may be damaged. If you still have the same
problem, remove the toner cartridge and, install a new one (see
"Replacing the toner cartridge" on page 235).
• Parts of the machine may have toner on them. If the defects
occur on the back of the page, the problem will likely correct
itself after a few more pages.
• The fusing assembly may be damaged. Contact a service
representative.
Background scatter
Background scatter results from bits of toner randomly
distributed on the printed page.
The paper may be too damp. Try printing with a different batch
of paper. Do not open packages of paper until necessary so that
the paper does not absorb too much moisture.
• If background scatter occurs on an envelope, change the
printing layout to avoid printing over areas that have
overlapping seams on the reverse side. Printing on seams can
cause problems.
Or select Thick from the Printing Preferences window (see
"Opening printing preferences" on page 58).
If background scatter covers the entire surface area of a printed
page, adjust the print resolution through your software
application or in Printing Preferences (see "Opening printing
preferences" on page 58). Ensure the correct paper type is
selected. For example: If Thicker Paper is selected, but Plain
Paper actually used, an overcharging can occur causing this
copy quality problem.
• If you are using a new toner cartridge, redistribute the toner
first (see "Redistributing toner" on page 233).
Condition Suggested solutions
Printing quality problems | 271
Toner particles are
around bold characters or
pictures
The toner might not adhere properly to this type of paper.
• Change the printer option and try again. Go to Printing
Preferences, click the Paper tab, and set the paper type to
Recycled (see "Opening printing preferences" on page 58).
• Ensure the correct paper type is selected. For example: If
Thicker Paper is selected, but Plain Paper actually used, an
overcharging can occur causing this copy quality problem.
Misformed characters • If characters are improperly formed and producing hollow
images, the paper stock may be too slick. Try different paper.
Page skew • Ensure that the paper is loaded properly.
• Check the paper type and quality.
Ensure that the guides are not too tight or too loose against the
paper stack.
Curl or wave • Ensure that the paper is loaded properly.
• Check the paper type and quality. Both high temperature and
humidity can cause paper curl.
• Turn the stack of paper over in the tray. Also try rotating the
paper 180° in the tray.
Wrinkles or creases • Ensure that the paper is loaded properly.
• Check the paper type and quality.
• Turn the stack of paper over in the tray. Also try rotating the
paper 180° in the tray.
Condition Suggested solutions
Printing quality problems | 272
Back of printouts are
dirty
• Check for leaking toner. Clean the inside of the machine (see
"Cleaning the machine" on page 242).
Solid color or black pages • The toner cartridge may not be installed properly. Remove the
cartridge and reinsert it.
• The toner cartridge may be defective. Remove the toner
cartridge and install a new one (see "Replacing the toner
cartridge" on page 235).
• The machine may require repairing. Contact a service
representative.
Loose toner Clean the inside of the machine (see "Cleaning the machine" on
page 242).
• Check the paper type, thickness, and quality.
• Remove the toner cartridge and then, install a new one (see
"Replacing the toner cartridge" on page 235).
If the problem persists, the machine may require repair. Contact a
service representative.
Character voids
Character voids are white areas within parts of characters that
should be solid black:
You may be printing on the wrong surface of the paper. Remove
the paper and turn it around.
• The paper may not meet paper specifications.
Horizontal stripes
If horizontally aligned black streaks or smears appear:
• The toner cartridge may be installed improperly. Remove the
cartridge and reinsert it.
• The toner cartridge may be defective. Remove the toner
cartridge and install a new one (see "Replacing the toner
cartridge" on page 235).
If the problem persists, the machine may require repairing.
Contact a service representative.
Condition Suggested solutions
Printing quality problems | 273
Curl
If the printed paper is curled or paper does not feed into the
machine:
• Turn the stack of paper over in the tray. Also try rotating the
paper 180° in the tray.
• Change the printer’s paper option and try again. Go to Printing
Preferences, click the Paper tab, and set type to Thin (see
"Opening printing preferences" on page 58).
• An unknown image
repetitively appears on
a few sheets
• Loose toner
• Light print or
contamination occurs
Your machine is probably being used at an altitude of 1,000 m
(3,281 ft) or above.The high altitude may affect the print quality,
such as loose toner or light imaging. Change the altitude setting
for your machine (see "Admin Settings" on page 182).
Condition Suggested solutions
Copying problems | 274
Copying problems
Condition Suggested solutions
Copies are too light
or too dark.
Adjust the darkness in copy feature to lighten or darken the
backgrounds of copies.
Smears, lines,
marks, or spots
appear on copies.
• If the defects are on the original, adjust darkness in copy feature to
lighten the background of your copies.
• If there are no defects on the original, clean the scan unit (see
"Cleaning the scan unit" on page 245).
Copy image is
skewed.
• Ensure that the original is aligned with the registration guide.
The transfer roller may be dirty. Clean the inside of your machine (see
"Cleaning the machine" on page 242).
• The skew caused by Dual Scan Document Feeder (DSDF) need to
adjust the hinges. Contact a service representative.
Blank copies print
out.
Ensure that the original is face down on the scanner glass or face up in
the document feeder.
If these steps do not correct the problem, contact a service
representative.
Image rubs off the
copy easily.
• Replace the paper in the tray with paper from a new package.
• In high humidity areas, do not leave paper in the machine for
extended periods of time.
Frequent copy
paper jams occur.
• Fan the paper, then turn it over in the tray. Replace the paper in the
tray with a fresh supply. Check/adjust the paper guides, if necessary.
Ensure that the paper is the proper type and weight (see "Print media
specifications" on page 282).
• Check for copy paper or pieces of copy paper remaining in the
machine after a paper jam has been cleared.
Toner cartridge
produces fewer
copies than
expected before
running out of
toner.
• Your originals may contain pictures, solids, or heavy lines. For
example, your originals may be forms, newsletters, books, or other
documents that use more toner.
• The Dual Scan Document Feeder (DSDF) may be left open while
copies are being made.
• Turn the machine off and back on.
Scanning problems | 275
Scanning problems
Condition Suggested solutions
The scanner does not
work.
• Make sure that you place the original to be scanned face down
on the scanner glass, or face up in the document feeder (see
"Loading originals" on page 40).
• There may not be enough available memory to hold the
document you want to scan. Try the Prescan function to see if
that works. Try lowering the scan resolution rate.
• Check that the machine printer cable is connected properly.
• Make sure that the machine printer cable is not defective.
Switch the printer cable with a known good cable. If necessary,
replace the printer cable.
• Check that the scanner is configured correctly. Check scan
setting in the application you want to use to make certain that
the scanner job is being sent to the correct port (for example,
USB001).
The unit scans very
slowly.
• Check if the machine is printing received data. If so, scan the
document after the received data has been printed.
• Graphics are scanned more slowly than text.
Communication speed slows in scan mode because of the large
amount of memory required to analyze and reproduce the
scanned image. Set your computer to the ECP printer mode
through BIOS setting. It will help to increase the speed. For
details about how to set BIOS, refer to your computer user
guide.
Message appears on your
computer screen:
• Device can’t be set to
the H/W mode you
want.
• Port is being used by
another program.
• Port is disabled.
• Scanner is busy
receiving or printing
data. When the current
job is completed, try
again.
• Invalid handle.
• Scanning has failed.
There may be a copying or printing job in progress. Try your job
again when that job is finished.
• The selected port is currently being used. Restart your
computer and try again.
The machine printer cable may be improperly connected or the
power may be off.
• The scanner driver is not installed or the operating
environment is not set up properly.
• Ensure that the machine is properly connected and the power
is on, then restart your computer.
The USB cable may be improperly connected or the power may
be off.
Faxing problems | 276
Faxing problems
Condition Suggested solutions
The machine is not
working, there is no
display, or the buttons
are not working.
• Unplug the power cord and plug it in again.
Ensure that there is power being supplied to the electrical outlet.
• Ensure that the power is turned on.
No dial tone.
Check that the phone line is properly connected (see "Rear view"
on page 17).
• Check that the phone socket on the wall is working by plugging
in another phone.
The numbers stored in
memory do not dial
correctly.
Make sure that the numbers are stored in memory correctly. To
check that, print an address book list.
The original does not
feed into the machine.
Make sure that the paper is not wrinkled and you are inserting it
in correctly. Check that the original is the right size, not too thick
or thin.
• Make sure that the document feeder is firmly closed.
• The document feeder rubber pad may need to be replaced.
Contact a service representative (see "Available maintenance
parts" on page 230).
Faxes are not received
automatically.
• The receiving mode should be set to fax (see "Changing Receive
Mode" on page 114).
• Make sure that there is paper in the tray (see "Print media
specifications" on page 282).
• Check to see if the display shows any error message. If it does,
clear the problem.
The machine does not
send.
• Make sure that the original is loaded in the document feeder or
on the scanner glass.
Check the fax machine you are sending to, to see if it can receive
your fax.
The incoming fax has
blank spaces or is of
poor-quality.
• The fax machine sending you the fax may be faulty.
• A noisy phone line can cause line errors.
• Check your machine by making a copy.
A toner cartridge has almost reached its estimated cartridge life.
Replace the toner cartridge (see "Replacing the toner cartridge"
on page 235).
Some of the words on an
incoming fax are
stretched.
The fax machine sending the fax had a temporary document jam.
Faxing problems | 277
There are lines on the
originals you sent.
Check your scan unit for marks and clean it (see "Cleaning the scan
unit" on page 245).
The machine dials a
number, but the
connection with the
other fax machine fails.
The other fax machine may be turned off, out of paper, or cannot
answer incoming calls. Speak with the other machine operator and
ask them to solve the problem on their side.
Faxes do not store in
memory.
There may not be enough memory space to store the fax. If the
display indicating the memory status shows, delete any faxes you
no longer need from the memory, and then try to store the fax
again. Call for service.
Blank areas appear at
the bottom of each page
or on other pages, with
a small strip of text at
the top.
You may have chosen the wrong paper settings in the user option
setting. Check the paper size and type again.
Condition Suggested solutions
Operating system problems | 278
Operating system problems
Common Windows problems
Refer to the Microsoft Windows User Guide that came with your computer for further
information on Windows error messages.
Condition Suggested solutions
“File in Use” message
appears during
installation.
Exit all software applications. Remove all software from the
startup group, then restart Windows. Reinstall the printer
driver.
“General Protection Fault”,
“Exception OE”, “Spool 32”,
or “Illegal Operation”
messages appear.
Close all other applications, reboot Windows and try printing
again.
“Fail To Print”, “A printer
timeout error occurred”
message appear.
These messages may appear during printing. Just keep waiting
until the machine finishes printing. If the message appears in
ready mode or after printing has completed, check the
connection and/or whether an error has occurred.
Samsung Printer
Experience is not shown
when you click more
settings.
Samsung Printer Experience is not installed. Download the app
from the Windows Store and install it.
Machine information is not
displayed when you click
the device in the Devices
and Printers.
Check the Printer properties. Click the Ports tab.
(Control Panel > Devices and Printers > Right-click on your
printer icon and select Printer properties)
If the port is set to File or LPT, uncheck them and select TCP/IP,
USB, or WSD.
Wireless network problems | 279
Wireless network problems
If problems occur while using the machine on a network, check the following:
For information on the access point (or wireless router), refer to its own user guide.
• Your computer, access point (or wireless router), or machine may not be turned on.
Check the wireless reception around the machine. If the router is far from the machine or there
is an obstacle, you might have difficulty receiving the signal.
• Cycle the power for the access point (or wireless router), machine, and computer. Sometimes
cycling the power can recover network communication.
• Check whether firewall software (V3 or Norton) is blocking the communication.
If the computer and the machine are connected on the same network and it cannot be found
when searching, firewall software might be blocking the communication. Refer to the user
guide for the software to turn it off and try searching for the machine again.
• Check the machine's IP address. Reinstall the machine driver and change the settings to
connect to the machine on the network. Due to the characteristics of DHCP, the allocated IP
address could change if the machine is not used for a long time or if the access point has been
reset.
Register the product's MAC address when you configure the DHCP server on the access point
(or wireless router). Then you can always use the IP address that is set with the MAC address.
You can identify the Mac address of your machine by printing a network configuration report.
Check whether the machine's IP address is allocated correctly. You can check the IP address by
printing the network configuration report.D
• Check whether the access point (or wireless router) has a configured security (password). If it
has a password, refer to the access point (or wireless router) administrator.
• Check the wireless environment. You might not be able to connect to the network in the
infrastructure environment where you need to type in a user's information before connecting
to the access point (or wireless router).
• This machine only supports IEEE 802.11 b/g/n and Wi-Fi. Other wireless communication types
(e.g., Bluetooth) are not supported.
• The machine is within the range of the wireless network.
• The machine is located away from obstacles that could block the wireless signal.
Remove any large metal objects between the access point (or wireless router) and the machine.
Make sure the machine and wireless access point (or wireless router) are not separated by
poles, walls, or support columns containing metal or concrete.
The machine is located away from other electronic devices that may interfere with the wireless
signal.
Many devices can interfere with the wireless signal, including a microwave oven and some
Bluetooth devices.
Whenever the configuration of your access point (or wireless router) changes, you must do the
product's wireless network setup again.
• The maximum number of devices that can be connected via Wi-Fi Direct is 4.
• If the access point is set to work with the 802.11n standard only, it may not connect to your
machine.
Appendix
This chapter provides product specifications and information concerning applicable regulations.
• Specifications 281
• Regulatory information 287
• Copyright 300
Specifications | 281
Specifications
General specifications
These specifications are subject to change without notice. To see additional specifications
and information about changes to the specifications, please visit, www.samsung.com.
Items Description
Dimension
a
a.Dimensions and weight are measured without a other accessories.
Width x Depth x
Height
C406x: 420 x 453 x 529 mm (16.54 x 17.83 x 20.83
inches)
C4062: 530 x 453 x 581 mm (20.87 x 17.83 x 22.87
inches)
Weight
a
Machine with
supplies
C406x: 28.5 kg (62.83 Ibs)
C4062: 30.3 kg (66.80 Ibs)
Noise Level
bc
b.Sound Pressure Level, ISO 7779. Configuration tested: basic machine installation, A4 paper, simplex
printing.
c.China only: If the equipment's noise is louder than 63 dB (A) ,the equipment should be placed in region of
relatively independent advice.
Ready mode Less than 37 dB (A)
Print mode Less than 52 dB (A)
Copy mode Less than 54 dB (A)
Scan
mode
Scanner
glass
Less than 50 dB (A)
Document
feeder
Less than 53 dB (A)
Temperature Operation 10 to 30 °C (50 to 86 °F)
Storage (packed) -20 to 40 °C (-4 to 104 °F)
Humidity Operation 20 to 80 % RH
Storage (packed) 10 to 90 % RH
Power rating
d
d.See the rating label on the machine for the correct voltage (V), frequency (hertz) and of current (A) for
your machine.
110 volt models AC 110 - 127 V
220 volt models AC 220 - 240 V
Power
consumption
e
e.The power consumption may be affected by the machine’s status, setting conditions, operating
environment, and measuring equipment and method the country uses.
Average operating
mode
Less than 600 W
Ready mode Less than 21 W
Power save mode Less than 1.4 W
Power off mode
f
f.Power consumption can be completely avoided only when the power cable is not connected.
Less than 0.3 W (0.1 W
g
)
g.Korea only.
Specifications | 282
Print media specifications
We recommend using recycled paper for saving energy.
Type Size Dimensions
Weight/Capacity
a
Tray1/ Optional
tray
Multi-purpose
tray
Plain
paper
b
c
Letter
216 x 279mm (8.5 x 11
inches)
70 to 90g/m
2
(19
to 24lbs bond)
• Tray1: 550
sheets of
75g/m
2
(20lbs
bond)
• Optional tray:
550 sheets of
75g/m
2
(20lbs
bond)
70 to 90g/m
2
(19 to 24lbs
bond)
• 50 sheets
Legal
216 x 356mm (8.5 x 14
inches)
Folio
216 x 330mm (8.5 x 13
inches)
A4
210 x 297mm (8.27 x 11.69
inches)
Oficio
216 x 343mm (8.5 x 13.5
inches)
B5(JIS)
182 x 257mm (7.17 x 10.12
inches)
B5(ISO)
176 x 250mm (6.93 x 9.84
inches)
Executive
184 x 267mm (7.25 x 10.5
inches)
Statement
140 x 216mm (5.5 x 8.5
inches)
A5
148 x 210mm (5.83 x 8.27
inches)
A6
105 x 148mm (4.13 x 5.83
inches)
70 to 90g/m
2
(19
to 24lbs bond)
• 150 sheets of
75g/m
2
(20lbs
bond)
Not available in
optional tray.
Thick
Envelope
Envelope
Monarch
98 x 191mm (3.87 x 7.5
inches)
91 to 120g/m
2
(24
to 32lbs bond)
• 20 sheets
Not available in
optional tray.
91 to 120g/m
2
(24 to 32lbs
bond)
• 5 sheets
Specifications | 283
Envelope
Envelope
No. 10
105 x 241mm (4.12 x 9.5
inches)
75 to 90g/m
2
(20
to 24lbs bond)
• 20 sheets
Not available in
optional tray.
75 to 90g/m
2
(20 to 24lbs
bond)
• 5 sheets
Envelope
No. 9
98 x 225mm (3.87 x 8.87
inches)
Envelope
DL
110 x 220mm (4.33 x 8.66
inches)
Envelope
C5
162 x 229mm (6.38 x 9.02
inches)
Envelope
C6
114 x 162mm (4.49 x 6.38
inches)
Thick
paper
b
c
Refer to
the Plain
paper
section
Refer to the Plain paper
section
91 to 105 g/m
2
(24
to 28 lbs bond)
• 50 sheets of 105
g/m
2
(28 lbs
bond)
91 to 105 g/m
2
(24 to 28 lbs
bond)
• 5 sheets
Heavy
weight
Refer to
the Plain
paper
section
Refer to the Plain paper
section
106 to 176 g/m
2
(28 to 47 lbs bond)
• 50 sheets
106 to 176 g/m
2
(28 to 47 lbs
bond)
• 5 sheets
Extra
Heavy
weight
Refer to
the Plain
paper
section
Refer to the Plain paper
section
177 to 220 g/m
2
(47
to 59 lbs bond)
• 50 sheets
177 to 220 g/m
2
(47 to 59 lbs
bond)
• 5 sheets
Thin paper Refer to
the Plain
paper
section
Refer to the Plain paper
section
60 to 70 g/m
2
(16
to 19 lbs bond)
• 550 sheets of 70
g/m
2
(19 lbs
bond)
60 to 70 g/m
2
(16 to 19 lbs
bond)
• 50 sheets
Cotton,
Color,
Preprinted
Refer to
the Plain
paper
section
Refer to the Plain paper
section
75 to 90 g/m
2
(20
to 24 lbs bond)
• 550 sheets of
75g/m
2
(20lbs
bond)
75 to 90 g/m
2
(20 to 24 lbs
bond)
• 50 sheets
Type Size Dimensions
Weight/Capacity
a
Tray1/ Optional
tray
Multi-purpose
tray
Specifications | 284
Recycled Refer to
the Plain
paper
section
Refer to the Plain paper
section
70 to 90 g/m
2
(19
to 24 lbs bond)
• 550 sheets of
75g/m
2
(20lbs
bond)
70 to 90 g/m
2
(19 to 24 lbs
bond)
• 50 sheets
Labels
b
cd
Letter,
Legal, US
Folio, A4,
B5(JIS),
B5(ISO),
Executive,
A5,
Statement
, A6, Oficio
Refer to the Plain paper
section
120 to 150 g/m
2
(32 to 40 lbs bond)
• 50 sheets
Not available in
optional tray.
120 to 150 g/m
2
(32 to 40 lbs
bond)
• 5 sheets
Card stock
b
c
Letter,
Legal, US
Folio, A4,
B5(JIS),
B5(ISO),
Executive,
A5,
Statement
, A6, Oficio
Refer to the Plain paper
section
121 to 163 g/m
2
(32
to 43 lbs bond)
• 50 sheets
121 to 163 g/m
2
(32 to 43 lbs
bond)
• 5 sheets
Bond
paper
Refer to
the Plain
paper
section
Refer to the Plain paper
section
105 to 120 g/m
2
(28 to 32 lbs bond)
• 50 sheets
105 to 120 g/m
2
(28 to 32 lbs
bond)
• 5 sheets
Archive,
Punched
paper,
Letterhead
Refer to
the Plain
paper
section
Refer to the Plain paper
section
• 550 sheets • 50 sheets
Type Size Dimensions
Weight/Capacity
a
Tray1/ Optional
tray
Multi-purpose
tray
Specifications | 285
Glossy
Photo
b
Letter, A4,
Postcard
4x6
Refer to the Plain paper
section
111 to 130 g/m
2
(30
to 35 lbs bond) for
tray
• Tray1: 50 sheets
• Optional tray: 50
sheets
111 to 130 g/m
2
(30 to 35 lbs
bond)
• 5 sheets
Refer to the Plain paper
section
131 to 175 g/m
2
(35
to 47 lbs bond)
• Tray1: 50 sheets
• Optional tray: 50
sheets
131 to 175 g/m
2
(35 to 47 lbs
bond)
• 5 sheets
Refer to the Plain paper
section
176 to 220 g/m
2
(47 to 59 lbs bond)
• Tray1: 50 sheets
• Optional tray: 50
sheets
176 to 220 g/m
2
(47 to 59 lbs
bond)
• 5 sheets
Minimum size (custom) Tray1: 98 x 149mm
(3.86 x 5.85 inches)
Optional tray: 98 x
210mm (5.85 x
8.27inches)
Multi-Purpose tray: 76
x 127mm (3 x 5 inches)
60 to 220 g/m
2
(
16 to 59 lbs
bond) for tray1.
• 60 to 176 g/m
2
(
16 to 47 lbs
bond) for
optional tray.
60 to 220 g/m
2
(
16 to 59 lbs
bond)
Maximum size (custom) 216 x 356mm (8.5 x 14
inches)
a.Maximum capacity may differ depending on media weight, thickness, and environmental conditions.
b.Post card 4 x 6 is supported for tray1 or Multi-purpose tray.
c.Index card (3 x 5) is supported for Multi-purpose tray.
d.The smoothness of the labels used in this machine is 100 to 250 (sheffield). This means the numeric level
of smoothness.
Type Size Dimensions
Weight/Capacity
a
Tray1/ Optional
tray
Multi-purpose
tray
Specifications | 286
System requirements
Printer software are occasionally updated due to release of new operating system and etc.
If needed, download the latest version from the Samsung website.
Microsoft
®
Windows
®
• Internet Explorer 6.0 or higher is the minimum requirement for all Windows operating
systems.
• Users who have administrator rights can install the software.
Windows Terminal Services is compatible with your machine.
Operating system
Requirement (recommended)
CPU RAM
Free HDD
space
Windows
®
XP
Service Pack 3
Intel
®
Pentium
®
III 933 MHz (Pentium IV
1 GHz)
128 MB (256
MB)
1.5 GB
Windows Server
®
2003
Intel
®
Pentium
®
III 933 MHz (Pentium IV
1 GHz)
128 MB (512
MB)
1.25 GB to 2
GB
Windows Server
®
2008
Intel
®
Pentium
®
IV 1 GHz (Pentium IV 2
GHz)
512 MB (2
GB)
10 GB
Windows Vista
®
Intel
®
Pentium
®
IV 3 GHz
512 MB (1
GB)
15 GB
Windows
®
7 Intel
®
Pentium
®
IV 1 GHz 32-bit or
64-bit processor or higher
1 GB (2 GB) 16 GB
• Support for DirectX
®
9 graphics with 128 MB memory (to enable the
Aero theme).
• DVD-R/W Drive
Windows Server
®
2008 R2
Intel
®
Pentium
®
IV 1.4 GHz (x64)
processors (2 GHz or faster)
512 MB (2
GB)
10 GB
Windows
®
8
Windows
®
8.1
Windows
®
10
Windows Server
®
2016
Intel
®
Pentium
®
IV 1 GHz 32-bit or
64-bit processor or higher
2 GB (2 GB) 20 GB
• Support for DirectX
®
9 graphics with 128 MB memory (to enable the
Aero theme).
• DVD-R/W Drive
Windows Server
®
2012
Windows Server
®
2012 R2
Intel
®
Pentium
®
IV 1.4 GHz (x64)
processors (2 GHz or faster)
512 MB (2
GB)
32GB
Regulatory information | 287
Regulatory information
This machine is designed for a normal work environment and certified with several regulatory
statements.
Laser safety statement
The printer is certified in the U.S. to conform to the requirements of DHHS 21 CFR, chapter 1
Subchapter J for Class I (1) laser products, and elsewhere is certified as a Class I laser product
conforming to the requirements of IEC/EN 60825-1:2014.
Class I laser products are not considered to be hazardous. The laser system and printer are
designed so there is never any human access to laser radiation above a Class I level during normal
operation, user maintenance or prescribed service condition.
Warning
Never operate or service the printer with the protective cover removed from laser/scanner
assembly. The reflected beam, although invisible, can damage your eyes.
When using this product, these basic safety precautions should always be followed to reduce risk
of fire, electric shock, and injury to persons:
Below the warning label of Laser is attached on LSU cover.
For 110 volt models , “This product complies with 21 CFR Chapter 1, subchapter J.” is written on
the label of rear cover. And for 220 volt models, below image is applied on the label of rear cover.
Regulatory information | 288
Ozone safety
Perchlorate warning
This Perchlorate warning applies only to primary CR (Manganese Dioxide) Lithium coin cells in
the product sold or distributed ONLY in California USA.
Perchlorate Material - special handling may apply.
See www.dtsc.ca.gov/hazardouswaste/perchlorate. (U.S.A. only)
Power saver
Recycling
This product’s ozone emission rate is under 0.1 ppm. Because
ozone is heavier than air, keep the product in a place with good
ventilation.
This printer contains advanced energy conservation technology that
reduces power consumption when it is not in active use.
When the printer does not receive data for an extended period of
time, power consumption is automatically lowered.
ENERGY STAR and the ENERGY STAR mark are registered U.S. marks.
For more information on the ENERGY STAR program, see
http://www.energystar.gov
For ENERGY STAR certified models, the ENERGY STAR label will be
on your machine. Check if your machine is ENERGY STAR certified.
Recycle or dispose of the packaging material for this product in an
environmentally responsible manner.
Regulatory information | 289
Correct disposal of this product (Waste electrical & electronic
equipment)
(Applicable in countries with separate collection systems)
(The United States of America only)
Dispose unwanted electronics through an approved recycler. To find the nearest recycling
location, go to our website: www.samsung.com/recyclingdirect Or call, (877) 278 - 0799
EU REACH SVHC Declaration
For information on Samsung’s environmental commitments and product specific regulatory
obligations e.g. REACH visit:
samsung.com/uk/aboutsamsung/samsungelectronics/corporatecitizenship/data_corner.html.
State of California Proposition 65 Warning (USA Only)
Radio frequency emissions
FCC information to the user
This device complies with Part 15 of the FCC Rules. Operation is subject to the following two
conditions:
• This device may not cause harmful interference.
This marking on the product, accessories or literature indicates that the
product and its electronic accessories (e.g. charger, headset, USB cable)
should not be disposed of with other household waste at the end of their
working life. To prevent possible harm to the environment or human
health from uncontrolled waste disposal, please separate these items
from other s of waste and recycle them responsibly to promote the
sustainable reuse of material resources.
Household users should contact either the retailer where they
purchased this product, or their local government office, for details of
where and how they can take these items for environmentally safe
recycling.
Business users should contact their supplier and check the terms and
conditions of the purchase contract. This product and its electronic
accessories should not be mixed with other commercial wastes for
disposal.
Regulatory information | 290
• This device must accept any interference received, including interference that may cause
undesired operation.
This equipment has been tested and found to comply with the limits for a Class A digital device,
pursuant to Part 15 of the FCC Rules. These limits are designed to provide reasonable protection
against harmful interference in a residential installation. This equipment generates, uses and can
radiate radio frequency energy and, if not installed and used in accordance with the instructions,
may cause harmful interference to radio communications. However, there is no guarantee that
interference will not occur in a particular installation. If this equipment does cause harmful
interference to radio or television reception, which can be determined by turning the equipment
off and on, the user is encouraged to try to correct the interference by one or more of the
following measures:
• Reorient or relocate the receiving antenna.
• Increase the separation between the equipment and receiver.
• Connect the equipment into an outlet on a circuit different from that to which the receiver is
connected.
• Consult the dealer or experienced radio TV technician for help.
Change or modifications not expressly approved by the manufacturer responsible for
compliance could void the user's authority to operate the equipment.
Canadian radio interference regulations
This digital apparatus does not exceed the Class A limits for radio noise emissions from digital
apparatus as set out in the interference-causing equipment standard entitled “Digital Apparatus”,
ICES-003 of the Industry and Science Canada.
Cet appareil numérique respecte les limites de bruits radioélectriques applicables aux appareils
numériques de Classe A prescrites dans la norme sur le matériel brouilleur: “Appareils
Numériques”, ICES-003 édictée par l’Industrie et Sciences Canada.
United States of America
Federal Communications Commission (FCC)
Intentional emitter per FCC Part 15
Low power, Radio LAN devices (radio frequency (RF) wireless communication devices), operating
in the 2.4 GHz/5 GHz Band, may be present (embedded) in your printer system. This section is only
applicable if these devices are present. Refer to the system label to verify the presence of
wireless devices.
Wireless devices that may be in your system are only qualified for use in the United States of
America if an FCC ID number is on the system label.
The FCC has set a general guideline of 20 cm (8 inches) separation between the device and the
body, for use of a wireless device near the body (this does not include extremities). This device
should be used more than 20 cm (8 inches) from the body when wireless devices are on. The
power output of the wireless device (or devices), which may be embedded in your printer, is well
below the RF exposure limits as set by the FCC.
Regulatory information | 291
This transmitter must not be collocated or operation in conjunction with any other antenna or
transmitter.
Operation of this device is subject to the following two conditions: (1) This device may not cause
harmful interference, and (2) this device must accept any interference received, including
interference that may cause undesired operation of the device.
Wireless devices are not user serviceable. Do not modify them in any way. Modification to
a wireless device will void the authorization to use it. Contact manufacturer for service.
FCC Statement for Wireless LAN use:
While installing and operating this transmitter and antenna combination the radio
frequency exposure limit of 1 mW/cm
2
may be exceeded at distances close to the antenna
installed. Therefore, the user must maintain a minimum distance of 20 cm from the
antenna at all times. This device cannot be collocated with another transmitter and trans-
mitting antenna.
RFID (Radio Frequency Interface Device)
RFID operation is subject to the following two conditions:(1) this device may not cause
interference, and (2) this device must accept any interference, including interference that may
cause undesired operation of the device. (U.S.A., France, Taiwan only)
Taiwan only
Regulatory information | 292
Russia / Kazakhstan / Belarus only
Regulatory information | 293
Germany only
Turkey only
Canada only
This product meets the applicable Innovation, Science and Economic Development Canada
technical speci cations. / Le present produit est conforme aux speci cations techniques
applicables d'Innovation, Sciences et Developpement economique Canada.
Product Marketing Name (PMN): Multi Function Printer with Facsimile function /Nom de marque
de produit (NMP): Imprimantes Multifonctions avec fonctions de telecopie
The Ringer Equivalence Number (REN) is an indication of the maximum number of devices
allowed to be connected to a telephone interface. The termination of an interface may consist of
any combination of devices subject only to the requirement that the sum of the RENs of all the
devices not exceed five. / L’indice d’equivalence de la sonnerie (IES) sert a indiquer le nombre
maximal de terminaux qui peuvent etre raccordes a une interface telephonique. La terminaison
d’une interface peut consister en une combinaison quelconque de dispositifs, a la seule condition
que la somme d’indices d’equivalence de la sonnerie de tous les dispositifs n’excede pas cinq.
Ringer Equivalence Number : 0.1/ Indice REN : 0.1
Thailand only
This telecommunication equipment conforms to NTC technical requirement.
Fax Branding
The Telephone Consumer Protection Act of 1991 makes it unlawful for any person to use a
computer or other electronic device to send any message via a telephone facsimile machine
unless such message clearly contains in a margin at the top or bottom of each transmitted page
or on the first page of the transmission the following information:
1. the date and time of transmission
2. identification of either business, business entity or individual sending the message; and
3. telephone number of either the sending machine, business, business entity or individual.
Regulatory information | 294
The Telephone Company may make changes in its communications facilities, equipment
operations or procedures where such action is reasonably required in the operation of its
business and is not inconsistent with the rules and regulations in FCC Part 68. If such changes can
be reasonably expected to render any customer terminal equipment incompatible with
telephone company communications facilities, or require modification or alteration of such
terminal equipment, or otherwise materially affect its use or performance, the customer shall be
given adequate notice in writing, to allow the customer an opportunity to maintain uninterrupted
service.
Ringer Equivalence Number
The Ringer Equivalence Number and FCC Registration Number for this machine may be found on
the label located on the bottom or rear of the machine. In some instances you may need to
provide these numbers to the telephone company.
The Ringer Equivalence Number (REN) is a measure of the electrical load placed on the telephone
line, and is useful for determining whether you have “overloaded” the line. Installing several s of
equipment on the same telephone line may result in problems making and receiving telephone
calls, especially ringing when your line is called. The sum of all Ringer Equivalence Numbers of
the equipment on your telephone line should be less than five in order to assure proper service
from the telephone company. In some cases, a sum of five may not be usable on your line. If any
of your telephone equipment is not operating properly, you should immediately remove it from
your telephone line, as it may cause harm to the telephone network.
The equipment complies with Part 68 of the FCC rules and the requirements adopted by the
ACTA. On the rear of this equipment is a label that contains, among other information, a product
identifier in the format US:AAAEQ##TXXXX. If requested, this number must be provided to the
telephone company.
FCC Regulations state that changes or modifications to this equipment not expressly
approved by the manufacturer could void the user’s authority to operate this equipment.
In the event that terminal equipment causes harm to the telephone network, the tele-
phone company should notify the customer that service may be stopped. However, where
prior notice is impractical, the company may temporarily cease service, providing that
they:
a. promptly notify the customer.
b. give the customer an opportunity to correct the equipment problem.
c. inform the customer of the right to bring a complaint to the Federal Communication
Commission pursuant to procedures set out in FCC Rules and Regulations Subpart E of
Part 68.
You should also know that:
• Your machine is not designed to be connected to a digital PBX system.
If you intend to use a computer modem or fax modem on the same phone line as your machine,
you may experience transmission and reception problems with all the equipment. It is
recommended that no other equipment, except for a regular telephone, share the line with
your machine.
Regulatory information | 295
If your area experiences a high incidence of lightning or power surges, we recommend that you
install surge protectors for both the power and the telephone lines. Surge protectors can be
purchased from your dealer or telephone and electronic specialty stores.
When programming emergency numbers and/or making test calls to emergency numbers, use
a non-emergency number to advise the emergency service dispatcher of your intentions. The
dispatcher will give you further instructions on how to actually test the emergency number.
• This machine may not be used on coin service or party lines.
• This machine provides magnetic coupling to hearing aids.
You may safely connect this equipment to the telephone network by means of a standard
modular jack, USOC RJ-11C.
Replacing the Fitted Plug (for UK Only)
Important
The mains lead for this machine is fitted with a standard (BS 1363) 13 amp plug and has a 13 amp
fuse. When you change or examine the fuse, you must re-fit the correct 13 amp fuse. You then
need to replace the fuse cover. If you have lost the fuse cover, do not use the plug until you have
another fuse cover.
Contact the people from you purchased the machine.
The 13 amp plug is the most widely used in the UK and should be suitable. However, some
buildings (mainly old ones) do not have normal 13 amp plug sockets. You need to buy a suitable
plug adaptor. Do not remove the moulded plug.
If you cut off the moulded plug, get rid of it straight away.You cannot rewire the plug and
you may receive an electric shock if you plug it into a socket.
Important warning:
If the wires in the mains lead do not match the colors marked in your plug, do the following:
You must connect the green and yellow wire to the pin marked by the letter “E” or by the safety
‘Earth symbol’ or colored green and yellow or green.
You must connect the blue wire to the pin which is marked with the letter “N” or colored black.
You must connect the brown wire to the pin which is marked with the letter “L” or colored red.
You must have a 13 amp fuse in the plug, adaptor, or at the distribution board.
You must earth this machine.
The wires in the mains lead have the following color code:
Green and Yellow: Earth
Blue: Neutral
Brown: Live
Regulatory information | 296
European Class A Warning
This is a Class A product. In a domestic environment this product may cause radio interference in
which case the user may be required to take adequate measures.
Declaration of conformity (European countries)
Approvals and Certifications
Council Directive 2014/35/EU, Approximation of the laws of the member states related to low
voltage equipment.
Council Directive 2014/30/EU, Approximation of the laws of the Member States related to
electromagnetic compatibility.
Council Directive 2014/53/EU on radio equipment and telecommunications terminal equipment
and the mutual recognition of their conformity. A full declaration, defining the relevant Directives
and referenced standards can be obtained from your Samsung Electronics Co., Ltd.
representative.
EC Certification
This Samsung product has been self-certified by Samsung for pan-European single terminal
connection to the analogue public switched telephone network (PSTN) in accordance. The
product has been designed to work with the national PSTNs and compatible PBXs of the
European countries:
In the event of problems, you should contact the Euro QA Lab of Samsung Electronics Co., Ltd. in
the first instance.
The product has been tested against TBR21. To assist in the use and application of terminal
equipment which complies with this standard, the European Telecommunication Standards
Institute (ETSI) has issued an advisory document (EG 201 121) which contains notes and additional
requirements to ensure network compatibility of TBR21 terminals. The product has been
designed against, and is fully compliant with, all of the relevant advisory notes contained in this
document.
European radio approval information (for products fitted with
Hereby, Samsung Electronics, declares that this [C406x series] is
incompliance with the essential requirements and other
relevantprovisions of Low Voltage Directive (2014/35/EU), EMC
Directive(2014/30/EU).
Hereby, Samsung Electronics, declares that this [C406x series] is in
compliance with the essential requirements and other relevant
provisions of Radio Equipment Directive 2014/53/EU.
The declaration of conformity may be consulted at
www.samsung.com, go to Support > Download center and enter
your printer (MFP) name to browse the EuDoC.
Regulatory information | 297
EU-approved radio devices)
Low power, Radio LAN type devices (radio frequency (RF) wireless communication devices),
operating in the 2.4 GHz/5 GHz band, may be present (embedded) in your printer system which
is intended for home or office use. This section is only applicable if these devices are present.
Refer to the system label to verify the presence of wireless devices.
The power output of the wireless device or devices that may be embedded in you printer is well
below the RF exposure limits as set by the European Commission through the Radio Equipment
Directive.
European states qualified under wireless approvals:
EU countries
European states with restrictions on use:
EU
In France, this equipment may only be used indoors.
EEA/EFTA countries
No limitations at this time
Regulatory compliance statements
Wireless guidance
Low power, Radio LAN devices (radio frequency (RF) wireless communication devices), operating
in the 2.4 GHz/5 GHz Band, may be present (embedded) in your printer system. The following
section is a general overview of considerations while operating a wireless device.
Additional limitations, cautions, and concerns for specific countries are listed in the specific
country sections (or country group sections). The wireless devices in your system are only
qualified for use in the countries identified by the Radio Approval Marks on the system rating
label. If the country you will be using the wireless device in, is not listed, contact your local Radio
Approval agency for requirements. Wireless devices are closely regulated and use may not be
allowed.
The power output of the wireless device or devices that may be embedded in your printer is well
below the RF exposure limits as known at this time. Because the wireless devices (which may be
embedded into your printer) emit less energy than is allowed in radio frequency safety standards
and recommendations, manufacturer believes these devices are safe for use. Regardless of the
power levels, care should be taken to minimize human contact during normal operation.
As a general guideline, a separation of 20 cm (8 inches) between the wireless device and the body,
for use of a wireless device near the body (this does not include extremities) is typical. This device
should be used more than 20 cm (8 inches) from the body when wireless devices are on and
transmitting.
Wireless devices that may be in your system are only qualified for
use in the European Union or associated areas if a CE mark with a
Notified Body Registration Number and the Alert Symbol is on the
system label.
Regulatory information | 298
This transmitter must not be collocated or operation in conjunction with any other antenna or
transmitter.
Some circumstances require restrictions on wireless devices. Examples of common restrictions
are listed below:
China only
Website:
http://www.samsung.com/cn/support/location/supportServiceLocation.do?page=SERVICE.LOC
ATION
Radio frequency wireless communication can interfere with
equipment on commercial aircraft. Current aviation regulations
require wireless devices to be turned off while traveling in an airplane.
IEEE 802.11 (also known as wireless Ethernet) and Bluetooth
communication devices are examples of devices that provide wireless
communication.
In environments where the risk of interference to other devices or
services is harmful or perceived as harmful, the option to use a
wireless device may be restricted or eliminated. Airports, Hospitals,
and Oxygen or flammable gas laden atmospheres are limited
examples where use of wireless devices may be restricted or
eliminated. When in environments where you are uncertain of the
sanction to use wireless devices, ask the applicable authority for
authorization prior to use or turning on the wireless device.
Every country has different restrictions on the use of wireless devices.
Since your system is equipped with a wireless device, when traveling
between countries with your system, check with the local Radio
Approval authorities prior to any move or trip for any restrictions on
the use of a wireless device in the destination country.
If your system came equipped with an internal embedded wireless
device, do not operate the wireless device unless all covers and shields
are in place and the system is fully assembled.
Wireless devices are not user serviceable. Do not modify them in any
way. Modification to a wireless device will void the authorization to use
it. Contact manufacturer for service.
Only use drivers approved for the country in which the device will be
used. See the manufacturer System Restoration Kit, or contact
manufacturer Technical Support for additional information.
Regulatory information | 299
᳝ᆇ⠽䋼
Copyright | 300
Copyright
© 2017 Samsung Electronics Co., Ltd. All rights reserved.
This user guide is provided for information purposes only. All information included herein is
subject to change without notice.
Samsung Electronics is not responsible for any direct or indirect damages, arising from or related
to use of this user guide.
• Samsung and the Samsung logo are trademarks of Samsung Electronics Co., Ltd.
• Microsoft, Windows XP, Windows Vista, Windows 7, Windows 8, and Windows Server 2008 R2,
Windows 10 and Windows Server 2016 are either registered trademarks or trademarks of
Microsoft Corporation.
• Microsoft, Internet Explorer, Excel, Word, PowerPoint, and Outlook are either registered
trademarks or trademarks of Microsoft Corporation in the United States and other countries.
• Google, Picasa, Google Cloud Print, Google Docs, Android and Gmail are either registered
trademarks or trademarks of Google Inc.
• Mopria, the Mopria Logo and the Mopria Alliance logo are registered trademarks and service
marks of Mopria Alliance, Inc. in the United States and other countries. Unauthorized use is
strictly prohibited.
• iPad, iPhone, iPod touch, Mac and Mac OS are trademarks of Apple Inc., registered in the U.S
and other countries.
• AirPrint and the AirPrint logo are trademarks of Apple Inc.
• All other brand or product names are trademarks of their respective companies or
organizations.
REV. 1.01
QR code
The software included in this product contains open source
software. You may obtain the complete corresponding source
code for a period of three years after the last shipment of this
product by sending an email to
mailto:oss.request@samsung.com. It is also possible to obtain
the complete corresponding source code in a physical medium
such as a CD-ROM; a minimal charge will be required.
The following URL
http://opensource.samsung.com/opensource/Samsung_C406
x_Series/seq/0 leads to the download page of the source code
made available and open source license information as related
to this product. This offer is valid to anyone in receipt of this
information.
Glossary | 301
Glossary
The following glossary helps you get familiar with the product by understanding the terminologies
commonly used with printing as well as mentioned in this user guide.
802.11
802.11 is a set of standards for wireless local area network (WLAN) communication, developed by the IEEE
LAN/MAN Standards Committee (IEEE 802).
802.11b/g/n
802.11b/g/n can share same hardware and use the 2.4 GHz band. 802.11b supports bandwidth up to 11 Mbps,
802.11n supports bandwidth up to 150 Mbps. 802.11b/g/n devices may occasionally suffer interference from
microwave ovens, cordless telephones, and Bluetooth devices.
Access point
Access Point or Wireless Access Point (AP or WAP) is a device that connects wireless communication devices
together on wireless local area networks (WLAN), and acts as a central transmitter and receiver of WLAN radio
signals.
ADF
An Automatic Document Feeder (ADF) is a scanning unit that will automatically feed an original sheet of paper
so that the machine can scan some amount of the paper at once.
BIT Depth
A computer graphics term describing the number of bits used to represent the color of a single pixel in a
bitmapped image. Higher color depth gives a broader range of distinct colors. As the number of bits increases,
the number of possible colors becomes impractically large for a color map. 1-bit color is commonly called as
monochrome or black and white.
BMP
A bitmapped graphics format used internally by the Microsoft Windows graphics subsystem (GDI), and used
commonly as a simple graphics file format on that platform.
BOOTP
Bootstrap Protocol. A network protocol used by a network client to obtain its IP address automatically. This is
usually done in the bootstrap process of computers or operating systems running on them. The BOOTP servers
assign the IP address from a pool of addresses to each client. BOOTP enables 'diskless workstation' computers
to obtain an IP address prior to loading any advanced operating system.
Glossary | 302
CCD
Charge Coupled Device (CCD) is a hardware which enables the scan job. CCD Locking mechanism is also used
to hold the CCD module to prevent any damage when you move the machine.
Collation
Collation is a process of printing a multiple-copy job in sets. When collation is selected, the device prints an
entire set before printing additional copies.
Control Panel
A control panel is a flat, typically vertical, area where control or monitoring instruments are displayed. They are
typically found in front of the machine.
Coverage
It is the printing term used for a toner usage measurement on printing. For example, 5% coverage means that
an A4 sided paper has about 5% image or text on it. So, if the paper or original has complicated images or lots
of text on it, the coverage will be higher and at the same time, a toner usage will be as much as the coverage.
CSV
Comma Separated Values (CSV). A type of file format, CSV is used to exchange data between disparate appli-
cations. The file format, as it is used in Microsoft Excel, has become a de facto standard throughout the industry,
even among non-Microsoft platforms.
Dual Scan Document Feeder (DSDF)
A Dual Scan Document Feeder (DSDF) is a scanning unit that will automatically feed and turn over an original
sheet of paper so that the machine can scan on both sides of the paper.
Default
The value or setting that is in effect when taking a printer out of its box state, reset, or initialized.
DHCP
A Dynamic Host Configuration Protocol (DHCP) is a client-server networking protocol. A DHCP server provides
configuration parameters specific to the DHCP client host requesting, generally, information required by the
client host to participate on an IP network. DHCP also provides a mechanism for allocation of IP addresses to
client hosts.
DIMM
Dual Inline Memory Module (DIMM), a small circuit board that holds memory. DIMM stores all the data within
the machine like printing data, received fax data.
DNS
The Domain Name Server (DNS) is a system that stores information associated with domain names in a distrib-
uted database on networks, such as the Internet.
Glossary | 303
Dot Matrix Printer
A dot matrix printer refers to a type of computer printer with a print head that runs back and forth on the page
and prints by impact, striking an ink-soaked cloth ribbon against the paper, much like a typewriter.
DPI
Dots Per Inch (DPI) is a measurement of resolution that is used for scanning and printing. Generally, higher DPI
results in a higher resolution, more visible detail in the image, and a larger file size.
DRPD
Distinctive Ring Pattern Detection. Distinctive Ring is a telephone company service which enables a user to use
a single telephone line to answer several different telephone numbers.
Duplex
A mechanism that will automatically turn over a sheet of paper so that the machine can print (or scan) on both
sides of the paper. A printer equipped with a Duplex Unit can print on both sides of paper during one print cycle.
Duty Cycle
Duty cycle is the page quantity which does not affect printer performance for a month. Generally the printer
has the lifespan limitation such as pages per year. The lifespan means the average capacity of print-outs,
usually within the warranty period. For example, if the duty cycle is 48,000 pages per month assuming 20
working days, a printer limits 2,400 pages a day.
ECM
Error Correction Mode (ECM) is an optional transmission mode built into Class 1 fax machines or fax modems.
It automatically detects and corrects errors in the fax transmission process that are sometimes caused by tele-
phone line noise.
Emulation
Emulation is a technique of one machine obtaining the same results as another.
An emulator duplicates the functions of one system with a different system, so that the second system behaves
like the first system. Emulation focuses on exact reproduction of external behavior, which is in contrast to simu-
lation, which concerns an abstract model of the system being simulated, often considering its internal state.
Ethernet
Ethernet is a frame-based computer networking technology for local area networks (LANs). It defines wiring
and signaling for the physical layer, and frame formats and protocols for the media access control (MAC)/data
link layer of the OSI model. Ethernet is mostly standardized as IEEE 802.3. It has become the most widespread
LAN technology in use during the 1990s to the present.
FDI
Foreign Device Interface (FDI) is a card installed inside the machine to allow a third party device such as a coin
operated device or a card reader. Those devices allow the pay-for-print service on your machine.
Glossary | 304
FTP
A File Transfer Protocol (FTP) is a commonly used protocol for exchanging files over any network that supports
the TCP/IP protocol (such as the Internet or an intranet).
Fuser Unit
The part of a laser printer that fuses the toner onto the print media. It consists of a heat roller and a pressure
roller. After toner is transferred onto the paper, the fuser unit applies heat and pressure to ensure that the
toner stays on the paper permanently, which is why paper is warm when it comes out of a laser printer.
Gateway
A connection between computer networks, or between a computer network and a telephone line. It is very
popular, as it is a computer or a network that allows access to another computer or network.
Grayscale
A shades of gray that represent light and dark portions of an image when color images are converted to gray-
scale; colors are represented by various shades of gray.
Halftone
An image type that simulates grayscale by varying the number of dots. Highly colored areas consist of a large
number of dots, while lighter areas consist of a smaller number of dots.
Mass storage device (HDD)
Mass storage device (HDD), commonly referred to as a hard drive or hard disk, is a non-volatile storage device
which stores digitally-encoded data on rapidly rotating platters with magnetic surfaces.
IEEE
The Institute of Electrical and Electronics Engineers (IEEE) is an international non-profit, professional organi-
zation for the advancement of technology related to electricity.
Internet Fax(T.37)
This feature allows users to send and receive fax documents using theInternet. Documents are transmitted in
E-mail messages as attached TIFF files. Users can send the documents to Internet Fax devices or other user
E-mail Box. Internet Fax device also can print out the documents without user’s intervention. This document
describes behavior of Internet Fax using T.37 protocol.
Intranet
A private network that uses Internet Protocols, network connectivity, and possibly the public telecommunica-
tion system to securely share part of an organization's information or operations with its employees. Some-
times the term refers only to the most visible service, the internal website.
IP address
An Internet Protocol (IP) address is a unique number that devices use in order to identify and communicate with
each other on a network utilizing the Internet Protocol standard.
Glossary | 305
IPM
The Images Per Minute (IPM) is a way of measuring the speed of a printer. An IPM rate indicates the number of
single-sided sheets a printer can complete within one minute.
IPP
The Internet Printing Protocol (IPP) defines a standard protocol for printing as well as managing print jobs,
media size, resolution, and so forth. IPP can be used locally or over the Internet to hundreds of printers, and
also supports access control, authentication, and encryption, making it a much more capable and secure
printing solution than older ones.
ISO
The International Organization for Standardization (ISO) is an international standard-setting body composed of
representatives from national standards bodies. It produces world-wide industrial and commercial standards.
ITU-T
The International Telecommunication Union is an international organization established to standardize and
regulate international radio and telecommunications. Its main tasks include standardization, allocation of the
radio spectrum, and organizing interconnection arrangements between different countries to allow interna-
tional phone calls. A -T out of ITU-T indicates telecommunication.
ITU-T No. 1 chart
Standardized test chart published by ITU-T for document facsimile transmissions.
JBIG
Joint Bi-level Image Experts Group (JBIG) is an image compression standard with no loss of accuracy or quality,
which was designed for compression of binary images, particularly for faxes, but can also be used on other
images.
JPEG
Joint Photographic Experts Group (JPEG) is a most commonly used standard method of lossy compression for
photographic images. It is the format used for storing and transmitting photographs on the World Wide Web.
LDAP
The Lightweight Directory Access Protocol (LDAP) is a networking protocol for querying and modifying direc-
tory services running over TCP/IP.
LED
A Light-Emitting Diode (LED) is a semiconductor device that indicates the status of a machine.
MAC address
Media Access Control (MAC) address is a unique identifier associated with a network adapter. MAC address is
a unique 48-bit identifier usually written as 12 hexadecimal characters grouped in pairs (e. g.,
Glossary | 306
00-00-0c-34-11-4e). This address is usually hard-coded into a Network Interface Card (NIC) by its manufac-
turer, and used as an aid for routers trying to locate machines on large networks.
MFP
Multi Function Peripheral (MFP) is an office machine that includes the following functionality in one physical
body, so as to have a printer, a copier, a fax, a scanner and etc.
MH
Modified Huffman (MH) is a compression method for decreasing the amount of data that needs to be trans-
mitted between the fax machines to transfer the image recommended by ITU-T T.4. MH is a codebook-based
run-length encoding scheme optimized to efficiently compress white space. As most faxes consist mostly of
white space, this minimizes the transmission time of most faxes.
MMR
Modified Modified READ (MMR) is a compression method recommended by ITU-T T.6.
Modem
A device that modulates a carrier signal to encode digital information, and also demodulates such a carrier
signal to decode transmitted information.
MR
Modified Read (MR) is a compression method recommended by ITU-T T.4. MR encodes the first scanned line
using MH. The next line is compared to the first, the differences determined, and then the differences are
encoded and transmitted.
OPC
Organic Photo Conductor (OPC) is a mechanism that makes a virtual image for print using a laser beam emitted
from a laser printer, and it is usually green or rust colored and has a cylinder shape.
An imaging unit containing a drum slowly wears the drum surface by its usage in the printer, and it should be
replaced appropriately since it gets worn from contact with the cartridge development brush, cleaning mech-
anism, and paper.
Originals
The first example of something, such as a document, photograph or text, etc, which is copied, reproduced or
translated to produce others, but which is not itself copied or derived from something else.
OSI
Open Systems Interconnection (OSI) is a model developed by the International Organization for Standardiza-
tion (ISO) for communications. OSI offers a standard, modular approach to network design that divides the
required set of complex functions into manageable, self-contained, functional layers. The layers are, from top
to bottom, Application, Presentation, Session, Transport, Network, Data Link and Physical.
Glossary | 307
PABX
A private automatic branch exchange (PABX) is an automatic telephone switching system within a private
enterprise.
PCL
Printer Command Language (PCL) is a Page Description Language (PDL) developed by HP as a printer protocol
and has become an industry standard. Originally developed for early inkjet printers, PCL has been released in
varying levels for thermal, dot matrix printer, and laser printers.
PDF
Portable Document Format (PDF) is a proprietary file format developed by Adobe Systems for representing two
dimensional documents in a device independent and resolution independent format.
PostScript
PostScript (PS) is a page description language and programming language used primarily in the electronic and
desktop publishing areas. - that is run in an interpreter to generate an image.
Printer Driver
A program used to send commands and transfer data from the computer to the printer.
Print Media
The media like paper, envelopes, labels, and transparencies which can be used in a printer, a scanner, a fax or,
a copier.
PPM
Pages Per Minute (PPM) is a method of measurement for determining how fast a printer works, meaning the
number of pages a printer can produce in one minute.
PRN file
An interface for a device driver, this allows software to interact with the device driver using standard
input/output system calls, which simplifies many tasks.
Protocol
A convention or standard that controls or enables the connection, communication, and data transfer between
two computing endpoints.
PS
See PostScript.
PSTN
The Public-Switched Telephone Network (PSTN) is the network of the world's public circuit-switched telephone
networks which, on industrial premises, is usually routed through the switchboard.
Glossary | 308
Resolution
The sharpness of an image, measured in Dots Per Inch (DPI). The higher the dpi, the greater the resolution.
SMB
Server Message Block (SMB) is a network protocol mainly applied to share files, printers, serial ports, and
miscellaneous communications between nodes on a network. It also provides an authenticated Inter-process
communication mechanism.
SMTP
Simple Mail Transfer Protocol (SMTP) is the standard for e-mail transmissions across the Internet. SMTP is a
relatively simple, text-based protocol, where one or more recipients of a message are specified, and then the
message text is transferred. It is a client-server protocol, where the client transmits an email message to the
server.
SSID
Service Set Identifier (SSID) is a name of a wireless local area network (WLAN). All wireless devices in a WLAN
use the same SSID in order to communicate with each other. The SSIDs are case-sensitive and have a maximum
length of 32 characters.
Subnet Mask
The subnet mask is used in conjunction with the network address to determine which part of the address is the
network address and which part is the host address.
TCP/IP
The Transmission Control Protocol (TCP) and the Internet Protocol (IP); the set of communications protocols
that implement the protocol stack on which the Internet and most commercial networks run.
TCR
Transmission Confirmation Report (TCR) provides details of each transmission such as job status, transmission
result and number of pages sent. This report can be set to print after each job or only after failed transmissions.
TIFF
Tagged Image File Format (TIFF) is a variable-resolution bitmapped image format. TIFF describes image data
that typically come from scanners. TIFF images make use of tags, keywords defining the characteristics of the
image that is included in the file. This flexible and platform-independent format can be used for pictures that
have been made by various image processing applications.
Toner Cartridge
A kind of bottle or container used in a machine like a printer which contains toner. Toner is a powder used in
laser printers and photocopiers, which forms the text and images on the printed paper. Toner can be fused by
by a combination of heat/pressure from the fuser, causing it to bind to the fibers in the paper.
Glossary | 309
TWAIN
An industry standard for scanners and software. By using a TWAIN-compliant scanner with a TWAIN-compliant
program, a scan can be initiated from within the program. It is an image capture API for Microsoft Windows and
Apple Macintosh operating systems.
UNC Path
Uniform Naming Convention (UNC) is a standard way to access network shares in Window NT and other Micro-
soft products. The format of a UNC path is: \\<servername>\<sharename>\<Additional directory>
URL
Uniform Resource Locator (URL) is the global address of documents and resources on the Internet. The first
part of the address indicates what protocol to use, the second part specifies the IP address or the domain name
where the resource is located.
USB
Universal Serial Bus (USB) is a standard that was developed by the USB Implementers Forum, Inc., to connect
computers and peripherals. Unlike the parallel port, USB is designed to concurrently connect a single computer
USB port to multiple peripherals.
Watermark
A watermark is a recognizable image or pattern in paper that appears lighter when viewed by transmitted light.
Watermarks were first introduced in Bologna, Italy in 1282; they have been used by papermakers to identify
their product, and also on postage stamps, currency, and other government documents to discourage counter-
feiting.
WEP
Wired Equivalent Privacy (WEP) is a security protocol specified in IEEE 802.11 to provide the same level of secu-
rity as that of a wired LAN. WEP provides security by encrypting data over radio so that it is protected as it is
transmitted from one end point to another.
WIA
Windows Imaging Architecture (WIA) is an imaging architecture that is originally introduced in Windows Me
and Windows XP. A scan can be initiated from within these operating systems by using a WIA-compliant
scanner.
WPA
Wi-Fi Protected Access (WPA) is a class of systems to secure wireless (Wi-Fi) computer networks, which was
created to improve upon the security features of WEP.
WPA-PSK
WPA-PSK (WPA Pre-Shared Key) is special mode of WPA for small business or home users. A shared key, or
password, is configured in the wireless access point (WAP) and any wireless laptop or desktop devices.
WPA-PSK generates a unique key for each session between a wireless client and the associated WAP for more
advanced security.
Glossary | 310
WPS
The Wi-Fi Protected Setup (WPS) is a standard for establishing a wireless home network. If your wireless access
point supports WPS, you can configure the wireless network connection easily without a computer.
XPS
XML Paper Specification (XPS) is a specification for a Page Description Language (PDL) and a new document
format, which has benefits for portable document and electronic document, developed by Microsoft. It is an
XML-based specification, based on a new print path and a vector-based device-independent document format.
Index | 311
Index
A
accessories
installing 238
ordering 229
accounting 203
address book 200
group 200
inividual 200
adjusting
altitude 176, 181
AirPrint 169
altitude adjustment 176, 181
answering machine/fax 115
application 188
enable/disable 189
installing 189
managing 188
uninstalling 189
viewing 189
authentication 183
login 175, 199
authority 203
B
booklet printing 66
booklets 66
C
certificate 202
cleaning
inside 243
outside 242
pickup roller 244
scan unit 245
cleaning a machine 242
control panel 18
convention 8
copy
setting 201
copying
basic copying 89, 102
understanding the copy screen 80, 94, 109,
121
customer support 195
D
default paper selection
printing 187
default settings
setting a fax header 111
deleting
address book 126
device options 238
direct printing utility 75
display screen 18
displaying
IP address 140
document box
understanding the document box screen 219
duplex printing
print 67
Index | 312
E
easy document creator 104
editing
group address 125
individual address 125
error correction mode 117
error message 256
ethernet 139
extension telephone 113, 115
external authentication server 202
F
favorites settings, for printing 64
fax
address book 200
forward 118
prefix dial 117
printing 118
secure receive 118
toll save 118
fax receiving
changing the receive mode 114
in answering machine/fax 115, 117
secure receiving 115, 116
using an extension telephone 115
fax sending
delay sending 113
resending automatically 113
sending a fax 111
fax, email
individual address 123
faxing
changing receiving mode 114
delaying a fax transmission 113
forwarding 117
preparing to fax 107
receiving 114
receiving a fax in memory 117
receiving in Ans/Fax mode 115
receiving in Tel mode 114
sending 111
setting the fax header 111
features
print media feature 282
filtering 202
IPv6 202
MAC 202
network 144
firmware 203
G
general icons 8
general settings 176, 177, 182, 190
glossary 301
google cloud printing 171
group
group address 125
H
http 300
HTTP settings 202
I
id copy 90
IPP settings 201
J
jam
clearing paper 249
tips for avoiding paper jams 248
Index | 313
JPEG
USB scanning memory device 124, 130
K
keyboard
understanding the keyboard 30
L
LED
machine status 32, 34
understanding the status LED 32
link 203
loading
paper in multi-purpose (or manual feeder) tray
47
paper in the tray1 46
paper in the tray1 / optional trays 46
special media 49
loading originals 40
log 203
login 175, 199
LPR/LPD settings 201
M
machine detail 195
machine overview
front view 16
rear view 17
machine protocols 143
maintenance parts 230
managing
address book 200
application 188, 203
user 203
managing USB memory 224
margin
printing 187
memory
memory upgrading 240
Mopria 167
multi-purpose (or manual feeder) tray
loading 47
tips on using 47
multi-purpose tray
using special media 49
N
network
authentication 183
installing environment 137
SetIP program 151
setting up 137
Wireless network setup 145
network filtering 144
N-up printing
Windows 65
O
optional tray
ordering 229
overlay printing
create 72
delete 73
print 73
P
paper size 53
paper type 53
Index | 314
poster, print 66
power save 178, 179
preparing originals type 39
print
mobile OS 166
mobileprint 166
print media
card stock 52
envelope 50
guidelines 43
labels 51
output support 282
paper tab in printer preferences 60
preprinted paper 52
special media 49
printer properties
opening printer preferences 58
printer status
general information 211
printing
changing the default print settings 77
changing the print percentage 68
duplex 187, 201
fitting your document to a selected paper size
69
margin 187, 201
multiple pages on one sheet of paper
Windows 65
paper orientation 187, 201
poster 66
printing a document
Windows 56
printing on both sides of paper
Windows 67
using direct printing utility 75
using overlay 72
using watermarks 70
problem
operating system problems 278
problems
copying problems 274
faxing problems 276
paper feeding problems 263
power problems 264
printing problems 265
printing quality problems 268
scanning problems 275
R
Raw TCP/IP settings 201
regulatory information 287
report 190
demo page 190
requirements
SyncThruTM Web Service 198
S
safety
information 9
symbols 9
samsung printer experience 213
Samsung Printer Status 211
scan
email server 201, 202
scanning
TWAIN 103
searching
address book 126
security
system 202
security settings
user authentication 183
sending
extension telephone 113
server settings 136, 154
Index | 315
SetIP program 151
settings
copy 201
current 200
DNS 139
ethernet 139
fax 201
general 176, 177, 182, 190
HTTP 202
machine 201
margin 187, 201
network 136, 139, 154, 201
printer 201
scan 201
security 202
network 202
server 136, 154
sound 178
SyncThruTM Web Service 202
TCP/IPv4 139
tray 178
WINS 140
sound 178
specifications 281
print media 282
supplies
available supplies 228
estimated toner cartridge life 232
monitoring the supplies life 241
ordering 228
replacing toner cartridge 235
SyncThru Web Service
copy 201
network 201
printer 201
SyncThru™ Web Service 198
SyncThruTM Web Service
accounting 203
address book tab 200
application management 203
configuring 202
connecting to 198
external authentication server 202
fax 201
information tab 200, 201
log 203
maintenance tab 203
requirements 198
scan 201
security tab 202
settings 200
settings tab 201
user access control 202
user profile 203
what is 198
T
TCP/IPv4 139
TCP/IPv6 140, 141
toner cartridge
estimated life 232
handling instructions 231
non-Samsung and refilled 231
redistributing toner 233
replacing the cartridge 235
storing 231
tray
adjusting the width and length 44
auto continue 53
changing the tray size 44
loading paper in multi-purpose (or manual
feeder) tray 47
ordering an optional tray 229
paper substitution 53
Tray 1 53
tray setting 178
TWAIN, scan 103
Index | 316
U
usage
counter 26
usb
understanding the usb screen 222
USB cable
driver installation 35
USB Drive
how to manage 224
printing 223
user
managing 203
profile 203
user access control 202
using help 64
W
watermark
create 70
delete 71
edit 71
print 70
Windows
common Windows problems 278
driver installation for USB cable connected 35
printing 55
scanning 93
system requirements 286
using SetIP 151
Wireless
Connecting WPS 148
PBC mode 148
PIN mode 148
Wireless network
network cable 150
WSD settings 201
309


Need help? Post your question in this forum.

Forumrules


Report abuse

Libble takes abuse of its services very seriously. We're committed to dealing with such abuse according to the laws in your country of residence. When you submit a report, we'll investigate it and take the appropriate action. We'll get back to you only if we require additional details or have more information to share.

Product:

For example, Anti-Semitic content, racist content, or material that could result in a violent physical act.

For example, a credit card number, a personal identification number, or an unlisted home address. Note that email addresses and full names are not considered private information.

Forumrules

To achieve meaningful questions, we apply the following rules:

Register

Register getting emails for Samsung SL-C406 series at:


You will receive an email to register for one or both of the options.


Get your user manual by e-mail

Enter your email address to receive the manual of Samsung SL-C406 series in the language / languages: English as an attachment in your email.

The manual is 27,04 mb in size.


You will receive the manual in your email within minutes. If you have not received an email, then probably have entered the wrong email address or your mailbox is too full. In addition, it may be that your ISP may have a maximum size for emails to receive.

Others manual(s) of Samsung SL-C406 series

Samsung SL-C406 series User Manual - German - 231 pages

Samsung SL-C406 series User Manual - Dutch - 335 pages


The manual is sent by email. Check your email

If you have not received an email with the manual within fifteen minutes, it may be that you have a entered a wrong email address or that your ISP has set a maximum size to receive email that is smaller than the size of the manual.

The email address you have provided is not correct.

Please check the email address and correct it.

Your question is posted on this page

Would you like to receive an email when new answers and questions are posted? Please enter your email address.


Info