Contents
Guide
Connections
5
Connection Guide
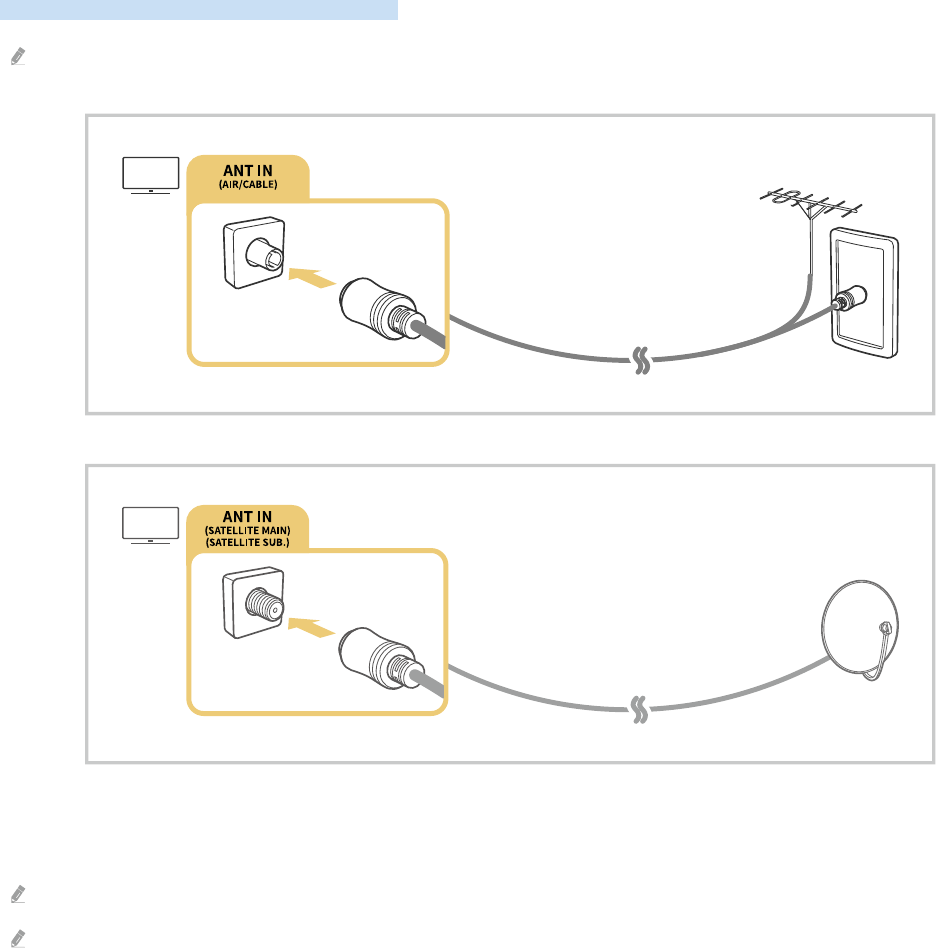
6 Connecting an Antenna (Aerial)
7
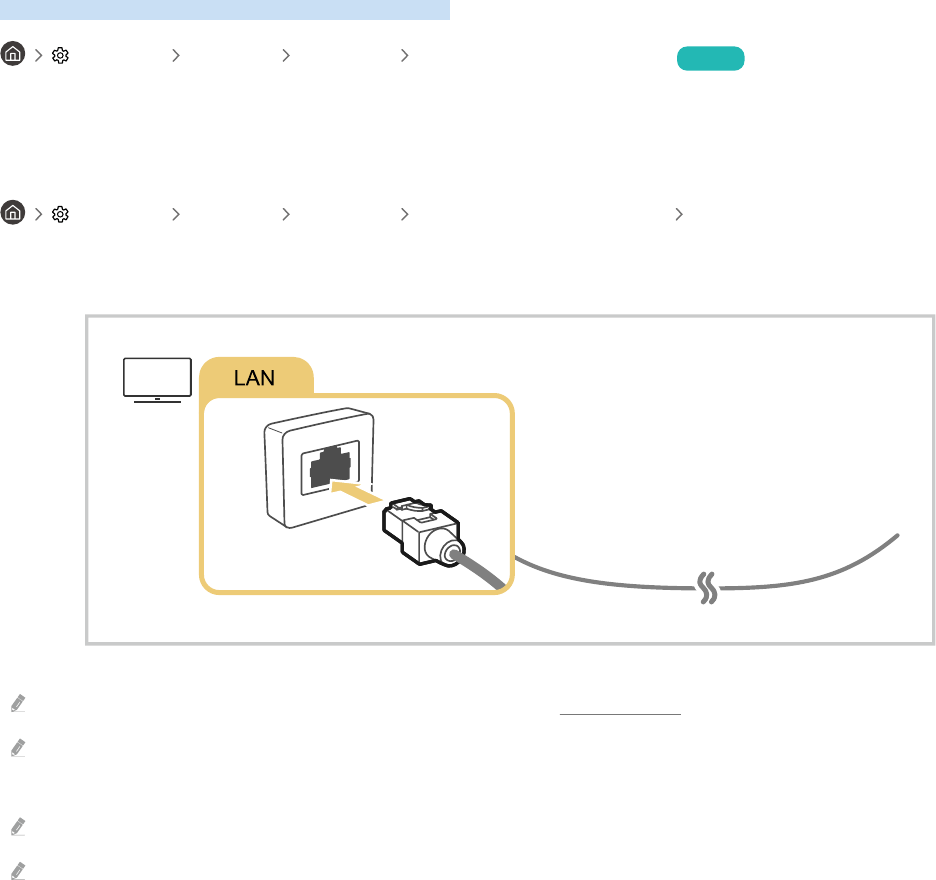
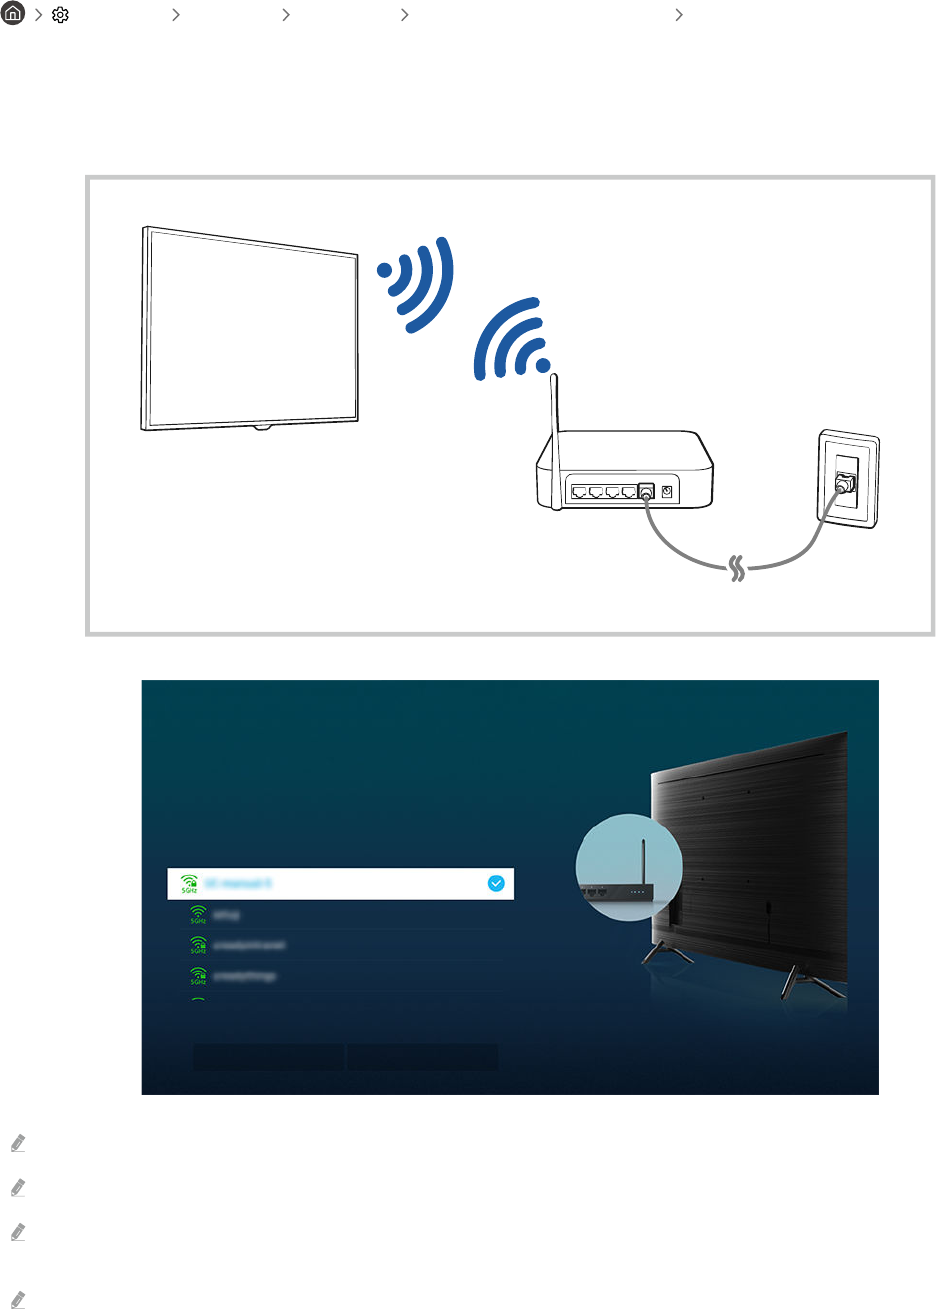
Connecting to the Internet
10 Screen Sharing (Smart View) with your Mobile Device
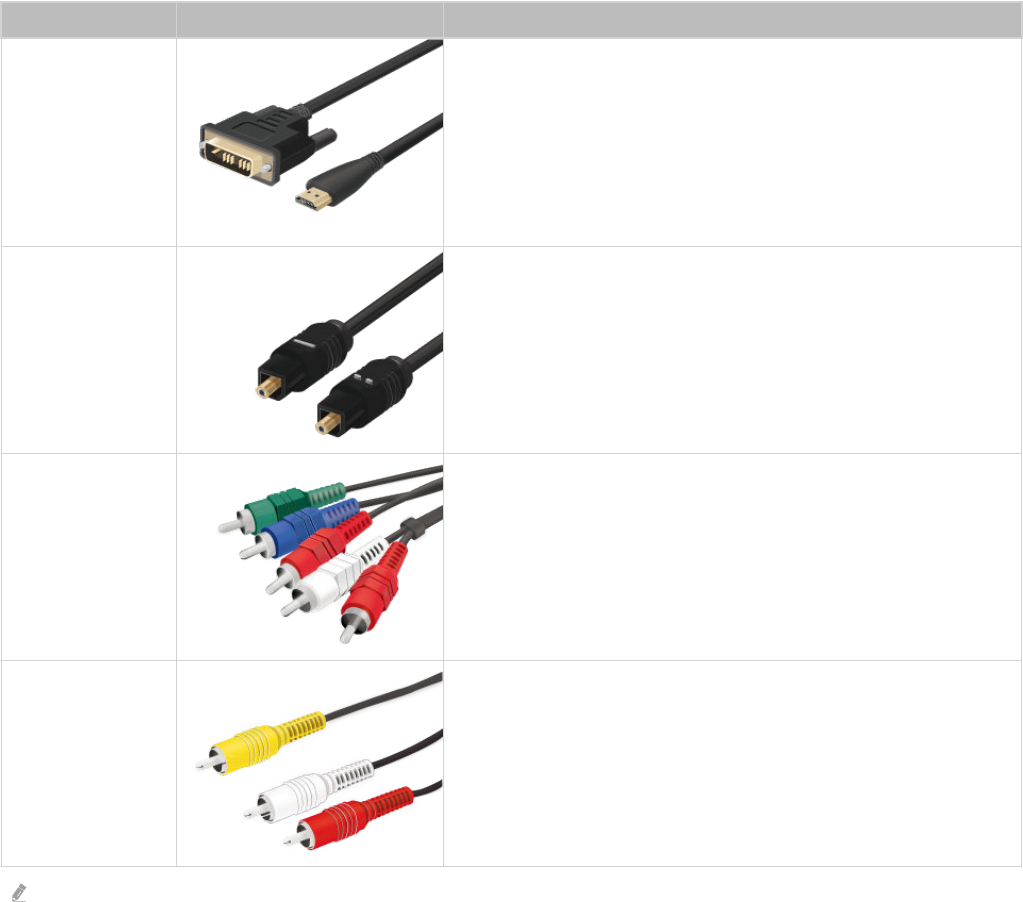
13 Connection Cables for External Devices
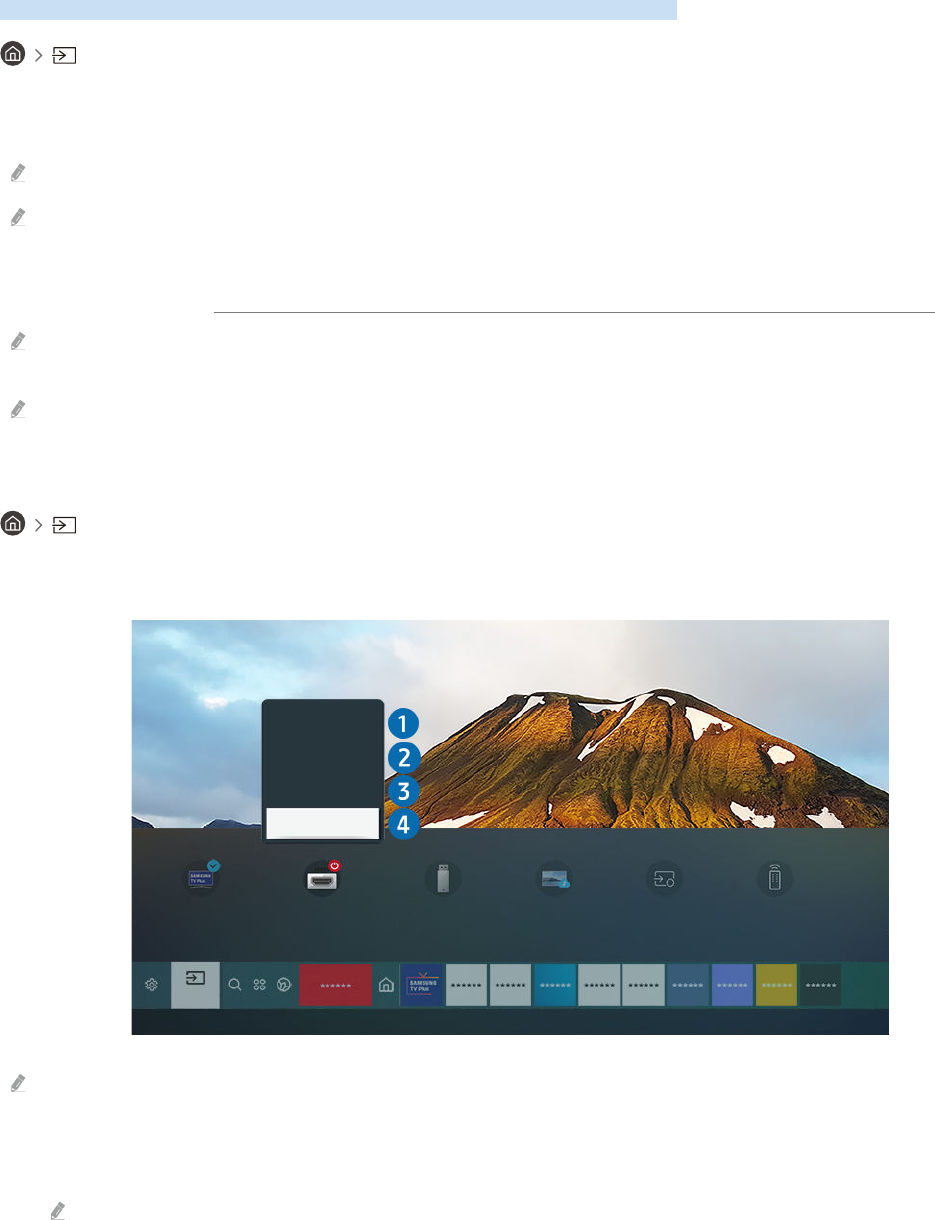
15 Switching between external devices connected to the TV
17 Connection Notes
Remote Control and Peripherals
20
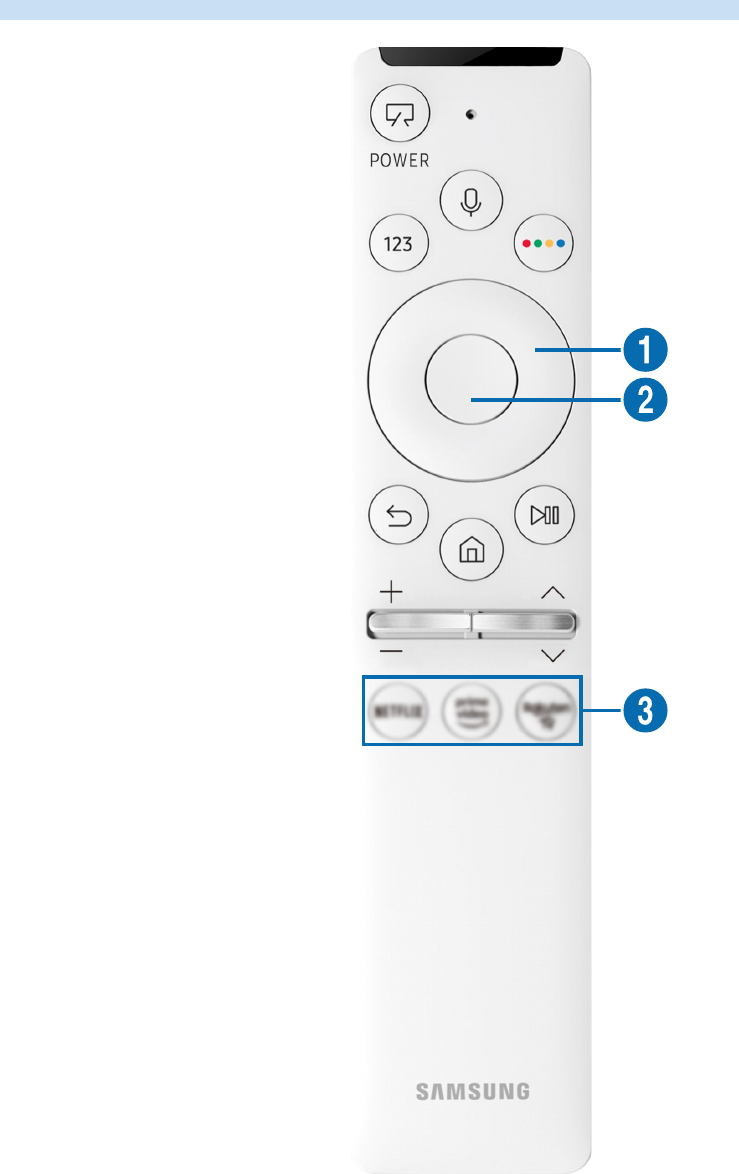
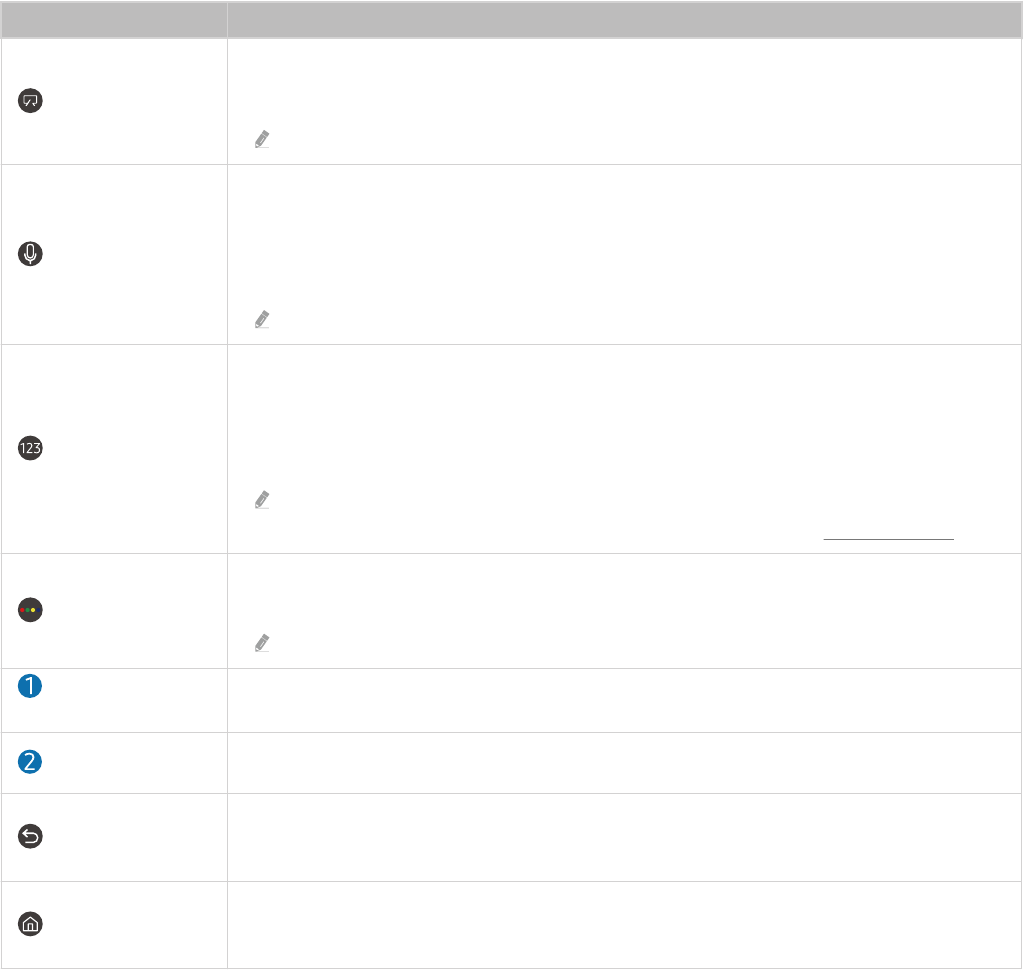
About the Samsung Smart Remote
23 About the Samsung Smart Remote (The Frame)
26 About the Samsung Smart Remote (The Sero)
29 Connecting the Samsung Smart Remote to the TV
30 Controlling External Devices with a Samsung Remote
Control - Using the Universal Remote
31
Using Anynet+ (HDMI-CEC)
32
Controlling the TV with a Keyboard, Mouse or Gamepad
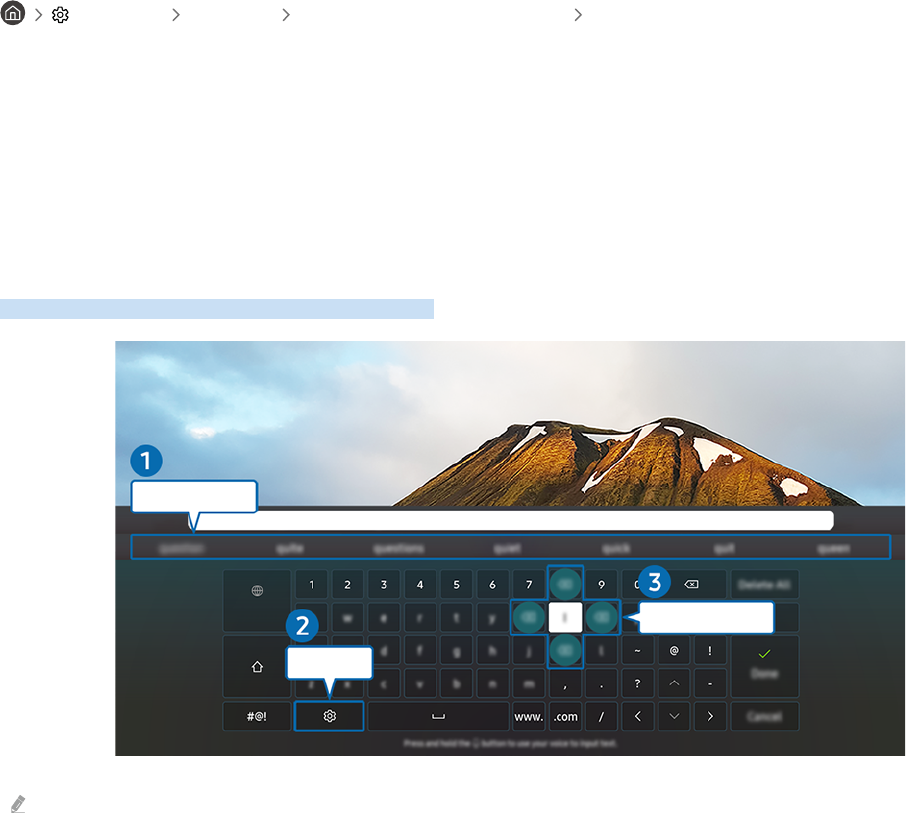
34 Entering Text using the On-Screen Virtual Keyboard
Smart Features
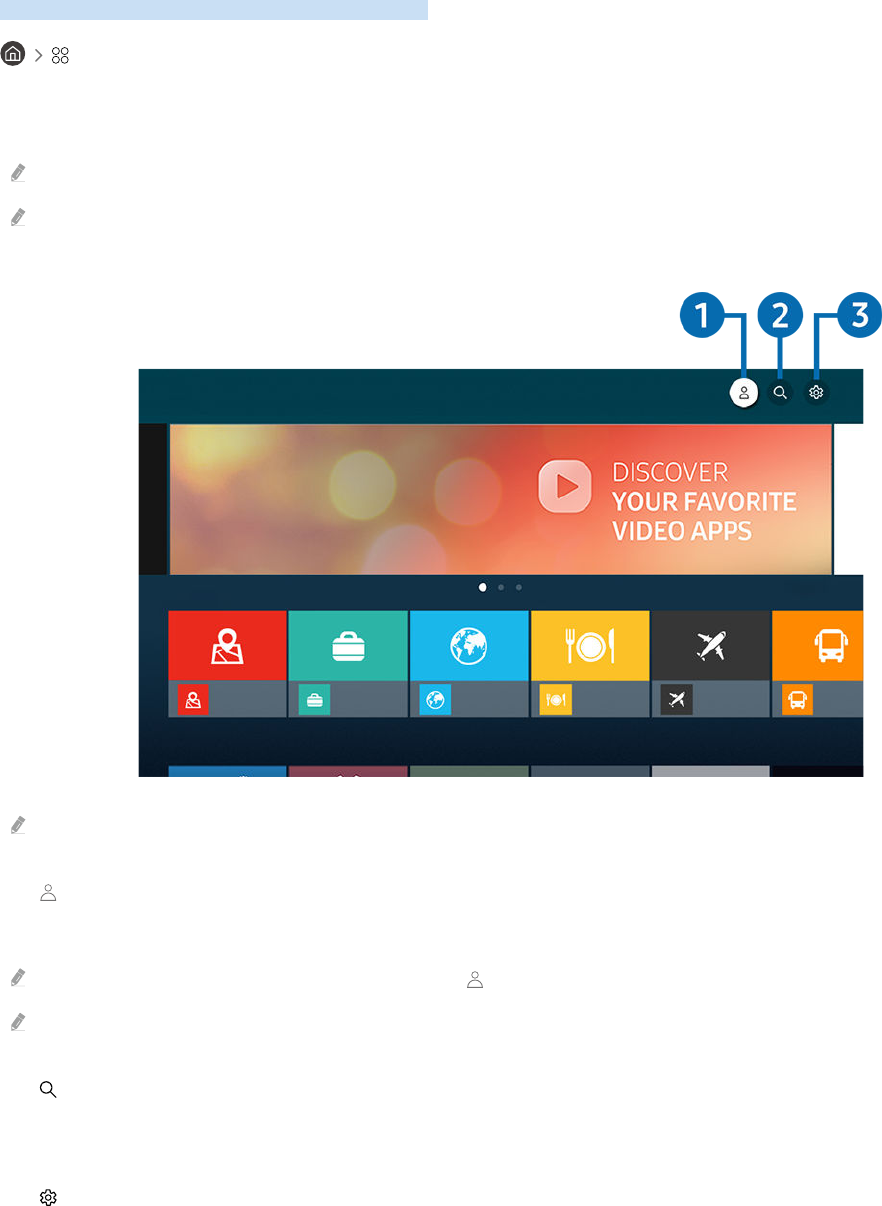
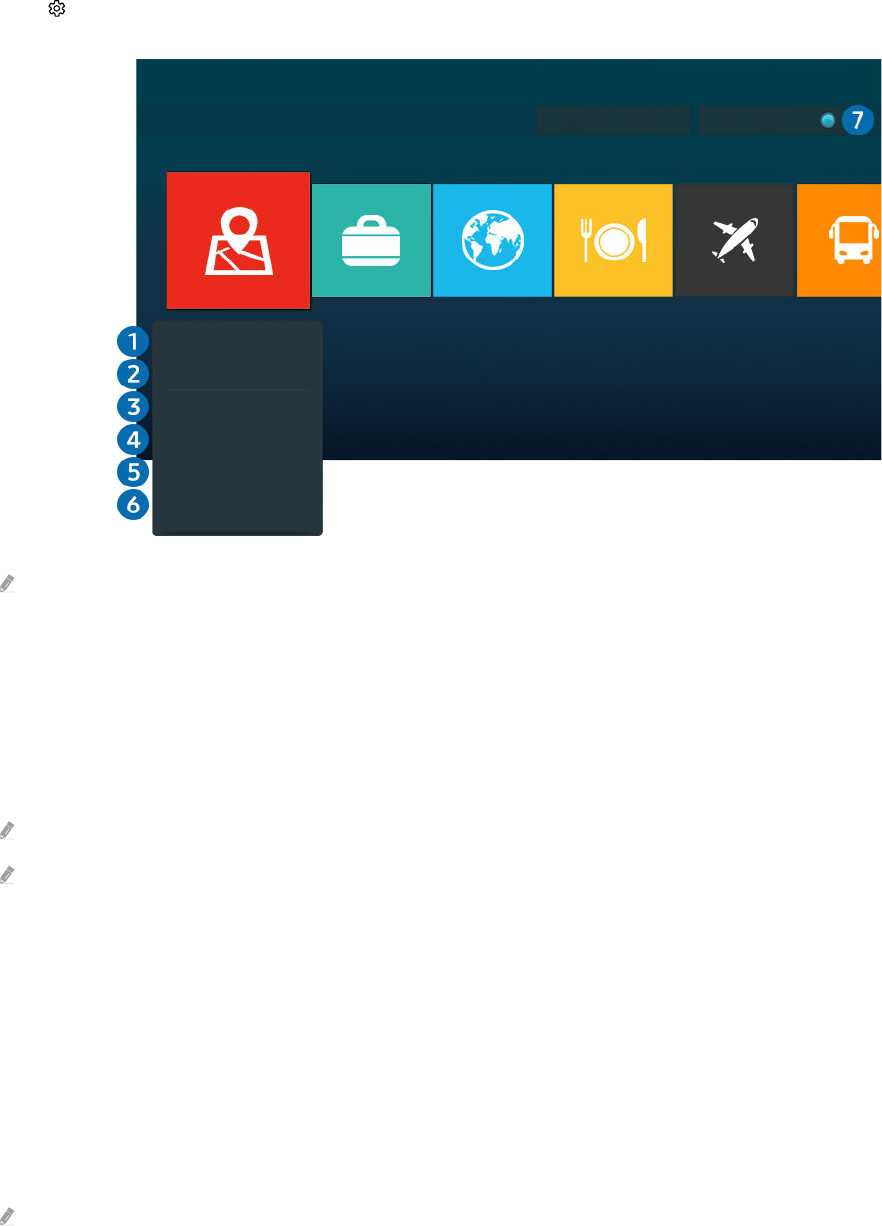
36 Using Smart Hub
44
Using a Samsung account
46
Using the Ambient Mode
51
Using the Shortcuts
53
Using Remote Access
57
Using the Apps Service
61
Using the Gallery App
62
Using the SmartThings App
63
Using the e-Manual
66
Using the Internet
67
Playing pictures/video/music
73
Using Bixby
TV Viewing
77 Using the Guide
80
Recording Programmes
82 Setting Up a Schedule Viewing
84 Using Timeshift
84
Buttons and functions available while recording a
programme or Timeshift
86
Using the Channel List
87
Editing channels
88
Using a Personal Favourites List
89 TV-Viewing Support Functions
Picture and Sound
96
Using the Intelligent Mode
97
Adjusting the Picture Quality
99
Setting the Viewing Environment for External Devices
101
Picture Support Functions
103 Conguring a Sound Mode and Expert Settings
105 Using the Sound Support Functions
System and Support
107
Using the Time Functions and the Timers
110
Using the Auto Protection Time and Energy Saving
Functions
111 Updating the TV's Software
112 Audio and Video Functions for the Visually or Hearing
Impaired
118 Using the Voice Recognition feature
119 Using Other Functions
121 HbbTV
122 Using a TV Viewing Card (“CI or CI+ Card”)
125 Teletext Feature
Precautions and Notes
129
Before Using the Recording and Timeshift Functions
130
Supported broadcasting audio options