377608
10
Zoom out
Zoom in
Previous page
1/24
Next page
NOTA: L’orologio di questa bilancia è a 12 ore,
per cui sul display appaiono le sigle AM/PM.
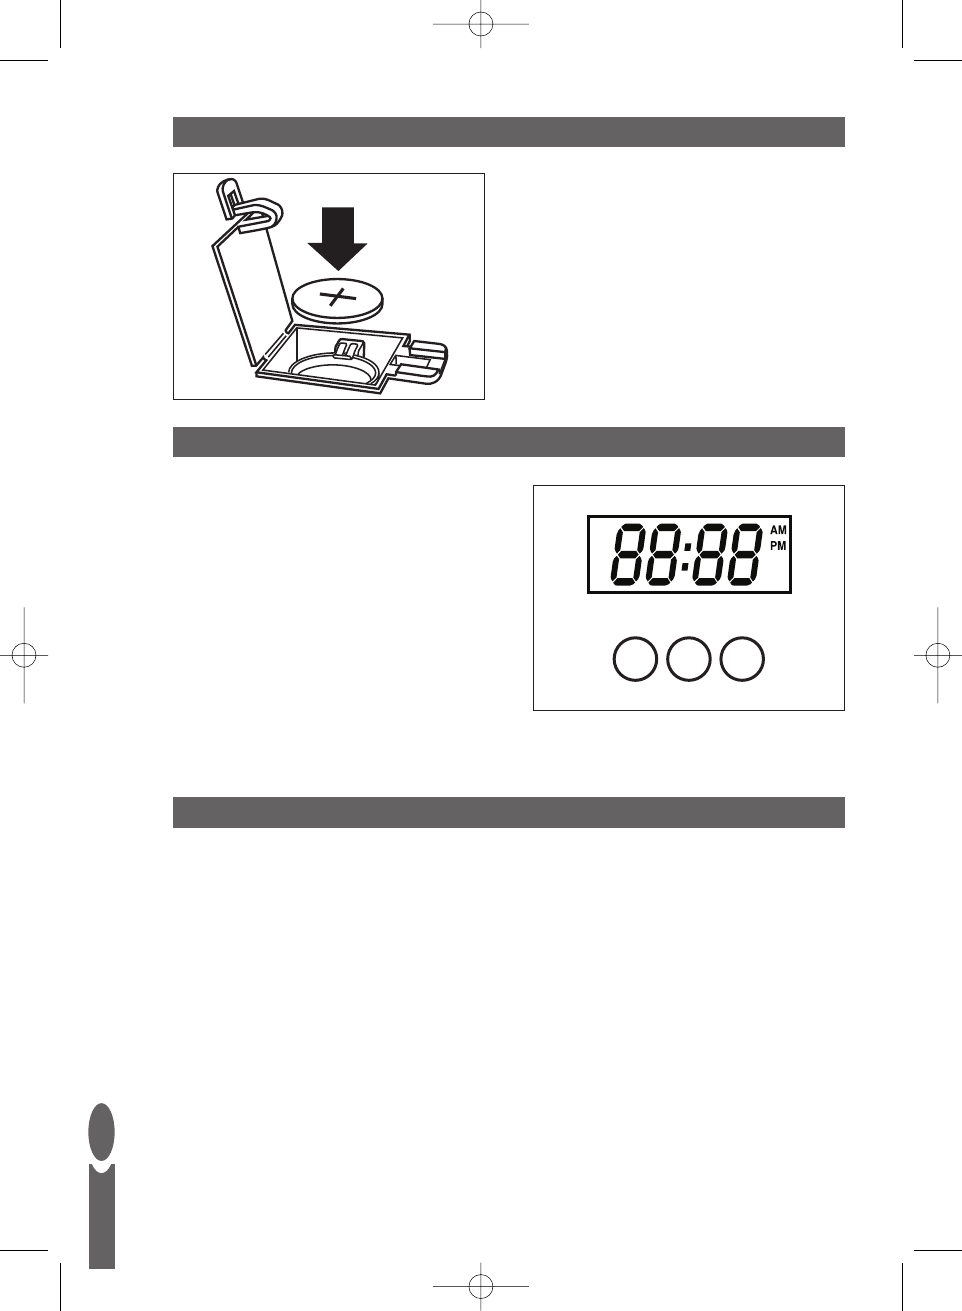
1. Per selezionare la modalità orologio, premere
il tasto TIME finché sul display non appaia ‘TM’.
2. Premere e tenere premuto il tasto TIME
per 2 secondi finché non iniziano a lampeggiare
le cifre dei minuti.
3. Premere il tasto UNIT per impostare i minuti.
Tenere premuto il tasto per accelerare
la selezione.
4. Premere il tasto TIME.
5. Premere il tasto UNIT per impostare l’ora.Tenere premuto il tasto per accelerare la selezione.
6. Premere di nuovo il tasto TIME per confermare l’impostazione dell’ora.
I
10
IMPOSTAZIONE DEL CONTAMINUTI ALLA ROVESCIA
1. Premere il tasto TIME sign finché non appare ‘TMR’.
2. Premere e tenere premuto il tasto UNIT per 2 secondi per riportare le cifre a ‘00.00’.
3. Premere e tenere premuto il tasto TIME per 2 secondi finché la visualizzazione non inizia
a lampeggiare.
4. Premere il tasto UNIT per impostare i secondi.Tenere premuto il tasto per accelerare
la selezione.
5. Premere il tasto TIME.
6. Premere il tasto UNIT per impostare i minuti.Tenere premuto il tasto per accelerare
la selezione.
7. Premere il tasto TIME per avviare il conto alla rovescia.
8. Per arrestare il conto alla rovescia basta premere il tasto UNIT. Per riavviarlo premere
di nuovo il tasto UNIT.
9. Il contaminuti emette un avviso acustico per 30 secondi quando raggiunge ‘00.00’,
dopodiché viene ripristinata la modalità orologio.
10. Per spegnere l’avviso acustico basta premere qualsiasi tasto. Sul display apparirà ‘00.00’. Premere
il tasto UNIT per richiamare l’ultimo periodo di tempo impostato e avviare il contaminuti.
IMPOSTAZIONE DELLOROLOGIO
SOSTITUIRE BATTERIE
UNIT
TIME
ON/TARE
1. Togliere lo sportello del vano batterie dal
retro della bilancia.
2. Assicurarsi che i poli siano posizionati
correttamente.Tirare via la
linguetta isolante.
3. Rimettere a posto lo sportello.
1014-1016.qxd:1014 1016 15/6/09 16:08 Page 10
10


Need help? Post your question in this forum.

Forumrules


Report abuse

Libble takes abuse of its services very seriously. We're committed to dealing with such abuse according to the laws in your country of residence. When you submit a report, we'll investigate it and take the appropriate action. We'll get back to you only if we require additional details or have more information to share.

Product:

For example, Anti-Semitic content, racist content, or material that could result in a violent physical act.

For example, a credit card number, a personal identification number, or an unlisted home address. Note that email addresses and full names are not considered private information.

Forumrules

To achieve meaningful questions, we apply the following rules:

Register

Register getting emails for Salter 1016 at:


You will receive an email to register for one or both of the options.


Get your user manual by e-mail

Enter your email address to receive the manual of Salter 1016 in the language / languages: English, German, Dutch, Danish, French, Italian, Portuguese, Swedish, Spanish, Norwegian, Finnish as an attachment in your email.

The manual is 0,24 mb in size.


You will receive the manual in your email within minutes. If you have not received an email, then probably have entered the wrong email address or your mailbox is too full. In addition, it may be that your ISP may have a maximum size for emails to receive.

The manual is sent by email. Check your email

If you have not received an email with the manual within fifteen minutes, it may be that you have a entered a wrong email address or that your ISP has set a maximum size to receive email that is smaller than the size of the manual.

The email address you have provided is not correct.

Please check the email address and correct it.

Your question is posted on this page

Would you like to receive an email when new answers and questions are posted? Please enter your email address.


Info