7
Informations générales.
Déballer l’insert avec précaution et conserver l’
que ce soit pour un déménagement ou un retour de l’
piles sont emballées séparément dans le carton.
L
possible de bénécier de son eet tranquillisant tout au long de l’année
seul ne requiert qu’une faible consommation d’
Ce modèle est conçu pour être installé dans un encadrement ou dans un encastr
Avant de brancher l’
indiquée sur l’insert.
Attention : l’
est normal et ne doit pas être une source inutile d’
Branchement électrique.
A
Cet insert doit être utilisé en courant alternatif uniquement et la tension d’alimen
correspondre à la tension indiquée sur l’appar
Lire attentivement les c
marche.
CONSERVER CE GUIDE D’UTILISA
Ne pas passer les éléments en plastique au lave-vaisselle.
Fair
ampoule doit être remplacée, sinon le niv
risquent d’
Utiliser de l’
T
Si une période de non-utilisation de plus de 2 semaines est prévue, vidanger l’eau du bac et du
réservoir d’eau et sécher le bac.
Une fois installé, ne jamais déplacer cet insert ou le mettre à plat sur le sol sans vidanger l’eau
du bac et du réservoir d’eau.
Le ré
être
calcaire.
Ne jamais utiliser l’insert si les ampoules ne fonctionnent pas.
Les ampoules doivent être régulièrement contrôlées comme décrit à la section « Entretien »,
« Remplacement des ampoules ».
Instructions d’installation
V
Conserver tous les emballages pour une éven
déménagement ou un retour en usine.
Pour réduire les pertes de chaleur et empêcher que l’
fonctionnement de l’
qu’un petit passage pour la ventila
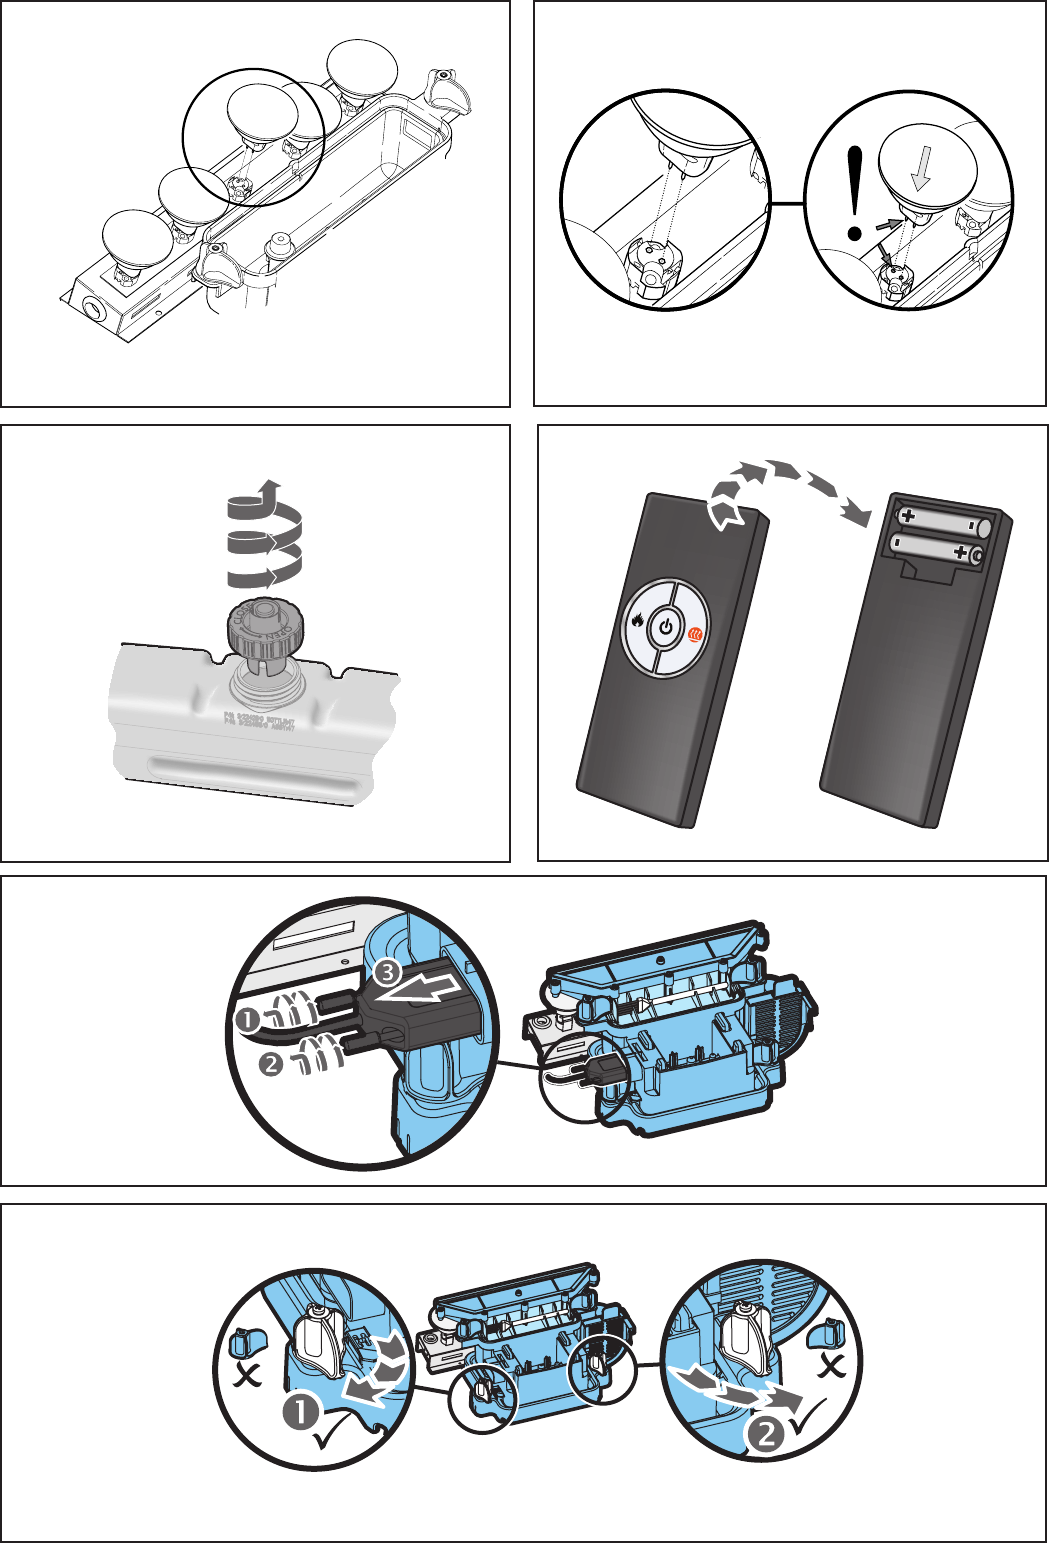
Insérer les ampoules avant tout br
Les ampoules sont emballées séparément.
Pour installer l’appar
T
prise de 13 ampères / 240 volts.
droite ou à gauche en fonction de l’
sous l’insert, ce qui pourrait l’
Lire attentivement les instructions suivantes a
IMPORT
C
Consignes de sécurité importantes :
Lors de l’utilisation d’
les risques d’
Si le produit est endommagé, consulter le f
l’utilisation.
Ne pas utiliser à l’
Ne pas utiliser à proximit
Ne pas placer l’
Cet appareil ne doit pas être utilisé par des enfan
dont les capacités phy
toute sécurité sans assistance
servir sans surveillance.
Ne pas utiliser cet insert en série avec un régulat
programmé, une minuterie ou t
chaleur
déplacé.
S’
d’au moins 1 mètre de l’
Débrancher l’
Débrancher l’
Bien que cet insert soit conforme aux normes de sécurité, nous r
l’utiliser sur une moquette très épaisse ou sur des tapis à poils longs.
Le produit doit être positionné de façon à rendr
Si le cordon d’
réparateur ou tout
Éloigner le cordon d’
A
matériaux ou de vêtements sur l’
Le symbole d’a
RUBY FIRES Mystic F
Avan
« Entretien », « Remplissage du réservoir d’
Commandes manuelles.
Les commandes manuelles se trouven
(voir Fig
Interrupteur « A » : commande l’alimentation électrique de l’
Remarque : Cet interrupteur doit se trouvI ) pour que l’
dégage, ou non, de la chaleur
Interrupteur « B » : commande le fonctionnement de l’
Appuyer une fois sur pour mettre en mar. Un bip sonore retentit.
Bien que les ampoules principales fonctionnent immédiatement, 30 secondes
supplémentaires sont nécessaires pour que l’
Appuyer de nouveau sur pour obtenir l’ Deux
bips sonores retentissent.
Appuyer de nouveau sur pour obtenir l’.
bips sonores retentissent.
Appuyer de nouveau sur pour r.
Un bi
Appuyer sur pour mettre l’
Un bi
Bouton « C » : commande l’in
T
sens antihoraire diminue l’
Lorsque le réservoir d’
la section « Entretien », « Remplissage du réservoir d’
les ampoules principales s’allument mais 30 secondes son
réapparaissent.
Fonctionnement à distance
Sur le panneau de commande, l’( I ) pour
que la télécommande fonctionne. La télécommande c
Pour fonctionner correctement, la t
Les fonctions de la télécommande sont les suivant
Appuyer une fois pour allumer l’eet amme uniquement.
Un b
App
De
App.
Trois b
Veille
Un b
Informations concernan
1. Retirer le couvercle des piles à l’
2. Installer des piles AAA dans la télécommande.
3. Remettre en place le couvercle des piles
Mettre au rebut toute pile présentan.
Mettre au rebut les piles conformément aux r
L
ensemble, si les piles sont installées de manière incorrecte
simultanément, si les piles sont jetées dans un feu ou en cas de tenta
rechargeable.
Disjoncteur thermique
Un disjon
surchau
de quelqu
et atte
obstruction susceptible de restreindre la sortie de chaleur
Astuces concernan
1. F
doit être remplacée, sinon un ex
réduit. Si cela se produit, vider l’
2. En réglant les ammes au minimum et non pas au maximum, l’appareil utilise en
par heure et a une durée de vie 3 fois plus longue
3. Ne pas incliner ou déplacer l’insert tant qu’
4. V
5. Le bouton « C » (voir F
6. Quelquefois, les ammes semblent plus réelles lorsque ce bout
7. Donner au générateur de ammes le temps de réagir aux modications apportées à l’aide du
bouton de réglage des ammes.
Entretien
A
OPÉRA
Remplacement des ampoules.
Si une grande quantité de fumée semble grise ou incolore
soient défectueuses.
L
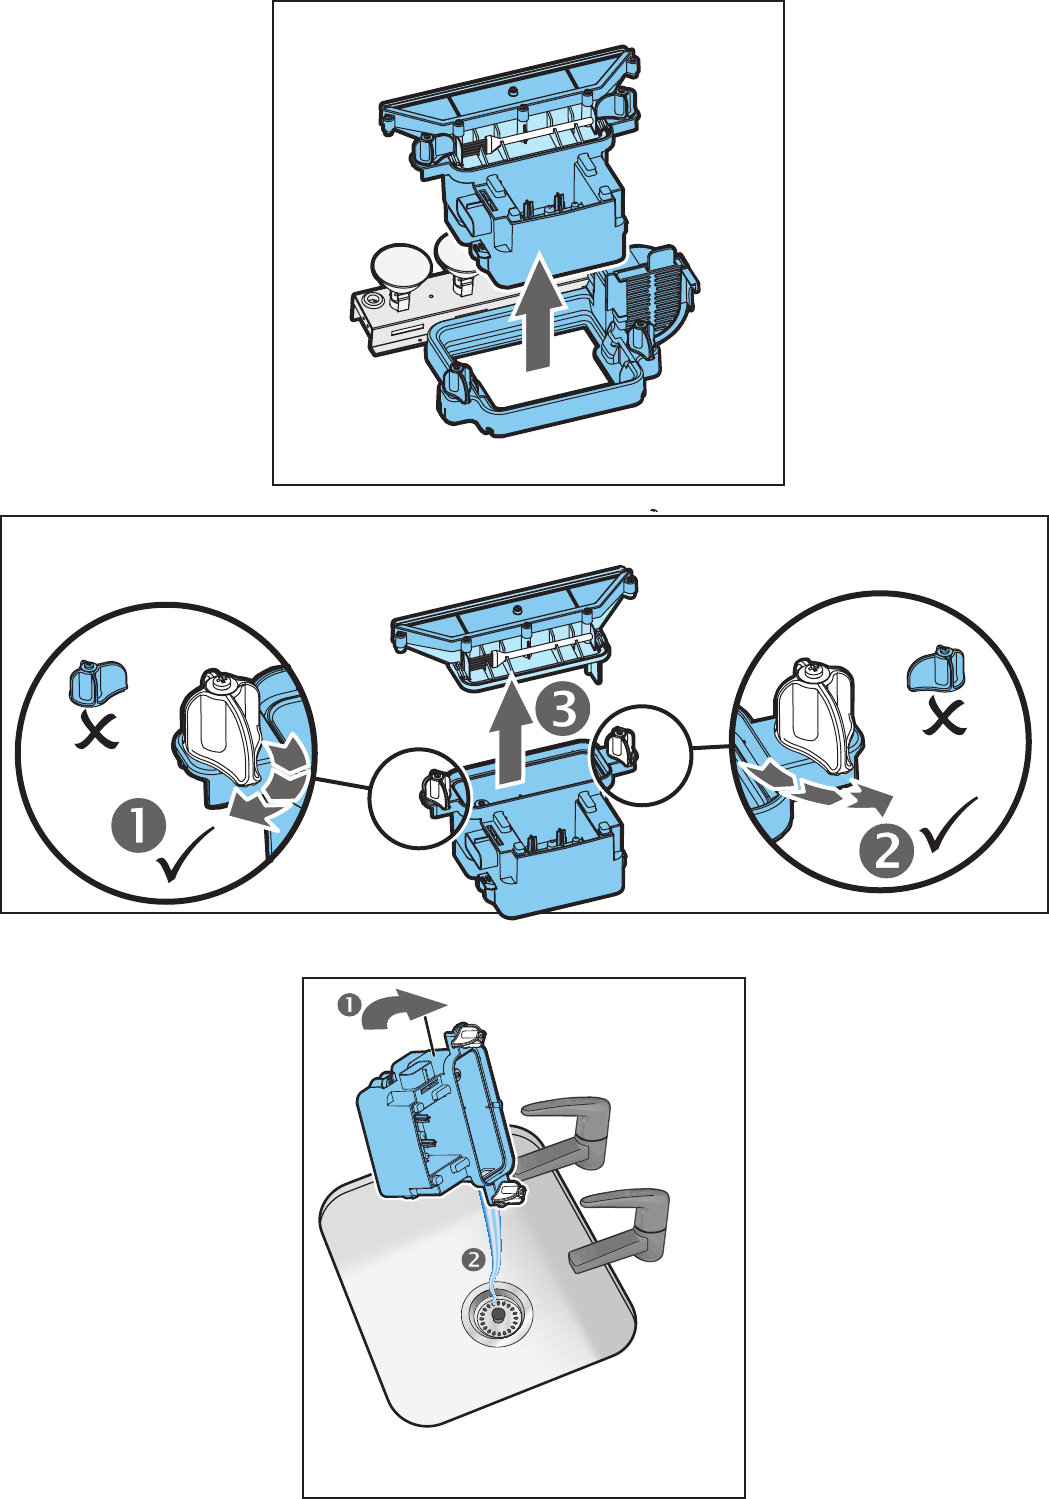
1. En laissant l’
à fond en le tirant par la languette. (v
2. Observer les ampoules à une certaine distance du devant de l’insert et déterminer quelles ampoules
doivent être remplacées
3. Mettre l’int
4. Attendre envir
5. Retirer le réservoir d’
6. Retirer le bac tel que décrit dans la section Nettoyage.