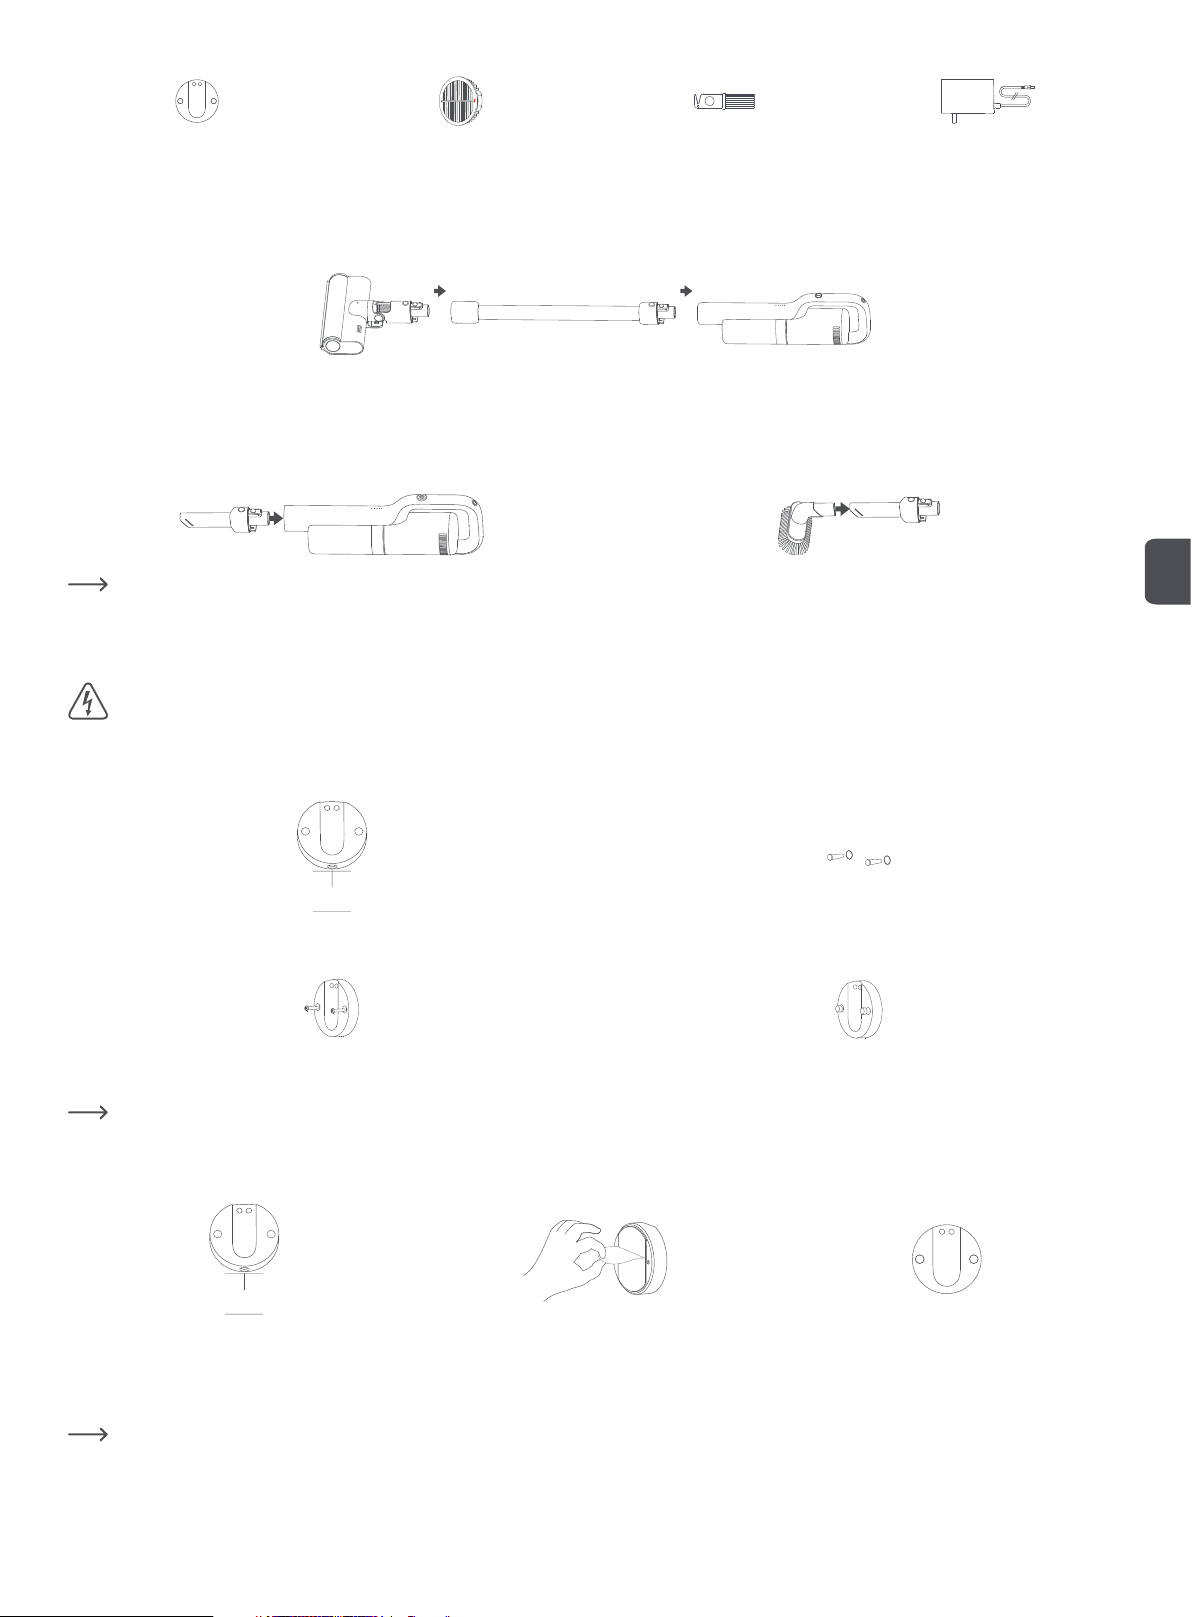
There are a variety of accessories that are compatible with this vacuum cleaner. Attach desired accessory or cleaning tool to the vacuum cleaner for specific cleaning
purpose.
1. Attaching crevice tool: Insert release button end of the crevice tool into the
main unit. Push it in until it clicks securely into place.
2. Attaching dusting brush: Insert the dusting brush into the crevice tool. Push it
in until it secures into place.
Accessories which can be directly connected to the main unit include mattress brush. The method for attaching them is the same as for attaching the crevice tool.
c) Installing wall-mounted charging dock
Wall-mounted charging dock is designed to store and charge the vacuum cleaner while not in use. Be sure it is installed near an outlet.
Method 1: Installing with screws
Make sure there are no gas, water or electrical pipes/wires behind the mounting area before drilling.
1. Remove small plastic caps on the charging dock. At a height of 92 cm, position
the charging dock on the wall and mark the fixing hole positions. Make sure
fixing holes are on a horizontal line.
2. Drill fixing holes and hammer wall plugs into the holes.
92 cm
3. With the charging contacts on the top, put the charging dock in place and fix
it with screws.
4. Put the caps back to cover the holes.
Method 2: Installing without screws
This installation method is not applicable to peeling walls, dirty walls and walls of poor quality. Ensure the wall is clean and free of dust before installing.
1. Measure a height of 92 cm and mark the installation
position.
2. Remove the protective film.3. With the charging contacts on the top, paste the
charging dock on the wall, pressing slightly to make
sure it is firmly adhered to the wall.
92 cm
7. Operation
a) Charging
Fully charge the vacuum cleaner before first use.
• To charge, connect the power adapter to the charging port on the vacuum cleaner, then connect the other end of the power adapter to a wall outlet. It takes approx.
2.5 hours to fully charge.
Another way to charge the vacuum cleaner is using the wall-mounted charging dock. Connect the charging dock to an outlet via the power adapter. Align the contact
charging points and simply attach the vacuum cleaner to the dock to charge.
Libble takes abuse of its services very seriously. We're committed to dealing with such abuse according to the laws in your country of residence. When you submit a report, we'll investigate it and take the appropriate action. We'll get back to you only if we require additional details or have more information to share.
Product:
Forumrules
To achieve meaningful questions, we apply the following rules:
First, read the manual;
Check if your question has been asked previously;
Try to ask your question as clearly as possible;
Did you already try to solve the problem? Please mention this;
Is your problem solved by a visitor then let him/her know in this forum;
To give a response to a question or answer, do not use this form but click on the button 'reply to this question';
Your question will be posted here and emailed to our subscribers. Therefore, avoid filling in personal details.
Register
Register getting emails for Roidmi X20 S at:
new questions and answers
new manuals
You will receive an email to register for one or both of the options.
Get your user manual by e-mail
Enter your email address to receive the manual of Roidmi X20 S in the language / languages: English as an attachment in your email.
The manual is 8.34 mb in size.
You will receive the manual in your email within minutes. If you have not received an email, then probably have entered the wrong email address or your mailbox is too full. In addition, it may be that your ISP may have a maximum size for emails to receive.
If you have not received an email with the manual within fifteen minutes, it may be that you have a entered a wrong email address or that your ISP has set a maximum size to receive email that is smaller than the size of the manual.
The email address you have provided is not correct.
Please check the email address and correct it.
Your question is posted on this page
Would you like to receive an email when new answers and questions are posted? Please enter your email address.