625554
15
Zoom out
Zoom in
Previous page
1/57
Next page
15
Mounting of the scoring saw blade (fig. 7.1)
Warning : Before changing saw blades always turn off the main switch (fig.6.1).
Push the sliding table to the rear and open the saw cover (fig.8)and loosen the 2 wingnuts under-
neath the sliding table handle plate, slide the plate open to the left as can bee seen in the figure
7.
Raise the scoring saw blade to its highest position and turn the arbor to the left.
Now the forked spanner can be put onto the flattened part of the saw arbor.
The scorer saw blade is changed as follows: turn the scorer blade to the far left and put the span-
ner onto the flatened arbor.
Loosen the bolt with the Allen key (right hand thread) and remove the scorer blade. After chang-
ing the blade tighten the bolt and remove the spanner from the arbor.
Alignment of main and scoring saw blade
The use of two piece scoring saw blades is best
because they can easily be adjusted to the kerf of the
main saw blade using spacer rings.
Each time the main saw blade is replaced by a new
one, or even a newly sharpened saw blade, the scorer
has to be adjusted to match the main saw blade teeth
kerf. It is very important that this is done in the cor-
rect way to ensure a clean cut, free of splintering.
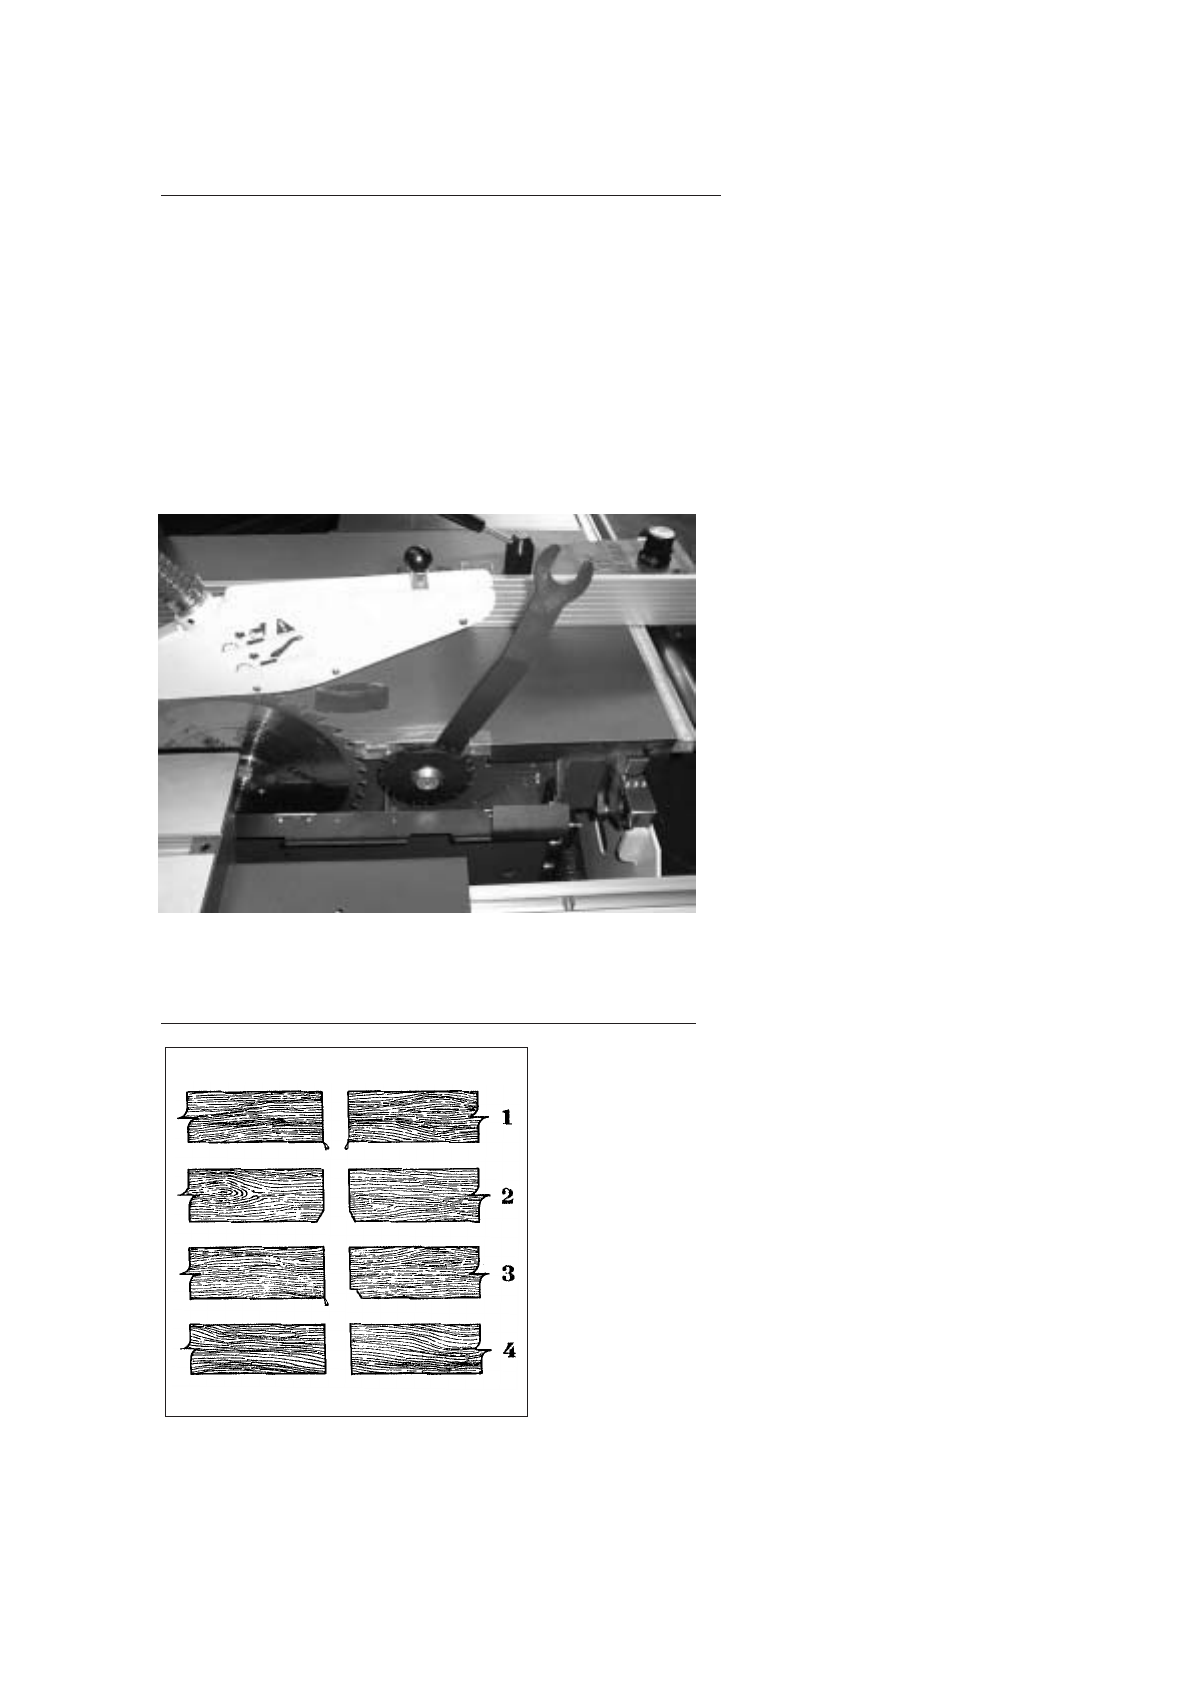
The diagram shows the different possibilities :
1) Without the use of a scorer saw blade
2) Correct setting of the scorer saw blade but too
deep
3) Scorer saw blade too much to the right side
4) Correct setting of the scorer saw blade
15


Need help? Post your question in this forum.

Forumrules


Report abuse

Libble takes abuse of its services very seriously. We're committed to dealing with such abuse according to the laws in your country of residence. When you submit a report, we'll investigate it and take the appropriate action. We'll get back to you only if we require additional details or have more information to share.

Product:

For example, Anti-Semitic content, racist content, or material that could result in a violent physical act.

For example, a credit card number, a personal identification number, or an unlisted home address. Note that email addresses and full names are not considered private information.

Forumrules

To achieve meaningful questions, we apply the following rules:

Register

Register getting emails for Robland NX- NLX-310 at:


You will receive an email to register for one or both of the options.


Get your user manual by e-mail

Enter your email address to receive the manual of Robland NX- NLX-310 in the language / languages: English as an attachment in your email.

The manual is 1,97 mb in size.


You will receive the manual in your email within minutes. If you have not received an email, then probably have entered the wrong email address or your mailbox is too full. In addition, it may be that your ISP may have a maximum size for emails to receive.

Others manual(s) of Robland NX- NLX-310

Robland NX- NLX-310 User Manual - German - 56 pages

Robland NX- NLX-310 User Manual - Dutch - 61 pages


The manual is sent by email. Check your email

If you have not received an email with the manual within fifteen minutes, it may be that you have a entered a wrong email address or that your ISP has set a maximum size to receive email that is smaller than the size of the manual.

The email address you have provided is not correct.

Please check the email address and correct it.

Your question is posted on this page

Would you like to receive an email when new answers and questions are posted? Please enter your email address.


Info