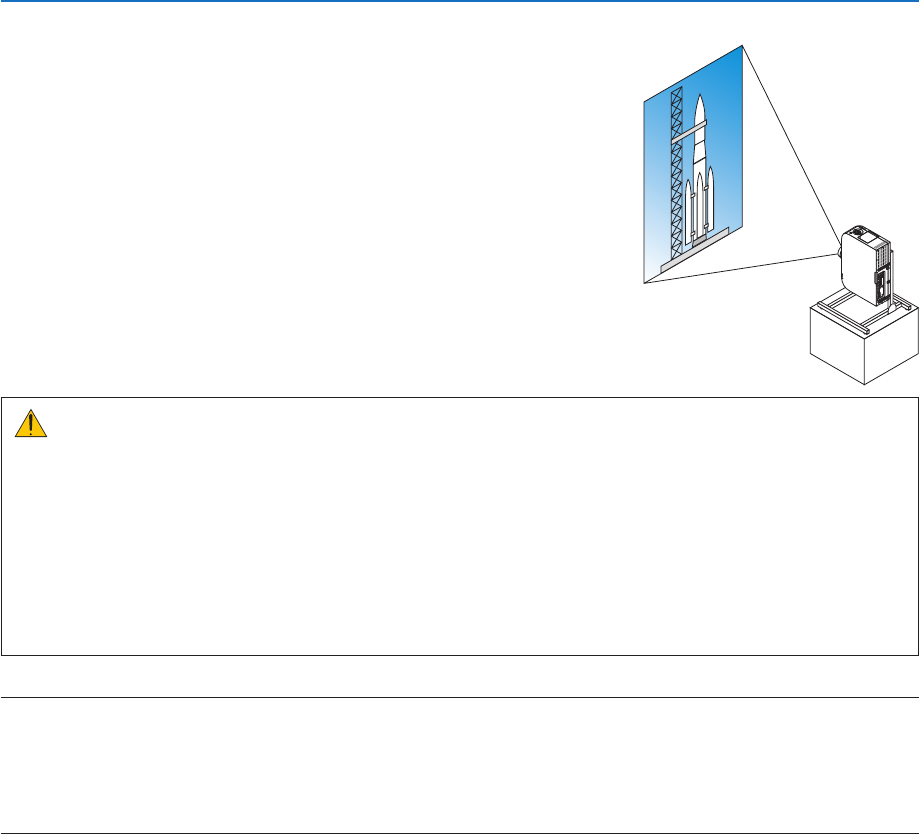
Portrait screens from a computer can be projected by installing the projector in
a vertical orientation. All the screens such as the on-screen menu will be rotated
in an counter-clockwise direction.
The projector is equipped with a sensor to automatically detect the installation
state.
When the projector is installed in a portrait configuration for the first time with
the lamp lit up, a caution message to indicate that the operating time of the
lamp may be shortened will be displayed.
This message will automatically disappear when the installation state of the
projector is returned to the original state.
Precautions during installation
• Please do not install the projector in a vertical orientation on top of the floor or table on its own. The intake vent may be
obstructed, resulting in the projector getting warm and the possibility of fire and malfunction occurring.
• For vertical installation, install the projector with the intake vent (filter) facing downwards. A stand for supporting the
projector needs to be made for this purpose. In this case, the stand must be designed such that the center of gravity of
the projector is located well within the legs of the stand. If not, the projector may fall over and result in injury, damage
and malfunction.
• Do not use the lens shift function when performing portrait projection. Use the position of the lens shift mechanism in
the center (lens center).
NOTE:
• The lamp replacement time (as a guide)* is about 2000 hours for portrait projection.
* Replacement time is not guaranteed.
• When installing in a portrait conguration for the rst time, portrait projection cannot be used when the number of lamp hours used shown under [INFO.] → [USAGE
TIME] → [LAMP HOURS USED] in the on-screen menu exceeds 1900 hours.
• When the [FAN MODE] is set to a mode other than [AUTO], portrait projection cannot be used.
Design and manufacturing conditions for the stand
Please engage an installation service provider for the design and manufacture of the customized stand to be used for portrait
projection. Please ensure that the following are complied with when designing the stand.
1. Maintain an opening of at least 310 × 170 mm so as not to obstruct the intake vent / filter of the projector.
2. Maintain a distance of at least 130 mm between the projector intake vent and the floor (for the opening of the filter cover).
3. Use the four screw holes at the back of the projector to secure it to the stand.
Screw hole center dimension: 200 × 250 mm
Screw hole dimension on the projector: M4 with a maximum depth of 8 mm.
* Please design the stand such that the rear legs at the back of the projector do not contact the stand. The front legs can
be turned and removed.
4. Horizontal adjustment mechanism (for example, bolts and nuts in four locations)
5. Please design the stand such that it does not topple over easily.
Libble takes abuse of its services very seriously. We're committed to dealing with such abuse according to the laws in your country of residence. When you submit a report, we'll investigate it and take the appropriate action. We'll get back to you only if we require additional details or have more information to share.
Product:
Forumrules
To achieve meaningful questions, we apply the following rules:
First, read the manual;
Check if your question has been asked previously;
Try to ask your question as clearly as possible;
Did you already try to solve the problem? Please mention this;
Is your problem solved by a visitor then let him/her know in this forum;
To give a response to a question or answer, do not use this form but click on the button 'reply to this question';
Your question will be posted here and emailed to our subscribers. Therefore, avoid filling in personal details.
Register
Register getting emails for Ricoh PJ WU6181N at:
new questions and answers
new manuals
You will receive an email to register for one or both of the options.
Get your user manual by e-mail
Enter your email address to receive the manual of Ricoh PJ WU6181N in the language / languages: English as an attachment in your email.
The manual is 17,37 mb in size.
You will receive the manual in your email within minutes. If you have not received an email, then probably have entered the wrong email address or your mailbox is too full. In addition, it may be that your ISP may have a maximum size for emails to receive.
If you have not received an email with the manual within fifteen minutes, it may be that you have a entered a wrong email address or that your ISP has set a maximum size to receive email that is smaller than the size of the manual.
The email address you have provided is not correct.
Please check the email address and correct it.
Your question is posted on this page
Would you like to receive an email when new answers and questions are posted? Please enter your email address.