658398
28
Zoom out
Zoom in
Previous page
1/68
Next page
28 I General User Manual
2. Fit the xing washers onto both sides of the hub
axle. Turn the shiing arm until the projections on
the xing washers engage with the slits in the
dropouts. In this case the shiing arm can be
mounted more or less parallel to the ame fork.
CJ-NX10
JAPAN
LOCK
7R
Locking washer (le-hand side)
Shiing arm
Frame fork
Dropout
Locking washer
(right-hand side)
The projecting part must be on the dropout side.
Fit the xing washers so the projections precisely
engage in the slits in the dropouts on the ont or
rear of the hub axle.
3. Take up the slack in the chain and fasten the
wheel onto the ame with the cap nuts.
CJ-NX10
JAPAN
LOCK
7
R
Cap nut
Locking washer
Tightening torque
30 – 45 Nm
4. Fit the brake arm with brake arm clamp correctly
onto the ame fork.
Brake arm
Clamp nut
Clamp screw
Brake arm clamp
Frame fork
Counter the clamp nut with a 10 mm spanner when
tightening the clamp screw for assembly of the brake
arm clamp.
Tightening torque
2
– 3Nm
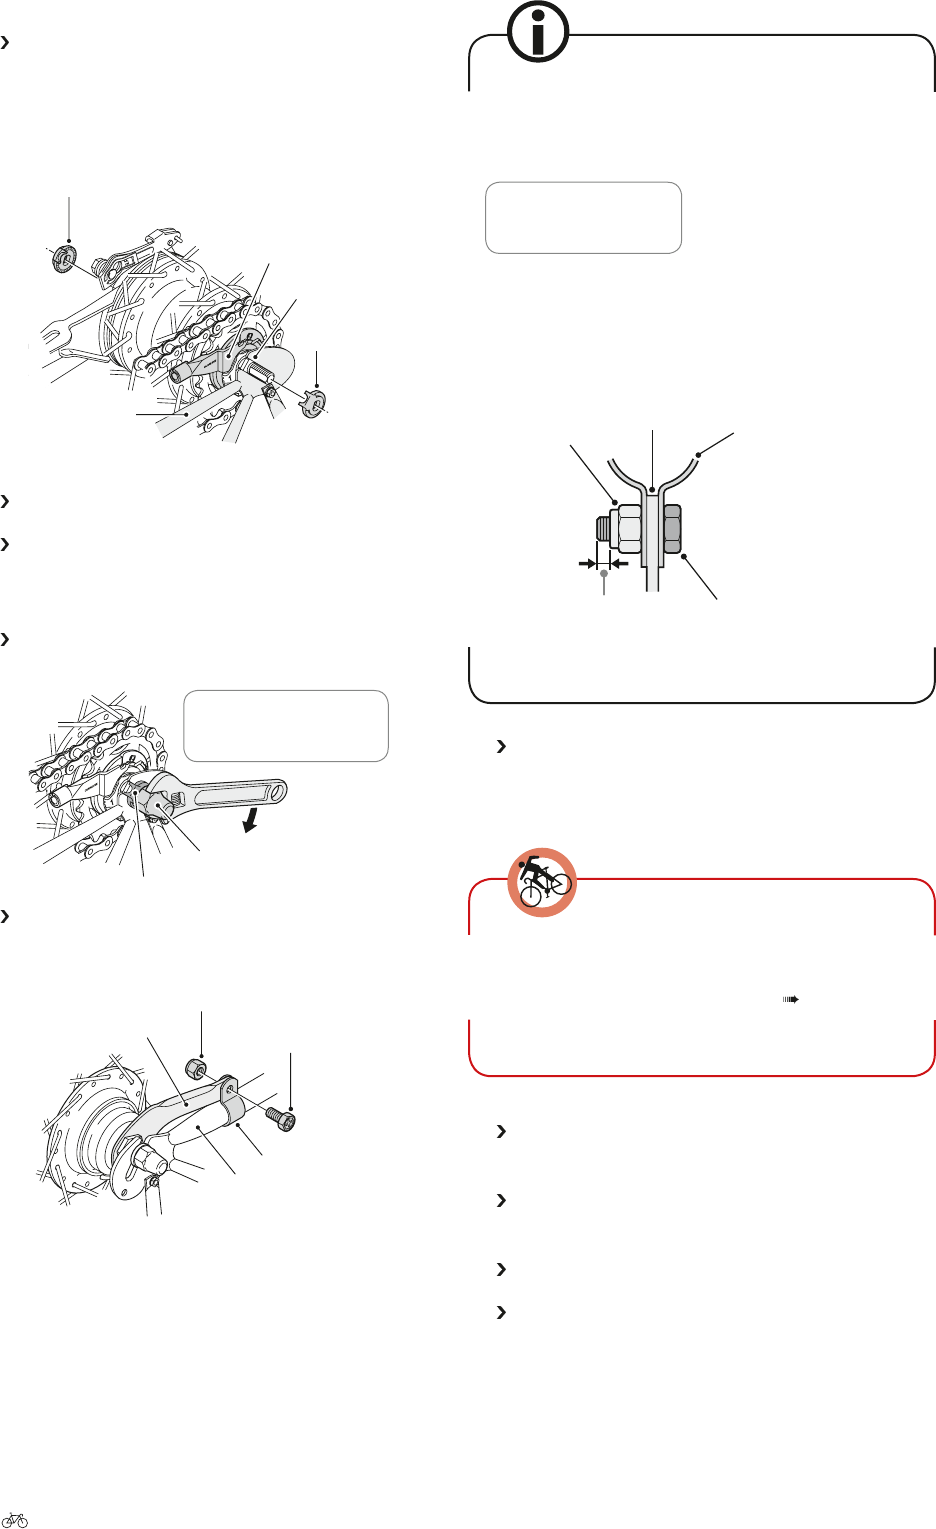
Once you have installed the brake arm clamp, make
sure the clamp screw projects roughly 2 to 3mm be-
yond the clamp nut.
Brake arm clamp
Clamp screw
(M6 × 16mm)
2 – 3 mm
Brake arm
Clamp nut
5. Before using the back-pedal brake, make sure
the brake is working properly and the wheel turns
easily.
Tighten all screws to the prescribed torque as other-
wise screws could shear o and components could
come loose or detach altogether (see
Chapter 30.3
"Tightening torques for screw connections").
Thread in the brake cable and secure it or close the
quick-release brake mechanism.
Check that the brake pads make contact with the
brake contact surfaces.
Check that the brake arm is securely fastened.
Test the brakes.
28


Need help? Post your question in this forum.

Forumrules


Report abuse

Libble takes abuse of its services very seriously. We're committed to dealing with such abuse according to the laws in your country of residence. When you submit a report, we'll investigate it and take the appropriate action. We'll get back to you only if we require additional details or have more information to share.

Product:

For example, Anti-Semitic content, racist content, or material that could result in a violent physical act.

For example, a credit card number, a personal identification number, or an unlisted home address. Note that email addresses and full names are not considered private information.

Forumrules

To achieve meaningful questions, we apply the following rules:

Register

Register getting emails for Raleigh 2012 at:


You will receive an email to register for one or both of the options.


Get your user manual by e-mail

Enter your email address to receive the manual of Raleigh 2012 in the language / languages: English as an attachment in your email.

The manual is 3,41 mb in size.


You will receive the manual in your email within minutes. If you have not received an email, then probably have entered the wrong email address or your mailbox is too full. In addition, it may be that your ISP may have a maximum size for emails to receive.

Others manual(s) of Raleigh 2012

Raleigh 2012 User Manual - German - 68 pages

Raleigh 2012 User Manual - Dutch - 68 pages

Raleigh 2012 User Manual - French - 68 pages


The manual is sent by email. Check your email

If you have not received an email with the manual within fifteen minutes, it may be that you have a entered a wrong email address or that your ISP has set a maximum size to receive email that is smaller than the size of the manual.

The email address you have provided is not correct.

Please check the email address and correct it.

Your question is posted on this page

Would you like to receive an email when new answers and questions are posted? Please enter your email address.


Info