658398
17
Zoom out
Zoom in
Previous page
1/68
Next page
I General User Manual 17
Never tighten the handlebar stem if the maximum
mark or stop mark is above the top of the sha. If you
cannot nd a mark, insert the handlebar stem into
the head tube to a depth of at least 6.5 cm. If you do
not do this, the handlebar stem could come loose or
break.
9.3.2 Adjusting the handlebar height with
A-head systems
With the A-head stems shown here, the handlebar height
must be adjusted by a professional bike workshop.
9.3.3 Aligning handlebars with A-head
systems in relation to the ont wheel
To align the handlebar with the ont wheel, proceed as
follows:
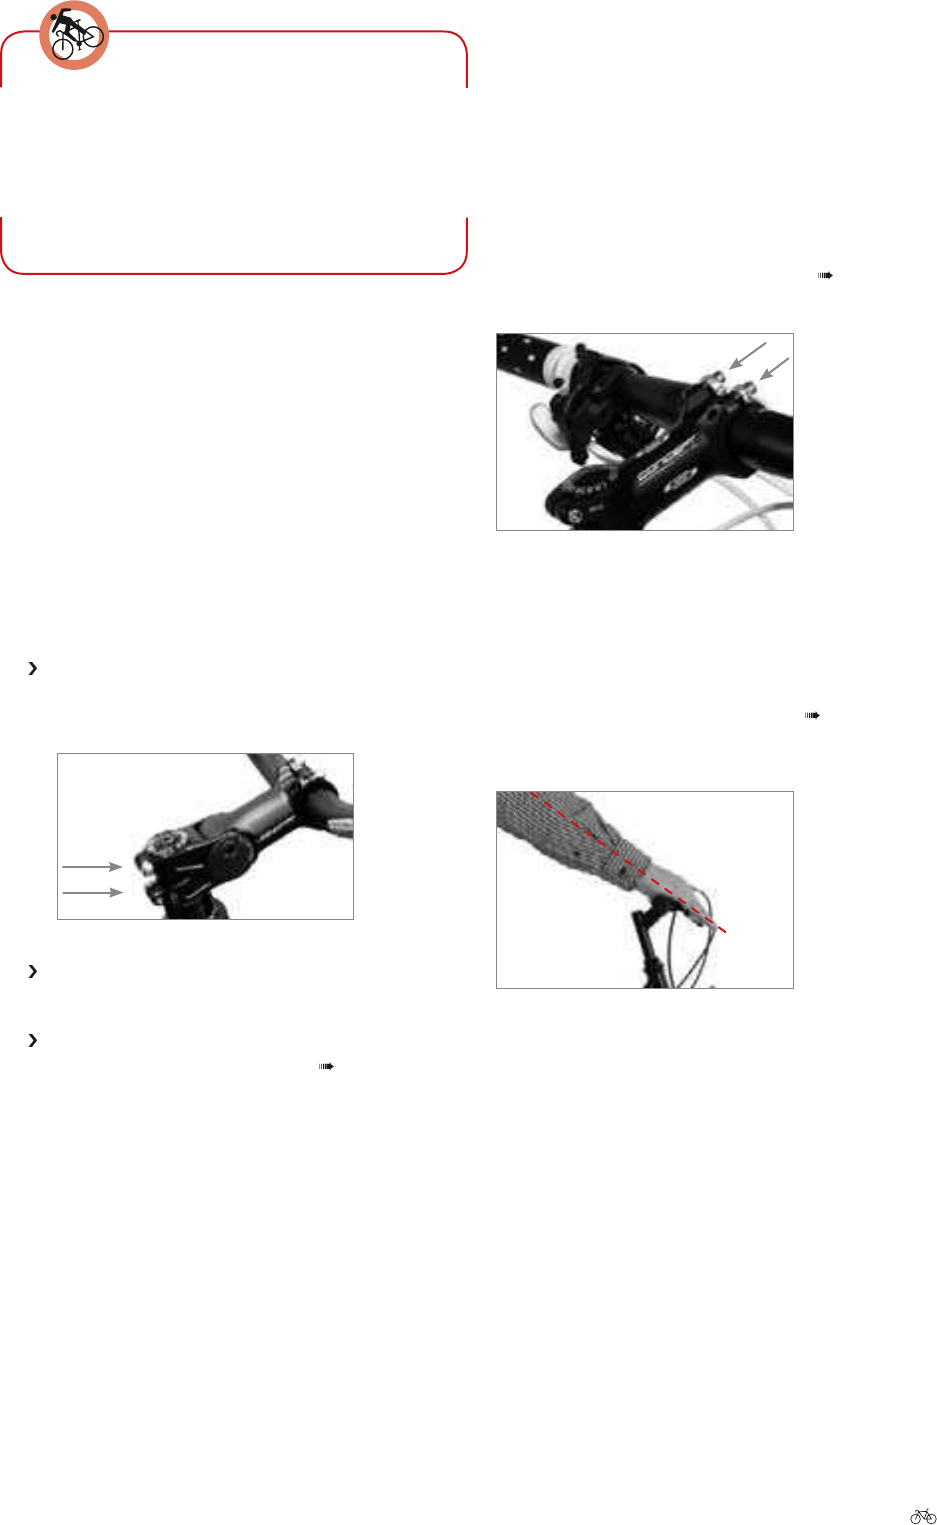
Loosen the hexagon socket screws on the rear of
the handlebar stem by turning them anticlockwise
with an Allen key.
Turn the handlebar so that it is exactly at right
angles to the ont wheel.
Tighten the hexagon socket screw by turning it
clockwise with an Allen key (see
Chapter 30
"Technical data").
9.3.4 Adjusting the handlebar position by
turning the handlebar
Loosen the hexagon socket screws on the ont of the
stem. Turn the handlebar until you nd the position that
is comfortable for you. Make sure that the handlebar is
always exactly in the centre of the stem. Now retighten the
hexagon socket screws by turning them clockwise. If the
tightening torque is stamped on the stem, use this value,
and if not, use the tightening torques in
Chapter 30
"Technical data".
Once you have adjusted the handlebar, you will also need
to adjust the brake levers and gear-shi handles. Loosen
the hexagon socket screws on the handle grips. Sit on
the saddle and put your nger on the lever. Turn the le-
ver until your hand and lower arm are in a straight line.
Retighten the screws in the handle grips by turning them
clockwise. (For tightening torques see
Chapter 30 "Tech-
nical data").
17


Need help? Post your question in this forum.

Forumrules


Report abuse

Libble takes abuse of its services very seriously. We're committed to dealing with such abuse according to the laws in your country of residence. When you submit a report, we'll investigate it and take the appropriate action. We'll get back to you only if we require additional details or have more information to share.

Product:

For example, Anti-Semitic content, racist content, or material that could result in a violent physical act.

For example, a credit card number, a personal identification number, or an unlisted home address. Note that email addresses and full names are not considered private information.

Forumrules

To achieve meaningful questions, we apply the following rules:

Register

Register getting emails for Raleigh 2012 at:


You will receive an email to register for one or both of the options.


Get your user manual by e-mail

Enter your email address to receive the manual of Raleigh 2012 in the language / languages: English as an attachment in your email.

The manual is 3,41 mb in size.


You will receive the manual in your email within minutes. If you have not received an email, then probably have entered the wrong email address or your mailbox is too full. In addition, it may be that your ISP may have a maximum size for emails to receive.

Others manual(s) of Raleigh 2012

Raleigh 2012 User Manual - German - 68 pages

Raleigh 2012 User Manual - Dutch - 68 pages

Raleigh 2012 User Manual - French - 68 pages


The manual is sent by email. Check your email

If you have not received an email with the manual within fifteen minutes, it may be that you have a entered a wrong email address or that your ISP has set a maximum size to receive email that is smaller than the size of the manual.

The email address you have provided is not correct.

Please check the email address and correct it.

Your question is posted on this page

Would you like to receive an email when new answers and questions are posted? Please enter your email address.


Info