6
What is new in Mercalli V3 SAL?
The latest additions to Mercalli V3 SAL at a glance:
•
New! Batch processing - Instead of stabilizing videos one at a time, users can now load an
unlimited number videos into Mercalli V3 SAL for automated batch processing;
•
New! Automatic profile selection – Mercalli V3 SAL can analyze a video clip and automatically
select the most appropriate stabilization profile, thus streamlining the stabilization process;
•
New! Support for 4K and 2.7K video clips; many NLEs don’t even support this yet!
•
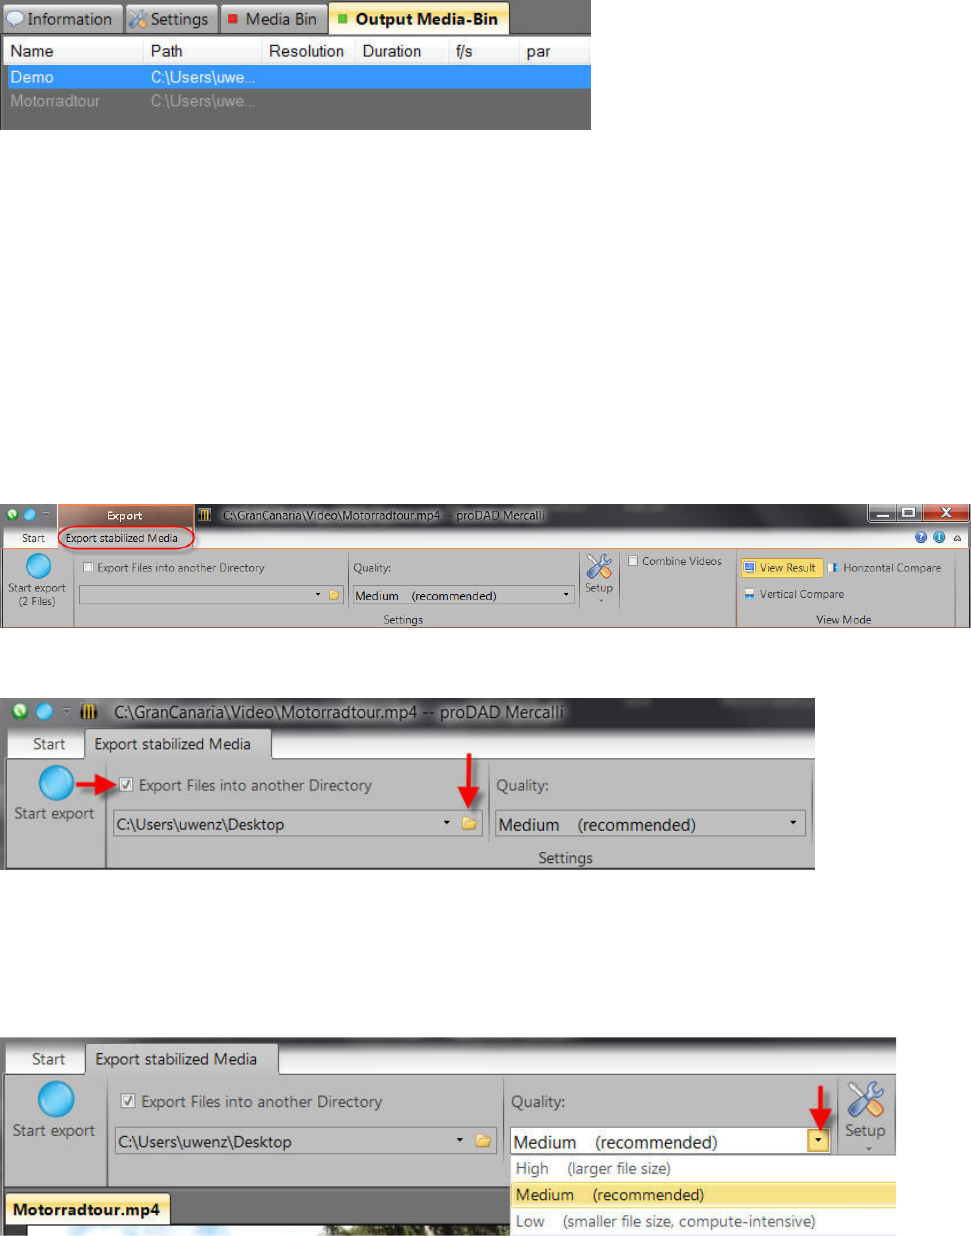
New! Export stabilized video in industry standard formats, including MP4!
•
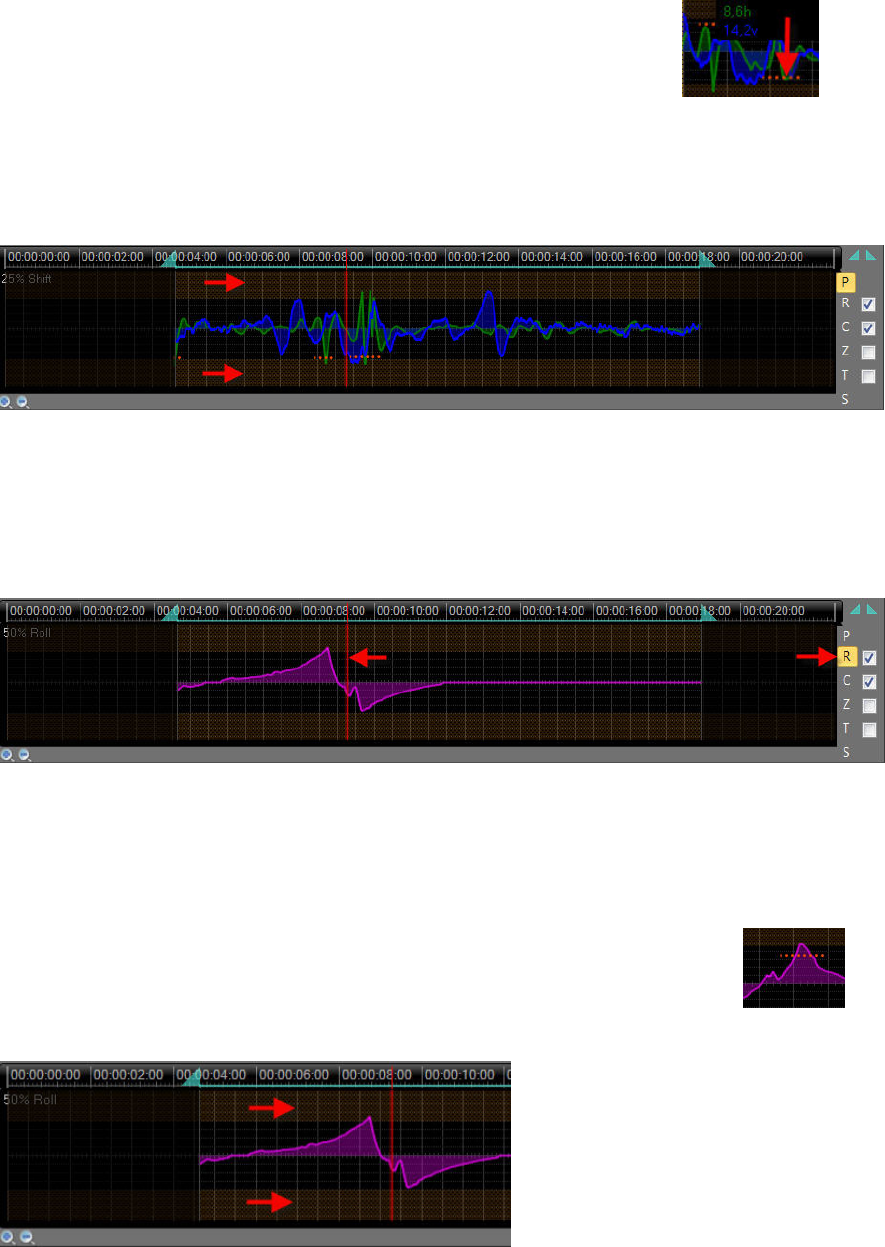
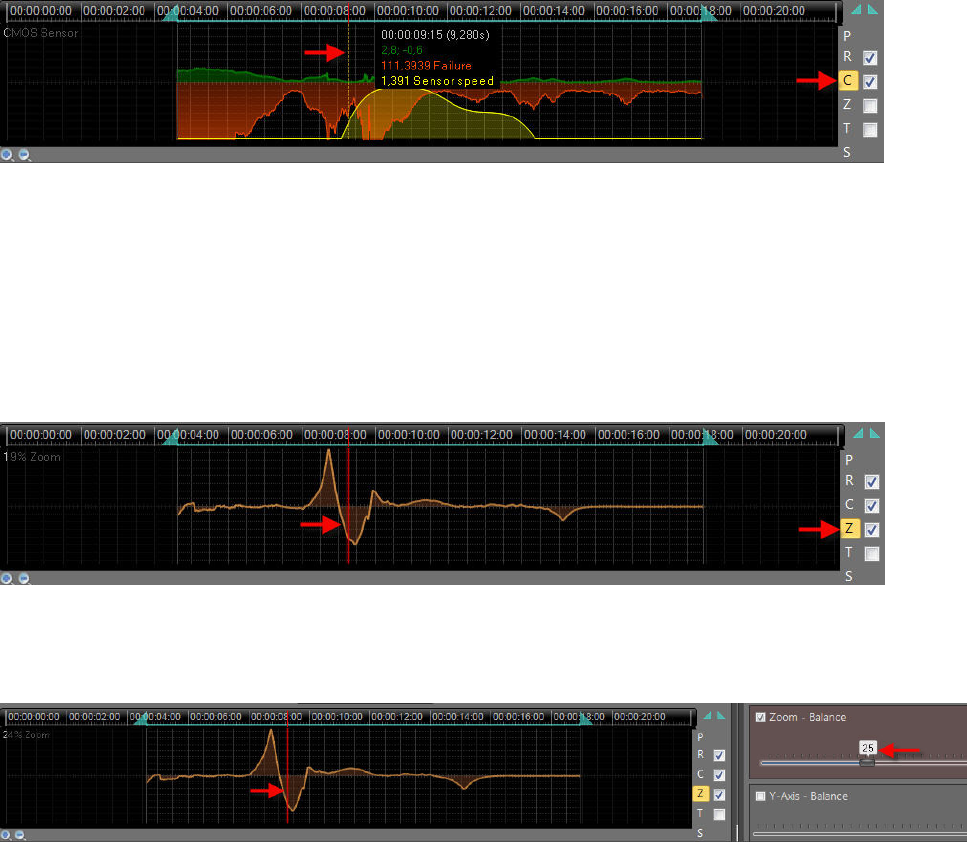
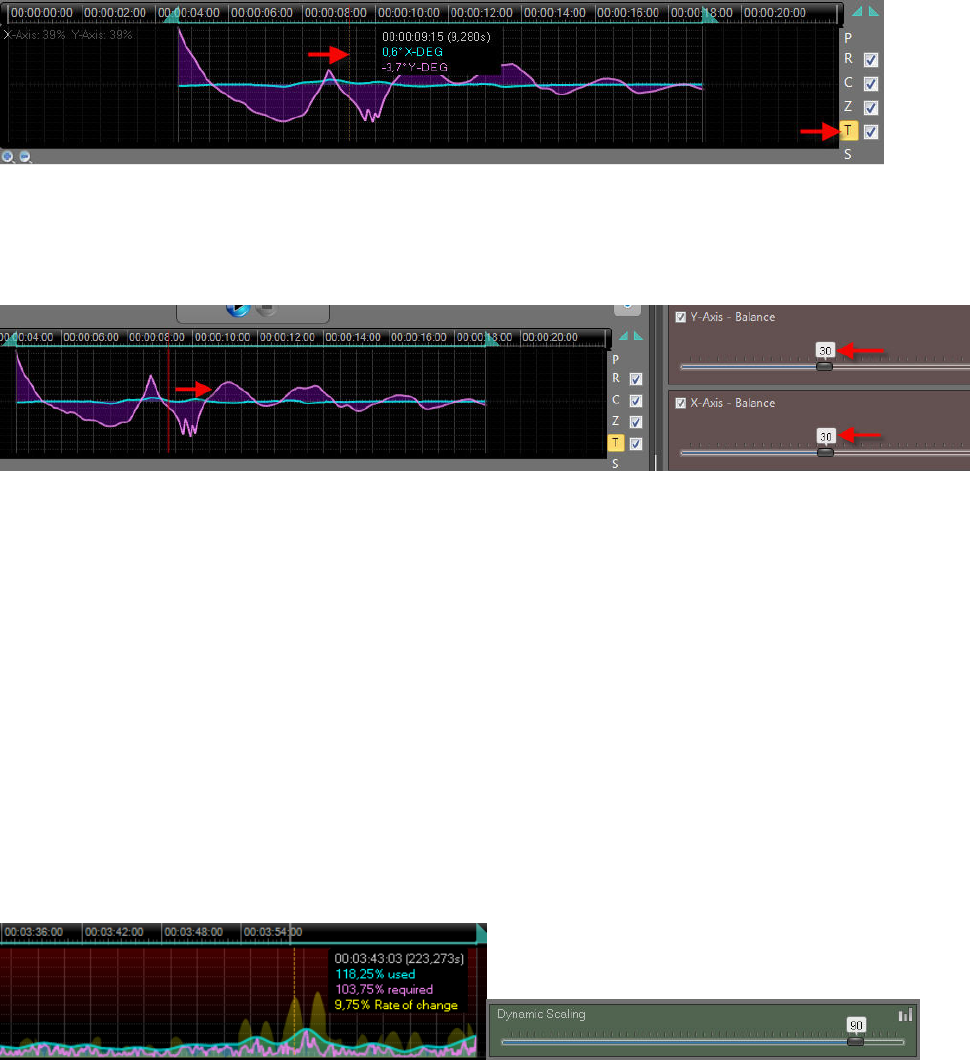
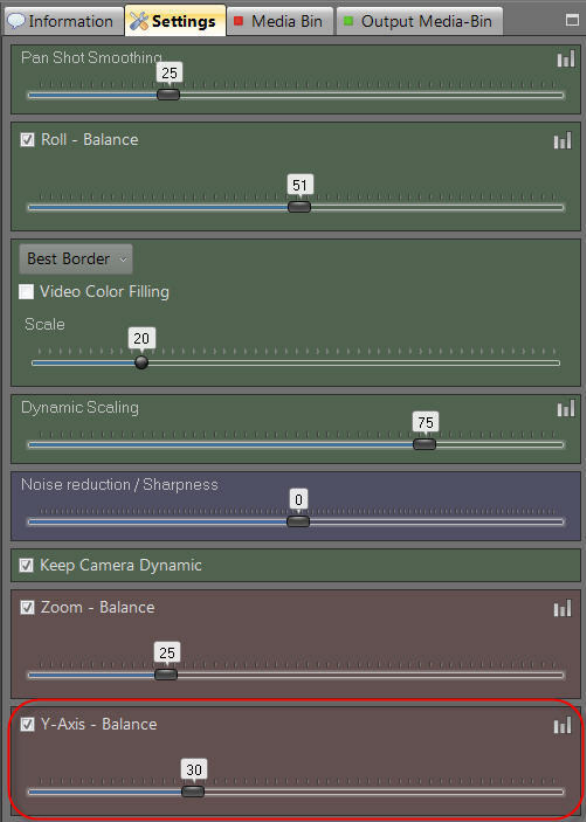
Industry’s only 3-axis (X, Y, Z axis) post-capture video stabilizer – delivers the best possible
stabilization results;
•
Fully automatic rolling-shutter compensation helps improve skew, wobble, and jitter caused by
CMOS camera sensors during fast action;
•
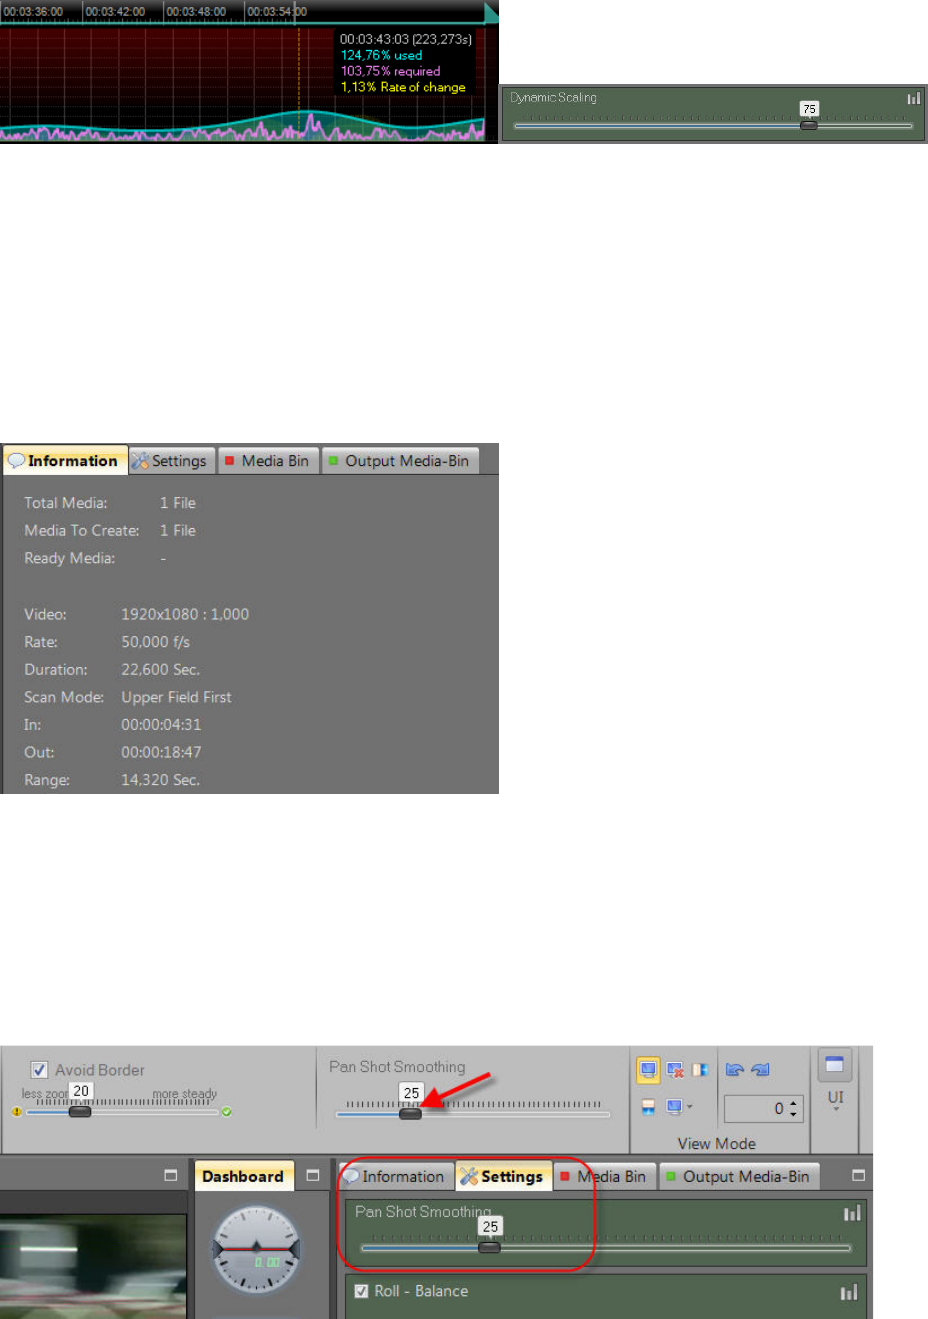
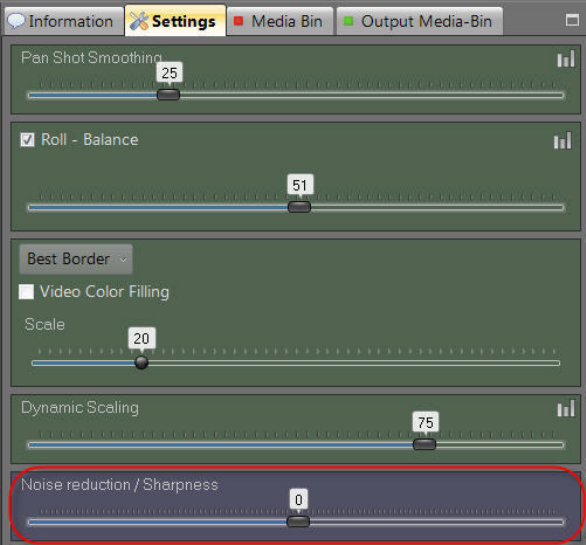
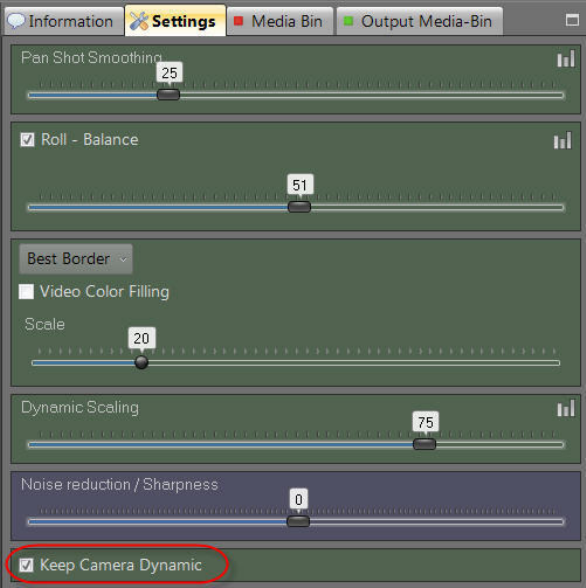
Dynamic Camera Options allow for highly effective stabilization without compromising the
original character of the video;
•
SmartBorder™ Options greatly reduce the amount of zoom-in needed to stabilize, helping keep
the video borders intact;
•
Automatic scene detection allows a single clip with multiple scenes to be optimized with a
single pass;
•
Full resolution preview, including side-by-side comparison of original and optimized video
before rendering;
•
Exports optimized video in several industry standard formats ready for sharing or importing
into a video editor;
•
Native 64-Bit and 32-Bit Windows stand-alone applications with multi-core/multi-thread
optimization and support for unlimited video resolutions.
What is new in Mercalli V4 SAL?
The latest additions to Mercalli V4 SAL at a glance:
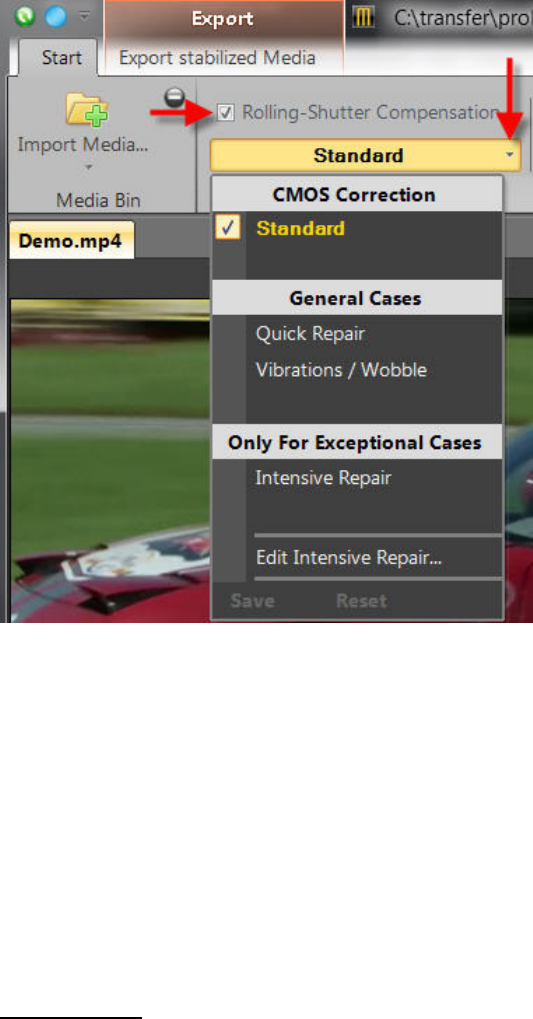
•
Unique and completely automatic CMOS correction for skew, wobble and jello
•
Greatly improved video stabilization, faster and more efficient than ever!
•
Improved stabilization, optimal perspectives (3D X, Y, and Z-axis stabilization)
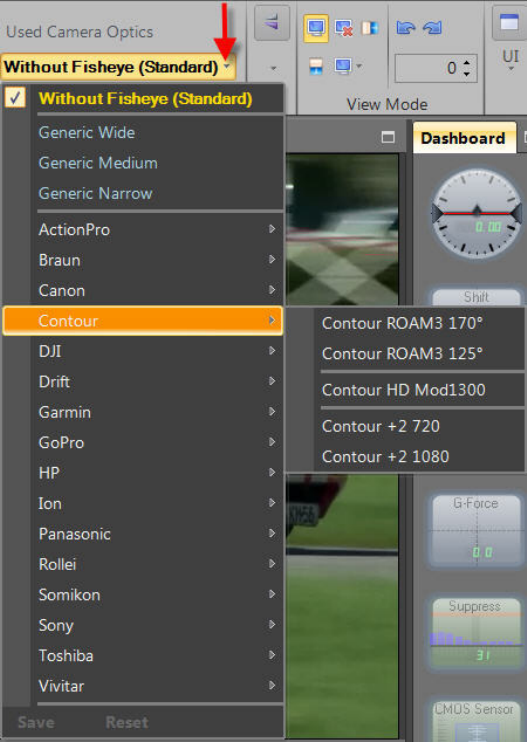
•
Optical-Warp-Image-Stabilize-Function (Fisheye-Distortions have no negative effect anymore
on stabilization process
•
Because the Fisheye-Effect doesn´t need to be removed before stabilization rendering is faster
overall and less zoom is needed
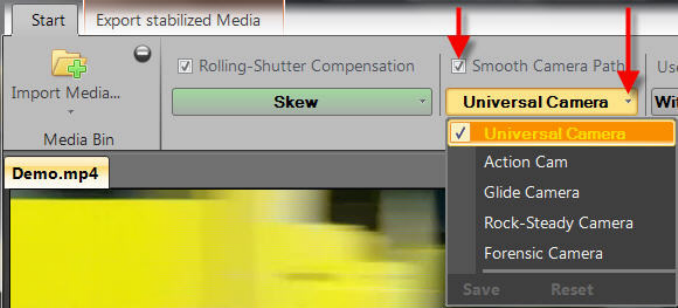
•
Numerous cameras are supported. Universal profiles included as well.
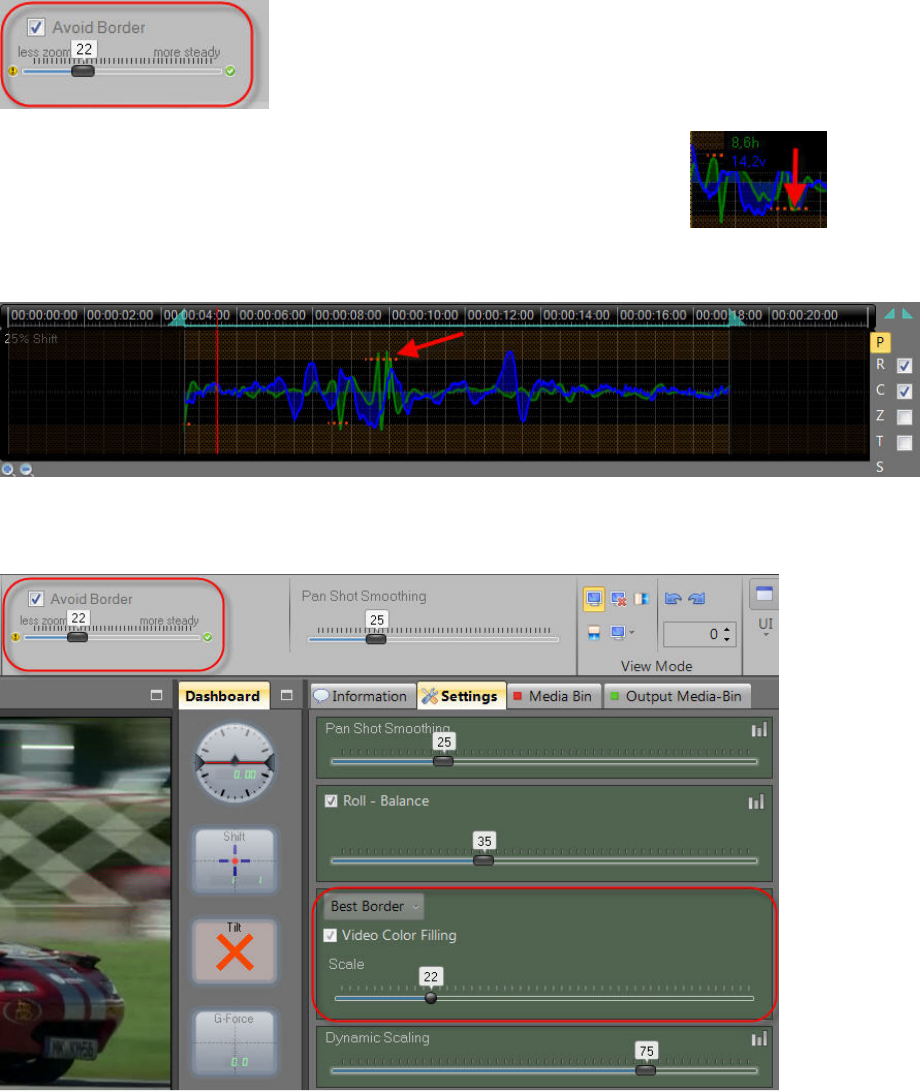
•
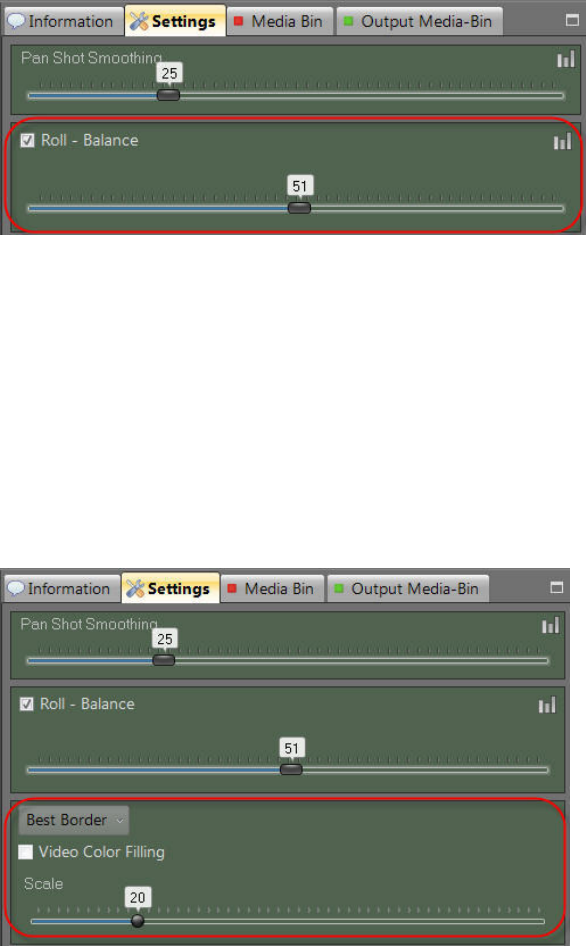
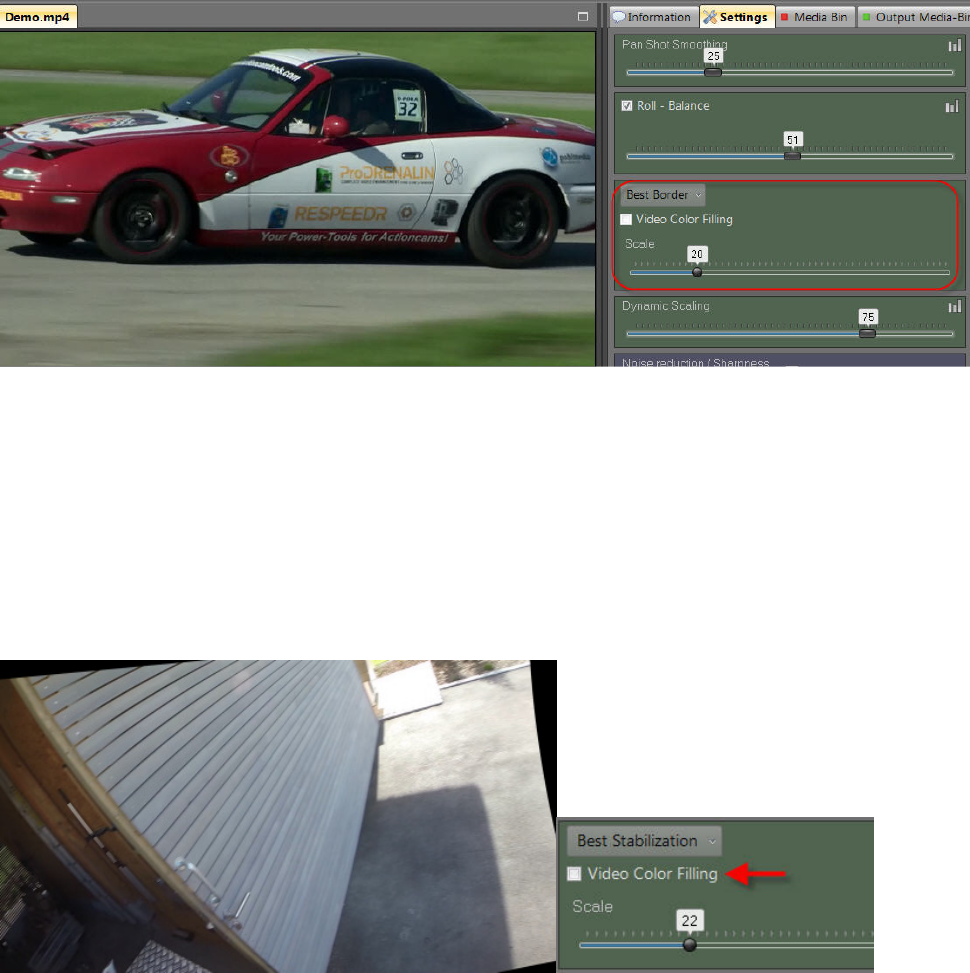
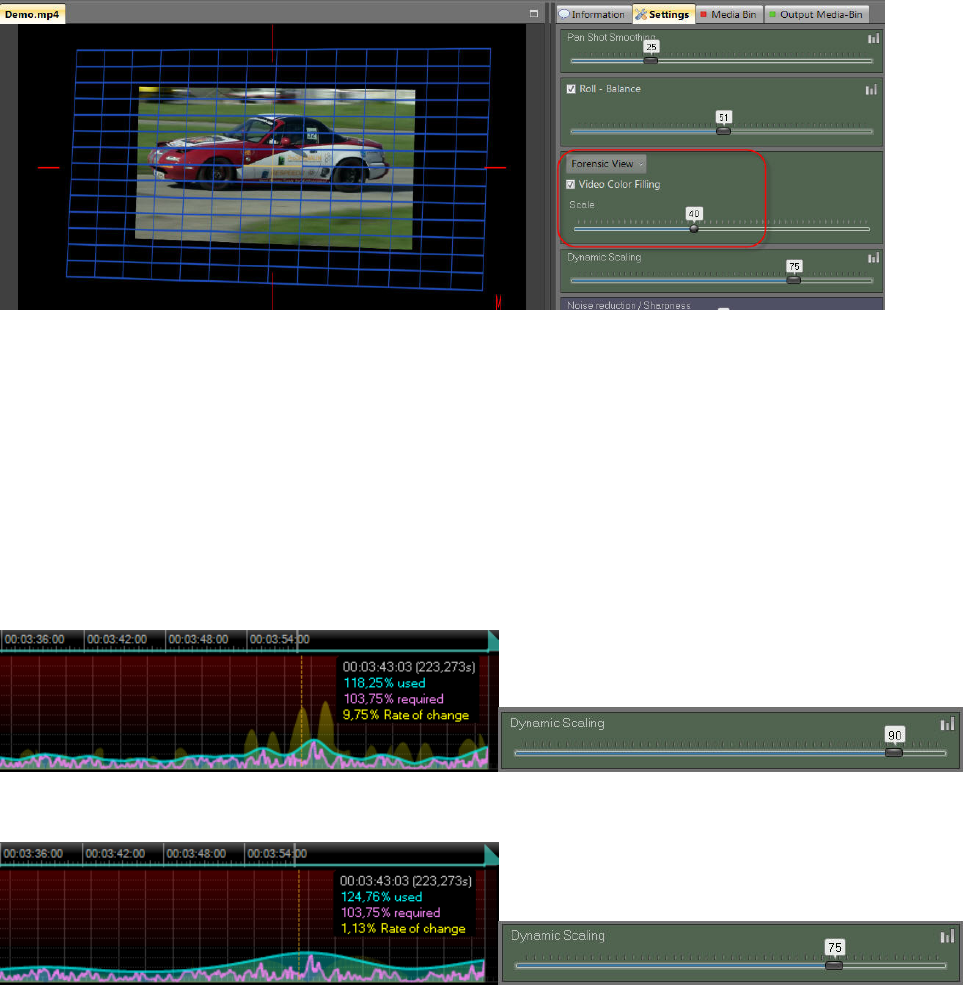
Dynamic Zoom Reduction (significantly reduces the need to zoom-in)
•
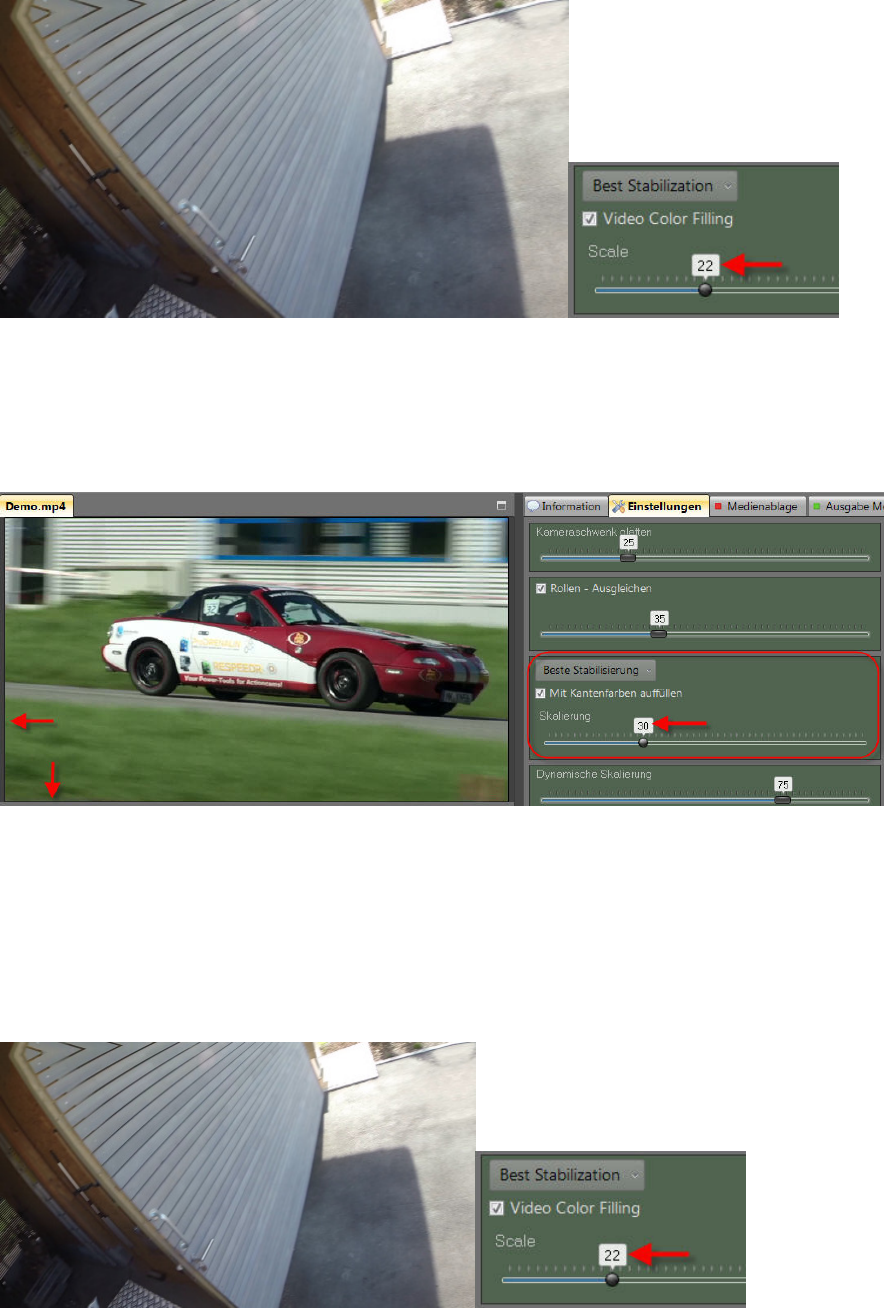
Improved border-boundary adjustments, which also reduces the need to zoom-in.
•
Increase in focus can be selected easily DURING editing
•
Enhancement of adjustability in handling of camera movement
•
Straight forward storyboard function makes arranging clips and exporting into a single file
effortless
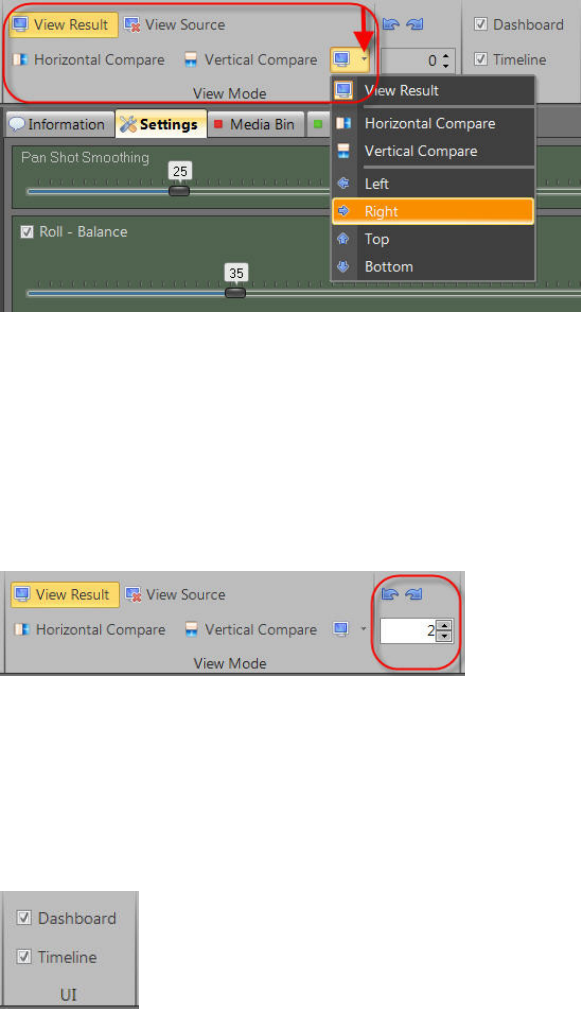
•
Super fast full screen preview with new comparison modes, original/optimized, and Forensic
View makes evaluation of corrected video a snap
•
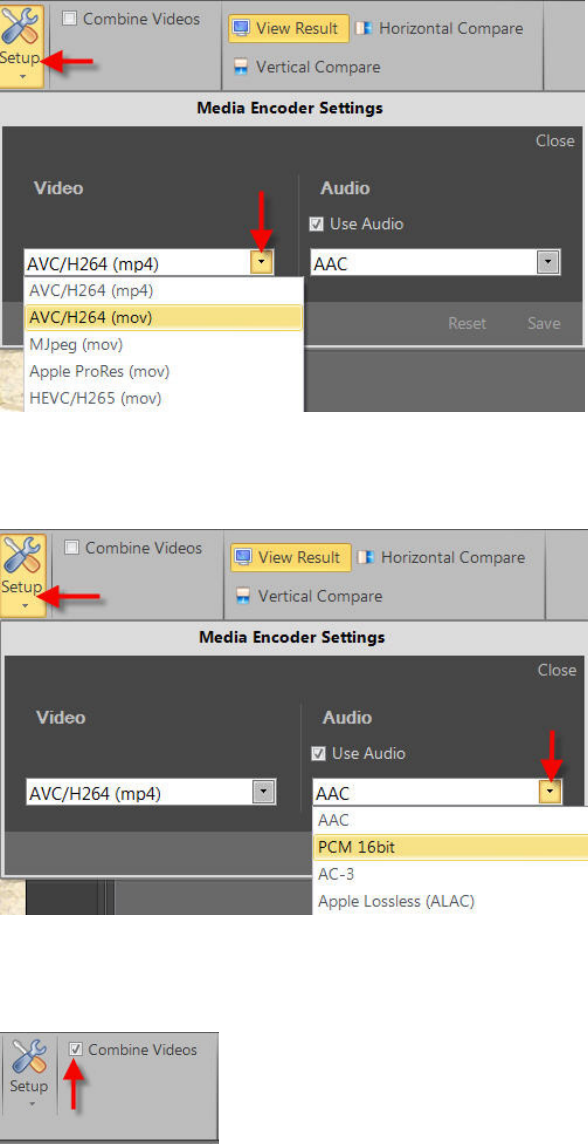
Export in AVC/H264 mp4/mov und Apple ProRes
•
Import von mov, mpg, mpeg, mp4, mts, m2t, m2ts, m2v, avi, mxf, vob, vcd, 3gp, jpg, tif