608119
22
Zoom out
Zoom in
Previous page
1/23
Next page
© proDAD GmbH
1
proDAD DeFishr
© proDAD GmbH – www.prodad.com
Autor : Uwe Wenz
© proDAD GmbH
2
Content
Welcome 3
General information 3
Copyright / Legal information 3
What is DeFishr? 4
Installation and registration 5
Help function 5
Defishr in Detail 6
Using DeFishr for the first time and User Surface 6
Media Bin 8
Import Media 8
Clear/Open/Save 9
Camera Profile 9
Select Profile 9
Edit
10
How to use properly the Calibrator 10
How to create your own camera profiles?
10
Your footage for your own Profiles
10
The Analysis of your footage
13
Graph - Grid Histogram - Parameter - Tips
16
Viewer
18
Additional correction
19
Viewer / Playback and Timeline
21
Register Media Bin
22
Export
22
© proDAD GmbH
3
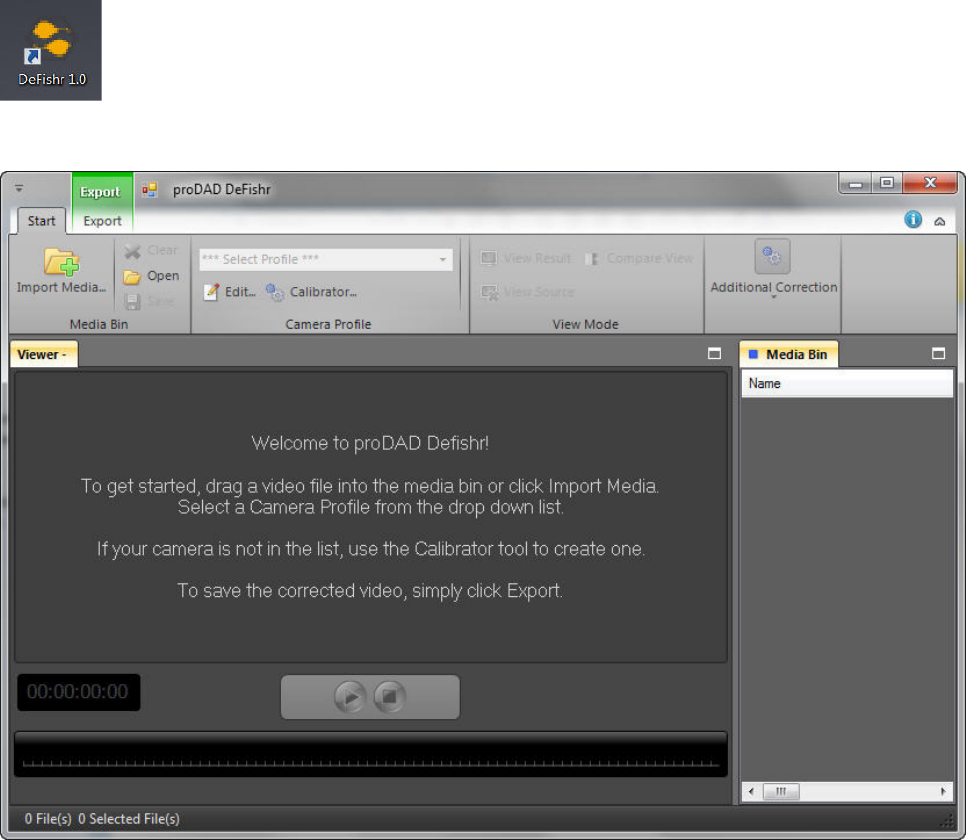
Welcome to proDAD DeFishr !
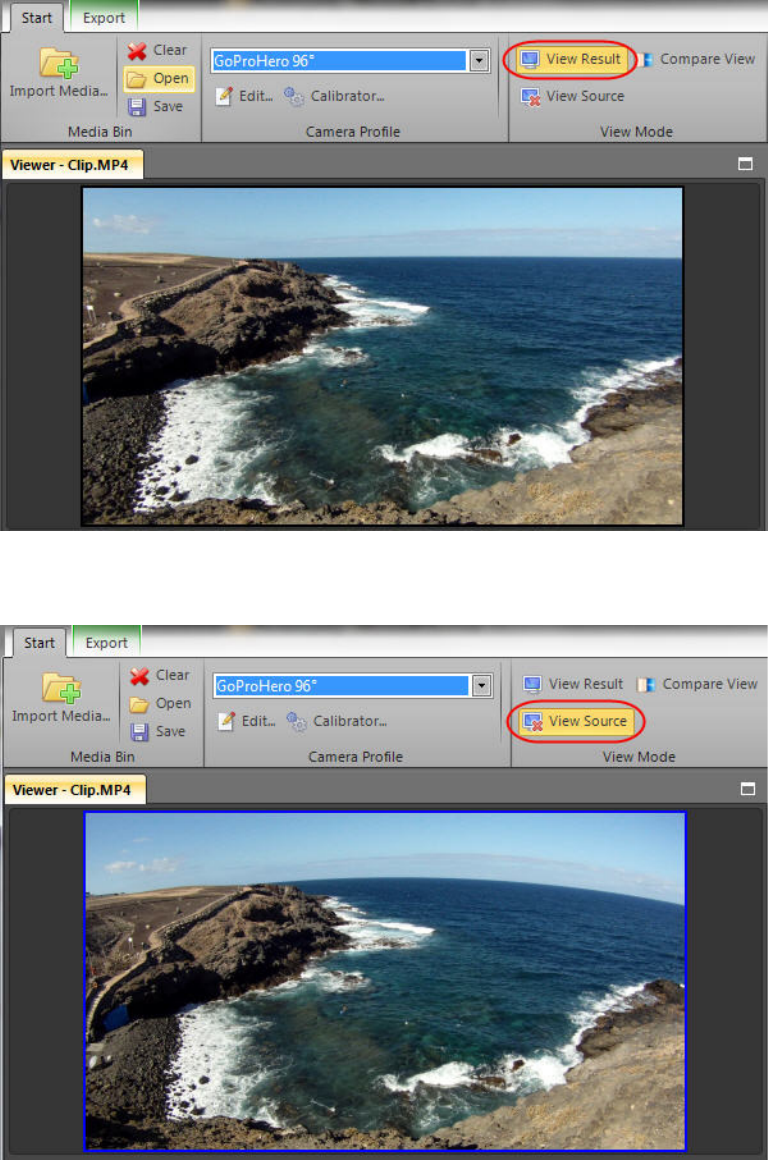
DeFishr is a tool that allows you to eliminate subsequently the fisheye-effect, which occurs in
footage captured with a lens that is bend (e.g. a wide-angle lens). Therefore it is a very important
tool when it comes to optimizing your footage, particularly those shoot with Action cameras.
We hope you enjoy working with proDAD DeFishr and that you achieve good results!
General information
Copyright / Legal information
Copyright proDAD GmbH. All rights reserved.
Licensing Conditions
Please read these licensing conditions carefully before installing the software.
Licensing agreement
When setup starts, a licensing agreement is shown, which you should read carefully.
By installing the software, you state that you accept the copyright conditions, the licensing
agreement and the licensing procedure.
License Guarantee
proDAD GmbH grants the user the right to use this product for its proper and permitted purpose.
The present product may only be installed on one computer. proDAD hereby guarantees to
provide a license key free of charge. By installing this product, the user acknowledges and accepts
the license guarantee, the copyright terms, and the limitation of liability.
Trademarks
All products and trademarks mentioned in association with this product are trademarks that
belong to the respective owners. All trademarks are used without any guarantee that they may be
used freely, and they may be registered trademarks.
Limitation of Liability
The extent of liability for any one claim is limited to a replacement of the product. This applies to
proDAD GmbH, all licensees and retailers. Claims shall only be recognized if the software is
returned in an orderly manner, together with the returned goods number that has to be
previously arranged with proDAD GmbH. The goods must also be accompanied by proof of
purchase. This guarantee becomes void if a malfunction of this product is due to improper use,
mistreatment, an accident or improper handling. proDAD GmbH, its sales partners and licensees,
shall not be held liable for damages or subsequent damages arising from the impossible usage of
this product. Liability is limited in all cases to the purchase price of the product.
Documentation
The greatest of care has been taken in compiling and translating the handbook. However, the
possibility of errors cannot be fully excluded. proDAD GmbH shall assume no responsibility or
liability whatsoever for the consequences of any incorrect statements or information which the
documentation or translation may contain. Subject to technical and optical modifications.
Information regarding any inaccuracies is always welcome.
Copyright
The software and the individual components of this product are the property of proDAD GmbH. By
© proDAD GmbH
4
installing this product, the licensee agrees to refrain from unauthorized use and duplication.
proDAD GmbH does not accept any responsibility for the usage of this program and the
publication of its contents and data that has been created with this program.
ProDAD GmbH * Gauertstr. 2 * 78194 Immendingen * Deutschland * HRB 1077
What is DeFishr?
DeFishr is a tool that allows you to eliminate subsequently the Fisheye effect and correct the
perspective distortion, that occurs frequently when the footage has been captured with a bent
lens, for instance.
Therefore DeFishr is a very important tool for optimizing of valuable takes, particularly those that
have been captured with Action cameras or using extreme wide-angle lenses.
DeFishr contains various camera profiles that help you correct the Fisheye effect. It also allows
you to create an own profile for your camera. This is relevant when you can't find your camera on
the profile list or when you are not satisfied with the results of the profiles. You can calibrate your
footage directly in the program using the Calibrator. The filming of the Calibration Grid and the
following analysis process the profile which is necessary for the correction.
© proDAD GmbH
5
Installation and registration
Double-click the Setup-file to start the Installation. By carrying out the installation you agree
with the legal conditions and the licence terms. If you have purchased DeFishr as a download
version, the Program archive will be unpacked before the installation starts. Then select a
directory in which you would like to install DeFishr.
Now follow the installation instructions. You'll find further information on the use of the program
as a DEMO and on Activation here.
Registering proDAD DeFishr
You would like to receive Updates and further information about DeFishr? Please register your
proDAD DeFishr at http://www.prodad.de/register.html.
Help function
Pressing the F1 key opens the Help function.
The user guide is also available in PDF format directly from the Programs menu. Go to
Windows Start menu
Programs
proDAD
Manual-DeFishr
You can also use the Search function to quickly find specific terms or topics in the user guide.
© proDAD GmbH
6
Defishr in Detail
Using DeFishr for the first time and User Surface
You can start DeFishr via Shortcut on your desktop
or via Start/Program/proDAD/DeFishr.
When you start DeFishr for the first time, you will be asked to enter a Code (Serial Number) to
activate the program. In case that you purchased the download version, enter the Code which you
received along with the download instructions email. In case that you purchased the DVD version,
you'll find the code inside the box. Click Unlock. If you want to test DeFishr in the DEMO-Mode,
click Continue with Demo Version. The Demo version is activated until you enter the serial
number. By entering the serial number you obtain the licence that converts it into the full version.
© proDAD GmbH
7
DeFishr starts with the Start Register activated.
Firstly, import your video. You can also start the Playback of the original video (via Control) in the
DeFishr Preview. Then you select a profile that corresponds to the profile of your camera.
IMPORTANT!
If none of the profiles from the Camera Profile Menu is suitable for your camera, you'll find
useful notes on the Creation of your own camera profiles.
An examplel:
If you are using videos of the Action Camera GoPro Hero, just select the Profile that is already
available. The corrected Clip will be shown immediately in the preview.
You can carry out further adjustments to a Profile via the parameter Lens (in the Additional
Correction area). The result is merely an approach. Greater values can lead to unwanted
distortions. In that case, it is necessary to carry out a Calibration.
Click here to find further information on how to use profiles.
© proDAD GmbH
8
Media Bin
You import, open and clear your video in the Media Bin area.
Import Media
Click the Import Media... option to import a video (or an image).
The Open dialog is activated now and allows you to navigate to the directory in which you saved
the video/image file.
Select it and click Open. The video/image will now be reproduced in the DeFishr-Preview. The
Fisheye Effect can be seen in the Viewer.
© proDAD GmbH
9
Clear/Open/Save Project
In the Media Bin area you can also clear the imported video/image in the DeFishr-preview,
open a project and save it .
Camera Profile
Select Profile
In this example the footage was captured with the GoPro Hero Action Camera.
Directly after selecting the pre-installed profile GoProHero the correction of the Fisheye effect
will be shown in the preview.
Select Compare View option in the Viewer to compare Original/corrected Video.
Click here for further information about the use of profiles.
© proDAD GmbH
10
Edit
You can edit, load and save profile via the Edit option.
How to use properly the Calibrator
How to create your own camera profiles?
Please bear in mind the following recommendations.
1. Create your footage as described in Your footage for your own profiles.
2. Carry out the analysis of your footage as described in The Analysis of your footage.
3. Evaluate the analysis and, if necessary, optimize the footage following the Tips and the
Instruction Video.
Your footage for your own Profiles
Now it is necessary to capture the Chessboard pattern (Calibration grid) with your camera in
the Calibrator. On the basis of this video the Calibrator will detect potential Fisheye Distortions
after the import of the video. A profile will be created, which eliminates the distortions (Fisheye).
This profile will be saved in DeFishr and it will be available in the profile list for your future
videos.
First, click the Calibrator... option...
... to start the Calibrator. Go to the Calibration Grid (1) register and the chessboard pattern
(2) appears. It is convenient to use the full-screen mode. In order to do so, make use of the
minimization options (3) and (4).
© proDAD GmbH
11
Useful Tips for the Calibration of your Camera.
To achieve a precise analysis for the calibration of your camera/lens, please bear in mind the
following tips
(Steps 1 and 2 need to be carried out in one single video, i.e. without interrupting the recording!):
1. First, move the camera beyond all the edges of the calibration grid (chessboard) (top, bottom,
right, left, beyond every corner), ALWAYS aiming at the centre of the chessboard so as to achieve
a movement of the camera towards the centre of the chessboard pattern!
2. Then move the camera beyond all the edges of the calibration grid (top, bottom, right, left,
beyond every corner), WITHOUT aiming at the centre of the chessboard. Hold the camera straight
instead!
3. Film the chessboard as large as possible, covering the whole area in recording!
4. Film the chessboard as sharp as possible.
5. Intend to use always short shutter speed, i.e. under good conditions of illumination.
6. Avoid constant shaking of the camera or stop moving it when capturing the chessboard. Thus,
the following analysis will lead to better results because the images are recognized more clearly.
7. In case that your camera does not dispose of a preview display, film the chessboard from
various distances moving it towards the monitor in one single Video clip. The ideal way of doing it
is to capture every camera movement subsequently starting from close and removing the camera
slowly and thus enhancing the distance to the chessboard and pausing every now and then.
In the Tips register you'll find an Instruction Video, which explains how to capture the
Calibration Grid.
© proDAD GmbH
12
This is how you recognize a successful Calibration:
a) The analysis finds at least 20 images (Counter = green), ideally even 50+ images, on the basis
of the geometrical points that were recognized.
b) There are no longer redly flashing areas in the Tab for the Grid histogram on the right. That
means that all the areas that were necessary for the calibration have been captured in step1 and
2.
The more areas you capture, the better the results of the latter corrections of your videos.
Tip:
If there are still redly flashing areas, move the camera slowly in the indicated directions, go
slowly beyond the upper points 1 and 2 in the indicated directions.
© proDAD GmbH
13
c) Successful analyses and profiles resulting from them will be marked as "<CAM>", less
successful ones as "<BAD>".
d) Good Profiles will be displayed with a "Total Average Error" below 0,3. Excellent profiles can
even reach values between 0,1 and 0,15.
e) Whether the profile you have generated works in practice, can be seen after the analysis.
Switch from "Calibration Grid" to "Viewer" and activate the splitscreen view "Compare View".
f) Select "View Source" and move the Timeline cursor manually over it or reproduce the video to
get detailled information on how your video works. Defishr shows the areas (yellow) and points.
Missing areas will be marked as described in b). Those points that were either recognized poorly
or even weren't recognized at all will be missing in the Grid histogram or will appear less marked.
Conclusion:
In case that the analysis contains
- less than 30 recognized images
- a "Total Average Error" greater than 0,3
it is advisable to repeat the analysis with optimized camera movements and plan pauses in
different camera positions. Otherweise your future corrections of unwanted Fisheye effects might
be imprecise or even wrong, in the worst case.
Here you'll find information on the import of videos.
The Analysis of your footage
First, copy the video from the camera into a directory of your video hard-disk.
Click the Import Media... option to import the video.
© proDAD GmbH
14
The Open dialog opens. Now navigate to the directory where you have saved your video.
Select it and click Open. The Video will be shown in the Viewer (preview).
Click the Analyze Calibration Video... option to start the analysis.
At the end of the analysis you can read the summary.
Click OK to accept it.
© proDAD GmbH
15
The newly created profile appears in the Profile list.
Select the Compare View option in the Viewer to see the split view of the Original-/Corrected
Video.
The Edit option allows you to edit, load and save profiles.
Note:
When you close the Calibrator and DeFishr, the newly created profile will be adopted automatically
in the profile list the next time you start DeFishr. You can select it directly for your future
corrections.
© proDAD GmbH
16
Graph - Grid Histogram - Parameter - Tips
The path of the imported video is indicated in the Media Bin.
In the Graph register there are diagrams with the data of the analysis of the calibrated video.
The Grid Histogram shows the areas that were not recognized in the calibration (blinking red). It
indicates in which positions the chessboard has not been recognized. The ideal case is when there
is no red area in the histogram.
© proDAD GmbH
17
The data of the analysis of the calibrated video are shown in the Parameter register.
There is an Instruction Video available in the tips register. The video explains the Calibration
Grids and contains useful tips for Calibration and provides links to important information.
© proDAD GmbH
18
Viewer
In the View Mode area you can choose between 3 different preview options (Viewer).
1. View Result
2. View Source
© proDAD GmbH
19
3. Compare View (Split View, before/after)
Additional correction
Here you can adjust Tilt, Shift and Zoom to correct the so-called Perspective Distortion.
Perspective Distortion are lines and edges in photos that head towards each other due to the
characteristics of the lens, even though in reality the lines are parallel. This effect occurs, when
the edges of the subject are not parallel to the projection surface. This happens, for instance,
when the camera is held in an upward inclination.
Use the arrow or set the numeric value to modify the options.
1. Lens (Modification of the bend of the lens)
2. Zoom (Modification of the zoom IN and OUT)
3. Shift X - shifts the video along the x-axis (left/right)
4. Shift Y - shifts the video along the y-axis (up/down)
5. Tilt - tilts the video (very useful for straighten footage of subjects (e.g. buildings) that have
been filmed with the camera held upwards)
In this case it is possible to achieve further Optimization, e.g. of objects filmed at an upward
angle.
To do so, use the Tilt option.
© proDAD GmbH
20
Before:
After:
© proDAD GmbH
21
Viewer / Playback and Timeline
There is a Preview (1) of the video available in the Viewer. The Control (2) with the
chronometrical data of the video is under the preview. Underneath the control is the Timeline
(3).
There is a needle that indicates Position (1) as well as 2 Markers for IN- and Out-Points(2)
in the timeline. This is where you determine the area of the video that you would like to reproduce.
You find the Video properties (3) under the timeline.
© proDAD GmbH
22
Register Media Bin
The path of the imported video is indicated in the Media Bin register .
Export
DeFishr exports the results in MP4 format or, in case that you use images, in JPG format.
Go to the Export register.
Click Start Export to export the corrected Video/Image into a new file.
Select the Export Files into Directory option
then you can determine an own Export path. Click the arrow to open the Search Archives
dialog. This is where you select an own directory.
22


Need help? Post your question in this forum.

Forumrules


Report abuse

Libble takes abuse of its services very seriously. We're committed to dealing with such abuse according to the laws in your country of residence. When you submit a report, we'll investigate it and take the appropriate action. We'll get back to you only if we require additional details or have more information to share.

Product:

For example, Anti-Semitic content, racist content, or material that could result in a violent physical act.

For example, a credit card number, a personal identification number, or an unlisted home address. Note that email addresses and full names are not considered private information.

Forumrules

To achieve meaningful questions, we apply the following rules:

Register

Register getting emails for ProDAD Defishr V1 at:


You will receive an email to register for one or both of the options.


Get your user manual by e-mail

Enter your email address to receive the manual of ProDAD Defishr V1 in the language / languages: English as an attachment in your email.

The manual is 2,08 mb in size.


You will receive the manual in your email within minutes. If you have not received an email, then probably have entered the wrong email address or your mailbox is too full. In addition, it may be that your ISP may have a maximum size for emails to receive.

Others manual(s) of ProDAD Defishr V1

ProDAD Defishr V1 User Manual - German - 24 pages


The manual is sent by email. Check your email

If you have not received an email with the manual within fifteen minutes, it may be that you have a entered a wrong email address or that your ISP has set a maximum size to receive email that is smaller than the size of the manual.

The email address you have provided is not correct.

Please check the email address and correct it.

Your question is posted on this page

Would you like to receive an email when new answers and questions are posted? Please enter your email address.


Info