481641
9
Zoom out
Zoom in
Previous page
1/12
Next page
2
5
4
6
1
3
11
11
9
11
22
22
44
44
22
22
33
33
22
22
22
22
22
22
11
11
11
11
88
88
11
11
66
66
20
11
17
19
1116
15
13
12
11
119
108
9
117
E
C
B
D
F
A
H
IG
Vtt 1030 - Cod. M0S04529 - Edizione 1F02
14
U R
S
5
6
4
QQ
QQ
T
ENGLISH
14) Filler bottle
15) Spare washers for accessory
connections
16) 120° nozzle
17) Small round brush for 120° nozzle
18) Window squeegee tool
19) Small blade for window tool
20) Large blade for window tool
ACCESSORIES SOLD SEPARATELY
21) High pressure lance
22) Triangular brush
23) Large round brush for 120° nozzle
24) Wallpaper stripper tool
Q) Iron
R) Steam request button
S) Temperature regulation control
T) Iron rest
U) Continuous steam jet button
Polti S.p.A. reserves the right to change
equipment or accessory specification without
prior notice.
GENERATOR
A) Patented Safety Cap
B) Main Generator on/off switch
C) Accessory on/off switch
D) Central connector block
E) Lock-in aperture for central connector
F) Power supply cable
G) Carrying handle
H) Rotating wheel
I) Steam regulation control
ACCESSORIES
1) Flexible hose
2) Steam gun
3) Steam request lever
4) Connector assembly
5) Press down connector button
6) Locking tab
7) Extension tubes
8) Large brush
9) Cloth retaining clips
10) Replaceable bristles plate
11) Accessories locking button
12) Small brush
13) Cotton cloths
ENGLISH
IMPORTANT SAFEGUARDS
READ ALL INSTRUCTIONS
BEFORE USING.
When using your VAPORETTO, basic safety precautions should always be followed, including the
following:
1. Use Steam Cleaner only for its intended use.
2. To protect against a risk of electric shock, do not immerse the VAPORETTO in water or other
liquids.
3. The VAPORETTO should always be turned off before plugging or unplugging from outlet.
Never yank cord to disconnect from outlet; instead, grasp plug and pull to disconnect.
4. Always disconnect from electrical outlet when filling with water or emptying and when not in use.
5. Do not operate VAPORETTO with a damaged power supply cable.
To avoid the risk of electric shock, do not disassemble the appliance, take it to a qualified
services person for examination and repair, incorrect reassemble can cause a risk of electric
shock when the appliance is used.
6. Before connecting VAPORETTO to the mains make sure that the current is the same as that
indicated for the machine and that the plug is an earthed plug.
7. Do not introduce any detergent or chemical substance into the generator tank.
Do not use in any event distilled water or descaler.
8. Do not refill the tank while it is still hot, allow it to cool down for a few minutes before refilling.
9. Never empty VAPORETTO when the water inside the generator tank is still hot.
10. Do not touch the appliance with wet hands and feet whilst the appliance is connected to the
mains.
11. Never leave the appliance unattended whilst it is connected to the mains.
12. Do not allow VAPORETTO to be used by children or by people who are not familiar with the usage
instructions.
13. Do not direct the steam jet at people or animals.
Danger of burns!
14. Never place your hands inside the jet of steam.
Danger of burns!
SPECIAL INSTRUCTIONS
1. To avoid a circuit overload, do not operate another high wattage appliance on the same circuit.
2. If an extension cord is absolutely necessary, a 15 ampere cord should be used.
Cords rated for less amperage may overheat. Care should be taken to arrange the cord so that
it cannot be pulled or tripped over.
• • • SAVE THESE INSTRUCTIONS • • •
ENGLISH
IMPORTANT SAFEGUARDS
READ ALL INSTRUCTIONS
BEFORE USING.
When using your flatiron, basic safety precautions should always be followed, including the follow-
ing:
1. Use iron only for its intended use.
2. To protect against a risk of electric shock, do not immerse the iron in water or other liquids.
3. The iron should always be turned to off before plugging or unplugging from outlet.
Never yank cord to disconnect from outlet; instead, grasp plug and pull to disconnect.
4. Do not allow cord to touch hot surfaces. Let iron cool completely before putting away.
Loop cord loosely around iron when storing.
5. Always disconnect iron from electrical outlet when filling with water or emptying and when not
in use.
6. Do not operate iron with a damaged cord or if the iron has been dropped or damaged. To avoid
the risk of electric shock, do not disasemble the iron, take it to a qualified service person for
examination and repair. Incorrect reassemble can cause a risk of electric shock when the iron
is used.
7. Close supervision is necessary for any appliance being used or near children.
Do not leave iron unattended while connected or on an ironing board.
8. Burns can occur from touching hot metal parts, hot water, or steam. Use caution when you turn
a steam iron upside down - there may be hot water in the reservoir.
SPECIAL INSTRUCTIONS
1. To avoid a circuit overload, do not operate another high wattagve appliance on the same cir-
cuit.
2. If an extension cord is absolutely necessary, a 15-ampere cord should be used.
Cords rated for less amperage may overheat. Care should be taken to arrange the cord so that
it cannot be pulled or tripped over.
••• SAVE THESE INSTRUCTIONS •••
ENGLISH
II
II
MM
MM
PP
PP
OO
OO
RR
RR
TT
TT
AA
AA
NN
NN
TT
TT
Before leaving our factory all our products are rigorously tested. For this
reason your Vaporetto contains a small quantity of water and on first use we
recommend that you do not add further water until all existing water in the tank
has been exhausted and allowed to escape as steam.
SS
SS
EE
EE
TT
TT
UU
UU
PP
PP
Before using VAPORETTO for the first time assemble the
pivoting wheels as indicated in the diagram.
PP
PP
RR
RR
EE
EE
PP
PP
AA
AA
RR
RR
AA
AA
TT
TT
II
II
OO
OO
NN
NN
FF
FF
OO
OO
RR
RR
UU
UU
SS
SS
EE
EE
1. Unscrew the patented safety cap (A) and fill the
generator with 1.2 litres of normal tap water, using the
filler bottle (14) (Fig. 1).
2. Carefully screw on the safety cap to hand tight (Fig 2).
3. Connect the power supply cable (F) into an earthed
power supply of the correct voltage.
II
II
NN
NN
SS
SS
TT
TT
RR
RR
UU
UU
CC
CC
TT
TT
II
II
OO
OO
NN
NN
SS
SS
FF
FF
OO
OO
RR
RR
UU
UU
SS
SS
EE
EE
1a. Press down the generator on/off switch (B) and the
accessories on/off switch (C).
The pressure indicator light (K) will light up.
2a. Insert the central connector (4) pressing the connector
button (5) and taking care that the locking tab (6) is
correctly positioned in the lock-in aperture (E) on the
block (Fig. 3).
3a. Wait for the pressure warning light (K) (where available)
to go out. (Note: on some models where there is no
separate pressure indicator light, instead wait for the
light inside the generator on/off switch to go out).
VAPORETTO is now ready for use.
Fig. 1
Fig. 2
Fig. 3
ENGLISH
4a. For the steam flow push the button (3) (fig. 4).
Note: The on/off switch (B) may go on and off from
time to time during use of VAPORETTO. This
indicates the machine maintaining the correct
and constant pressure and is quite normal.
SS
SS
TT
TT
EE
EE
AA
AA
MM
MM
RR
RR
EE
EE
GG
GG
UU
UU
LL
LL
AA
AA
TT
TT
II
II
OO
OO
NN
NN
FF
FF
EE
EE
AA
AA
TT
TT
UU
UU
RR
RR
EE
EE
Some VAPORETTO models come equipped with a steam reg-
ulator control (I) (Fig 5). You can use this control to increase
the steam flow by turning in an anti-clockwise direction.
Turning the control in a clockwise direction reduces the
steam flow. Here are some suggestions for the choice of
steam flow level:
Strong steam:
For encrusted dirt, stains, sanitising, grease
Normal steam:
For carpets, rugs, glass, tiles etc.
Delicate steam:
For vaporising plants and cleaning delicate
fabrics, upholstery, wallpaper etc. Please read separate
warning about use on draylon, velvet and other delicate
fabrics, or on sensitive wood surfaces.
CC
CC
OO
OO
NN
NN
NN
NN
EE
EE
CC
CC
TT
TT
II
II
OO
OO
NN
NN
OO
OO
FF
FF
AA
AA
CC
CC
CC
CC
EE
EE
SS
SS
SS
SS
OO
OO
RR
RR
II
II
EE
EE
SS
SS
To connect the accessories tools to the hand gun proceed
as follows (Fig. 6)
1c. Move the connector button (11) on the accessory to the
“open” position.
2c. Attach the required tool to the hand gun.
3c. Move the connector button (11) back to the position
‘closed’
4c. Check that the connector button has engaged and the
accessory is fully connected.
Fig. 5
+
Fig. 6
Fig. 4
ENGLISH
PP
PP
AA
AA
TT
TT
EE
EE
NN
NN
TT
TT
EE
EE
DD
DD
SS
SS
AA
AA
FF
FF
EE
EE
TT
TT
YY
YY
CC
CC
AA
AA
PP
PP
//
//
WW
WW
AA
AA
TT
TT
EE
EE
RR
RR
OO
OO
UU
UU
TT
TT
All POLTI machines are equipped with the unique Polti patented safety cap, which prevents
opening of the generator tank as long as there is any pressure remaining inside the tank.
This is an important and indispensable safety device, and it is necessary to follow certain
procedures when re-filling the tank.
According to model, ‘water out’ is indicated by a warning light (J), or by an audible alarm
signal from the machine, or on more basic models by the exhaustion of the steam output.
Whenever you have used up all the water in the tank, follow the following procedures:
1b. Switch off the machine at the generator on/off switch (B)
2b. Press the steam request lever (3) on the hand gun (2) so as to fully exhaust the steam
supply from the tank.
3b. Disconnect the power supply cable (F) from the mains.
4b. Unscrew anti-clockwise the patented safety cap (A)
5b. Wait 3 to 4 minutes to allow the generator tank to cool down.
6b. When cool proceed to carefully refill the tank as described in paragraph 1 of the
section “Preparation for Use” in the instructions. If refilling the generator when not
completely cooled, we recommend that you carefully pour only very small quantities
of water at each pouring into the tank, so as to avoid spitting from the tank and
cover exposed skin whilst filling.
UU
UU
SS
SS
EE
EE
OO
OO
FF
FF
TT
TT
HH
HH
EE
EE
PP
PP
RR
RR
OO
OO
FF
FF
EE
EE
SS
SS
SS
SS
II
II
OO
OO
NN
NN
AA
AA
LL
LL
SS
SS
TT
TT
RR
RR
EE
EE
NN
NN
GG
GG
TT
TT
HH
HH
PP
PP
RR
RR
EE
EE
SS
SS
SS
SS
II
II
NN
NN
GG
GG
II
II
RR
RR
OO
OO
NN
NN
(normally sold separately)
1d. Connect the connector block at the end of the iron hose (4) to the generator as shown
in point 2a of the section “Instruction for Use”.
2d. For all steam ironing, position the temperature indicator dial (F) to the position
“COTONE - LINO”. For dry ironing set the temperature control dial according to the
fabric to be ironed as indicated on the dial.
3d. Wait three to four minutes for the indicator (R) to go out indicating that the sole plate
of the iron has reached the correct temperature.
4d. Press the steam request button on the iron (R) to allow the steam to exit. Releasing
this button stops the steam flow. At first you may find that the steam contains some
water globules and we recommend that the first jet of steam is therefore played onto
an old cloth, and is not directed onto the garment to be ironed.
For dry ironing do not press the steam request button (R).
5d. In order to have a continuous steam jet, move the button (U) forwards. Steam will keep
on coming out, even if you release the button. To interrupt the outlet, move the but-
ton (U) backwards.
6d. The iron can also be used in a vertical position e.g. for removing creases from
curtain, clothing etc.
IMPORTANT
Do not leave the iron unattended whilst connected to the mains.
Iron only on heat resistant surfaces and on surfaces that allow the steam to escape
e.g. mesh ironing boards.
CC
CC
AA
AA
UU
UU
TT
TT
II
II
OO
OO
NN
NN
SS
SS
When cleaning electric ovens, refrigerators, or other electrical equipment, always
disconnect the electrical item to be cleaned from the mains before cleaning. Allow to
dry before reconnecting.
For cleaning leather, wood or delicate fabrics especially dralon, velvet and other pile
surfaces, consult the manufacturers instructions. Clean only by using the hand gun at
a safe distance together with a soft cloth and always do a test on a non visible part of
the item first or on a sample. Allow the test area to dry completely before observing
results and effects on surface or colour before proceeding to clean further areas, ensur-
ing that exactly the same distance and technique are applied as for the test area. If in
doubt, and on sensitive surfaces like fabrics, leather and wood it is always better to
ask advice from your Steam Cleaner dealer.
For cleaning wood surfaces (furniture, doors etc.) take great care as a too long
application of the steam could alter the waxed appearance, the shine or the colour of
the surfaces cleaned. We therefore recommend you apply the steam on such surfaces
only for brief periods or to clean these surfaces using a cloth first held in the steam.
Please pay particular attention while cleaning brick floors: a too long application of
steam could damage wax, brightness or colour of these surfaces.
Delicate surfaces (e.g. synthetic materials, lacquered surfaces etc.) we recommend
that the small brush should always be covered with at least two cloths to reduce the
intensity of the steam, and (on machines with steam variation control) with the steam
set at low level.
If cleaning glass surfaces in particularly low temperatures preheat the glass using the
hand gun from about 50 centimetres distance from the surface to be cleaned.
For care of your plants vaporise at a minimum distance of 50 centimetres.
TT
TT
II
II
PP
PP
SS
SS
FF
FF
OO
OO
RR
RR
BB
BB
EE
EE
TT
TT
TT
TT
EE
EE
RR
RR
UU
UU
NN
NN
II
II
TT
TT
PP
PP
EE
EE
RR
RR
FF
FF
OO
OO
RR
RR
MM
MM
AA
AA
NN
NN
CC
CC
EE
EE
STEAM GUN (2)
The steam gun can be used directly on all spots requiring a stronger, closer treatment
without connecting the brushes. The more resistant the stain, the closer you should hold
the gun; the steam pressure and temperature being higher at the source. You should
however always wipe with a dry cloth (or a slightly abrasive sponge-if the spot is a
difficult one to remove) after using the gun.
The steam gun is particularly efficient at:
- breaking down rug and carpet stains before they are treated with the large brush;
- cleaning stainless steel surfaces, panes, mirrors, enamelled surfaces;
- cleaning hard-to-reach corners, such as stairs, window sills, door posts;
- cleaning ovens, refrigerators and freezers (quick defrost) cleaning stove knobs, or tap
- bases;
- cleaning window shutters, heaters, car interiors;
- spraying plants (from a distance);
- removing odours and creases from clothes.
To reach higher points, the steam gun can be connected to one or both extension tubes.
ENGLISH
ENGLISH
LARGE BRUSH (8)
Use the large brush (8) with one or two extension tubes (7) on all large washable surfaces.
To wash floors, put a clean, dry kitchen cloth under the brush and swing back and forth
without applying any pressure. Use the other side of the cloth when the first one is impreg-
nated with dirt. Use the brush directly without the cloth on particularly dirty or incrusted areas
and in spaces between the tiles: swing the brush sideways to detach the dirt. Highly obsti-
nate stains may require a steam gun treatment before the brush and cloth are used (an old
bath towel is an ideal cloth) . The same procedures apply to ceilings and vertical surfaces,
like wallpaper: in this case the cloth can easily be fastened around the brush and held in
place by the 4 clips (9) on the brush itself. Smooth cotton cloths are suitable for the treat-
ment of glass surfaces: fasten the cloth around the brush then pass it over the window pane
(or mirror) to remove the greasy film. Finally, spray the surface with the steam gun and wipe
dry with a clean cloth. In cold weather, window panes will require pre-heating with the steam
gun (from a distance of 10/15 cm), prior to the actual cleaning with the brush. Vaporetto
Ecological System is ideal for both synthetic and wool rugs as well as for all types of car-
pets. Its use will ensure total hygiene, revive colours and restore the original brilliance of
the pile. The treatment can be repeated as frequently as you wish, with no damage what-
soever. Drying occurs practically at once. Fold a cotton cloth over 2 or 3 times (accord-
ing to the length and resistance of the pile) and fasten it onto the brush. Move the brush
rapidly in all directions without applying any pressure. You should avoid lingering in the same
place, as this may soak the area. Particularly dirty rugs may need several treatments. Obsti-
nate stains may require the use of the steam gun prior to treatment.
SMALL BRUSH (12)
The small brush is designed to perform the same operation as the large brush, only on small-
er surfaces. It can be connected to the steam gun with one or two extension tubes (7) .
For cleaning furniture spray the steam onto a dry cotton cloth then wipe with the cloth.
The warm moist cloth will pick up dirt and static, so that the furniture remains cleaner
longer thanks to the absence of sticky film from chemical cleaning products.
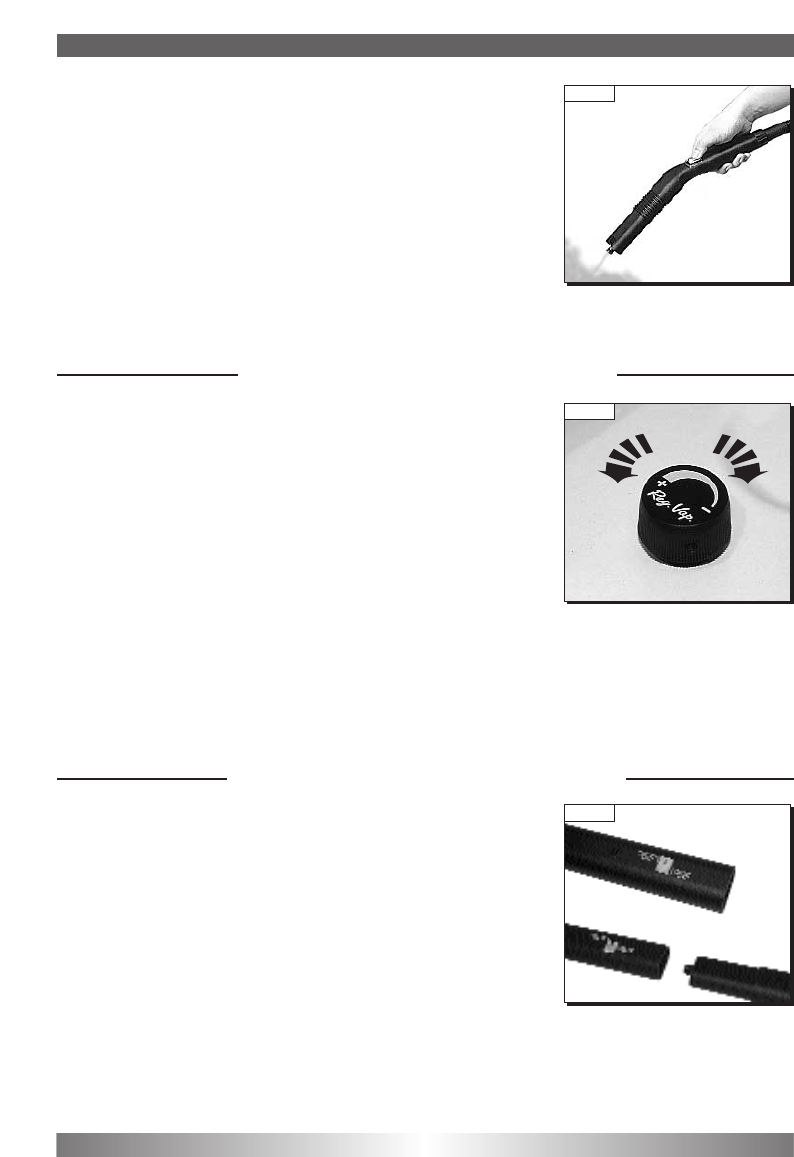
120° STEAM NOZZLE (16-17)
The 120° nozzle (which can be connected directly to the gun or together with the
extension tubes) allows you to concentrate a powerful jet of steam to otherwise
inaccessible locations, such as radiators, door posts, sills and shutters, as well as for
sterilising toilet bowls.
WINDOW SQUEEGEE TOOL (18,19,20)
The Window Squeegee Tool allows you to clean effectively and rapidly all glass surfaces
without using detergents. Your glass wilI remain cleaner longer thanks to the absence of
layers of film normally left behind by chemical cleaning products on which new dust and
grease can attach itself.
Cleaning glass is done in two stages:
- Spraying the steam onto the surface to be cleaned to loosen the dirt (not touching with
blade).
- Pulling the blade straight down the window surface from top to bottom without
applying the steam, to take away the dirt.
- To clean especially large glass surfaces, attach the Window Squeegee Tool to the
extension tubes.
CC
CC
AA
AA
RR
RR
EE
EE
OO
OO
FF
FF
YY
YY
OO
OO
UU
UU
RR
RR
VV
VV
AA
AA
PP
PP
OO
OO
RR
RR
EE
EE
TT
TT
TT
TT
OO
OO
Before attempting any maintenance operation, be sure to always disconnect the
appliance from the mains
To maintain efficient performance, we recommend emptying and flushing out the
generator with tap water at least once a month; this operation flushes away the scale
deposits inside the generator. Never empty the Vaporetto when the water in the
generator is still hot.
We recommend that the bristles of the brushes are allowed to cool down in their
normal position after use, so as to avoid any mis-shaping.
Check periodically the condition of the coloured washer connections on the
the central connector (4). If necessary, replace the washers with the spare
washers supplied (15).
Make the same check also on the connection washers of the extension tubes (7) and
of the steam gun (2).
To clean the body of the appliance, simply use a moist cloth. Do not use solvents or
detergents which may harm the body material.
WW
WW
AA
AA
RR
RR
NN
NN
II
II
NN
NN
GG
GG
In the case of a breakdown or malfunction do not attempt to repair the
aplliance yourself but refer to your nearest authorised service Centre.
If repairs or replacement parts are required, use only original Polti replacement parts.
The appliance is fitted with a safety thermostat, which should only be replaced by an
authorised technician.
If it is necessary to replace the power supply cable, please refer to the nearest Polti
authorised service centre, since the use of a special tool is necessary.
GG
GG
UU
UU
AA
AA
RR
RR
AA
AA
NN
NN
TT
TT
EE
EE
EE
EE
The Vaporetto is guaranteed to the original purchaser for one year from purchase date
against manufacturing or raw material defects. The guarantee is not valid if the appliance
has been misused in any way. Unauthorised alterations or repairs to the machine will
automatically invalidate this guarantee.
POLTI DECLINES LIABILITY FOR ANY DAMAGE OR ACCIDENT DERIVED FROM
ANY USE OF VAP0RETTO ECOLOGICAL SYSTEM WHICH IS NOT IN CONFORMI-
TY WITH THE INSTRUCTIONS CONTAINED IN THIS BOOKLET.
ENGLISH
ENGLISH
24
II
II
NN
NN
CC
CC
RR
RR
EE
EE
AA
AA
SS
SS
EE
EE
TT
TT
HH
HH
EE
EE
VV
VV
EE
EE
RR
RR
SS
SS
AA
AA
TT
TT
II
II
LL
LL
II
II
TT
TT
YY
YY
OO
OO
FF
FF
VV
VV
AA
AA
PP
PP
OO
OO
RR
RR
EE
EE
TT
TT
TT
TT
OO
OO
EE
EE
VV
VV
EE
EE
NN
NN
FF
FF
UU
UU
RR
RR
TT
TT
HH
HH
EE
EE
RR
RR
WW
WW
II
II
TT
TT
HH
HH
TT
TT
HH
HH
EE
EE
FF
FF
OO
OO
LL
LL
LL
LL
OO
OO
WW
WW
II
II
NN
NN
GG
GG
OO
OO
PP
PP
TT
TT
II
II
OO
OO
NN
NN
AA
AA
LL
LL
AA
AA
DD
DD
DD
DD
II
II
TT
TT
II
II
OO
OO
NN
NN
AA
AA
LL
LL
AA
AA
CC
CC
CC
CC
EE
EE
SS
SS
SS
SS
OO
OO
RR
RR
II
II
EE
EE
SS
SS
LONG STEAM LANCE (21)
This accessory allows you to reach the most inaccessible places. Ideal for cleaning large
radiators or shutters etc.
TRIANGULAR BRUSH (22)
A new accessory whose shape allows access into the most difficult corners.
LARGE BRUSH FOR 120° ACCESSORY (23)
A very useful new accessory which allows the 120° steam nozzle to be used for cleaning
larger surfaces.
WALLPAPER STRIPPER TOOL (24)
Specially designed for easy removal of wallpaper without significant wetting.
9


Need help? Post your question in this forum.

Forumrules


Report abuse

Libble takes abuse of its services very seriously. We're committed to dealing with such abuse according to the laws in your country of residence. When you submit a report, we'll investigate it and take the appropriate action. We'll get back to you only if we require additional details or have more information to share.

Product:

For example, Anti-Semitic content, racist content, or material that could result in a violent physical act.

For example, a credit card number, a personal identification number, or an unlisted home address. Note that email addresses and full names are not considered private information.

Forumrules

To achieve meaningful questions, we apply the following rules:

Register

Register getting emails for Polti Vaporetto 1030R at:


You will receive an email to register for one or both of the options.


Get your user manual by e-mail

Enter your email address to receive the manual of Polti Vaporetto 1030R in the language / languages: English as an attachment in your email.

The manual is 0,24 mb in size.


You will receive the manual in your email within minutes. If you have not received an email, then probably have entered the wrong email address or your mailbox is too full. In addition, it may be that your ISP may have a maximum size for emails to receive.

Others manual(s) of Polti Vaporetto 1030R

Polti Vaporetto 1030R User Manual - Dutch - 8 pages


The manual is sent by email. Check your email

If you have not received an email with the manual within fifteen minutes, it may be that you have a entered a wrong email address or that your ISP has set a maximum size to receive email that is smaller than the size of the manual.

The email address you have provided is not correct.

Please check the email address and correct it.

Your question is posted on this page

Would you like to receive an email when new answers and questions are posted? Please enter your email address.


Info