Section 6. Maintenance and Troubleshooting
PX-716 Installation and Users Manual 105
NOTE: You may have to remove the drive from the computer to
perform the next two steps.
2. Hold the SATA interface cable (the left-hand cable) at its connection
to the PX-716SA drive. Carefully remove the SATA cable from the
drive by pulling the cable gently rearward. Leave the SATA power
cable attached to the drive.
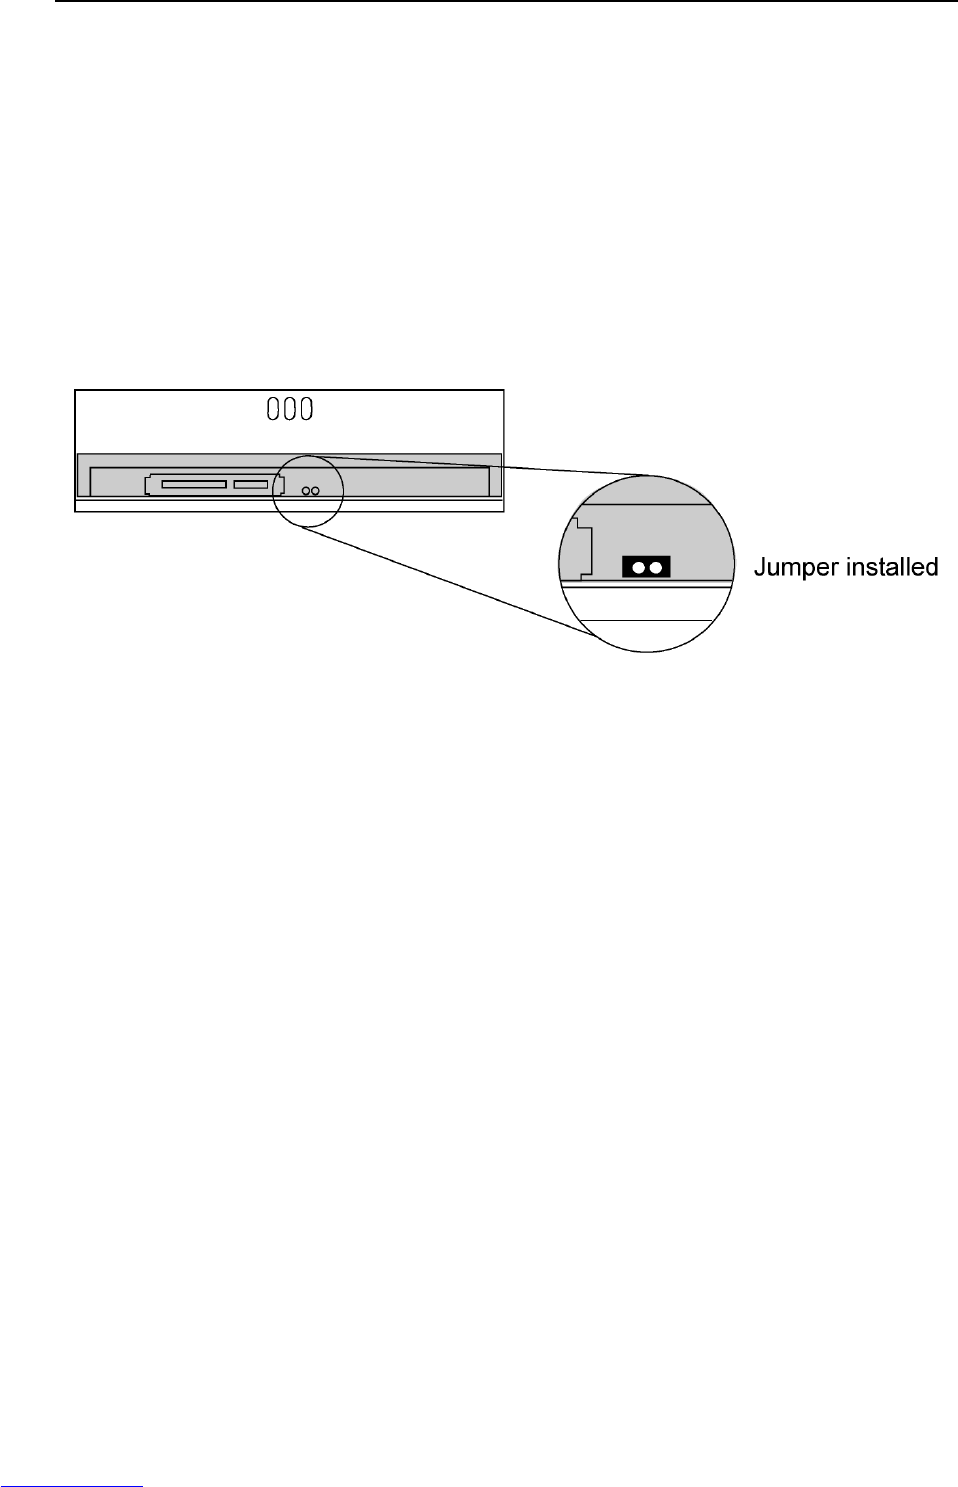
3. Note the self-test/DMA jumper at the rear of the PX-716SA. If no
jumper is installed, place a jumper across the two pins.
Figure 55: Add the PX-716SA self-test/DMA jumper to
enable the self-test diagnostics
4. If you removed the drive for access to the cable and self-test/DMA
jumper, slide it back into the computer and reconnect the power
cable to the drive. (Do not connect the SATA interface cable.)
5. Replace the computer’s cover and re-connect the computer’s power
cord to the power source.
CAUTION: Turning on the computer power without first replacing the
cover can be dangerous to the computer’s components and also to
you. Be aware of the danger of electric shock and do not touch any
components inside the computer.
6. While pressing the eject button on the PX-716SA, turn the computer
power on. Continue to press the eject button. The LED indicator
blinks green, then amber, and the tray ejects.