740813
8
Zoom out
Zoom in
Previous page
1/41
Next page
8
5. Nur Abluftbetrieb: Befestigen Sie den Abluftschlauch
1
und führen Sie ihn in einen
geeigneten Abluftschacht oder ins Freie.
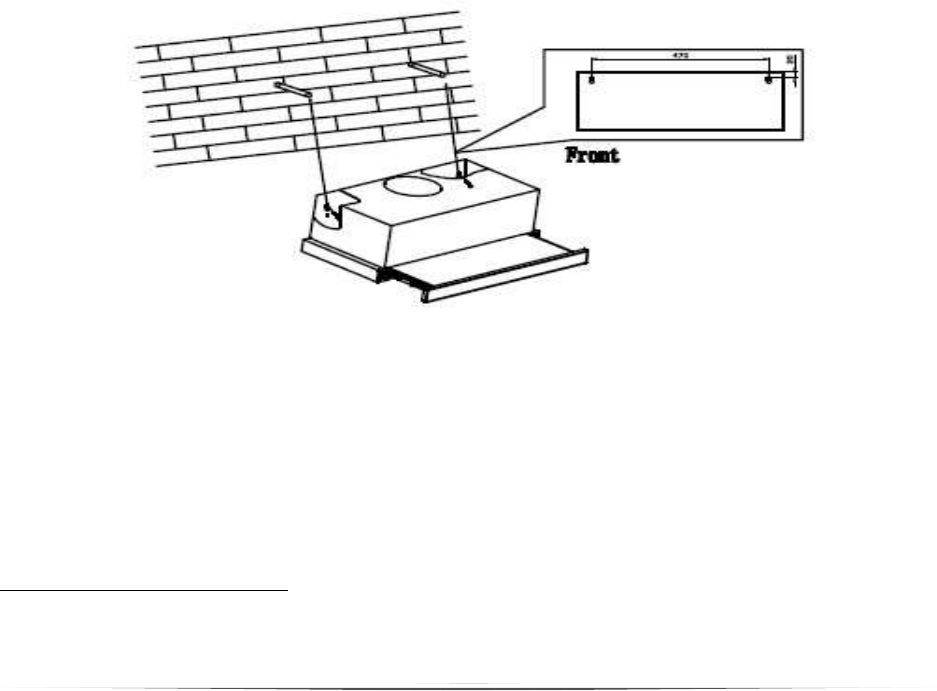
Einbaumöglichkeit 2 / unter einem Schrank (Abb.2):
1. Bohren Sie sechs Löcher mit einem Durchmesser von 4 mm in die Unterseite des
Schranks.
2. Versehen Sie die Unter- und Oberseite des Schranks an den entsprechenden
Stellen mit jeweils einem passenden Loch für den Luftableitung.
3. Befestigen Sie den Luftauslass an der Haube. Befestigen Sie die Haube mit den 6
Schrauben am Schrank.
4. Verbinden Sie den Luftauslass und die obere Luftablassöffnung des Schranks mit
einem passenden Abluftschlauch
[2]
.
5. Sollten Sie keine Abluftschlauch-Verbindung (Schrankloch unten →Schrankloch
oben) für den Umluftbetrieb verwenden, müssen die Öffnungen des Schranks
immer frei sein. Reinigen Sie das Schrankinnere regelmäßig.
6. Befestigen Sie die Ausrichtungsvorrichtung unten an der Haube, um die Lücke
zu schließen.
7. Nur Abluftbetrieb: Versehen Sie die Unter- und Oberseite des Schranks an den
entsprechenden Stellen mit jeweils einem passenden Loch für die Luftableitung.
Befestigen Sie den Abluftschlauch und führen Sie ihn in einen geeigneten
Abluftschacht oder ins Freie.
1
Ausstattung optional.
[2]
Ausstattung optional.
8


Need help? Post your question in this forum.

Forumrules


Report abuse

Libble takes abuse of its services very seriously. We're committed to dealing with such abuse according to the laws in your country of residence. When you submit a report, we'll investigate it and take the appropriate action. We'll get back to you only if we require additional details or have more information to share.

Product:

For example, Anti-Semitic content, racist content, or material that could result in a violent physical act.

For example, a credit card number, a personal identification number, or an unlisted home address. Note that email addresses and full names are not considered private information.

Forumrules

To achieve meaningful questions, we apply the following rules:

Register

Register getting emails for PKM BFS1-60BSPY at:


You will receive an email to register for one or both of the options.


Get your user manual by e-mail

Enter your email address to receive the manual of PKM BFS1-60BSPY in the language / languages: English, German, French as an attachment in your email.

The manual is 0,58 mb in size.


You will receive the manual in your email within minutes. If you have not received an email, then probably have entered the wrong email address or your mailbox is too full. In addition, it may be that your ISP may have a maximum size for emails to receive.

The manual is sent by email. Check your email

If you have not received an email with the manual within fifteen minutes, it may be that you have a entered a wrong email address or that your ISP has set a maximum size to receive email that is smaller than the size of the manual.

The email address you have provided is not correct.

Please check the email address and correct it.

Your question is posted on this page

Would you like to receive an email when new answers and questions are posted? Please enter your email address.


Info