5 Altoparlante posteriore
Installazione
Importante
! Controllare tutti i collegamenti e i sistemi
prima dell’installazione finale.
! Non utilizzare componenti non approvati, poi-
ché potrebbero provocare malfunzionamenti.
! Consultare il rivenditore se l’installazione ri-
chiede la trapanatura di fori o altre modifiche
del veicolo.
! Non installare questa unità se:
— potrebbe interferire con il funzionamento
del veicolo.
— potrebbe procurare lesioni al passeggero
in caso di arresto improvviso del veicolo.
! Se si surriscalda il laser a semiconduttore po-
trebbe subire danni. Non installare questa
unità in luoghi soggetti a surriscaldamento,
come in prossimità delle bocchette dell’im-
pianto di riscaldamento.
! Le prestazioni ottimali si ottengono quando
l’unità viene installata con un’angolazione in-
feriore a 60°.
60°
Montaggio DIN anteriore/
posteriore
Questa unità può essere installata corretta-
mente sia dalla posizione di montaggio ante-
riore, sia dalla posizione di montaggio
posteriore.
Montaggio DIN anteriore
1 Inserire la fascetta di montaggio nel
cruscotto.
Se l’unità viene installata in uno spazio poco
profondo, utilizzare una fascetta di montaggio
fornita. Se dietro l’unità vi è spazio sufficiente,
utilizzare la fascetta di montaggio fornita con
il veicolo.
! Durante l’installazione utilizzare componen-
ti disponibili in commercio.
2 Assicurare la fascetta di montaggio uti-
lizzando un cacciavite per piegare le lin-
guette metalliche (90°) in posizione.
1
2
1 Cruscotto
2 Fascetta di montaggio
3 Installare l’unità come illustrato.
1
2
3
4
5
1 Dado
2 Paratia antifuoco o supporto in metallo
3 Staffa metallica
4 Vite
5 Vite (M4 × 8)
# Accertarsi che l’unità sia installata saldamen-
te in posizione. Un’installazione instabile potreb-
be causare salti audio o altri malfunzionamenti.
It
44
Sezione
03
Installazione
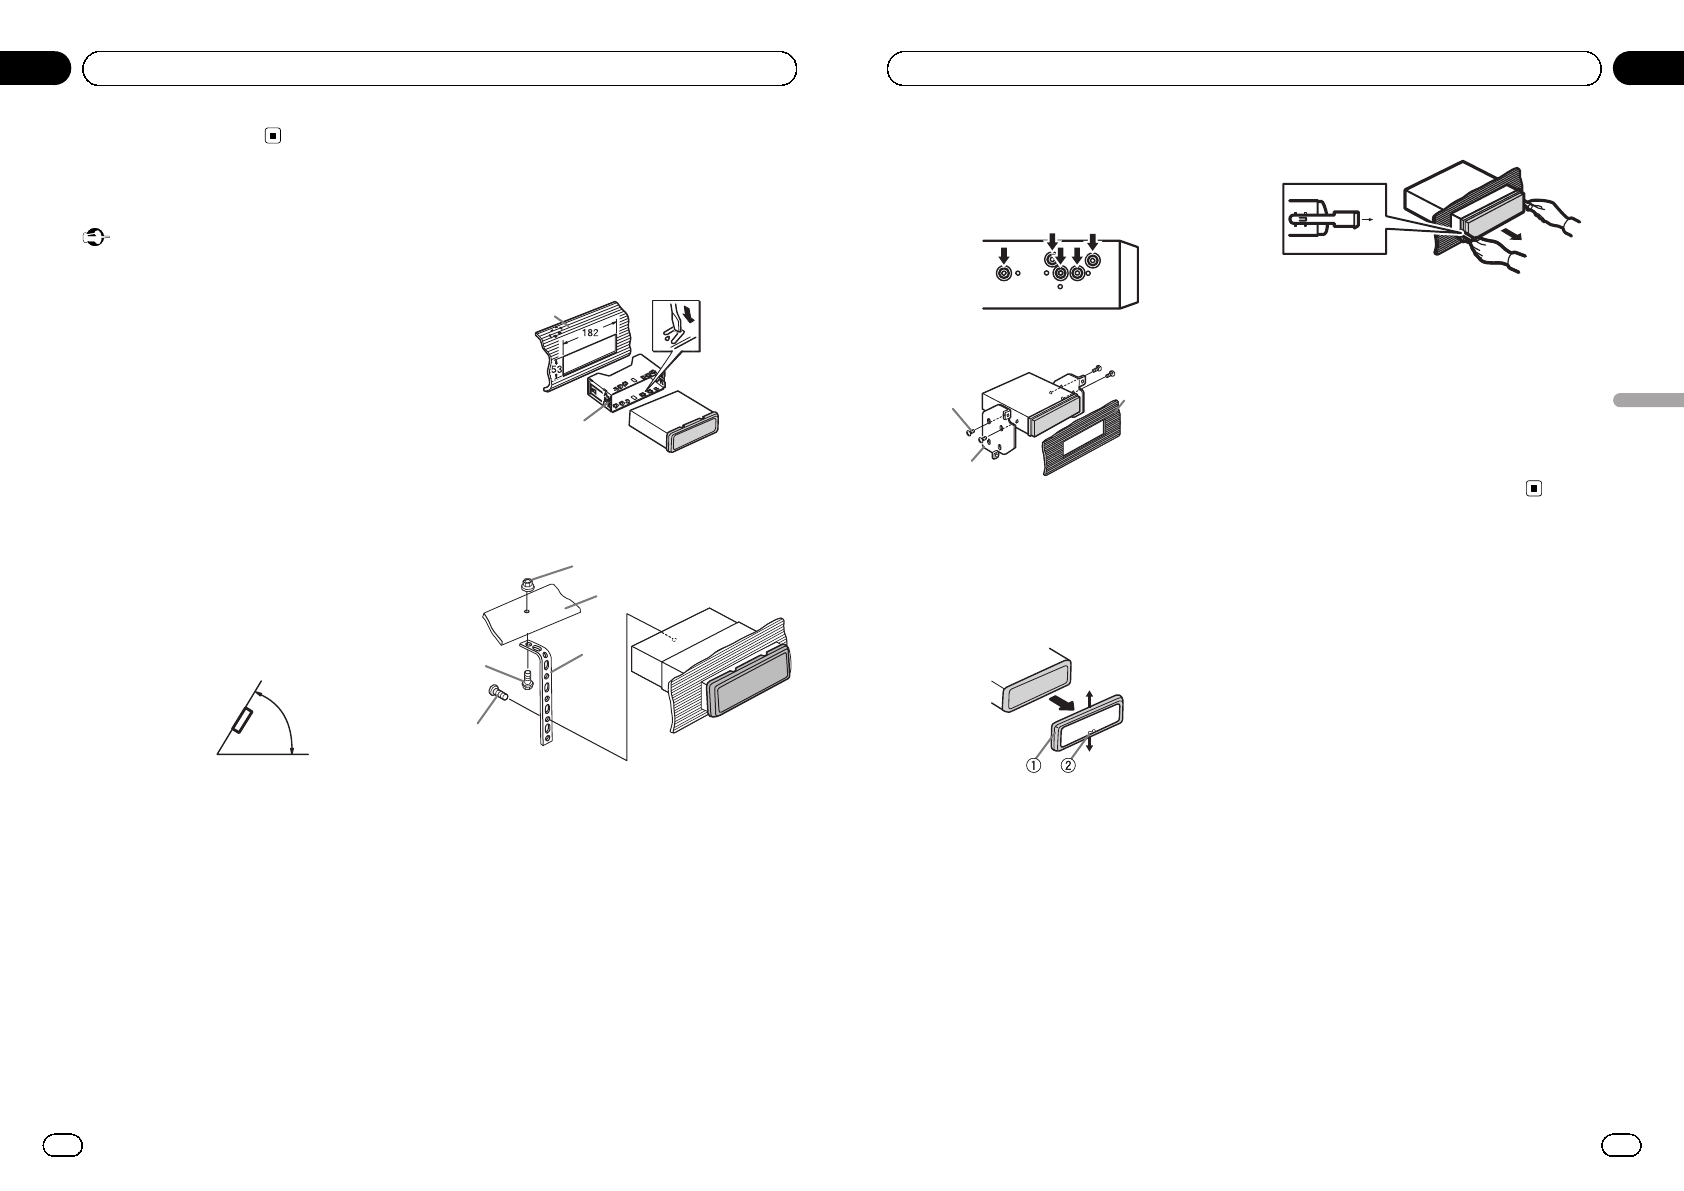
Montaggio DIN posteriore
1 Determinare la posizione appropriata,
in modo che i fori sulla staffa e sul lato del-
l’unità corrispondano.
2 Serrare due viti su ciascun lato.
1
2
3
1 Vite autofilettante (5 mm × 8 mm)
2 Staffa di montaggio
3 Cruscotto o console
Rimozione dell’unità
1 Rimuovere la guarnizione.
1 Guarnizione
2 Linguetta intaccata
! La rimozione del frontalino permette di ac-
cedere facilmente alla guarnizione.
! Quando si riapplica la guarnizione, spinge-
re il lato con la linguetta intaccata verso il
basso.
2 Inserire le chiavi di estrazione fornite
su entrambi i lati dell’unità fino a che non
scattano in posizione.
3 Estrarre l’unità dal cruscotto.
Rimozione e reinserimento del
frontalino
È possibile rimuovere il frontalino per proteg-
gere l’unità dai furti.
Premere il tasto di rimozione e spingere il fron-
talino verso l’alto tirandolo verso l’esterno.
Per ulteriori dettagli, vedere Rimozione del
frontalino per proteggere l’unità dai furti e Rein-
serimento del frontalino a pagina 36.
It
45
Sezione
Italiano
03
Installazione