454839
19
Zoom out
Zoom in
Previous page
1/32
Next page
Adjusting the Image
The contrast and brightness of the captured images can be adjusted or effects such as negative
and positive conversions can be applied.
Note:
Images that have already been saved as files cannot be adjusted.
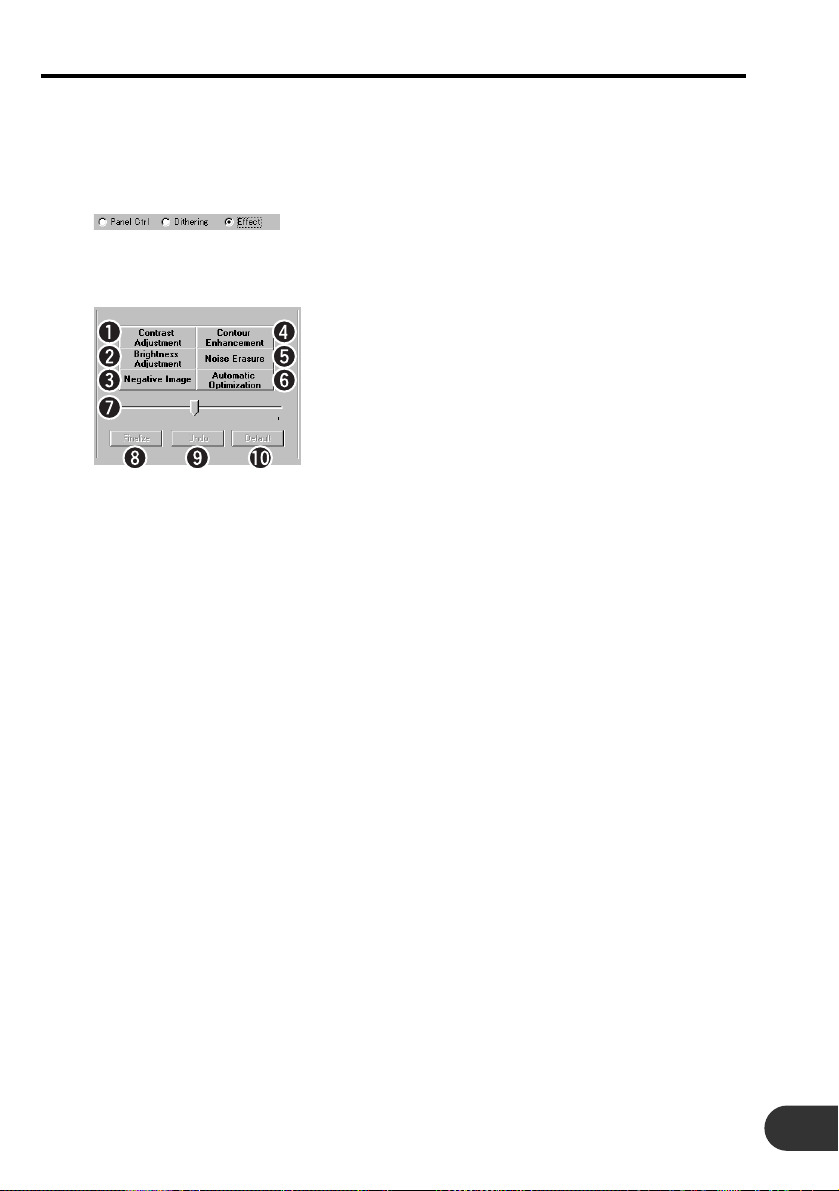
zClick “Effect”.
The Effects screen will appear.
xAdjust the effects.
qContrast Adjustment: The contrast of the image can be adjusted. The contrast level is
adjusted by moving the slider.
wBrightness Adjustment: The brightness of the image (overall brightness) can be adjust-
ed. The brightness level is adjusted by moving the slider.
eNegative Image: The image is converted to negative/positive image.
rContour Enhancement: The contour level can be adjusted. The contour level is adjusted
by moving the slider.
tNoise Erasure: Noise on the image can be erased. Noise can be erased in lev-
els by moving the slider to the right.
yAutomatic Optimization: The image can be automatically adjusted so that it appears
clearer.
uSlider: Used to adjust the contrast level, brightness level, contour level
and noise erasure level. The level of adjustment increases
when the slider is moved to the right and the level of adjust-
ment decreases when the slider is moved to the left.
iFinalize: The adjusted effect is confirmed.
oUndo: Previously finalized effect can be removed.
!0 Default: All adjusted effects are canceled and the image returns to the
default state.
cConfirm the adjusted effect using the following proce-
dure.
1. Select the item to adjust and perform the adjustment.
2. When completed with the adjustment of the selected item, click
“Finalize”.
Note:
Click “Finalize” every time each item is adjusted. Moving to other items without clicking “Finalize”
will cancel the previous adjustment.
19
19


Need help? Post your question in this forum.

Forumrules


Report abuse

Libble takes abuse of its services very seriously. We're committed to dealing with such abuse according to the laws in your country of residence. When you submit a report, we'll investigate it and take the appropriate action. We'll get back to you only if we require additional details or have more information to share.

Product:

For example, Anti-Semitic content, racist content, or material that could result in a violent physical act.

For example, a credit card number, a personal identification number, or an unlisted home address. Note that email addresses and full names are not considered private information.

Forumrules

To achieve meaningful questions, we apply the following rules:

Register

Register getting emails for Pioneer CD-PC1 at:


You will receive an email to register for one or both of the options.


Get your user manual by e-mail

Enter your email address to receive the manual of Pioneer CD-PC1 in the language / languages: English as an attachment in your email.

The manual is 3.85 mb in size.


You will receive the manual in your email within minutes. If you have not received an email, then probably have entered the wrong email address or your mailbox is too full. In addition, it may be that your ISP may have a maximum size for emails to receive.

Others manual(s) of Pioneer CD-PC1

Pioneer CD-PC1 User Manual - German - 32 pages

Pioneer CD-PC1 User Manual - Dutch - 32 pages

Pioneer CD-PC1 User Manual - French - 32 pages


The manual is sent by email. Check your email

If you have not received an email with the manual within fifteen minutes, it may be that you have a entered a wrong email address or that your ISP has set a maximum size to receive email that is smaller than the size of the manual.

The email address you have provided is not correct.

Please check the email address and correct it.

Your question is posted on this page

Would you like to receive an email when new answers and questions are posted? Please enter your email address.


Info