30660
12
Zoom out
Zoom in
Previous page
1/85
Next page
11
Installation
Note:
Before finally installing the unit, connect the
wiring temporarily, making sure it is all connect-
ed up properly, and the unit and the system work
properly.
Use only the parts included with the unit to ensure
proper installation. The use of unauthorized parts
can cause malfunctions.
Consult with your nearest dealer if installation
requires the drilling of holes or other modifica-
tions of the vehicle.
Install the unit where it does not get in the dri-
ver’s way and cannot injure the passenger if there
is a sudden stop, like an emergency stop.
Do not install the display where it may (i) obstruct
the driver's vision, (ii) impair the performance of
any of the vehicle's operating systems or safety
features, including air bags, hazard lamp buttons
or (iii) impair the driver's ability to safely operate
the vehicle.
The semiconductor laser will be damaged if it
overheats, so don’t install the unit anywhere hot
— for instance, near a heater outlet.
If installation angle exceeds 30° from horizontal,
the unit might not give its optimum performance.
(Fig. 11)
Fig. 11
The cords must not cover up the area shown in the
figure below. This is necessary to allow the
amplifires to radiate freely. (Fig. 12)
Fig. 12
When mounting the hide-away unit, make sure
none of the leads are trapped between the hide-
away unit and the surrounding metalwork or fit-
tings.
Do not mount the hide-away unit near the heater
outlet, where it would be affected by heat, or near
the doors, where rainwater might splash onto it.
If the hide-away unit is installed in the passenger
compartment, anchor it securely so it does not
break free while the car is moving, and cause
injury or an accident.
If the hide-away unit is installed under a front
seat, make sure it does not obstruct seat move-
ment. Route all leads and cords carefully around
the sliding mechanism so they do not get caught
or pinched in the mechanism and cause a short
circuit.
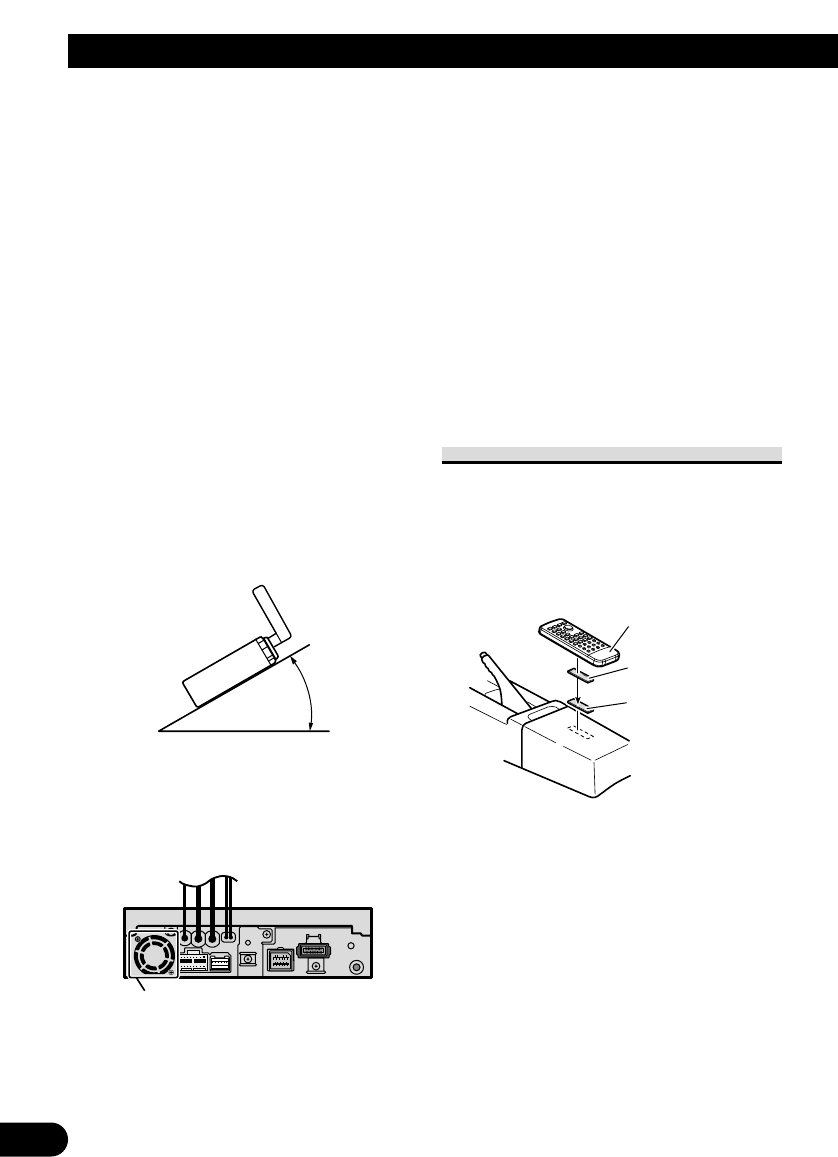
Installing the remote control unit
When not using the remote control
unit, secure it with velcro tape to pre-
vent it from moving.
Thoroughly wipe off the surface
before affixing the velcro tape.
Fig.13
Velcro tape (small)
(hard)
Velcro tape (small)
(soft)
Remote control unit
Do not close this area.
30°
12


Need help? Post your question in this forum.

Forumrules


Report abuse

Libble takes abuse of its services very seriously. We're committed to dealing with such abuse according to the laws in your country of residence. When you submit a report, we'll investigate it and take the appropriate action. We'll get back to you only if we require additional details or have more information to share.

Product:

For example, Anti-Semitic content, racist content, or material that could result in a violent physical act.

For example, a credit card number, a personal identification number, or an unlisted home address. Note that email addresses and full names are not considered private information.

Forumrules

To achieve meaningful questions, we apply the following rules:

Register

Register getting emails for Pioneer AVHP6600DVD at:


You will receive an email to register for one or both of the options.


Get your user manual by e-mail

Enter your email address to receive the manual of Pioneer AVHP6600DVD in the language / languages: English, German, Dutch, French, Italian, Spanish as an attachment in your email.

The manual is 2,18 mb in size.


You will receive the manual in your email within minutes. If you have not received an email, then probably have entered the wrong email address or your mailbox is too full. In addition, it may be that your ISP may have a maximum size for emails to receive.

Others manual(s) of Pioneer AVHP6600DVD

Pioneer AVHP6600DVD User Manual - English - 120 pages

Pioneer AVHP6600DVD User Manual - German - 134 pages

Pioneer AVHP6600DVD User Manual - French - 134 pages

Pioneer AVHP6600DVD User Manual - Italian - 130 pages

Pioneer AVHP6600DVD User Manual - Portuguese - 82 pages

Pioneer AVHP6600DVD User Manual - Spanish - 129 pages


The manual is sent by email. Check your email

If you have not received an email with the manual within fifteen minutes, it may be that you have a entered a wrong email address or that your ISP has set a maximum size to receive email that is smaller than the size of the manual.

The email address you have provided is not correct.

Please check the email address and correct it.

Your question is posted on this page

Would you like to receive an email when new answers and questions are posted? Please enter your email address.


Info