English
Español
Deutsch
Français
Italiano
Nederlands
Installazione
12
Nota:
• Prima di installare definitivamente l’apparecchio,
collegare temporaneamente i cavi in modo da
verificare che i collegamenti eseguiti siano cor-
retti ed il sistema operi correttamente.
• Per un’installazione appropriata, usare soltanto i
pezzi in dotazione all’apparecchio. L’uso di pezzi
non autorizzati può causare problemi di
funzionamento.
• Rivolgersi al più vicino rivenditore se
l’installazione richiede la trapanatura di fori o
altre modifiche del veicolo.
• Installare l’apparecchio in un punto in cui esso
non intralci le manovre del conducente e in cui
non possa provocare lesioni ai passeggeri nel caso
dell’arresto improvviso del veicolo, come nel caso
di una frenata d’emergenza.
• Non installare il display in ubicazioni in cui
potrebbe (i) limitare la visuale del guidatore, (ii)
limitare le prestazioni dei sistemi operativi o delle
funzionalità di sicurezza del veicolo, inclusi gli
air bag, i tasti per le luci di emergenza o (iii)
limitare l'abilità del guidatore a controllare il
veicolo in modo sicuro.
• Il laser a semiconduttore subisce danni se si
surriscalda; pertanto, non installare l’apparecchio
in luoghi esposti al calore, come per esempio nei
pressi della bocca di efflusso dell’impianto di
riscaldamento.
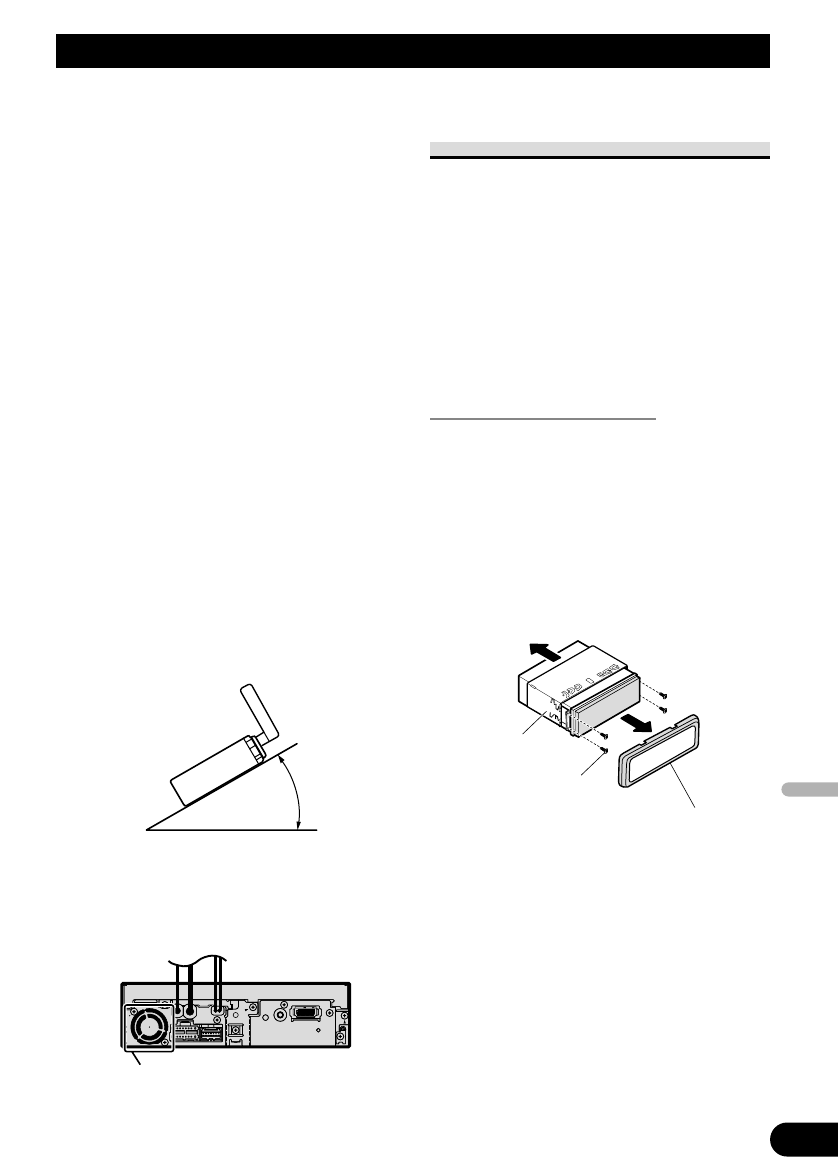
• Se l’angolo di installazione supera i 30° rispetto
alla posizione orizzontale, l’apparecchio potrebbe
non fornire prestazioni ottimali. (Fig. 12)
Fig. 12
• I cavi non devono coprire la zona mostrata nella
figura qui sotto: l’amplificatore deve essere in
grado di diffondere il suono liberamente. (Fig. 13)
Fig. 13
Montaggio anteriore o posteriore
di standard DIN
Questo apparecchio può essere monta-
to senza problemi dalla parte “anteri-
ore” (montaggio DIN anteriore con-
venzionale) o dalla parte “posteriore”
(installazione DIN a montaggio poste-
riore, facente uso dei fori per viti filet-
tate presenti sui due lati dello chassis
dell’apparecchio). Per dettagli, vedere
i seguenti metodi di installazione e le
relative illustrazioni.
Prima di installare l’unità
• Rimuovere la cornice ed il con-
tenitore di supporto. (Fig. 14)
Rimuovere innanzi tutto la cornice e
quindi allentare le viti (2 × 3 mm) in
modo da rimuovere il contenitore di
supporto (per fissare nuovamente la
cornice, orientare verso il basso il lato
provvisto di scanalatura e quindi richi-
udere).
Fig. 14
Non chiudere questa zona.