2
Thank you for buying this Pioneer
Please read through these instructions so you
will know how to operate your model properly
After you have finished reading the instruc-
tions, keep this document in a safe place for
future reference.
Important
The screens shown in the examples may
differ from actual screens, which may be
changed without notice for performance and
function improvements.
■ Precaution ..........................4
Important safety information ............................4
T
......................................4
When using a display connected
......4
T
..............................5
Rear view camera
............................................5
Handling the USB connector
............................5
In case of trouble.......5
Visit our website
...............................................5
About this product
............................................5
Protecting the LCD panel and screen...............5
Notes on internal memor
................................5
About this manual
............................................5
■ Basic operation ..................6
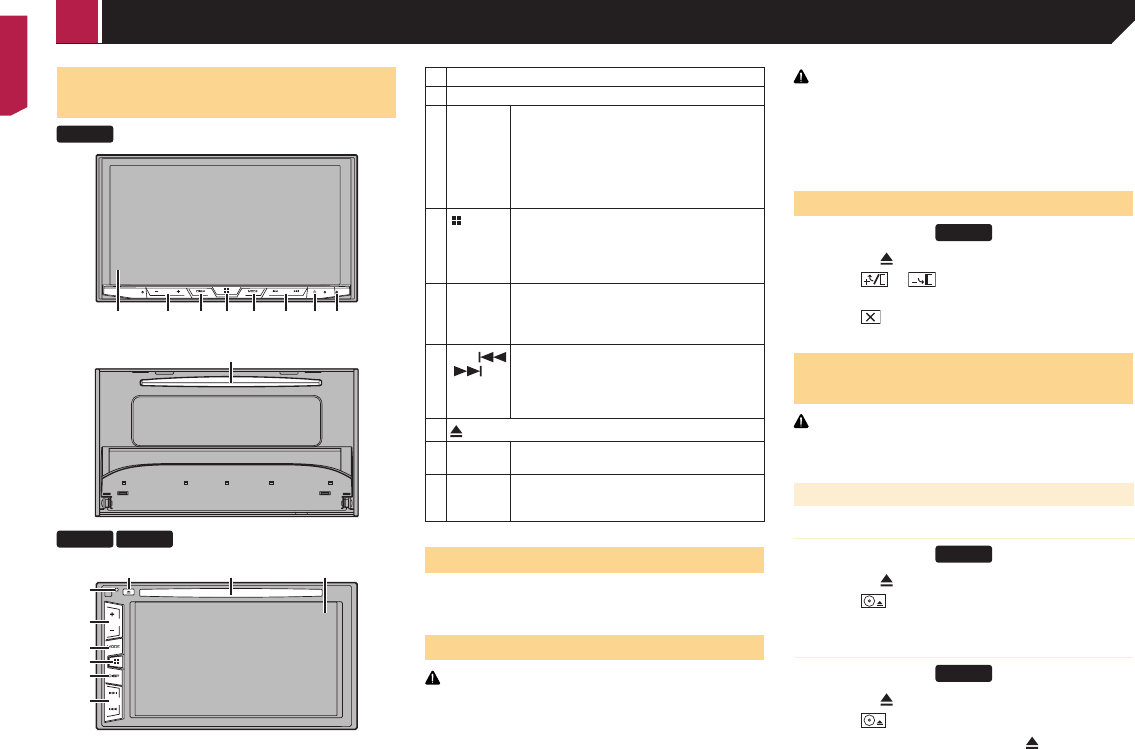
Checking part names and functions .................6
Remote control
................................................6
Notes on using the LCD panel
.........................6
Adjusting the LCD panel angle
.........................6
Inserting/ejecting/connecting media.................6
On rst-time
.........................................7
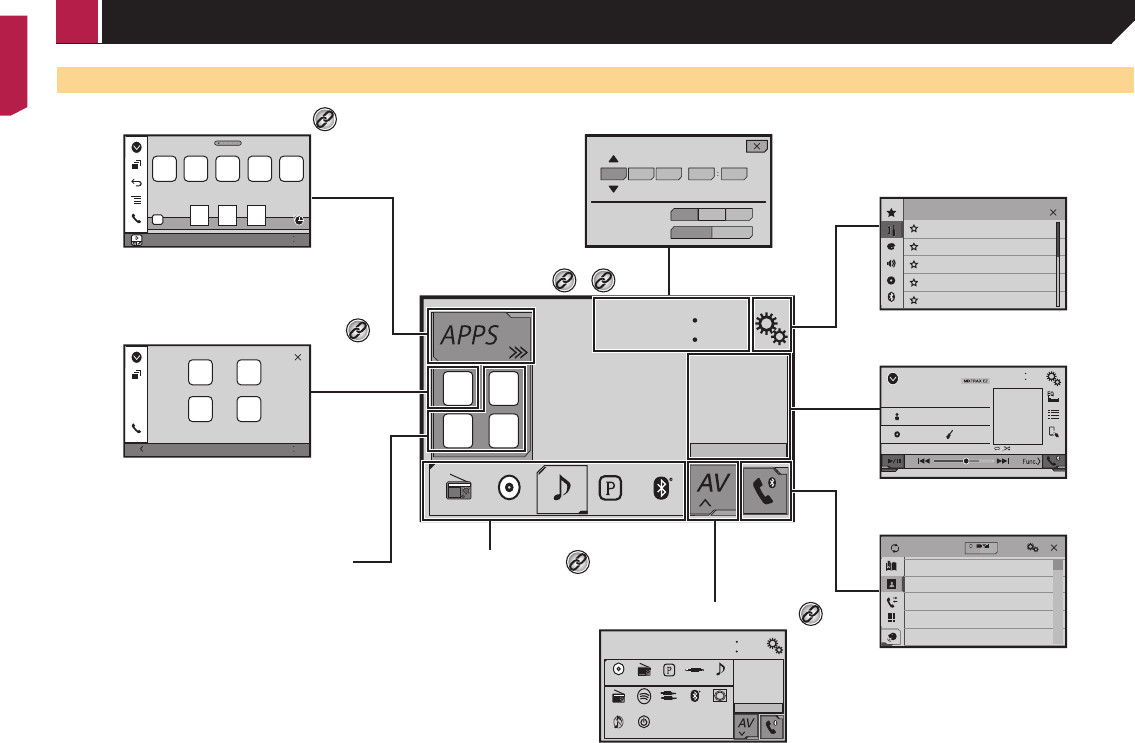
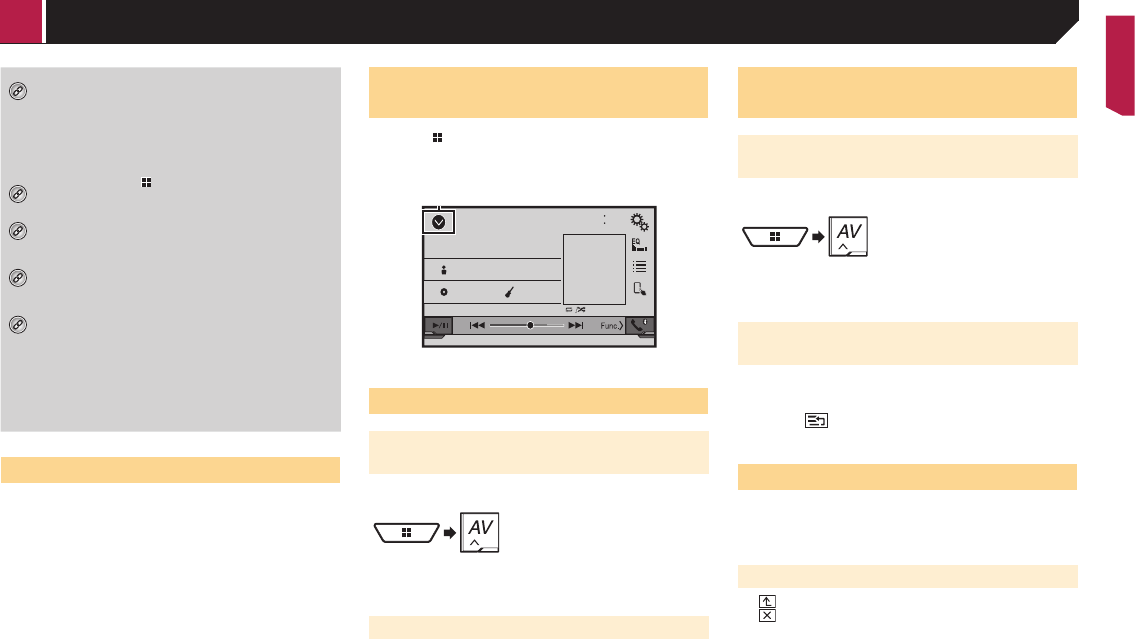
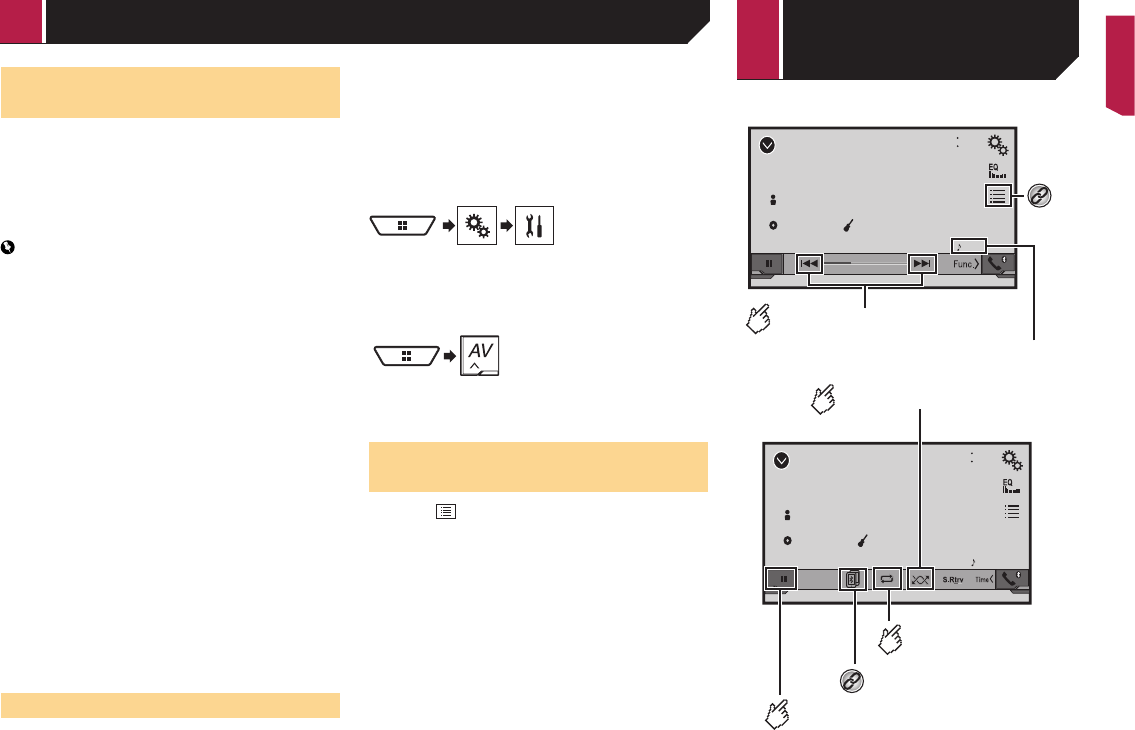
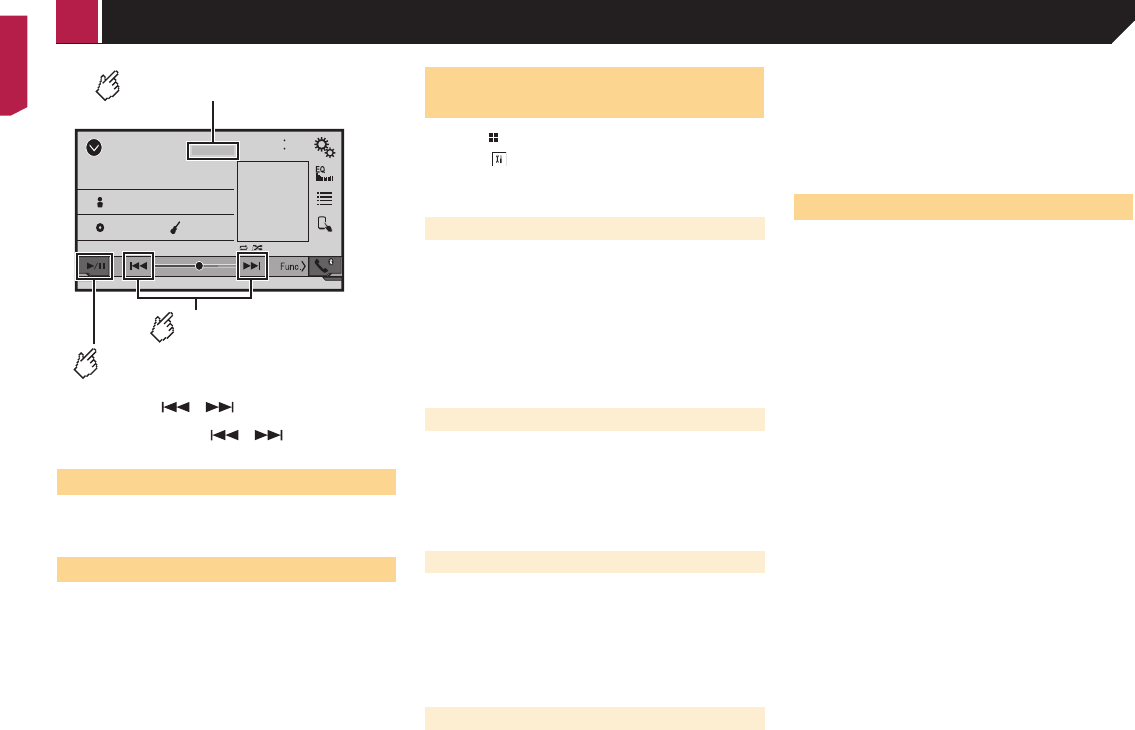
How to use the screens
....................................8
Supported AV source
.......................................9
Displaying the A
..................9
Selecting a source
...........................................9
Changing the display order of sources
.............9
Using the touch panel
......................................9
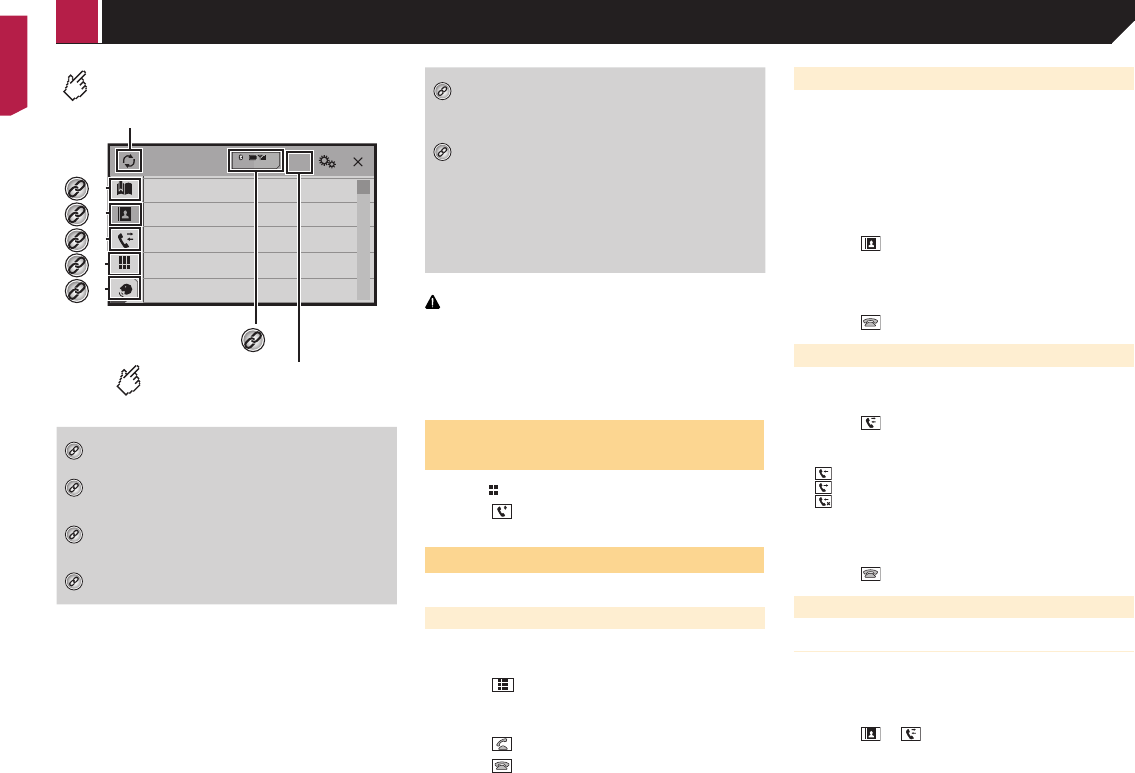
■ Registration and
connection of Bluetooth
®
device ............................... 10
Displaying the ...................10
Registering your Bluetooth de
................10
Connecting a registered Bluetooth de
manually
...................................................10
Switching visibility
..........................................11
Entering the PIN code for Bluetooth wireless
connection
................................................11
Displaying the de
...................11
Clearing the Bluetooth memory......................11
Updating Bluetooth software
..........................11
Displaying the Bluetooth softw
......11
Switching the connected Bluetooth de
.....11
■ Hands-free phoning .........12
Displaying the Phone men ................12
Making a phone call
.......................................12
Receiving a phone call
...................................13
Minimising the
.........13
Changing the phone settings
.........................13
Using the voice recognition function (f
iPhone)
.....................................................13
Setting phone book auto synchronisation
......13
Notes for hands-free phoning
.........................13
■
smartphone ...................... 14
The basic
setup
.........................................................14
Setting the device connection metho............14
iP
...........................................14
Android
™
device compatibility.........................14
Information on the connections and functions
for each de
..........................................15
■ Digital Radio ....................16
Digital Radio tuner operations ........................16
Starting procedure
.........................................16
Listening to a recent broadcast (time shift)
.....16
Selecting a Service Component
.....................16
Updating service list information manually
.....16
Displaying the
.............16
■ Radio ................................17
Starting procedure .........................................18
Storing the strongest broadcast
frequencies
...............................................18
Displaying the
...........18
T
.......................18
Setting the FM tuning step
.............................18
Switching the sound quality of the FM
tuner
.........................................................18
Setting the alternative frequency search
........18
Setting the Auto PI search
..............................18
Limiting stations to regional programming
......18
Receiving trafc
............18
Receiving trafc
............19
Receiving news announcements....................19
■ Disc ...................................19
Starting procedure .........................................20
Selecting les
..............20
Switching the
..........................20
Searching for the part you want to pla
..........21
Operating the D
...............................21
Switching the subtitle/audio language
............21
Operating the D
keys
..........................................................21
■ .............21
Starting procedure (for Disc) ..........................23
Starting procedure (for USB)
..........................23
Operations common
...............24
Audio .......................................24
Still image
...............................24
■ iPod ..................................25
Connecting your iP .............25
Starting procedure
.........................................26
Selecting song or video sources from the
playlist screen
...........................................26
Using this product’
iP
...........................................................26
Selecting a song from the list related to the
song currently playing (link search)
...........26
■ AppRadioMode ................26
Using AppRadioMode ....................................26
Using the audio mix function
..........................27
■ Pandora
®
..........................28
Pando ........................................28
Starting procedure
.........................................29
Selecting a P
........29
Adding a station
.............................................29
Storing the preset stations
.............................29
■ Spotify
®
.............................29
Using Spotify with your Pioneer car audio/
video
.........................................................31
Starting procedure
.........................................31
Selecting a track or station from t
..........31
■ ....31
Starting procedure .........................................32
Selecting les
..............32
■ AUX source ......................32
Starting procedure .........................................32
Setting the video signal
..................................33
■ AV input ............................33
Starting procedure (for A .................33
Starting procedure (for camera)
.....................33
Setting the video signal
..................................33
■ MIXTRAX ..........................34
MIXTRAX operation .......................................34
MIXTRAX EZ operation..................................34
Displaying the
....34
Setting the
.................................34
■ System settings ...............35
Displaying the ..........35
Setting Bluetooth audio source activation
......35
Setting Spotify source activation
....................35
Setting the ev
.....................................35
Setting the beep tone
.....................................35
Setting the auto audio mix function
................35
Setting AppRadioMode Sound
.......................35
Setting the rear view camera
..........................35
Setting the safe mode
....................................36
Setting the demo mode
..................................36
Selecting the system language
......................36
Selecting the using location
...........................36
Setting the ke
application for iPhone................................36
Adjusting the response positions of the touch
panel (touch panel calibration)
..................36
Setting the dimmer
.........................................36
Adjusting the picture
......................................37
Displaying
.....................37
Displaying the open source licence
..............37
Updating rmware
..........................................37
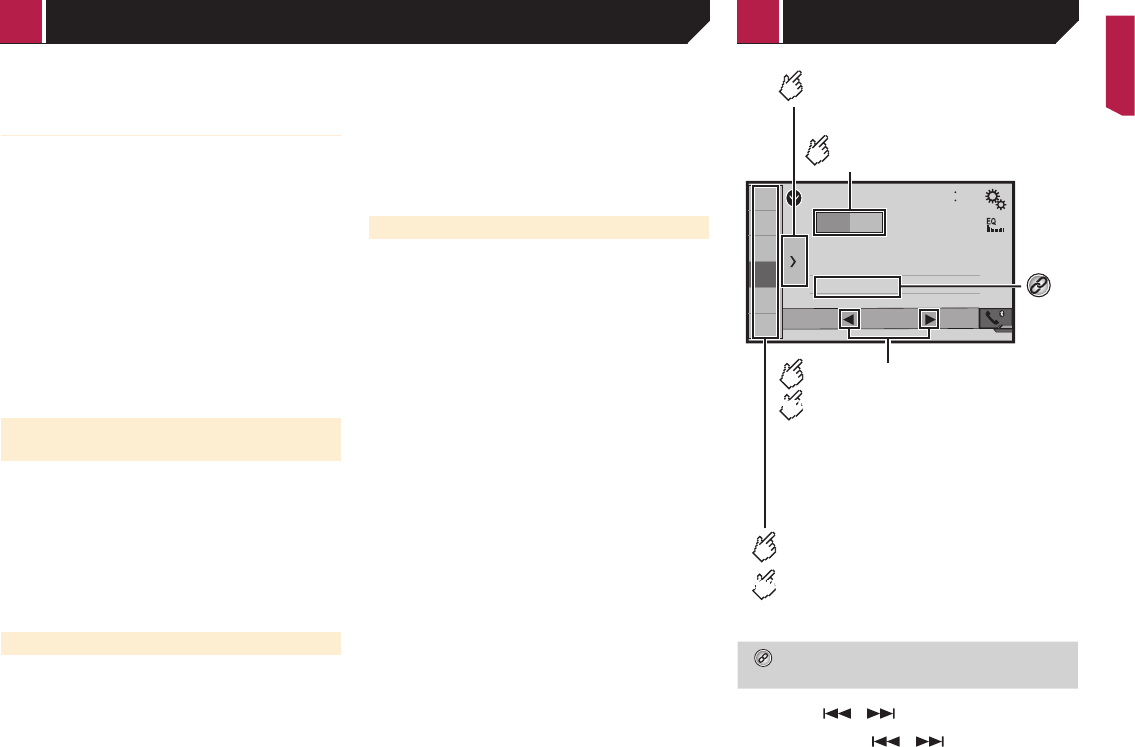
■ Audio adjustments ..........38
Displaying the .............38
Using fader/balance adjustment
.....................38
Switching sound muting/attenuation
..............38
Adjusting source lev
..................................38
< CRB4721-B >
Contents