603678
35
Zoom out
Zoom in
Previous page
1/385
Next page
Pinnacle Studio for Dazzle
Version 1.0
Your Life in Movies
2
Pinnacle Studio
Copyright ©2013 Corel Corporation. All rights reserved.
Please respect the Rights of Artists and Creators. Content such as music,
photos, video and celebrity images are protected by the laws of many
countries. You may not use other people’s content unless you own the rights
or have the permission of the owner.
This product or portions thereof are protected in the United States by one or
more of the following United States Patents: 5,495,291; 6,469,711; 6,532,043;
6,901,211; 7,124,366; 7,165,219; 7,286,132; 7,301,092 and 7,500,176; and in
Europe by one or more of the following European Patents: 0695094 and
0916136. Other patents are pending.
Mpegable DS 2.2 ©2004 Dicas Digital Image Coding GmbH. Portions of
this product were created using LEADTOOLS ©1991-2006, LEAD
Technologies, Inc. All rights reserved. Portions utilize Windows Media
Technologies ©1999-2005 Microsoft Corporation MPEG Layer II Audio
by QDesign Corp. This product is based in part on the work of the
Independent JPEG Group.
No part of this manual may be copied or distributed, transmitted, transcribed,
stored in a retrieval system, or translated into any human or computer
language, in any form by any means, electronic, mechanical, magnetic,
manual, or otherwise, without the express written permission of Corel
Corporation.
Corel Corporation
385 Ravendale Drive
Mountain View, CA 94043, USA
Table of contents
3
Table of contents
BEFORE YOU START IX
Abbreviations and conventions .............................................................. ix
Help and on-line help ............................................................................. xi
CHAPTER 1: USING PINNACLE STUDIO 1
The Library .............................................................................................. 3
The Movie Editor and the Disc Editor ..................................................... 6
The media editors .................................................................................... 7
The Player ................................................................................................ 8
Pinnacle Studio Projects .......................................................................... 9
CHAPTER 2: THE LIBRARY 11
Understanding the Library ..................................................................... 14
Location tabs ......................................................................................... 16
The Asset Tree ...................................................................................... 17
Collections ............................................................................................ 19
Managing Library assets ....................................................................... 21
The Browser ......................................................................................... 24
Thumbnails and details ......................................................................... 25
Optional indicators and controls ........................................................... 28
The Library preview ............................................................................. 31
Using the Library .................................................................................... 35
Choosing what to display ...................................................................... 35
Tags ...................................................................................................... 38
Correcting media ................................................................................... 41
Video scene detection ........................................................................... 42
4
Pinnacle Studio
CHAPTER 3: THE MOVIE EDITOR 51
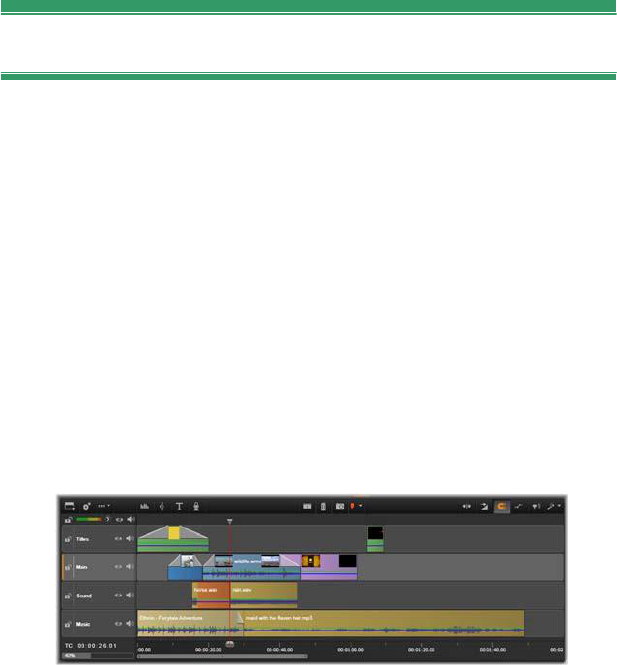
The project timeline ................................................................................. 55
Timeline fundamentals ......................................................................... 55
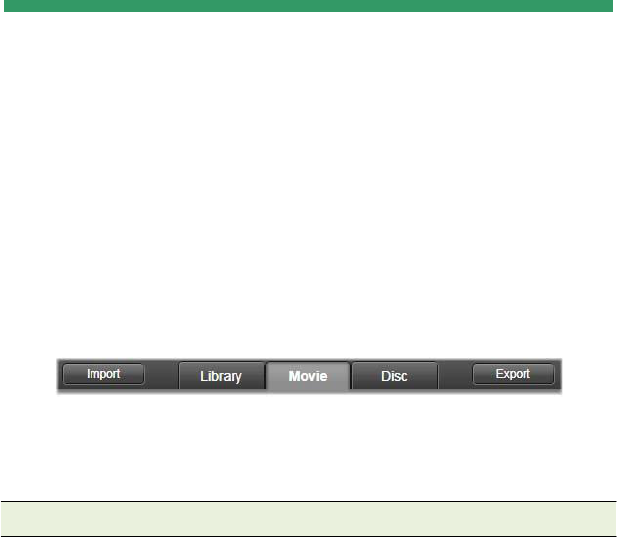
The timeline toolbar .............................................................................. 60
The timeline track header ..................................................................... 67
Timeline audio functions ...................................................................... 69
Editing movies ......................................................................................... 69
Adding clips to the timeline .................................................................. 71
Title Editor, voice-over ......................................................................... 75
Deleting clips ........................................................................................ 76
Clip operations ...................................................................................... 76
Using the Clipboard .............................................................................. 88
Speed .................................................................................................... 89
Movies within movies ........................................................................... 91
Transitions ............................................................................................ 92
Clip effects ............................................................................................ 98
Clip context menus ............................................................................... 99
CHAPTER 4: MEDIA EDITING: CORRECTIONS 101
Media editing overview ...................................................................... 103
Correcting photos .................................................................................. 108
Photo editing tools .............................................................................. 109
Photo corrections ................................................................................ 110
Correcting video .................................................................................... 115
Video tools .......................................................................................... 116
Video corrections ................................................................................ 119
Correcting audio .................................................................................... 122
CHAPTER 5: MEDIA EDITING: EFFECTS 123
Effects in the media editors ................................................................ 125
Effects on the timeline ........................................................................ 129
The Settings panel .............................................................................. 131
Working with keyframes .................................................................... 133
Video and photo effects ...................................................................... 135
Working with transitions .................................................................... 140
Table of contents
5
Pan-and-zoom ..................................................................................... 141
CHAPTER 6: MONTAGE 145
Note: Montage is disabled in the Pinnacle Studio for Dazzle version;
upgrade to Pinnacle Studio 16 to use the Montage feature.
The Montage section of the Library ................................................... 147
Using Montage templates ...................................................................... 148
Montage clips on the timeline ............................................................. 149
Anatomy of a template ........................................................................ 151
Montage Editing .................................................................................... 154
Using the Montage Editor ................................................................... 155
CHAPTER 7: THE TITLE EDITOR 157
Launching (and leaving) the Title Editor ............................................ 159
The Library ............................................................................................ 160
Creating and editing titles ..................................................................... 166
Background settings ........................................................................... 168
Look settings ...................................................................................... 169
The Edit window ................................................................................ 173
Text and text settings .......................................................................... 175
The Layer List ....................................................................................... 181
Working with the Layer List ............................................................... 182
CHAPTER 8: SOUND AND MUSIC 191
The Audio Editor ................................................................................... 193
Audio on the timeline ............................................................................ 204
Timeline audio functions .................................................................... 204
Audio creation tools ............................................................................... 211
The Voice-over tool ............................................................................ 214
6
Pinnacle Studio
CHAPTER 9: DISC PROJECTS 217
Disc menus ......................................................................................... 218
Adding disc menus ............................................................................. 221
Previewing disc menus ....................................................................... 223
Menu editing on the timeline ................................................................ 225
Timeline menu markers 225
Authoring tools 226
The Chapter Wizard ............................................................................ 229
The Menu Editor ................................................................................... 232
Menu buttons ...................................................................................... 233
The Disc Simulator ................................................................................ 235
CHAPTER 10: THE IMPORTER 237
Using the Importer .............................................................................. 238
Importer panels ..................................................................................... 240
The Import From panel ....................................................................... 240
The Import To panel ........................................................................... 243
The Mode panel .................................................................................. 246
The Scene Detection Options window ................................................ 249
The Filename panel ............................................................................ 251
Selecting assets for import .................................................................... 253
Import from file .................................................................................. 253
Selecting files for Import .................................................................... 254
Scan for assets .................................................................................... 260
Import from DV or HDV camera ........................................................ 261
Import from analog sources ................................................................ 265
Import from DVD or Blu-ray Disc ..................................................... 266
Import from digital cameras ............................................................... 267
Snapshot ............................................................................................. 269
Table of contents
7
CHAPTER 11: THE EXPORTER 273
Output to disc or memory card ............................................................ 276
Output to file .......................................................................................... 280
Output to cloud ...................................................................................... 289
Output to a device ................................................................................. 293
CHAPTER 12: SETUP 297
Watchfolders ....................................................................................... 298
Audio device ....................................................................................... 298
Event logging ...................................................................................... 298
Import ................................................................................................. 298
Keyboard ............................................................................................ 300
Preview ............................................................................................... 301
Project settings .................................................................................... 303
Storage locations ................................................................................. 304
APPENDIX A: TROUBLESHOOTING ............................... 305
Contacting support ................................................................................ 306
Top support issues ................................................................................. 307
Compatibility with past content .......................................................... 307
Capture hardware compatibility .......................................................... 310
Serial number information .................................................................. 311
Error or crash while installing ............................................................. 312
Hangs or crashes while launching ....................................................... 314
Troubleshooting software crashes ...................................................... 315
Export problems .................................................................................. 320
Disc playback problems ...................................................................... 321
Resources, tutorials and training ......................................................... 323
APPENDIX B: VIDEOGRAPHY 325
Creating a shooting plan ..................................................................... 325
Editing ................................................................................................ 326
Rules of thumb for video editing ........................................................ 329
Soundtrack production ........................................................................ 331
Title ..................................................................................................... 332
viii
Pinnacle Studio
APPENDIX C: GLOSSARY 333
APPENDIX D: KEYBOARD SHORTCUTS 347
APPENDIX E: THE INSTALLATION MANAGER 353
The Welcome Screen .......................................................................... 355
Plugs-ins and bonus content ............................................................... 357
Equipment requirements ..................................................................... 358
INDEX 361
Before you start
9
Before you start
Thank you for purchasing Pinnacle Studio. We hope you enjoy using
the software.
If you are new to Pinnacle Studio, we recommend that you keep the
manual handy for reference even if you don’t actually read it all the
way through.
In order to ensure that your movie-making experience gets off on the
right foot, please review the topics below before continuing to
Chapter 1: Using Pinnacle Studio. We also recommend
consideration of the products equipment requirements, which are
given on page 358 in Appendix E: The Installation Manager.
Abbreviations and conventions
This guide uses the following conventions to help organize the
material.
Common terms
AVCHD: A video data format used by some high-definition
camcorders, and for creating DVD discs that can be read on Blu-ray
players. Successful editing of AVCHD files requires more
computing power than other formats supported by Pinnacle Studio.
DV: This term refers to DV and Digital8 camcorders, VCRs and
tapes.
HDV: A ‘high-definition video format that allows video in frame
sizes of 1280x720 or 1440x1080 to be recorded in MPEG-2 format
on DV media.
x
Pinnacle Studio
1394: The term 1394 applies to OHCI-compliant IEEE-1394,
FireWire, DV or i.LINK interfaces, ports and cables.
Analog: The term analog applies to 8mm, Hi8, VHS, SVHS, VHS-
C or SVHS-C camcorders, VCRs and tapes, and to Composite/RCA
and S-Video cables and connectors.
Buttons, menus, dialog boxes and windows
Names of buttons, menus and related items are written in italics to
distinguish them from the surrounding text, whereas window and
dialog names are written with initial capital letters. For example:
Click the Edit menu button to open your menu in the Menu Editor.
Choosing menu commands
The right arrowhead symbol () denotes the path for hierarchical
menu items. For example:
Select File Burn Disc Image.
Context menus
A context menu is a pop-up list of commands that appears when
you click with the right mouse-button on certain areas of the
application interface. Depending where you click, a context menu
may pertain either to an editable object (like a clip on an editing
timeline), to a window, or to a zone such as a control panel. Once
open, context menus behave just like the ones on the main menu bar.
Context menus are available in most parts of the Pinnacle Studio
interface. Our documentation generally takes for granted that you
know how to open and use them.
Mouse clicks
When a mouse click is required, the default is always a left-click
unless otherwise specified, or unless the click is to open a context
menu:
Right-click and select Title Editor. (Or, one might say, Select
Title Editor from the context menu.)
Before you start
1
1
Key names
Key names are spelled with an initial capital and are underlined. A
plus sign denotes a key combination. For example:
Press Ctrl+A to select all the clips on the timeline.
Please refer to Appendix D: Keyboard shortcuts for a comprehensive
table of available shortcuts.
Help and on-line help
Immediate help is available while you are working in Pinnacle
Studio, both inside the program and on-line.
Help file: To open the Pinnacle Studio help
file, press F1, or click the help button in the
main menu bar and choose Help.
Tool tips: To find out what a button or other Studio control does,
pause your mouse pointer over it. A ‘tool tip pops up, like Help
(F1) in the illustration above, to explain the control’s function.
Enhanced tool tips: For some features, more information is
available through enhanced tool tips, which you can turn on by
clicking the help button and choosing Show enhanced tool tips.
These provide links to video tutorials with in-depth information If
you don’t wish to have the link displayed, click the x button in the
extended tool tip, or uncheck the option in the Help menu.
The extended tool tip for the Library tab.
Click the video icon to start the tutorial.
Chapter 1: Using Pinnacle Studio
CHAPTER 1:
Using Pinnacle Studio
For a simple outline of the digital movie-making process, you dont
have to look any further than the central tab group of Pinnacle
Studios main window. The same steps apply to any type of
production, from an unpretentious slideshow with dissolves between
each frame to a 3D extravaganza containing hundreds of carefully-
arranged clips and effects.
Pinnacle Studios main control bar
summarizes the movie-making process.
The Importer
Import, on the left, is a preparatory step. It involves procedures like
‘capturing video from your analog or DV camcorder, bringing in
photos from a digital camera, and copying media files to your local
hard drive from a network location.
The Pinnacle Studio Importer provides tools for these tasks, along
with a Snapshot feature for grabbing frames from video files, and a
Stop motion tool for building up video frame-by-frame. See Chapter
10: The Importer for details.
File menu import commands: Choosing Import from the file menu
has the same effect as clicking the Import tab: it opens the Importer.
The menu provides three other import-related choices as well. Each
Pinnacle Studio
of these opens a Windows file dialog to permit import of files from a
hard drive or other local storage.
Import previous Pinnacle Studio Projects lets you load movie
projects created with earlier versions of Studio.
Import Studio for iPad App Projects lets you bring in projects
exported from Studios companion app for the iPad.
Quick Import lets you directly select ordinary media files photo,
video, audio and project for import.
Principal controls in the Importer’s Snapshot tool.
The Exporter
At the other end of the movie-making process is Export. By the time
you get to this stage, the hard part of the task is behind you. The
creative energy that went into making your movie has paid off in a
production that now lacks only one ingredient an audience.
The Pinnacle Studio Exporter helps you over that last hurdle with
tools for taking your movie to its viewers, whoever and wherever
they might be. Create a digital movie file in the format of your
choice, burn a DVD, or upload directly to destinations in the Cloud
like YouTube and Vimeo, or to your personal Cloud-based storage
area in Box.
Chapter 1: Using Pinnacle Studio
Like the Importer, the Exporter opens in a separate window, and
returns to the main window after its work is done. Turn to Chapter
11: The Exporter to learn more.
Preparing to create a video file in the Exporter.
The central tabs
The three central tabs, Library, Movie and Disc, are where most of
your work in Pinnacle Studio takes place. The first of these opens
the main view of the Library, where you can ‘curate your media
collections.
The other tabs open the two project editors, one for digital movies,
and the other for disc projects, which are digital movies enhanced
with interactivity in the form of DVD menus.
The Library
The Library is a cataloguing and management tool for all the file-
based resources or assets that you can draw on when authoring.
Almost all of the materials of your movie video footage, music and
audio files, and many specialized resources such as transitions and
effects originate as assets in the Library. Many Library assets are
Pinnacle Studio
supplied with Pinnacle Studio, and are available for royalty-free use.
These include professionally-designed titles, DVD menus, and
Montages in both 2D and stereoscopic 3D.
The Library uses watchfolders for keeping up automatically with the
changing population of media files on your system. On the
watchfolders page of the Pinnacle Studio Setup control panel, enter
the names of your media directories, especially those that you update
frequently. Thereafter the Library will scan those directories
regularly for changes, and update itself as needed. See
Watchfolders on page 298 for details.
Main view: When you click the Library tab, the Library takes over
the main window. This main view gives you spacious access to a
number of cataloguing and search tools, including those for
categorizing assets by means of ratings and tags, and those for
creating user-defined asset collections.
Compact view: The ‘compact view of the Library squeezes
virtually the whole functionality of the main view into a panel
embedded within certain other windows, such as the Movie Editor
and the Disc Editor. The primary purpose of the compact view is to
allow assets to be brought into a movie or disc project from the
Library by drag-and-drop.
The main view of the Library consists of navigation controls for
exploring the catalog structure (left) and a browser for examining
and selecting assets (right).
Chapter 1: Using Pinnacle Studio
Player: The tools available from within the Library include the
Player, a viewer that works for all media types handled by the
application. When used from the main view of the Library, the
Player opens in a separate window. When the compact Library is
used, an embedded version of the Player appears in the same
window. See The Player on page 8 for further information.
Previewing a Library video asset in the resizable Player window,
with full transport controls including a shuttle wheel. You can
work in the main window while the pop-up Player is open.
For comprehensive coverage of the Library and its uses, please see
Chapter 2: The Library.
The next step
The next step, once you know your way around the Library and have
made any changes needed to the default set-up, is to start creating a
movie.
Pinnacle Studio
The Movie Editor and the Disc Editor
Once you have gathered your materials together and organized them
to your satisfaction in the Library, its time to get to work on a video
or a slideshow. If you are working on a disc production specifically,
you can immediately start work in the Disc Editor, which is just like
the Movie Editor but has extra tools for creating and setting up DVD
menus. The Disc Editor is described in Chapter 9: Disc projects.
If you arent planning on creating a disc, or arent sure, or if disc is
only one of the output media you are targeting, the Movie Editor is
the right place to start. Once your movie is completed, you can
export it to the Disc Editor and add the menus.
The Movie Editor and the Disc Editor exist side-by-side, but apart
from the export feature just mentioned, they do not interact. If you
want, you can have a regular movie project and a disc project loaded
simultaneously, and switch from one to another at will.
In both the Movie Editor and the Disc Editor, a multitrack
timeline occupies the lower part of the display. Most of the clips
on the timeline come from the Library; a few types, like automatic
background music, are generated with special tools.
Chapter 1: Using Pinnacle Studio
Both project editors include embedded versions of the Library and
the Player in addition to the timeline display. To build a project, drag
assets from the Compact Library onto the timeline tracks or
Storyboard area of the project editor, where they are known as
‘clips. Both the Movie Editor and the Disc Editor can be used with
stereoscopic 3D as well as 2D material.
The preview type control above the Player lets you switch between
viewing the current Library asset (‘source’) and the current timeline
clip. In the Disc Editor, an additional preview type (‘menu) lets you
use the Player as an editor for linking disc menus to points on the
timeline.
Timeline editing, a central activity in project authoring, is covered in
detail in Chapter 3: The Movie Editor.
The media editors
Additional windows are often needed for working with particular
types of media. In general, you can open an editor window
appropriate to any asset or clip by double-clicking the item.
Corrections from the Library: The editors for the standard media
types of video, photo and audio are particularly important. When
invoked from the Library (by double-clicking an asset), each of these
editors provides a suite of correction tools appropriate to its media
type. These tools can be applied directly to Library assets in order to
remove camera shake from video, trim unwanted material from a
photo, or suppress audio hiss, to give just a few examples.
When a correction is applied to a Library asset, the media file is not
modified. Instead the correction parameters are saved in the Library
database. They can be altered at any time, or removed, as your needs
dictate. The corrections you make in the Library are brought with the
asset when you add it to your timeline as a clip.
Corrections from the timeline: When you open one of the standard
media editors by double-clicking a timeline clip, the correction tools
Pinnacle Studio
are again available, but in this context they apply only to the clip in
the project, not to the underlying Library asset.
Transitions and Effects: When they are invoked from a projects
timeline, the media editors also offer a wide-range of enhancements
for all three media types in the transition in, transition out, and
effects groups.
Transitions let you punctuate the passage of one clip to the next with
anything from a barely perceptible dissolve to an audience-
awakening flare.
Effects range from the practical (Brightness and contrast) to the
theatrical (Fractal fire). They can be animated with keyframed
parameters to any degree of complexity, providing innumerable
ways to add creative interest to your productions. Some effects are
particularly designed for 3D material, and it is even possible to give
a 3D appearance to 2D footage (using the S3D depth control).
Pan-and-zoom: The Photo Editor provides one more tool, pan-and-
zoom, of its own. Like the effects just discussed, pan-and-zoom can
be animated with keyframes to create any desired combination of
simulated pan and zoom camera moves within the boundaries of a
single photo.
The Correction tools, and the media editors in general, are the
subject of Chapter 4: Media editing: Corrections. The effects, and
the pan-and-zoom tool, are described in Chapter 5: Media editing:
Effects.
The Player
The Player is a preview screen in which you can examine Library
media, play back your movie project, work on disc menus, and much
more. In each window or context in which it is used, the Player
exhibits somewhat different controls.
For an introduction to the Player and its basic controls, please see
The Library preview on page 31. The various stereoscopic 3D
viewing modes are discussed on page 34. For the use of the Player in
Chapter 1: Using Pinnacle Studio
trim mode on the timeline, see Clip operations on page 76. For
information on using the Player with Montage, see The Montage
Editor on page 154. For the use of the Player in editing disc menus,
see Previewing disc menus on page 223.
Pinnacle Studio Projects
The movies and discs that you create in Pinnacle Studio are distilled
from the projects that you build on the timeline of the Movie Editor
or the Disc Editor.
To manage projects, Studio must keep track of everything that goes
onto your timeline, and all the editing decisions you make with
regard to trimming, adding effects, and much more. Much of this
information is stored in the project file, which is in axp (Studio
Movie) format.
In order to conserve hard drive space when dealing with files that
can be very large, the project file does not include the media items in
your movie. For these, only their location in the Library is stored.
The axp project file is the default file format for the File Open,
File Save and File Save As menu commands. It may be the only
one you need.
Sometimes, however, it is convenient to have all the resources
recruited for a project gathered into a single, manageable unit for
hassle-free archiving, file transfer or upload. This is the purpose of
an alternative file format, the axx (Studio Project Package), which
contains in a single file all the materials your project uses, including
media items. Of necessity, files in this format are considerably larger
than standard project files.
Although it is not possible to directly edit a project in the package
format, Pinnacle Studio lets you open a project package with File
Open by selecting axx in the file extension box. Studio seamlessly
unpacks the project, creates a new Library entry for the unpacked
version, and opens it for editing.
Chapter 2: The Library
11
CHAPTER 2:
The Library
The Pinnacle Studio Library, or simply ‘the Library, is a
cataloguing and management tool for all the file-based resources you
can draw on when authoring. Its purpose is to let you choose and use
the video segments, photos, sound bites, transition effects, titles and
other ‘assets (as they are often called) for your movies as easily,
rapidly and intuitively as possible.
The Pinnacle Studio Media Library
opened on a folder of graphic images.
The Library’s classification scheme resembles what you might see in
a file-system viewer. While the viewer groups files under their
physical storage locations such as hard drives, the Library groups
12
Pinnacle Studio
assets under their type video, photo, and so on. In other respects,
the tree view concept for accessing subgroups of assets is virtually
identical and should feel immediately familiar.
In addition to audio, photo and video files in standard formats, the
Library includes specialized auxiliary media like titles and disc
menus. They are found, along with transitions, filters and other
effects, in the main category called Creative Elements.
The Library can easily manage large media holdings such as are
often found nowadays even on a home system. All of the dozens of
media file types usable in Pinnacle Studio can be browsed, organized
and previewed within its integrated interface.
Assets are displayed either as icons or text records within collapsible
folders that stack up in the Library Browser. The folders may
correspond either to real directories in your computers file system,
or to virtual groupings based on ratings, file type, creation date, or
membership in a user-defined Collection.
Adding assets to a project
The Library is displayed as a panel, either docked (as in the Movie
and Disc project editors) or floating (as in the Title Editor). The
Compact view retains the full functionality of the Library. Its
Chapter 2: The Library
13
primary purpose is to allow you to bring assets into a movie or disc
project with drag and drop.
The current set of Library tabs, and the contents of the Browser, are
common to all views of the Library. For instance, if you are
browsing in a particular folder of disc menus in the Movie Editor,
that same folder will be open if you now switch to the Title Editor.
Correcting media files
With regard to technical quality, media files are not all created equal.
Occasionally, you do come across the perfect photo, clip, or sound
effect. More often, though, the photo needs cropping, the video is
shaky, or the sound starts with an annoying hiss. Pinnacle Studios
media correction tools let you fix these and similar issues by
applying correction filters to a problem clip after you have placed it
on the timeline of your project.
Often, however, an even better solution is to apply the correction to
the Library asset itself, before adding it to a project. That way, any
production using the asset will start with the corrected version, not
the unsatisfactory original. Such corrections can quickly be made by
opening media editors from the Library. The file underlying the
corrected asset is not modified: instead, the correction parameters
are stored in the Library database and reapplied whenever the item is
displayed or used.
14
Pinnacle Studio
UNDERSTANDING THE LIBRARY
The Studio Library lets you manage and efficiently use the entire
pool of media and other assets available for use in your productions.
What exactly does the Library contain?
The full range of assets that you can draw on for your projects is
summarized by the four main branches of the Asset Tree. Each
branch is further divided into more specialized subsections.
The All Media branch contains the standard media files on your
system in subsections named Photos, Video, and Audio. Many
standard file types are supported. The purpose of the fourth
subsection, Missing media, is described below.
The Projects branch of the Asset Tree contains your own Pinnacle
Studio movie and disc projects. You can open a project right from
the Library and begin editing it, or you can add it to the timeline of
another project to serve as an ordinary clip.
Collections are custom groupings of Library media. The more time
you spend on media management, the more you will probably use
Collections. They can serve as temporary holding places while you
work, or for classifying and setting aside media for later use.
Collections may be automatically
generated, but most are user defined.
Hierarchically-organized Collections are
also supported. The top-level Collections
in the hierarchy are used as subsections of
the Collections branch.
The Creative Elements branch is shown
open in the illustration at right, revealing
its subsections. Each is either a type of
special effect (Effects and Transitions), or
a special media type. Ready-to-use, royalty-free collections of all
seven types are included with Pinnacle Studio.
Chapter 2: The Library
15
Storage of Library assets
Every asset in the Library every clip, sound, transition, and so on
corresponds to a file somewhere in the local storage of your
computer system. The Library doesnt own these files, and never
modifies them unless specifically requested to do so. Rather, it keeps
track of their names, locations and properties in an internal database.
The information stored also includes any tags and ratings with which
you have annotated particular items, and the parameters of any
correction filters you have applied.
The database
The files that make up the Library database are stored in a folder
with single-user rather than shared access rights under Microsoft
Windows. If Pinnacle Studio is used on your computer by multiple
users with individual log-ins, a separate Library will be created for
each.
Missing media
Operations like adding, removing and renaming a Library asset are
database operations that have no effect on the media file itself. When
you remove an asset from the Library, an option on the confirmation
dialog box does let you go one step further and delete the actual file
as well, but the option is off by default you have to specifically
request the action.
By the same token, when you delete or move an
asset file in Windows Explorer or another
application outside of Pinnacle Studio, the
database record of the file continues to exist. Since
the Library can’t actually access the file, however,
an error graphic is added to the files listing. If the file still exists,
but has simply been moved to another folder or device, relinking it
to the Library is easy. Double-click the item to pop up a standard
File Open dialog with which you can point the way to the files new
location.
16
Pinnacle Studio
Incidentally, to check if there are missing media anywhere in the
Library, look in the special subsection All media Missing media of
the Asset Tree. The Asset Tree is described below (page 17).
Location tabs
Editing a video project involves coordinating the various media and
other assets at your disposal. As you proceed, it’s likely that you’ll
find yourself browsing repeatedly in various parts of the Library that
are relevant to the project. No doubt you will also change your
viewing and filtering options from time to time, depending on the
material you’re reviewing.
Like a web browser that uses a row of tabs to allow flipping
effortlessly amongst multiple open web sites, the Library lets you
create and configure location tabs as you work. The tabs provide
direct access to each of the various locations in which you are
currently working.
Here three tabs give access to media required by different parts of
a movie project. The mouse pointer is poised to create a new tab.
To close a tab, click the x icon to the right of the tab caption.
Chapter 2: The Library
17
To set the location of the current tab, click a name in the Asset Tree.
Changes you make to viewing and filtering options while the tab is
active are retained between accesses.
The Asset Tree
The entire gamut of Library assets is organized into a folder tree
whose structure and general usage should be familiar from file-
system tools like Windows Explorer. When you select a location in
the Asset Tree, the folder name appears on the caption of the active
location tab, and its contents are displayed in the neighboring
Browser.
The four main branches of the Asset Tree were introduced above
(page 14).
The Group By menu
The header line of the All media
branch offers a small dropdown menu
of options to control how the
groupings within each subsection of
the branch are created.
When you group by folder (the
default), the folder structure corresponds to actual directories on
18
Pinnacle Studio
your hard drive, flash drive, or other file-system device. Some
standard folders are included by default; you can add others at will
using the watchfolder system. Grouping by folder is shown in the
Main Library illustration above.
When you use another grouping, by rating, by date or by file type,
exactly the same asset files are listed within each subsection as with
the by folder grouping. However, instead of classifying them by the
file system folders in which they are stored, the Asset Tree groups
them into ‘virtual folders according to the chosen property.
Grouping by rating, for example, divides each subsection into six
virtual folders. Five of them display media files to which you have
given star ratings; the sixth is for those you havent rated yet. See
The Browser (page 24) for more information about file ratings and
their uses.
In the inset illustration above, the Photos subsection of the All Media
branch is shown grouped by file type. The virtual folders have names
like bmp, gif and jpg one virtual folder for each recognized file
extension in the subsections media files.
The Library with grouping By Date selected in the All Media
branch of the Asset Tree. The bottom-level folders in the Asset
Tree are displayed in the Browser (right). These ‘virtual
folders each represent all the photos whose file date falls within a
particular month.
Under group by date, the folders represent the year of the files
creation; within these, the files are further grouped by month.
Chapter 2: The Library
19
Grouping in other subsections
The Projects and Creative Elements branches of the Asset Tree also
provide a group by menu, so it is possible for branches to be in
different grouping modes. The menu commands are the same as
described above for the All Media branch, except that the by file type
option is not needed and doesnt appear.
The add collection button
The Collections branch does not
exhibit a group by menu. This button
on the branch header lets you create a
new Collection as described under
Collection operations below.
Collections
Note: Some collection features are disabled in Pinnacle Studio for Dazzle. To
enable all collection features, please upgrade to Pinnacle Studio 16.
From the Librarys point of view, a Collection is just an arbitrary
grouping of assets a set of Library items with no organizing
principle. You may well have a good reason for gathering certain
files into a particular collection, but the Library doesnt have to
know what it is. Inside a Collection, any asset can rub shoulders with
any other.
One special Collection, with the name Latest import, is
automatically updated after each import operation to display the
media added. Immediately after importing, you can turn to this
Collection and start working with the new material.
Another automatically-generated Collection is Latest Smart
Creation, which stores the media you selected for your most recent
SmartSlide or SmartMovie production.
20
Pinnacle Studio
Collection operations
To create a new Collection, click the icon in the header line of the
Collections branch and enter a name in the provided text field.
Complete the process by pressing Enter. Alternatively, choose Add
to collection Create new collection from any assets context
menu.
Manage Collections: The context menu for any Collection provides
commands for renaming and deleting the Collection, and one for
creating a subcollection that has the current Collection as its parent
folder’.
Drag and drop: Collections can be organized in the Asset Tree with
the mouse. A dragged Collection becomes a subcollection when
dropped upon another.
Displaying collected assets
Clicking the name of a Collection causes it to be displayed in the
Browser.
There is one important difference between the Browser view of
Collections and those of all other categories: the media assets in any
subcollections are visually merged with those of the selected
Collection, but not subgrouped.
However, a special feature of the Browser makes it easier to keep
track of the assets when viewing Collections, even if you’re not a
robotically systematic sort of person: As your mouse pointer passes
over any listed asset, the Collections to which the asset belongs
‘light up in the Asset Tree.
Operations on collected assets
These operations can be performed from the context menu of any
Collection item. To act on a group of items, first select them with the
mouse (using Ctrl-click and Shift-click for multiple selections as
needed) or by dragging out a frame around the items. Then right-
click within the selection to access the context menu.
Chapter 2: The Library
21
Add to collection: Choose a target Collection on the Add to
collection submenu to add the selected item or items. Alternatively,
drag the selection onto the target Collection.
Remove from Collection: The Remove command removes the item
(or items) from the Collection. As usual with the Library, the
underlying media items involved are not affected, so removing a
video or other item from a Collection in the Library does not delete
it from other Library locations.
Managing Library assets
Media and other assets find their way into the Library in several
ways. For instance, the original contents of the Creative Elements
branch of the Library are installed with Pinnacle Studio.
The Library automatically discovers some assets on your system by
regularly scanning Windows-standard media locations. These are set
up on Pinnacle Studio installation as watchfolders. Media files in
these locations will automatically be brought into the Library. You
can add your own watchfolders (see below), and they will be
automatically updated, too.
Finally, you can import media manually by any of several methods
(see Importing below).
Watchfolders
Watchfolders are directories on your computer that Pinnacle Studio
monitors. If you add media files such as video clips to a watchfolder,
or one of its subfolders, they automatically become part of the
Library. Updating occurs each time the application is launched and
while the application is running.
Watchfolders are set up on the Watchfolders page of the Setup
control panel. For each folder that you add, you can specify that
either one particular supported media type will be watched for’, or
all of them. Please see Chapter 12: Setup for more information.
22
Pinnacle Studio
Importing
If you need to import a large amount or variety of media, or to
import from analog media such as VHS tape, click the Import button
near the top of the application window to open the Importer. See
Chapter 10: The Importer for full information.
Quick import
The Quick Import button at the top left of the
Library opens a Windows file dialog for fast
import of files from a hard drive or other local
storage.
New folders in the corresponding media categories (photos, video,
audio and projects) are created for the files specified. In addition, the
imported items are included in the Last Import Collection.
(Collections were described earlier in this chapter, on page 19.)
Direct import via drag and drop
To select and import items in one step, use drag-and-drop from
Windows Explorer or the desktop into the Browser. The new items
are immediately displayed in the Collection Latest Import’, which is
created for the occasion if necessary.
Exporting directly from the Library
Any photo, video, audio file or project in the Main Library can be
directly exported “as is, using the context menu commands
described below, to either a Cloud-based storage service or a disc.
For other exporting options, use the Exporter instead, by selecting
the asset and clicking the Export tab at the top of the window. See
Chapter 11: The Exporter for full information.
To store a Library asset on a disc, select Burn Disc on the context
menu. You can burn just the file, or a disc image if you have made
one. If you select multiple assets, and then select Burn Disc, all of
the assets will appear on the Burn files to disc dialog. More assets
can be added by clicking the File icon and browsing. You can also
delete files from the list before burning.
Chapter 2: The Library
23
Removing items from the Library
To remove an item from the Library, or a selection containing
multiple items, choose Delete selected from the context menu or
press the Delete key. A confirmation dialog lets you approve the list
of media files to be removed from the Library database. By default,
the files themselves will not be affected, but the Remove from
library and delete option lets you delete the files too, if desired. Be
careful, as this command works on all kinds of Library assets,
including your Pinnacle Studio projects if any of those are selected.
When all the files in a folder are removed, the Library hides the
folder as well.
35


Need help? Post your question in this forum.

Forumrules


Report abuse

Libble takes abuse of its services very seriously. We're committed to dealing with such abuse according to the laws in your country of residence. When you submit a report, we'll investigate it and take the appropriate action. We'll get back to you only if we require additional details or have more information to share.

Product:

For example, Anti-Semitic content, racist content, or material that could result in a violent physical act.

For example, a credit card number, a personal identification number, or an unlisted home address. Note that email addresses and full names are not considered private information.

Forumrules

To achieve meaningful questions, we apply the following rules:

Register

Register getting emails for Pinnacle Pinnacle Studio for Dazzle at:


You will receive an email to register for one or both of the options.


Get your user manual by e-mail

Enter your email address to receive the manual of Pinnacle Pinnacle Studio for Dazzle in the language / languages: English as an attachment in your email.

The manual is 8,52 mb in size.


You will receive the manual in your email within minutes. If you have not received an email, then probably have entered the wrong email address or your mailbox is too full. In addition, it may be that your ISP may have a maximum size for emails to receive.

The manual is sent by email. Check your email

If you have not received an email with the manual within fifteen minutes, it may be that you have a entered a wrong email address or that your ISP has set a maximum size to receive email that is smaller than the size of the manual.

The email address you have provided is not correct.

Please check the email address and correct it.

Your question is posted on this page

Would you like to receive an email when new answers and questions are posted? Please enter your email address.


Info