These are the
connections (on the back of
your drive) you will have to
use for connecting the drive
to the computer.
Das sind die Anschlüsse
(an der Rückseite Ihres
Laufwerks), die Sie für den
Anschluss Ihres Laufwerks an
den Computer verwenden
müssen.
Ce sont les connecteurs
(à l’arrière de votre appareil)
que vous devrez utiliser pour
raccorder l’unité à l’ordinateur.
Queste sono le connessioni (sul retro dell'unità) che dovranno essere utilizzate
per collegare l'unità al computer.
Dit zijn de aansluitingen (op de achterkant van het station) die u gebruikt om het
station op de computer aan te sluiten.
Estas son las conexiones (en la parte posterior de la unidad) que tendrá que
utilizar para desconectar la unidad del ordenador.
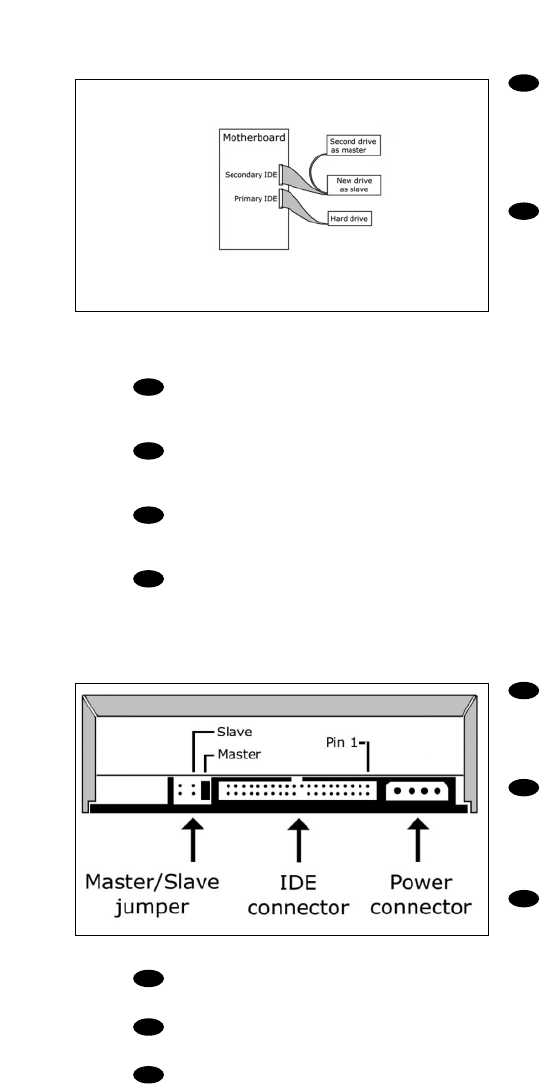
Find the cable that goes
from your motherboard to
your CDROM, DVDROM or
other drive and attach your
new drive as SLAVE onto this
cable.The MASTER/SLAVE
settings will be set in step 9.
Suchen Sie das Kabel,
das Ihr Motherboard mit
Ihrem CD-ROM-, DVD-
ROM- oder einem anderen
Laufwerk verbindet, und
schließen Sie Ihr neues
Laufwerk als SLAVE an dieses
Kabel an. Die
MASTER/SLAVE-Einstellungen
werden in Schritt 9 festgelegt.
Identifiez le câble qui part de la carte mère vers le lecteur de CD-ROM, de DVD-
ROM ou vers un autre lecteur et raccordez le nouveau lecteur comme esclave (SLAVE)
sur ce câble. Le réglage maître/esclave (MASTER/SLAVE) sera effectué à l’étape 9.
Individuare il cavo che collega la scheda madre a CD-ROM, DVD-ROM o altra
unità e collegarvi la nuova unità come SLAVE. Le impostazioni MASTER/SLAVE si
trovano al passo 9.
Zoek de kabel die het bestaande CD-ROM, DVD-ROM of andere station
verbindt met het moederbord,en sluit het nieuwe station als SLAVE aan op deze kabel.
Zo nodig kunt u de MASTER/SLAVE-instelling in stap 9 veranderen.
Localice el cable que va de la placa principal al lector de CD-ROM, DVD-ROM u
otra unidad y conéctelo a su unidad nueva como SLAVE en este cable. En el paso 9 se
configuran los parámetros MASTER/SLAVE.
8
7
UK
F
NL
E
D
UK
D
F
I
NL
E
8
I